Home Blog Page 63

Savour the Holidays with a Festive Carved Turkey Recipe

172

Whether it is a grand celebration with family and friends or a quaint and quiet one you are having this year, a meal is something everyone likes to sit down to during the holidays. Not sure what to serve for your holiday meal? Canadian Turkey has plenty of ideas to help make your meal for the holidays no matter how many people are tucked in around the table. Canadian Turkey has shared this “Make it Faster” Festive Carved Turkey recipe that will shorten the amount of time you spend in the kitchen.

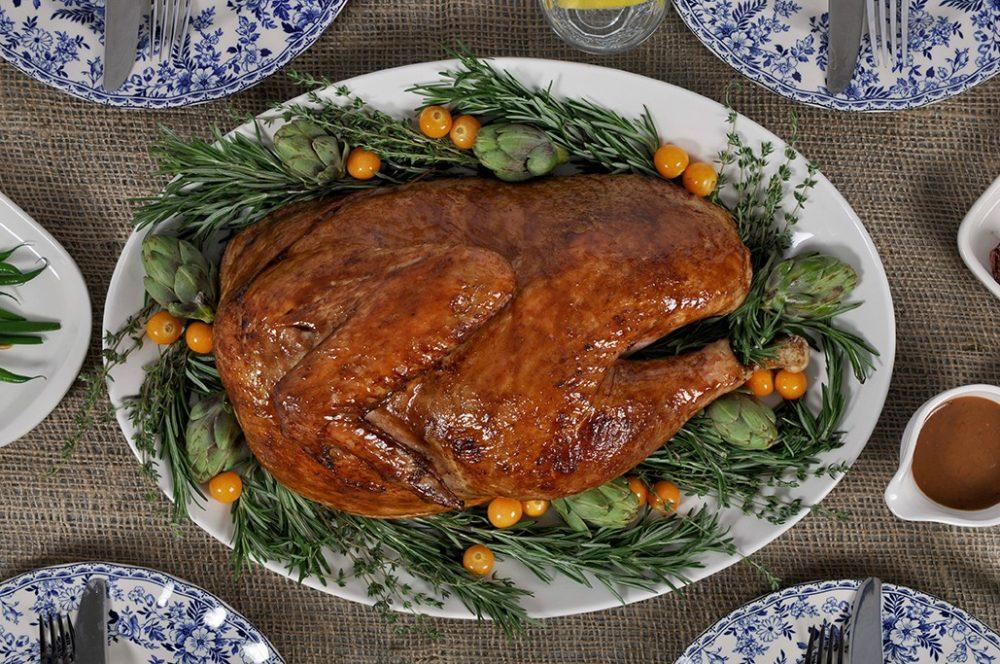
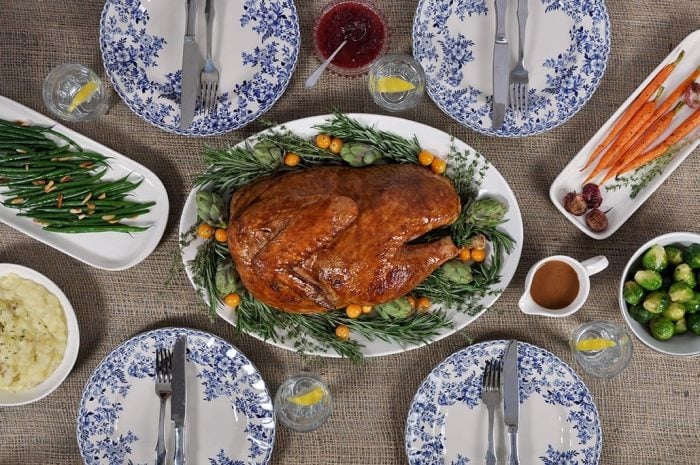
Festive Carved Turkey recipe

If a sit-down celebration is what you had in mind for the holidays, Canadian Turkey has you covered! They know that a holiday meal can take a lot of planning and preparation to pull off a delicious meal while having time to take care of other details for the day.

The holiday season is on its way! The countdown effectively on and it is time to start planning for this special time of the year.  Some of these items may be on your holiday checklists:

  • Home decorations
  • Tree trimming
  • Gift buying and wrapping
  • Party planning
Canadian Turkey Festive Holiday appetizers

Looking for fun and festive appetizers to serve at your holiday parties this year? Canadian Turkey has a bevy of recipes to get your celebration off to a fabulous start! Want to spice things up? Take a look at these chic Bacon Wrapped Turkey Bites with Cranberry Chipotle BBQ Sauce. For a comfy and cozy affair, try out these Turkey Tartlets with Cranberry Salsa or pop these Potato-Topped Turkey Meatloaf Bites. Give guests a bit variety by serving them these turkey Bombas and a Trio of Dips! Any of these tasty bites are sure to make your gathering festive and fun!

Festive Carved Turkey recipe

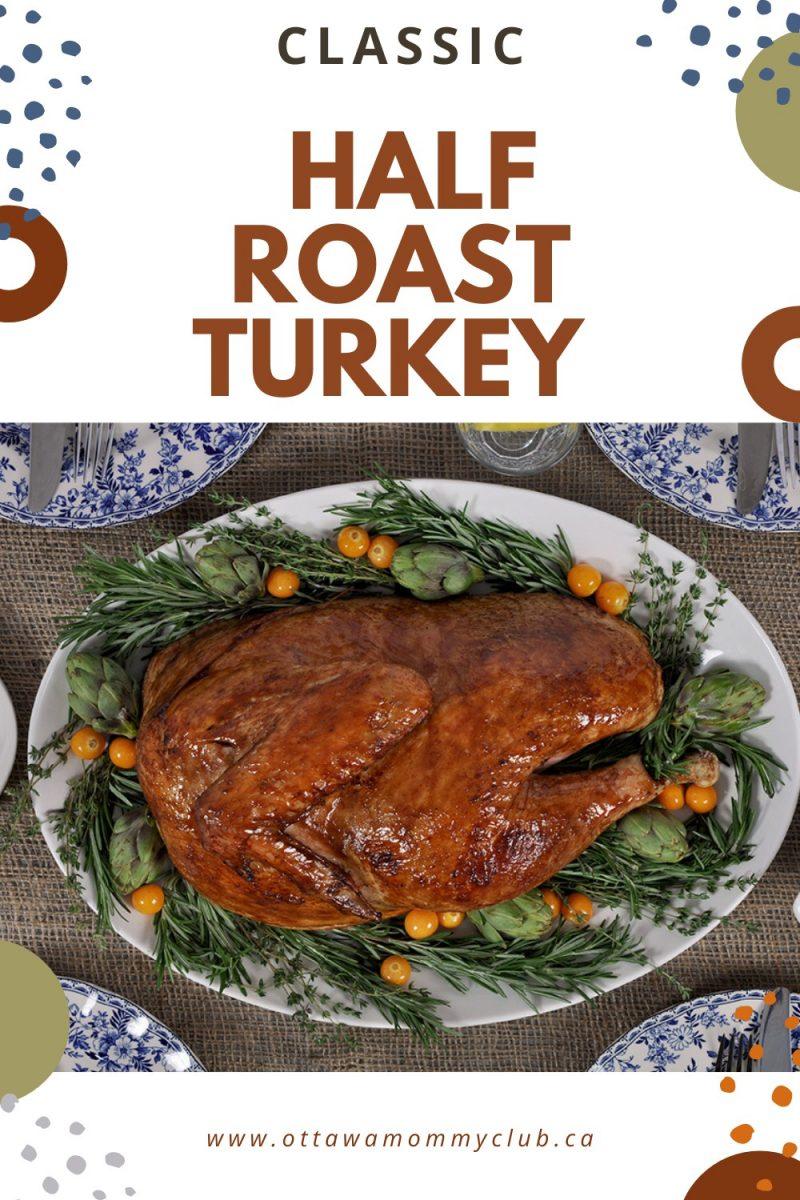
“Make it Faster” Festive Carved Turkey recipe

Festive Carved Turkey recipe

“Make it Faster” Festive Carved Turkey

Pieces of Me
Canadian Turkey has shared this “Make it Faster” Festive Carved Turkey recipe that will shorten the amount of time you spend in the kitchen.
No ratings yet
Prep Time 20 minutes
Cook Time 2 hours
Total Time 2 hours 20 minutes
Course Main Course
Cuisine American, Canadian
Servings 10
Calories 420 kcal

Ingredients
  

  • 1 cup roughly chopped carrots
  • 1 cup roughly chopped celery
  • 1 cup roughly chopped onion
  • 2 tbsp olive oil
  • 6 cloves garlic peeled
  • 1 turkey broken down into parts OR 2 large legs 2 large thighs and 2 large bone-in breasts
  • 6 tablespoons butter melted
  • 1 cup broth
  • ½ cup white wine
  • 1 tbsp each of paprika thyme, sage, oregano and garlic powder
  • salt and pepper to season
  • fresh rosemary and thyme optional

Instructions
 

  • Set your oven to 425F.
  • Place your carrots, celery, onions and garlic in a large roasting pan.
  • Dress with olive oil and a light sprinkle of salt and pepper.
  • Pat the turkey parts dry with a paper towel.
  • Combine dry spices to make a rub.
  • Sprinkle generously on both sides of the turkey parts.
  • Spread your turkey parts skin side up around the pan.
  • Make sure to leave room between the pieces to allow heat to circulate.
  • If using any fresh herbs, tuck in around the parts.
  • Add the broth and white wine.
  • Roast turkey for 30 minutes at 425F.
  • Lower heat to 350F and cook for an additional 1- 1½ hours until an instant thermometer inserted into the thickest part of the breast reads 170F.
  • Remove from heat and tent for thirty minutes before carving.

Notes

TURKEY TIPS:
• Tuck garlic under turkey parts to ensure they don’t burn.
• Get your local butcher to break down your turkey for you. This is an economical way to use a whole bird for parts, with no extra work for you!
• Make sure to get the carcass, neck and wings from your butcher to make a rich and tasty turkey stock.
• If your local grocer doesn’t have a butcher on site, you can use turkey parts for this recipe.
Make sure to stock up on extra dark or white meat, depending on what your family prefers.
• Make a quick gravy: Pour off pan juices and let sit for 2-3 minutes until fat rises to the top. Skim off fat. Blend together remaining pan juices and vegetables to make a delicious gravy. Add a ½ – ¾ cup of broth or milk, 2 tbsps of cornstarch and heat until thickened to desired consistency.

Nutrition

Calories: 420kcalCarbohydrates: 5gProtein: 57gFat: 18gSaturated Fat: 4gPolyunsaturated Fat: 4gMonounsaturated Fat: 7gTrans Fat: 1gCholesterol: 186mgSodium: 410mgPotassium: 695mgFiber: 1gSugar: 2gVitamin A: 2393IUVitamin C: 3mgCalcium: 55mgIron: 2mg
Keyword carved turkey, Holiday turkey, turkey, Turkey recipe
Tried this recipe?Let us know how it was!

Not only is this recipe a time-saver, it is can also help to keep some coin in your pocket! This One Pan Turkey Pilaf with Olives, Orange and Apricots Recipe can be a perfect centerpiece of your holiday festivities.

Is this your first year preparing the “Big Bird?”  Canadian Turkey can give you a hand here, as well! They have a WHOLE BIRD HOW TO page that shares tips and tricks for cooking your turkey from store to table.

Whether it is appetizers, a small meal or a meal you are thinking about creating for the holidays, Canadian Turkey has you covered! They have amazing ideas to add turkey to your festivities this year that will please anyone who tastes them. Take a look and see how Canadian Turkey can make your holiday celebrations festive, merry, and deliciously memorable!

For more information about Canadian Turkey, you can connect with them on their Facebook, Twitter, Instagram, Pinterest and YouTube pages!

This post has been sponsored by Canadian Turkey.

It Takes a Village…Tips for a Successful Parent-Teacher Conference

10

It’s almost that time of year again: the parent-teacher conference. This is a meeting between you and your child’s teacher to discuss your child’s progress in school so far. As a teacher, I cannot stress how crucial a strong partnership between the teacher and parents is in the education of children. The open communication with parents makes it easier for us to address issues before they become a problem and also share in your child’s achievements together.

3871617607_d6907c5817_z

Here are some tips on how you can prepare for a parent-teacher meeting:

  1. Before the meeting, talk to your children. Ask them about their favourite and least favourite subjects and if they would like you to talk to the teacher about anything. It is important to involve your children in their own learning so try to get your children’s input whenever you can. This involvement from an early age will show them that they can come to you with any concerns.
  2. Your children’s teachers may show you samples of your children’s work, discuss their progress, classroom behaviour and/or ask if you have any questions. So it is a good idea to come prepared with some questions. You want to consider all areas of school, including your children’s study habits, social skills, classroom participation, expectations for the school year, and/or what you can do at home to help them progress. If your child is receiving any special services (English classes, gifted program, speech or occupational therapy, or support for a learning difference) make sure you ask about the progress he/she is making and how often the support is being given.
  3. Make sure you arrive on time to the consultation. If possible, arrive a few minutes before your scheduled time so you have time to review your notes and questions beforehand.
  4. The meeting offers a good opportunity for you and the teacher to develop a plan together to help your child succeed. You both have an important role to play in the process. As the parent, you know your child’s personality, habits, strengths, weaknesses and even insecurities. While the teacher has been professionally trained in how to use methods/strategies to meet the individual needs of students. Together you can develop a plan with the necessary resources and accommodations tailored to your child’s needs.
  5. After the meeting, go over what was discussed with your child. Make sure you emphasize the positive points but be honest about any problems too. Explain the plan you and the teacher discussed and ask your child for feedback. Getting your child to contribute to the plan will help them learn how to be an independent learner.
  6. Put the plan in action. Make sure that you keep in touch with the teacher and continue to check in with your child to see how the action plan is working out.

By Julie Diamond – President, Teachers to Go

Photo credit: frankieleon via Foter.com / CC BY

The Best Butter Pecan Cupcake Recipe

16

Butter Pecan Cupcake Recipe

Butter Pecan Cupcake

This Butter Pecan Cupcake is tender, ultra-moist, loaded with pecans, and topped with salted caramel sauce and a maraschino cherry. The cupcake is amazingly delicious!

Cupcake Ingredients

  • 1/2 cup unsalted butter at room temperature
  • 1/2 cup chopped pecans
  • 1-1/2 cups all-purpose flour
  • 3/4 tsp. baking powder
  • 1/2 tsp. baking soda
  • 1 cup brown sugar
  • 1/4 tsp. salt
  • 2 eggs, room temp
  • 2 tsp. vanilla extract
  • 1/2 cup buttermilk room temperature

Directions

  • Heat oven to 350F.
  • Line cupcake pan with 12 paper liners
  • Whisk flour, lightly spoon and level to measure, then sift twice into medium bowl with baking powder and soda.
  • In bowl of a stand mixer or large bowl with a hand mixer, combine sugar, salt and 1 stick butter.
  • Beat at a medium speed for 5 minutes
  • Begin to add the eggs, one at a time, add vanilla with very last egg and beat till.
  • On the low-speed of the mixer, add flour mix and then alternate with milk, beginning and ending with flour and add the nuts with last bit of flour.
  • Stir batter with briefly, to be sure everything is well incorporated
  • Fill muffin cups with about 1/4 cup batter.
  • Bake 15-17 minutes or till a toothpick inserted near center returns clear
  • Cool on wire rack for 1 hour before frosting.


Butter Pecan Cupcake Recipe


Frosting Ingredients

  • 6 Tbsp. unsalted butter at room temp.
  • 1 cup powder sugar
  • 1/4 cup caramel
  • 2 tsp heavy whipping cream

Frosting Directions

  • In a large bowl or stand mixer, beat butter till light and fluffy 4-5 minutes maximum
  • Now scrape bottom and sides of bowl, begin to gradually add more powdered sugar and beat till soft peaks form.
  • Add caramel sauce and continue to beat on low-speed until well incorporated.
  • Increase speed to medium then to high about 2-3 minutes. 
  • Top cupcake in the frosting, caramel sauce, and a maraschino cherry.

I hope you enjoyed my Butter Pecan Cupcake recipe! If you make it, make sure to share with us on Facebook or Twitter! Also, check out all of our other Recipes.


butter-pecan-cupcake-recipe

Butter Pecan Cupcake

No ratings yet

Ingredients
  

Cupcake Ingredients

  • 1/2 cup unsalted butter at room temperature
  • 1/2 cup chopped pecans
  • 1-1/2 cups all-purpose flour
  • 3/4 tsp. baking powder
  • 1/2 tsp. baking soda
  • 1 cup brown sugar
  • 1/4 tsp. salt
  • 2 eggs room temp
  • 2 tsp. vanilla extract
  • 1/2 cup buttermilk room temperature

Frosting Ingredients

  • 6 Tbsp. unsalted butter at room temp.
  • 1 cup powder sugar
  • 1/4 cup caramel
  • 2 tsp heavy whipping cream

Instructions
 

Cupcake Directions

  • Heat oven to 350F.
  • Line cupcake pan with 12 paper liners
  • Whisk flour, lightly spoon and level to measure, then sift twice into medium bowl with baking powder and soda.
  • In bowl of a stand mixer or large bowl with a hand mixer, combine sugar, salt and 1 stick butter.
  • Beat at a medium speed for 5 minutes
  • Begin to add the eggs, one at a time, add vanilla with very last egg and beat till.
  • On the low-speed of the mixer, add flour mix and then alternate with milk, beginning and ending with flour and add the nuts with last bit of flour.
  • Stir batter with briefly, to be sure everything is well incorporated
  • Fill muffin cups with about 1/4 cup batter.
  • Bake 15-17 minutes or till a toothpick inserted near center returns clear
  • Cool on wire rack for 1 hour before frosting.

Frosting Directions

  • In a large bowl or stand mixer, beat butter till light and fluffy 4-5 minutes maximum
  • Now scrape bottom and sides of bowl, begin to gradually add more powdered sugar and beat till soft peaks form.
  • Add caramel sauce and continue to beat on low-speed until well incorporated.
  • Increase speed to medium then to high about 2-3 minutes.
  • Top cupcake in the frosting, caramel sauce, and a maraschino cherry.
Tried this recipe?Let us know how it was!

3 Ways to Stay Healthy Over the Winter

23

Fit, Trim, and Healthy. Though these three concepts are commonly related, they do not all describe the same experience. Those who are healthy are not always fit or trim. Those who are trim are not always healthy. Not all of us want to be all three of these things at the same time, but plenty of people do. It can be hard to maintain great health during a long cold Canadian winter. But it is possible with planning and a little extra effort. Here are a few ways stay healthy over the winter.

Ways to Stay Healthy Over the Winter

Tips to Stay Fit Over the Winter

1. Prioritize Warmth and Not Getting Sick

There are two main reasons why we get sick in the winter more often than in the rest of the year.

1) When our body temperatures drop while we’re outside in cold weather (Especially if we’re wet), it lowers that power of our immune systems. Immune systems weakened, we get sick more often.

2) Everybody is inside more often. Pressed together, it’s easy for germs and viruses to get spread around with coughs, sneezes, and unwashed hands. To protect yourself during this vulnerable time, get your flu shot, invest in a very warm winter coat or parka, and wash your hands more often that you normally good.

2. Resist the Urge to Bulk Up

It is a natural cycle for mammals to pack on the pounds during the winter to stay warm. But because you are not a bear or a beaver, you don’t have to follow this particular instinct in order to survive the hard winter months. If you have unwanted bulk, a membership at the gym including a virtual session, an exercise regimen, or body contouring procedure can help you achieve the silhouette you want. If you already applied step one (Above), you’ll already have an awesome warm coat or parka to keep your body temperature up without packing on extra pounds.

3. Take a Complete Multivitamin

It’s very easy to go off the deep end with supplements. That’s not what we’re suggesting you do. However, if you are an adult, chances are you need regular supplementation of one or more vitamins. A quality multivitamin should be part of your regimen every day. You’ll notice the difference. Make sure you pick a vitamin that is made of food-based nutrients. Your body will be able to absorb these easily. There are plenty of lesser quality multivitamins which are made with synthetic materials that can’t be absorbed by your body.

There are many vitamins, especially vitamin D and some of the B vitamins, which your body won’t produce in sufficient amounts during the winter. Without these, your immune system and energy levels won’t be high enough and you’re liable to get sick and have you scheduling a trip to the doctor.

Ways to Stay Healthy Over the Winter

It’s challenging to stay trim, fit, and healthy during a long, hard Canadian winter. It’s easy to neglect your health, especially when it’s cold, dark, and wet outside. Don’t let these conditions grind you down. There are plenty of ways to maintain great health even when the conditions are harsh. These steps alone should do a lot to help you achieve and maintain your goals.

Sweet and Salty Cupcake Recipe

20

Topped with caramel sauce and Reeses topping mix (if you can find it, simply add small pretzel pieces, M & M’s, and peanuts), this chocolate Sweet and Salty Cupcake is to die for! You are sure to make a good impression with your guests when serving them at a birthday party. Yummy!

Sweet and Salty Cupcake Recipe

Sweet and Salty Cupcake Recipe

Chocolate Cupcake Ingredients:

  • 2 Cup sugar
  • 1 3/4 Cup flour
  • 3/4 Cup cocoa
  • 1 tsp baking powder
  • 1 tsp baking soda
  • 1 tsp salt
  • 2 eggs, room temp
  • 1 Cup whole milk, room temp
  • 1/2 Cup canola
  • 2 tsp vanilla
  • 1 Cup boiling water
Sweet and Salty Cupcake Recipe

Chocolate Frosting Ingredients:

  • 1 Cup unsalted sweet cream
  • 3 Cup + 1/2 Cup powder sugar
  • 2 tsp vanilla
  • 3-5 TBSP heavy whipping cream
  • 1/4 tsp sea salt plus 1/8 for later
  • caramel sauce for drizzle
  • Reese topping mix pack


Sweet and Salty Cupcake Recipe


Chocolate Cupcake Directions

  • Preheat oven to 350 degrees.
  • Line cupcake tins with paper liners.
  • Whisk the sugar, flour, cocoa, baking powder, baking soda and salt in a mixing bowl.
  • Combine the eggs,milk, oil and vanilla in a bowl. Add this to the dry ingredients beating on medium until the batter is smooth.
  • Gradually add the boiling water, milk and oil and blend together until the batter is smooth.
  • Using a medium scoop fill the paper lined cupcake tins with the prepared batter.
  • Bake at 350 degrees for 20-25 minutes until an inserted toothpick comes out clean.
  • Allow to slightly cool before transferring to wire racks.

 Sweet and Salty Cupcake Recipe

Sea Salt Buttercream Frosting Directions

  • Beat powder sugar, butter and sea salt in a bowl.
  • Incorporate the vanilla
  • Add in the heavy whipping cream, and continue to mix until stiff peaks form.
  • Scoop the frosting into a pastry bag with a large tip.
  • Twist the open end of the pastry bag to push the frosting to the tip.
  • Start by frosting on the outside edge of the cupcake working to the center of the cupcake. 
  • Drizzle the caramel sauce and then sprinkle the Reese snack pack. 
  • sprinkle some of the remaining sea salt. 

I hope you enjoyed my Sweet and Salty Cupcake Recipe as much as I did! If you make it, please share your photos with us on Facebook or Twitter! Also, check out all of our other recipes and coffee recipes!

sweet-and-salty-cupcake-recipe

Sweet and Salty Cupcake

No ratings yet

Ingredients
  

Chocolate Cupcake Ingredients

  • 2 Cup sugar
  • 1 3/4 Cup flour
  • 3/4 Cup cocoa
  • 1 tsp baking powder
  • 1 tsp baking soda
  • 1 tsp salt
  • 2 eggs room temp
  • 1 Cup whole milk room temp
  • 1/2 Cup canola
  • 2 tsp vanilla
  • 1 Cup boiling water

Chocolate Frosting Ingredients

  • 1 Cup unsalted sweet cream
  • 3 Cup + 1/2 Cup powder sugar
  • 2 tsp vanilla
  • 3-5 TBSP heavy whipping cream
  • 1/4 tsp sea salt plus 1/8 for later
  • caramel sauce for drizzle
  • Reese topping mix pack

Instructions
 

  • Chocolate Cupcake Directions
  • Preheat oven to 350 degrees.
  • Line cupcake tins with paper liners.
  • Whisk the sugar, flour, cocoa, baking powder, baking soda and salt in a mixing bowl.
  • Combine the eggs,milk, oil and vanilla in a bowl. Add this to the dry ingredients beating on medium until the batter is smooth.
  • Gradually add the boiling water, milk and oil and blend together until the batter is smooth.
  • Using a medium scoop fill the paper lined cupcake tins with the prepared batter.
  • Bake at 350 degrees for 20-25 minutes until an inserted toothpick comes out clean.
  • Allow to slightly cool before transferring to wire racks.

Sea Salt Buttercream Frosting Directions

  • Beat powder sugar, butter and sea salt in a bowl.
  • Incorporate the vanilla
  • Add in the heavy whipping cream, and continue to mix until stiff peaks form.
  • Scoop the frosting into a pastry bag with a large tip.
  • Twist the open end of the pastry bag to push the frosting to the tip.
  • Start by frosting on the outside edge of the cupcake working to the center of the cupcake.
  • Drizzle the caramel sauce and then sprinkle the Reese snack pack.
  • sprinkle some of the remaining sea salt.
Tried this recipe?Let us know how it was!

25 Halloween Cupcakes Your Friends Will Love!

16

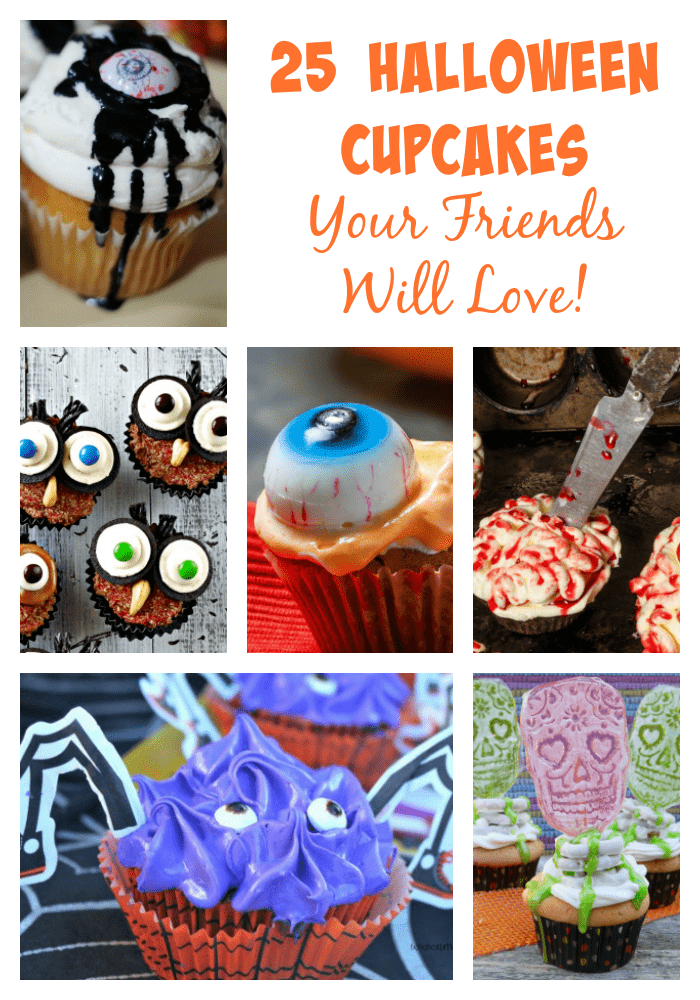
Halloween is near and there is no better way to celebrate than with a cupcake! This year why not skip the bakery and whip up something frightfully decadent to share? Your family and friends are going to love these 25 Halloween cupcakes, and you are going to appreciate how easy these are to make thanks to the well written instructions these recipes offer!

25 Halloween Cupcakes Your Friends Will Love!
Halloween Cupcakes

From creepy cupcakes that look like brains but taste like a dream to cupcakes that look like ghosts and are totally boo-tiful, this list has something for everyone on it. Picking just one to try from this list of 25+ Halloween Cupcakes that Friends will Love will be the true challenge. I am crazy about the egg free, dairy free and completely creepy eyeball cupcakes and Cauldron cupcakes are delicious and frightfully festive. No matter which one you decide to make, you can expect it to be a huge hit this Halloween!

Inspiration for adorable cupcakes for your Halloween party

If you’re looking for inspiration for adorable cupcakes for your Halloween party, look no further. These 25 Halloween cupcake ideas will have your friends “ooh-ing” and “ahh-ing” over your creativity, and they will be the hit of the party. Even better, perfection is overrated with these cupcakes; if you make a mistake, it adds to the character. So pull out your decorating supplies and have some fun!   

If you are taking cupcakes to a party, or just spreading spooky cheer to your family, I think everyone will appreciate any of these! Not that there’s anything wrong with a standard orange iced cupcake with sprinkles, but these ideas really take things to the next step! Not all of the recipes are creepy, so there will be plenty of options to meet your cupcake needs this Halloween.

25 Halloween Cupcakes Your Friends Will Love!
Halloween Cupcakes

Halloween Dessert

Cupcakes are the perfect Halloween dessert – they are portion-controlled (though it’s hard to eat only one!), they are a blank canvas to decorate however your heart desires, and they are easier to transport and display than a full cake. That makes them a ghoulishly great treat for your Halloween festivities. 

My kids and love to decorate Halloween cupcakes. We’d set aside a Saturday afternoon and gather around the dining room table, trying to top each other with scary or creative ideas. I’d mix up a bunch of colours of buttercream icing, buy red and green gel icing, throw in pretzels, mini-Oreos, and any other appropriate décor I could find, and off we’d go. Some of them turned out to be masterpieces only a mother could love, but we had a great time!

I can’t wait to hear which of these Halloween cupcake recipes is your favourite! I have made a few of these recipes and I plan to make a few more to make this year extra delicious!

Halloween inspired cupcake ideas

I have a few great cupcake recipes on site you might want to check out. Bloody Bone cupcakes are a favourite with my family. If you are looking for something less spooky to share, these Pumpkin Patch cupcakes are always popular.

25 Halloween Cupcakes Your Friends Will Love!

25 Halloween Cupcakes Your Friends Will Love!

More Halloween Cupcake Recipes

  1. Trick or Treat Cupcake Parfaits
  2. The Walking Dead Inspired Cupcake
  3. Spider Cupcakes Halloween Treat Idea

Cupcakes are always a huge hit and Halloween is the perfect time to bring out the creativity! Find more Halloween recipe ideas on our blog!

Retirement Planning? Who Has Time for That?

3

If you’ve ever talked to a good retirement financial planner, you’ll know this already. A good one will have helped you take the steps. But many families fumble along. And what a shock that can turn out to be. So you may be reading this for any of several reasons – you are already retired and just checking in on financial planning; you are ready to retire soon and want to know more about financial planning for retirement; or you’re planning ahead (or planning on planning); or perhaps helping with elderly problems of a loved one. 


Understanding Retirement Planning
Man in a back yard ~ Photo credit: bark via Foter.com / CC BY


So…do you really feel like you’re on top of your finances?

Do you know your monthly budget? This is a financial planning “must.” Are you living within your budget or a bit on the concerned side? Do you even know where to start? Are you perhaps a bit in denial about the whole thing and prefer to just not think about it?
Then there may be the matter of finding a retirement planner — that is, a good one. Do you currently work with an advisor who you believe in and trust? If so, do you thoroughly know what they are talking about and doing with your money?

Retirement planning, as you are aware, can be very complex. There are so many vehicles that can be used, from investments, to savings, to different types of insurance, to annuities. And if you are a homeowner, you may quality for additional income from a reverse mortgage.

We recommend the services of a certified financial planner to help establish your financial goals and meet them. The purpose here is to help you plan The Plan. Or review the one you may already have in place, if necessary.

From Here to There

For retirement planning, you need a road map to get you to where you want to go. If you know it. But to get from here to there, you need to start with Here. If you know it.

Where Are You?

Do you really know where you are right now?

Have a good grip on the wheel and the road map all planned out? Sort of? Hate to ask for directions? Took a fork in the road that maybe didn’t work? Totally lost? Or in denial and don’t even want to think about it, but you know you’ve gotta? A road map is no good if you don’t know where Here, your starting point, really is.  Which is a must for effective financial planning.
Once you know exactly how your Money In – Money Out comparison looks, then it’s time to assess. Are you OK, or do you need to tighten the belt? 

Is saving even possible?

In thinking ahead for retirement planning, it is said one thing you should never cut down on is savings, if you possibly can. If you are still working, always pay yourself first out of every paycheck – make an eventual goal of 10%. Start out with whatever percentage you can, and make it consistent. Gradually build it up. Think you can’t afford it? Actually, what you can’t afford is not to. A good idea is to have it automatically deducted from your pay check, even if you must start small.
You may have heard that an important goal is to put away three to six months worth of monthly expenses as a cushion. Remember, this is not extra spending money. It is your emergency savings fund and should not be touched unless really necessary. This should be maintained as part of your basic financial planning.

Where is “There”?

Now that you know where Here is, where is There? Here are some questions you can ask yourself or your partner, to make your road map – your Plan. Think in terms of several areas – Financial, Health, Relationships, Recreation, Professional if applicable, Other. All of these areas will be affected by retirement planning. You already have an idea of what you need. But it’s equally important to ask yourself or partner, What do you really want? Be specific in these categories. Take the lid off your imagination. Do not let your old habits and thinking (your inner Dictator) “edit” out what you really want.

You’ve probably heard the old sayings…Shoot for the stars and you might hit the moon; or don’t shoot too low…you may get what you want. (That’s the point).


Retirement Planning_ Who Has Time for That_


How to afford extra expenses during retirement

When you retire, it is necessary to find ways to either reduce expenses or increase your available money. If you are considering taking out a mortgage on your home to help you afford expenses during retirement, you may have concerns about the potential to default. After all, on a fixed income it may be easy to miss a payment. However, you may qualify for a reverse mortgage, which has no such default risks and does not require immediate repayment at all. When you apply for such a loan, a reverse mortgage calculator will be used to assess the value of your home and decide how much you can borrow. But it will be up to you how you use the money and when you repay it. In fact, you will not owe the balance back as long as you stay in the home. However, as the homeowner, you must prove you can maintain the home by paying taxes and other expenses to qualify for a reverse loan. The home can also be sold to recover the loan balance, if you leave the property without fully repaying the amount you owe.
 

If you are just beginning early retirement planning

Assess how much time you have as of now to accomplish your ultimate goal. Time must be factored into investment, just as with planning a trip. There are more, very technical questions involved in this, that a professional specializing retirement planning can assist you with.

So you’ve got your Here and your There. You’ve set some financial planning goals. You’ve got a good start on your road map. But what is the best vehicle to use? It depends on what stage of the trip you’re in, your retirement age, how far you have to go and how long you have. Again, you may need some professional retirement advice. Don’t let financial planning issues become serious problems in the future. And if they already are heading that way, get some professional advice. 


25 Super Cute Halloween Snacks!

19

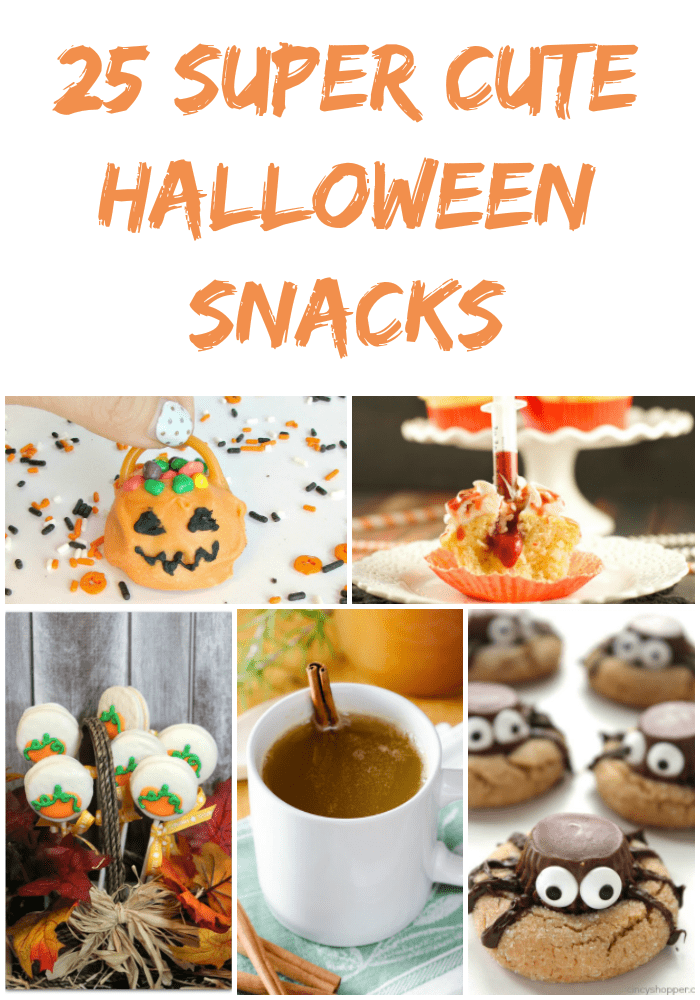
These cute Halloween snacks will be a huge hit, and they are sure to become requested family favourites for years to come. Who knows – maybe some of these snacks will become part of the Halloween traditions you see your kids carry on to their own families someday!

Halloween is the favourite holiday of many kids, and for good reason. They get to dress up and “be” whomever or whatever they would like for a day (A superhero? The Staypuft Marshmallow Man? Lime Jell-O? The possibilities are endless…). Plus, they get to collect obscene amounts of candy that should last for months but usually only lasts a week. The biggest bummer about Halloween is that it is only one day. The anticipation of Halloween, however, can last the entire month of October.

25 Super Fun Halloween Inspired Snacks & Treats

Halloween Snacks

One of my favourite ways to celebrate the month of October is with special snacks that I make in the theme of the holiday such as this Halloween Puppy Chow. Think of the excitement on your child’s face as they open their lunchbox to find an adorable spider cookie or pumpkin sucker waiting to be their dessert. Or the warm, cozy feeling as you share a “cauldron” of hot cider with them as you discuss the details of the day.

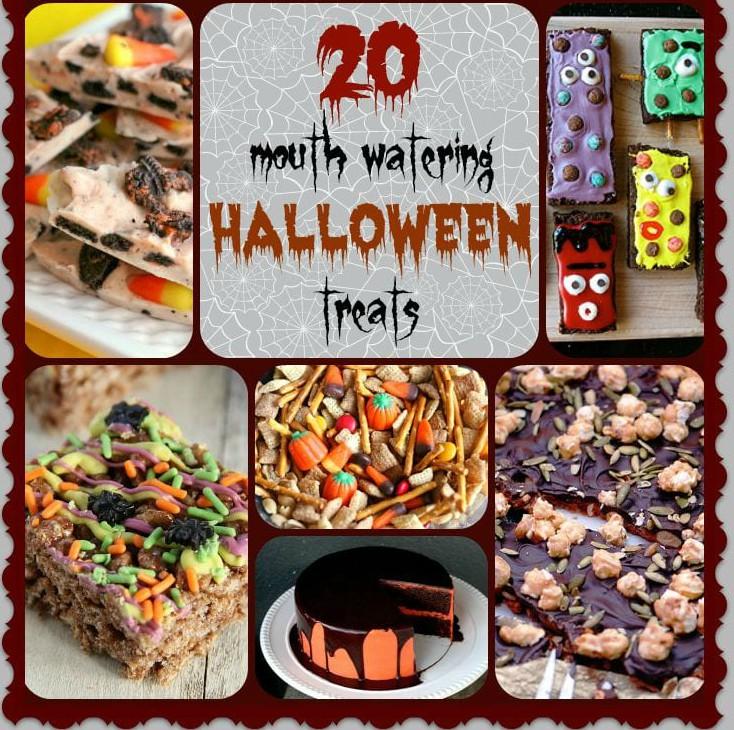
For more Halloween recipe ideas, please visit 14 Freaky Foods For Halloween, 14 Spooky Snacks for Your Halloween Party and Fun Halloween Kids Snacks for School Lunches!

25 Super Cute Halloween Snacks
Halloween Snacks

25 Super Cute Halloween Snacks & Treats

You will find below fun Halloween snacks for the family!

Hope you enjoy these cute Halloween snack recipes as much as I did! Also, check out all of our recipes! If you have a favourite Halloween treat recipe, be sure to share that with us in the comment below!

Three Out of the Box Nursery Ideas for New Moms on a Budget

7

Three Out of the Box Nursery Ideas for New Moms on a Budget

As you count down toward your due date, preparing your home for a new baby might be the last thing on your mind. While we understand the need to baby-proof our homes, often over-looked is the importance of a safe, secure and stylish sleeping space for our newborns. Then again, what exactly does the ideal nursery look  like, anyway? In short, a nursery should represent a place of peace and comfort for your child, whilst also having a sense of personality that’s not too loud. You will find below Three Out of the Box Nursery Ideas for New Moms on a Budget!


Three Out of the Box Nursery Ideas for New Moms on a Budget
Nursery room ~ Photo credit: Kenziepoo via Foter.com / CC BY


Unfortunately, finding the time and spare cash for the perfect nursery may seem out of reach for many new moms trying to balance work, doctor’s appointments and everything in between. Fear not: setting up your baby’s nursery on a budget doesn’t mean you have to sacrifice style or comfort. By bringing together the following elements of décor, you can ensure that your child is safe and sound on the day you bring them home.

Lights Out

Since your nursery should represent a place of peace and quiet, it’s crucial that you avoid as many disturbances as possible. Likewise, pesky lights from outdoors, either due to the sun or artificial light from lamps or headlights, can be a huge disruption to your child’s ability to get a proper night’s sleep.

Therefore, consider first and foremost covering up any windows with Bali blinds, offering both style and security in terms of your baby’s sleep-cycle. Such blinds come in a variety of affordable styles that mesh with any color scheme or existing décor.

Considering that you don’t want too much on the walls which could potentially fall down, proper blinds can give your nursery a sense of style while simultaneously blocking out light.

Safe Décor with Personality

Painting your nursery based on your baby’s gender is a rather traditional practice; however, you can safely take your décor a step further with a combination of the following:

  • Wall murals and decals that you don’t have to worry about falling down
  • Fabric decorations and prints (think: no sharp edges involved)
  • Safe homemade mobiles minus any small pieces that could potentially fall into your baby’s crib

“Keep it simple” is perhaps the name of the game when it comes to decorating a nursery: likewise, the aforementioned décor won’t break your budget or pose any potential threats to your child.

Make Your Crib Count

Obviously the crib is the centerpiece of any nursery: however, cribs are about much, much more than just aesthetics. Choosing a safe crib is absolutely critical to avoiding any choking hazards and ensuring that your child sleeps soundly.

While a secondhand model may be tempting, make sure that your child’s crib is sturdy and contains no small pieces or cords. It may make sense for you to start with a crib as the focal point of your nursery and work your creative magic around it accordingly.


Three Out of the Box Nursery Ideas for New Moms on a Budget


Decorating your nursery should be an enjoyable process as you anticipate the coming of your baby. Rather than sacrifice safety for style, consider how you can think outside the box to create a comfortable sleeping space for your child that looks fabulous as well.


How to Get Your Kids to Eat Anything

18


How to Get Your Kids to Eat Anything

 
As a parent, we want the best for our children and that includes making sure they are eating a well balanced, whole food diet. Our children deserve to be as healthy and nourished as possible (as do we)! But what do you do when your child won’t eat optimally or no longer likes the healthy foods they once enjoyed? Don’t panic! Here are some tips and suggestions to help you on your parenting journey.
 

How to Get Your Kids to Eat Anything

First and foremost and I know I say this all the time, but it is so critical for children to see us eating what we want them to eat. If you want your child to eat healthy, more whole foods – not processed or man made – you must be the example and eat it as well. Children will do what you do. 
 
Secondly, give your child a sense of autonomy and allow them to choose between healthy options. This is done with limited choices, however. If you give your child too many options, they will become overwhelmed and not be able to choose at all. It’s best to give max three choices (I personally like to give two). This can be done in the grocery store and/or in the kitchen. Ask your child, “Would you like to enjoy carrots or beans?” Children are just like us in that if they feel like they have a say in their decision, t hey are more likely to follow through.
 

Thirdly, use food as leverage. This is something I do all the time with my three year old son. If for example, your child likes crackers, serve a few crackers and then before giving more, offer them a vegetable or protein source that optimizes their nutrition and then give them more crackers as soon as they eat say two bites of broccoli.

How to Get Your Kids to Eat Anything
Photo credit Natasha Grey  

Fourthly, make it a game. This is critical in getting kids to eat anything. A game I like to play is “What character matches the food.” To play, have your child name their favourite tv character after the food they just made or you just made. For example, you could make a green smoothie and have them call it the ‘Hulk’s drink’ and I’m the hulk (child being hulk)! Or you could say fun things like “Do you think (insert favourite character’s name) eats cauliflower to give him big, big muscles or cool magic powers?” Planting the seeds of health through games is key to success in the kitchen and in life!
 
Lastly and most importantly, the goal is to create healthy, nourishing habits early so they are instilled at a young age rather than having to do a ton of work later. Your goal is not to be perfect and have a perfect child who eats perfectly; your goal is to be an empowered parent doing the best you can which is what your child will see and ultimately emulate. 
 
We are all doing the best we can with what we know. Parenting, just like life, is a constant evolution and change will happen everyday so even if your child isn’t eating tomatoes right now, that doesn’t mean he or she won’t tomorrow (and if that happens, be prepared for that to change to)!
 
First Photo credit: https://www.flickr.com/photos/usdagov/8412940480/
 
Natasha


Jack-O-Lantern Orange Bowls Recipe

20

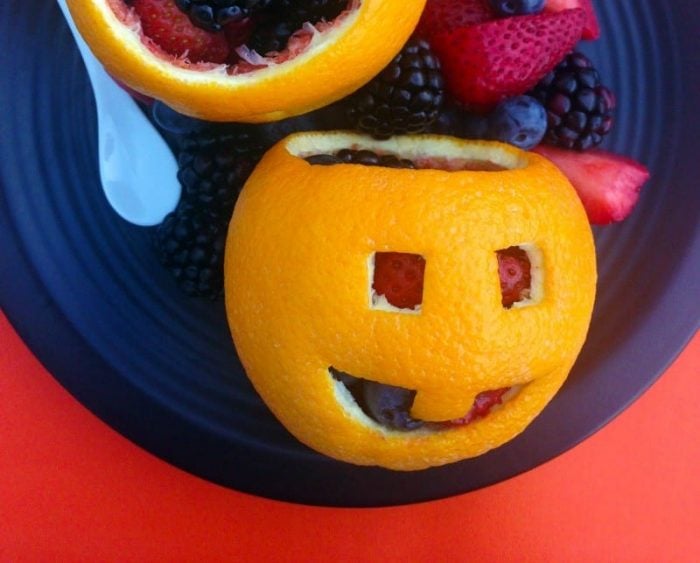
Most Halloween treats are not exactly healthy. I like to try new and different recipes that still fit the theme of the holiday but I can also feel good about giving to my family and friends. That’s why I created these adorable Jack-O-Lantern orange bowls. The process of making the bowl is similar to that of carving a real pumpkin, just on a miniature scale. You’ll probably want to stick with navel oranges, as their skins are thicker and will hold their shape better once the pulp has been removed.

Jack-O-Lantern Orange Bowls Recipe
Jack-O-Lantern Orange Bowls

I prefer to fill my Jack-O-Lantern bowls with berries – their small size is just right, and even though you have to cut the strawberries, they last well once cut. Small grapes are another great option. If you’re taking these halloween snacks with fruit to a party, avoid apples, pears, and other fruits that will oxidize quickly.

Jack-O-Lantern Orange Bowls Recipe
Jack-O-Lantern Orange Bowls

For an added touch, hang on to your strawberry caps to decorate the “lid” of the orange. You could even pick up green plastic toothpicks to hold the stem onto the orange if you wanted to put the lids on the oranges for your party platter.

These orange bowls have it all – they are festive, fun, and delicious!

Jack-O-Lantern Orange Bowls Recipe

Jack-O-Lantern Orange Bowls Recipe

For this recipe, you will need: 

Ingredients

  • 4 Medium Oranges
  • 1 1/2 cup Mixed Fruits of your choice (I find berries are ideal)

The directions are so easy:

Directions

1. Slice off the tops of the oranges.

Jack-O-Lantern Orange Bowls Recipe

2. Using a spoon, scoop out the pulp of the oranges.

Jack-O-Lantern Orange Bowls Recipe

3. Cut out faces as desired on each orange to resemble a Jack-O-Lantern.

Jack-O-Lantern Orange Bowls Recipe

4. Fill each orange with mixed fruits and serve.

I hope you enjoyed my Jack-O-Lantern Orange Bowls recipe as much as my family and I did. If you make it, make sure to share with us on Facebook or Twitter! Also, check out all of our other Recipes.

Jack-O-Lantern Orange Bowls Recipe

JACK-O-LANTERN ORANGE BOWLS RECIPE

No ratings yet
Prep Time 30 minutes
Course Breakfast, Dessert, Snack
Cuisine American, Canadian

Ingredients
  

  • 4 Medium Oranges
  • 1 1/2 cup Mixed Fruits of your choice I find berries are ideal

Instructions
 

  • Slice off the tops of the oranges.
  • Using a spoon, scoop out the pulp of the oranges.
  • Cut out faces as desired on each orange to resemble a Jack-O-Lantern.
  • Fill each orange with mixed fruits and serve.
Keyword fruits, halloween, orange
Tried this recipe?Let us know how it was!

Halloween Bloody Bone Cupcakes Recipe

19

The Halloween season is here and it’s time to get prepared. If you don’t like all the fear factors that come with Halloween, then this recipe might not be for you. If you like all the bloody and gory things about the season then this Halloween Bloody Bone Cupcakes recipe is just what you need to add to your creepy halloween treats.

Playing with food is something we have been told since childhood, not to do. When it comes to creating the best halloween treats to make, that statement doesn’t work. This is the time to get creative and get your hands right in there to make a gory mess. Make the Halloween snacks that work for you. If you don’t want scary, why not try these creative and fun Halloween Kids snacks for school lunches.

Halloween Bloody Bone Cupcakes
Bloody Bone Cupcakes

Halloween Cupcake Decorations

There are many treats you can make for a scary Halloween party treats. First, you need to decide on what Halloween theme you are going for, scary or not so scary. Now that you have chosen the type of theme it is time to make a list. I visited the Bulk Barn recently and they have quite a bit of product to use. Even the pharmacy will have the perfect non-edible items to help you out.

  • bone candy
  • googly eye candies
  • gummies
  • food colouring/gel
  • syringe
  • bandaids
  • cupcake liners

If you happen to be good with a piping bag then there are so many other ways to make easy Halloween cupcake decoration for school, work, or parties at home.

Chocolate Halloween Cupcake

Making cupcakes is an easy and very creative way to add to your Halloween theme. While this recipe uses chocolate Halloween cupcake and has the bloody theme in the icing, however, if you wanted them to be a bit more bloody, try red velvet cake

Bloody Halloween Cupcakes 

This Halloween Bloody Bone Cupcakes recipe is not for the faint-hearted! How a little bit of red food colouring mix to some corn syrup can make it look like blood dripping. They make scary halloween cupcake toppers!

A homemade chocolate cupcake with a butter cream vanilla frosting and topped with a bloody gummy bone. This is the best halloween cupcake recipe to serve at a Halloween Party.

Ingredients for chocolate cupcake

  • 1 3/4 cup Flour
  • 2 cups Sugar
  • 1 cup Cocoa
  • 1 1/2 Tsp Baking Soda
  • 1 1/2 Tsp Baking Powder
  • 1 Tsp Salt
  • 2 Eggs
  • 1 cup Whole Milk
  • 1/2 cup Oil
  • 1 cup Boiling Water
  • 1 Tbsp melted butter
Halloween Bloody Bone Cupcake Recipe
Bloody Bone Cupcake

Bloody Bone Cupcake Directions

Line the cupcake tins with paper liners. Preheat oven to 350 degrees.

Combine 1 cup of the graham cracker crumbs and melted butter and mix. Scoop a tablespoon of the graham cracker crumbs into the cupcake liner. Set aside.

Mix the flour, sugar, cocoa, baking soda, baking powder, and salt in a bowl.

In a separate bowl add the eggs, whole milk, and oil.

Add the bowl containing the eggs, whole milk, oil, and vanilla to the bowl holding the dry ingredients. Mix all together until fully incorporated. Beat for 3 minutes on medium. Slowly add the boiling water starting with a small amount then pour in the remaining boiling water. The batter may be a little runny.

Scoop batter into cupcake lined cups until 3/4s filled. Bake at 350 degrees for 20-25 minutes. Remove from oven and allow to cool completely.

Halloween cupcake icing: Ingredients for vanilla frosting

  • 1 cup unsalted sweet cream butter
  • 3 cups powder sugar
  • 1 tsp vanilla 
  • 3-5 Tbsp heavy whipping cream 
  • 2-3 drops of red food colouring
  • 1 cup corn syrup
  • 1 bag of gummy bones

How to decorate halloween cupcake

Combine all ingredients except the corn syrup and food colouring. Mix on medium speed until frosting doesn’t fall off a spoon. Place into a piping bag with a star tip and frost onto cooled cupcake.

In a small bowl, combine the corn syrup and the red food dye, mix until combined. 

Take a fork and dip it into the corn syrup, drizzle over the cupcakes for a blood effect. Place gummy bone on top.  

I hope you enjoyed my Halloween Bloody Bone Cupcake recipe!  If you make it, make sure to share with us on Facebook or Twitter! Also, check out all of our other Halloween Recipes.

Halloween Bloody Bone Cupcakes

Halloween Bloody Bone Cupcake

Lyne Proulx
If you like all gory things, then you have to make this Halloween Bloody Bone Cupcakes recipe and add them to your creepy halloween treats.
5 from 1 vote
Prep Time 25 minutes
Cook Time 25 minutes
Total Time 50 minutes
Course Dessert, Snack
Cuisine American, Canadian
Servings 12
Calories 673 kcal

Equipment

  • Cupcake tins with paper liners

Ingredients
  

Chocolate Cupcake Ingredients

  • 1 3/4 Cup Flour
  • 2 Cup Sugar
  • 1 Cup Cocoa
  • 1 1/2 TSP Baking Soda
  • 1 1/2 TSP Baking Powder
  • 1 TSP Salt
  • 2 Eggs
  • 1 Cup Whole Milk
  • 1/2 Cup Oil
  • 1 Cup Boiling Water
  • 1 Tbsp melted butter

Bloody Vanilla frosting

  • 1 Cup unsalted sweet cream butter
  • 3 Cup powder sugar
  • 1 tsp vanilla
  • 3-5 TBSP heavy whipping cream
  • 2-3 drops red food colouring
  • 1 Cup corn syrup
  • 1 bag gummy bones

Instructions
 

Bloody Bone Cupcake Directions

  • Line the cupcake tins with paper liners. Preheat oven to 350 degrees.
  • Combine 1 Cup of the graham cracker crumbs and melted butter and mix.
  • Scoop a tablespoon of the graham cracker crumbs into the cupcake liner. set aside
  • Mix the flour, sugar, cocoa, baking soda, baking powder, and salt in a bowl.
  • In a separate bowl add the eggs, whole milk, and oil.
  • Add the bowl containing the eggs, whole milk, oil, and vanilla to the bowl holding the dry ingredients.
  • Mix all together until fully incorporated.
  • Beat for 3 minutes on medium.
  • Slowly add the boiling water starting with a small amount then pour in the remaining boiling water.
  • The batter may be a little runny.
  • Scoop batter into cupcake lined cups until 3/4s filled.
  • Bake at 350 degrees for 20-25 minutes.
  • Remove from oven and allow to cool completely.

Frosting Directions

  • Combine all ingredients except the corn syrup and food colouring
  • Mix on medium speed until frosting doesn’t fall off a spoon.
  • Place into a piping bag with a star tip and frost onto cooled cupcake.
  • In a small bowl, combine the corn syrup and the red food dye, mix until combined.
  • Take a fork and dip it into the corn syrup, drizzle over the cupcakes for a blood effect.
  • Place gummy bone on top.

Nutrition

Calories: 673kcalCarbohydrates: 105gProtein: 5gFat: 30gSaturated Fat: 13gPolyunsaturated Fat: 4gMonounsaturated Fat: 12gTrans Fat: 1gCholesterol: 75mgSodium: 438mgPotassium: 176mgFiber: 3gSugar: 86gVitamin A: 642IUVitamin C: 1mgCalcium: 80mgIron: 2mg
Keyword Bloody bone cupcakes, Bloody Halloween cupcakes, chocolate Halloween cupcake, creepy Halloween treats, Halloween cupcakes
Tried this recipe?Let us know how it was!

Halloween Themed Caramel Apples Recipe

14

Kids have been back to school for some time now and I am sure parents will be looking for fun things to do on the weekends. There are so many farms that have to pick your own fruits and vegetables. Between mid-September and the end of October is the perfect time for apple picking. Fall brings a variety of recipes for apples. Pick enough to make a few recipes including this one for Halloween Themed caramel apples.

Halloween Themed Caramel Apples Recipe

Apple Games for Halloween

It isn’t Halloween unless you have some fun apple games to play at parties or other themed events during the fall season. The games below are fun and make will make fun memories and photo opportunities. Make some decorated caramel apples for prizes. Everyone wins one to take home.

For many years kids have been playing Bobbing for apples. The halloween apple biting game is played by filling a tub or a large bucket with water and putting apples in the water. Players then try to catch one with their teeth. The use of arms is not allowed, and the hands are often tied behind the back to prevent cheating.

Another fun game is the hanging apple game where you hang apples individually to a clothesline or rope. Without using their hand’s players must choose an apple and eat the majority of it. Again with this game, no hands are allowed.

Decorated Apple Treats 

If you plan to use these caramel apples for prizes or take-home treats, you will need a few extra items aside from the ingredients. The dollar store will be the place to go for all your needs. You will need some cellophane bags, orange, black and purple ribbons and you may just find some mini Halloween candies that you can add to the apples. Once the caramel apples are made and decorated, place them in the bags and tie-up with the ribbons. You can even add a name tag on each so you know everyone has one to go.

Halloween themed caramel apples

Not your average caramel apple recipe! These Halloween themed caramel apples are very festive with a crunchy bite thanks to the peanuts bits and the colourful candy melts! A sweet treat this Halloween for your family, enjoy!

You will only need a few simple ingredients to get the best caramel apple recipe going:

Ingredients for soft caramel apple recipe

  • 6+ Granny Smith Apples or Gala apples, large
  • 2 bags of caramel
  • 2 TBSP water
  • 1 package of candy sticks 
  • 1 bag chopped peanut bits
  • 1 bag of orange candy melts
  • 1 bag of purple candy melts

They are very simple, but follow these directions closely to make this homemade caramel apple recipe without corn syrup.

How to make halloween caramel apples

  1. Grocery store apples have a wax coating. You will want to remove the coating before starting to make the caramel apples. 
  2. The easiest way to remove the wax coating is to dip your apples in a pot of boiling water for a short amount of time. When you remove the apples, one at a time, from the pot of water, use a rough cloth to wipe the remaining wax off of the apples. 
  3. Set aside to allow your apples to cool. (Make sure that your apples are dry). Push a stick into the core of each of the apples. Cover each of your cookie sheets with wax paper, taping down each end. Spray the lined cookie sheets with baking spray. 
  4. Next, unwrap your caramel and put them in a glass bowl with 2 tablespoons of water and put it in your microwave. 
  5. This is the time-consuming part, put the bowl of caramel and water in your microwave cooking on heat for 2 minutes, stir and then return to the microwave for another minute, continue repeating this process until the caramel is fully melted. 
  6. Pick up each apple by the candy stick with a fork under the bottom of the apple dipping it into the melted caramel. If necessary use a spoon to cover the apple with the caramel. 
  7. Place each dipped apple on the wax paper lined cookie sheet. When your apples are done place in your refrigerator to cool for about 5 minutes. 
  8. Dip each caramel covered apple into the bowl of peanut bits and roll the sides of the apple in the apple bits. Place back on the wax paper. 
  9. Return to the refrigerator for 15 minutes or until the candy is firm on the apples.  
  10. Melt the purple and orange candy melts in separate bowls in the microwave, one at a time. When the orange candy is melted completely (following the previous steps) pour it into a plastic squeeze bottle and drizzle each apple and set aside to cool in the refrigerator. 
  11. Next, melt the purple candy melts and pour it into another plastic squeeze bottle and drizzle the purple candy on each apple. Return to the refrigerator until the purple melted candy is hardened.
Festive Halloween Caramel Apples Recipe
Caramel Apple Recipe

I hope you enjoyed my Halloween Themed Caramel Apples recipe as much as my family and I did. If you make it, make sure to share with us on Facebook or Twitter! Also, check out all of our other Recipes.

Halloween Themed Caramel Apples

Lyne Proulx
Fall brings a variety of recipes for apples. Pick enough to make a few recipes including this one for Halloween Themed caramel apples.
5 from 1 vote
Prep Time 30 minutes
Cook Time 5 minutes
Cooling in Refrigerator 20 minutes
Total Time 55 minutes
Course Snack
Cuisine American, Canadian
Servings 6 apples
Calories 955 kcal

Equipment

  • Pot of boiling water
  • Glass bowls
  • Wax paper lined cookie sheet
  • Plastic squeeze bottles
  • 1 package of candy sticks

Ingredients
  

  • 6 + Granny Smith Apples or Gala apples large
  • 2 bags caramel
  • 2 TBSP water
  • 1 12 oz bag chopped peanut bits
  • 1 bag orange candy melts
  • 1 bag purple candy melts

Instructions
 

  • Grocery store apples have a wax coating. You will want to remove the coating before starting to make the caramel apples.
  • The easiest way to remove the wax coating is to dip your apples in a pot of boiling water for a short amount of time. When you remove the apples, one at a time, from the pot of water, use a rough cloth to wipe the remaining wax off of the apples.
  • Set aside to allow your apples to cool. (Make sure that your apples are dry). Push a stick into the core of each of the apples. Cover each of your cookie sheets with wax paper, taping down each end. Sray the lined cookie sheets with baking spray.
  • Next, unwrap your caramel and put them in a glass bowl with 2 tablespoons of water and put it in your microwave.
  • This is the time-consuming part, put the bowl of caramel and water in your microwave cooking on heat for 2 minutes, stir and then return to the microwave for another minute, continue repeating this process until the caramel is fully melted.
  • Pick up each apple by the candy stick with a fork under the bottom of the apple dipping it into the melted caramel. If necessary use a spoon to cover the apple with the caramel.
  • Place each dipped apple on the wax paper lined cookie sheet. When your apples are done place in your refrigerator to cool for about 5 minutes.
  • Dip each caramel covered apple into the bowl of peanut bits and roll the sides of the apple in the apple bits. Place back on the wax paper.
  • Return to the refrigerator for 15 minutes or until the candy is firm on the apples.
  • Melt the purple and orange candy melts in separate bowls in the microwave, one at a time. When the orange candy is melted completely (following the previous steps) pour it into a plastic squeeze bottle and drizzle each apple and set aside to cool in the refrigerator.
  • Next, melt the purple candy melts and pour it into another plastic squeeze bottle and drizzle the purple candy on each apple. Return to the refrigerator until the purple melted candy is hardened.

Nutrition

Calories: 955kcalCarbohydrates: 126gProtein: 20gFat: 46gSaturated Fat: 17gPolyunsaturated Fat: 13gMonounsaturated Fat: 14gCholesterol: 6mgSodium: 498mgPotassium: 817mgFiber: 9gSugar: 100gVitamin A: 134IUVitamin C: 9mgCalcium: 185mgIron: 2mg
Keyword Caramel apples, Halloween Caramel apples, Halloween recipe
Tried this recipe?Let us know how it was!

Tips for Choosing a Wedding Caterer in Toronto

4

When you are planning your perfect wedding day remember that hungry guests are the worst guests in the world. This is why you need to remember to plan a perfect wedding reception and hire professional wedding caterer in order to make your day unforgettable. Below we present you several tips for choosing a wedding caterer in Toronto and make this day special!

Tips for Choosing a Wedding Caterer


FINDING THE RIGHT CATERER

When you start looking for a Toronto wedding caterer it is important to meet with every perspective ‘employee’ in person. Come to caterer’s office and discuss in person your thoughts and ideas in order to create a perfect tandem of your ideas and his or her professional implementation.

When you come to the any wedding catering in Toronto you will have to bring your own ‘estimate’ of the event. Make sure to include the number of guests, you venue or at least perspective options of it, bring photos of the reception facilities to explain how caterer’s work place will look like. Explain your theme, if there is one, and any cuisine preferences or styling choice.

THE BEVERAGES

Beverages is a totally different thing than food. First of all, if you are planning to serve alcohol at your reception then you need to choose wedding catering company in Toronto that has a liquor license to serve it. Pay attention to this fact when choosing your wedding caterer otherwise you will have to pay double to hire a caterer and a bartender separately.

The standard ratio of drinks at a wedding reception is considered to be one drink per hour per person, so calculate the number of alcohol needed yourself and of course ask your caterer for some advice. Keep in mind that some kinds of alcohol are more popular than others so you need to order more of them. But, at the same time you should remember that people will have to get back to their homes, so do not ‘overorder’ alcohol drinks. Hiring a skilled wedding bartender can also help ensure everything runs smoothly and that guests enjoy their drinks responsibly.

Apart from alcohol make sure to get enough water, coffee, tea, juices, and sodas especially if you will have children at your reception.

SIGNING THE CATERING CONTRACT

After you have checked several wedding catering companies and considered their offers it is time to make the final choice. Weight all pros and cons of every company in terms of style and menu offered, services provided, and your personal feeling about the chef. Once you decide on the team you are choosing you will need to sign a contract, but before doing so make sure that you have the following information written in the contract:

  • Name and contact info (both yours and theirs)
  • What: the list of everything provided by the company (including food and beverages, services, number of workers, etc.)
  • Where: the location of your wedding venue
  • When: date(s) and time of their service
  • How much: cost of services in total and detail description of every point as well as deposit paid
  • Additional details: cancellation policies and emergencies

After you made sure that you have all this information you can sign your contract with the company offering wedding catering in Toronto and finally stop worrying about your dinner and proceed to choosing your clothes and inviting friends!

Wedding Reception

Photo credit: Flower Factor via Foter.com / CC BY-NC

A New Way to Access Care Providers

5

When you’re trying to hire a nanny, a babysitter, or housekeeper, or elder care provider, where do you turn? For most families, the days of putting a notice in the newspapers are long gone, and many go online to find help. The abundance of options available on the Internet is both a blessing and a curse, though, and many families are left wondering how to separate qualified providers from the rest. The care economy is a uniquely delicate industry involving providers with vastly different training and qualifications, but all largely employed by individual households.

2979858811_e2a3c29d08_z

The three elements of the care industry families often find most frustrating are: finding providers, safety, and becoming employers. Luckily, new online services are making it easier than ever for families to tackle these issues.

The Search

Anyone who has ever tried to source a nanny from general-purpose online classifieds knows that it’s a nightmare; these sites just aren’t designed to accommodate the specific needs of those looking to hire care providers. Using a purpose-built directory allows you to narrow down your search based on very specific criteria. For example, a service like Canadian Nanny allows you to narrow your search by criteria such as age group (infant, newborn, early school, primary school), availability (part time, full time, after school), duration, language, pay, residency, ability to care for special needs, qualifications (training like CPR and First Aid), and whether or not providers can provide transportation.

Safety and Assurance

New online services that connect families with providers offer a layer of safety and assurance that other mechanisms, like job boards and classifieds, simply don’t provide. One service, Canadian Nanny, has introduced a safe telephone service that allows families to contact potential hires by phone or by instant message without exposing their identity. In addition to this layer of protection, they also provide live, human customer support, so there’s always someone who can answer your questions and assist you when you’re not sure how to proceed.

Becoming an Employer

One of the hardest parts of hiring a care provider is becoming an employer and following the rules and regulations that come with such a role. In addition to its search services, CanadianNanny.ca has also launched a service called HeartPayroll, a solution to families’ payroll and tax needs. Services like these handle issuing pay stubs and annual T4s and help families comply with legislation regarding vacation pay and statutory holidays, as well as other employment laws. They also manage registry with the CRA and the Workplace Safety Insurance Board, an absolutely necessary part of employing full-time as you can face heavy fines for ignoring employment regulations and legislation.

The next time you need to find a new nanny, save yourself the headaches, concerns, and worries and get straight to building a trusting and productive relationship. With new payroll solutions, you don’t have to add hours of stress to make sure you’re in compliance with labour laws. It’s time to take advantage of new solutions that help connect you with the people you need.

Photo credit: RTD Photography via Foter.com / CC BY-SA

Pumpkin Patch Cupcake Recipe

18

Halloween is such a fun time of year with all of the costumes, decorations and goodies to be enjoyed! If you are looking to add something sweet to the holiday offerings without bringing any extra spook to the table, you are going to love this pumpkin patch cupcake recipe! These chocolate Halloween cupcakes are easy to make and so delicious!

Pumpkin Patch Cupcake Recipe
Pumpkin Patch Cupcake

I love a good homemade chocolate cupcake! This Pumpkin Patch Cupcake is the perfect treat for any holiday. This easy halloween cupcake recipe is a must to make for Halloween because decorating them is so easy! You will love the way they turn out and you won’t have to spend all day in the kitchen preparing them. Take them to a classroom party, or offer to friends when they stop by for a treat on Halloween night.

Homemade Halloween cupcake and Frosting

This pumpkin patch cupcake is homemade, and you will find that you probably have all of the ingredients you need to make it in your pantry. There is nothing like a homemade halloween cupcake, but if you have a box mix and limited time, no one will be wiser!

The frosting is also homemade, and this is such a good and easy recipe that it is well worth the efforts for all of that light fluffy vanilla frosting! This recipe for homemade frosting beats any pre-packed frosting, any day!

Easy halloween cupcake decoration

When you are done frosting the halloween cupcake like a grass patch, add a candy pumpkin in the centre to make it look like a pumpkin patch.

Easy to make halloween treats

If you are looking for more Halloween treats, check out some of my other Halloween goodies.

  1. Halloween Marshmallow Witches
  2. Witches Hat Pumpkin Yogurt Bites
  3. 3 Easy Halloween Snacks – Fun Recipes For Kids
  4. 25 Super Cute Halloween Snacks!
  5. 25 Halloween Cupcakes Your Friends Will Love!

Pumpkin Patch Cupcake

This easy Halloween cupcake recipe is sure to be a hit with the kids because it brings a moist and tasty cupcake, that is piled with fluffy frosting and a classic fall treat, the candy pumpkin together! Who wouldn’t love a cupcake with a candy bonus on top?

Chocolate Cupcake Ingredients

  • 2 cups sugar
  • 1 3/4 cups flour
  • 3/4 cup cocoa
  • 1 tsp baking powder
  • 1 tsp baking soda
  • 1 tsp salt
  • 2 eggs, room temp
  • 1 cup whole milk, room temp
  • 1/2 cup canola oil
  • 2 tsp vanilla
  • 1 cup boiling water

Ingredients for vanilla frosting: Halloween cupcake icing

  • 1 cup soft unsalted butter
  • 4 + cup powder sugar
  • 4 Tbsp heavy whipping cream
  • 1 Tbsp. Vanilla
  • Gel food colouring

Topping Decoration

  • 1 candy pumpkin in the centre of each cupcake

How do you make chocolate cupcakes from scratch

  1. Preheat oven to 350 degrees. Line cupcake tins with paper liners.
  2. Whisk the sugar, flour, cocoa, baking powder, baking soda and salt in a mixing bowl.
  3. Combine the eggs, milk, oil and vanilla in a bowl. Add this to the dry ingredients beating on medium until the batter is smooth.
  4. Gradually add the boiling water, milk and oil and blend together until the batter is smooth.
  5. Using a medium scoop fill the paper lined cupcake tins with the prepared batter.
  6. Bake at 350 degrees for 20-25 minutes until an inserted toothpick comes out clean.
  7. Allow to slightly cool before transferring to wire racks.

Halloween cupcake icing

  1. Cream the butter, vanilla, and powder sugar until it looks light and creamy.
  2. If it doesn’t cream add several drops of the heavy whipping cream until it creams.
  3. Add several drops of the green gel food colouring. Mix well to blend the colours.
  4. Test to see if the frosting can form and hold a stiff peak by taking a spoonful of frosting and turning the spoon upside down. If the frosting stays on the spoon it is ready if not then add more powder sugar 1/2 cup at a time and mix well.
  5. Test to make sure that the frosting can make and hold a stiff peak.
  6. If ready scoop the frosting into a pastry bag with a large star tip.
  7. Twist the open end of the pastry bag to push the frosting to the tip.
  8. Instead of holding the pastry bag and tip to the side hold it straight up pointing the tip down to the cupcake making the frosting look like grass.
  9. Start by frosting on the outside edge of the cupcake working to the centre of the cupcake.
  10. You can add a candy pumpkin in the centre of the grass patch (centre of the frosting).
Pumpkin Patch Cupcake Recipe
Pumpkin Patch Cupcake

I hope you enjoyed my Pumpkin Patch Cupcake recipe. If you make it, make sure to share with us on Facebook or Twitter! Also, check out all of our other Recipes.

Pumpkin Patch Cupcake Recipe

Lyne Proulx
Your kids will just love this Pumpkin Patch Cupcake recipe for Halloween! They are easy to decorate and taste so yummy!
No ratings yet
Prep Time 8 minutes
Cook Time 25 minutes
Frosting 15 minutes
Total Time 48 minutes
Course Dessert, Snack
Cuisine American, Canadian
Servings 12 cupcakes
Calories 634 kcal

Equipment

  • Mixing bowls
  • Whisk
  • Muffin pan
  • Paper liners
  • Pastry bag with a large star tip

Ingredients
  

Chocolate Cupcake Ingredients

  • 2 Cup sugar
  • 1 3/4 Cup flour
  • 3/4 Cup cocoa
  • 1 tsp baking powder
  • 1 tsp baking soda
  • 1 tsp salt
  • 2 eggs room temp
  • 1 Cup whole milk room temp
  • 1/2 Cup canola oil
  • 2 tsp vanilla
  • 1 Cup boiling water

Vanilla Frosting

Frosting Ingredients

  • 1 Cup soft unsalted butter
  • 4 cup powder sugar add more if needed
  • 4 TBSP heavy whipping cream
  • 1 Tbsp. Vanilla
  • Grass Green gel food colouring
  • 12 pumpkin candy

Instructions
 

Chocolate Cupcake Directions

  • Preheat oven to 350 degrees. Line cupcake tins with paper liners.
  • Whisk the sugar, flour, cocoa, baking powder, baking soda and salt in a mixing bowl.
  • Combine the eggs,milk, oil and vanilla in a bowl. Add this to the dry ingredients beating on medium until the batter is smooth.
  • Gradually add the boiling water, milk and oil and blend together until the batter is smooth.
  • Using a medium scoop fill the paper lined cupcake tins with the prepared batter.
  • Bake at 350 degrees for 20-25 minutes until an inserted toothpick comes out clean.
  • Allow to slightly cool before transferring to wire racks.

Frosting Directions

  • Cream the butter, vanilla, and powder sugar until it looks light and creamy.
  • If it doesn’t cream add several drops of the heavy whipping cream until it creams.
  • Add several drops of the green gel food colouring. Mix well to blend the colours.
  • Test to see if the frosting can form and hold a stiff peak by taking a spoonful of frosting and turning the spoon upside down. If the frosting stays on the spoon it is ready if not then add more powder sugar 1/2 Cup at a time and mix well.
  • Test to make sure that the frosting can make and hold a stiff peak.
  • If ready scoop the frosting into a pastry bag with a large star tip.
  • Twist the open end of the pastry bag to push the frosting to the tip.
  • Instead of holding the pastry bag and tip to the side hold it straight up pointing the tip down to the cupcake making the frosting look like grass.
  • Start by frosting on the outside edge of the cupcake working to the center of the cupcake.
  • You can add an candy pumpkin in the center of the grass patch (center of the frosting).

Nutrition

Calories: 634kcalCarbohydrates: 94gProtein: 5gFat: 29gSaturated Fat: 13gPolyunsaturated Fat: 4gMonounsaturated Fat: 11gTrans Fat: 1gCholesterol: 77mgSodium: 352mgPotassium: 151mgFiber: 2gSugar: 76gVitamin A: 619IUVitamin C: 1mgCalcium: 65mgIron: 2mg
Keyword chocolate cupcakes, cupcake recipe, cupcakes, Halloween cupcake, Halloween dessert, pumpkin patch cupcake
Tried this recipe?Let us know how it was!

Feel More at Home with a Dyson Humidifier – Review

174

Fall is here, and the temperature is beginning to drop. Soon, we will be turning on the heat to keep is warm cozy and at home. This creates dry air that can cause issues such as dehydrating skin and increase the chance or contracting colds and the flu. Dyson asked my family to review the Dyson humidifier to see is it would bring a host of benefits to our home. 

Feel More at Home with a Dyson Humidifier - Review

Dyson kills 99 per cent of bacteria with its Air Multiplier™

An issue some humidifiers have is that they actually create bacteria and then spread it around your home. This can cause your family to become sick. Dyson found a solution to this problem by creating a humidifier that stops the breeding of bacteria before it can spread. Dyson kills 99 per cent of bacteria with its Air Multiplier™ and Dyson’s patented ultraviolet cleansing technology. The water in the tank is exposed to an ultraviolet light that destroys 99 per cent of the bacteria that lurks there. Dyson’s Air Multiplier™ technology uses a piezoelectric transducer at the base of this humidifier vibrates up to 1.7 million times a second to break the water down into microscopic particles. They are then drawn into the loop amplifier to be spread through the room.

4 Fabulous Benefits of Owning a Dyson Humidifier

Dyson humidifier is so quiet

Once assembled, the Dyson Humidifier was really easy to use. The first thing we noticed was not how well it was working. It was the lack of sound it made. Dyson created a quieter humidifier by improving the airway paths and an aerodynamic diffuser that allows for the machine to run quietly. Depending on the airflow level we had this machine set to, we were not able to hear it outside of the space it was running in. We were barely able to hear it inside our child’s room at low airflow level. We usually have the airflow setting on this humidifier set on 2 when our kids are sleeping in their room at night. I could hear it running, but just barely. At a higher setting, it does become louder, but not at an excessive sound level. I could hear the sound of air flowing through the machine in other rooms, but it is still quieter than many other humidifiers we have owned.

I was also impressed with how well I was able to feel the difference in the space we placed our machine in. It made a huge impact in our child’s room. This room is one of the smaller spaces in our home, and after running it in their room for a while, we were really able to notice a change in the room’s temperature and humidity. Dyson’s Intelligent Climate Control allows us to control the feel of the room this machine was operating in. Whether it was by pressing the button on the humidifier or using the remote control, we could make a room feel comfortable for our needs with the push of a button. Since this humidifier can also be used as a fan, it would be great to use during warm parts of the year as well.

Feel More at Home with a Dyson Humidifier - Review

Why I like the Dyson Humidifier so much

I have found that when we used our Dyson humidifier in our living room and in our children’s room, it was also easier to breathe. A few of us suffer from allergies and it can be hard to breathe with bacteria in our air space.  This humidifier destroying the bacteria also allows for allergy suffers to breathe easier. They are not taking in some symptoms that cause their symptoms to flare up. I have noticed that is easier to breathe in the rooms we have this machine set up in. Dyson’s Air Multiplier™ technology also allows for the air it created to be dispersed evenly around a room. It is easier to feel this effect in our little ones’ room as it is a smaller space, but we were all able to feel this different in our living room as well.

Positive benefits of owing a Dyson humidifier

There are so many positive benefits my family enjoyed after using our Dyson humidifier. We were able to control the heat and humidity in a space, it was quieter than other humidifiers we have owned in the past, and most importantly, we found it easier to breathe easier in our home. To have this peace of mind day and night makes our house more of a home.

4 Fabulous Benefits of Owning a Dyson Humidifier

For more information about Dyson, you can connect with them on their Facebook, Twitter, YouTube and Pinterest pages!

Disclaimer: I received the Dyson Humidifier to review. The views expressed are my own.

Save

Save

Save

Halloween Pumpkin Cookies Recipe

11

Cut out cookies are a holiday staple for good reason; they are so delicious! This Halloween pumpkin cookie recipe is perfect for sharing with friends or with classmates. Simply place one in a food storage bag, and tie it off with a festive ribbon or bakers twine for a treat anyone will want to gobble up!

What you need to make the Halloween cookies

To make this Pumpkin cookie recipe, you will want to get a candy corn cookie cutter to achieve the shape. The cookie part of this recipe is easy to make and has simple ingredients that you probably have in your pantry.

Things get a little more challenging with the icing, but the results are nothing short of delectable and adorable! Before you begin, note that the recipe will require patience! The dough needs 6 hours to chill before rolling. It is important to let the dough rest and chill for the best results. But, as we all know, good things are worth waiting for! The icing also requires about 6 hours of drying time. Be sure to not rush this part or the too cute details of your pumpkin face will be smudged!

Halloween Pumpkin Cookies Recipe

How to decorate the Halloween Cookies

You can use any sprinkles you like with this recipe. With so many cute options available, I know you will find something spooktacular to top your Halloween pumpkin cookies with!

This recipe is time consuming, but I think you will agree that the results, and flavour make it well worth it! Feel free to get creative with your pumpkin faces to make your cookies unique!

More Halloween Treats

If you are looking for more Halloween treat ideas you won’t want to miss my collection of Halloween posts. Reader favourites include Bloody Bone Cupcakes and Oreo Bat Truffles.

Halloween Pumpkin Cookies Recipe

  • 3 cup flour
  • 1 tsp baking soda
  • 1/2 tsp salt
  • 1 cup soft unsalted butter
  • 1 cup granulated sugar
  • 1 eggs
  • Halloween sprinkles 

Material needed

  • Cookie Cutter: candy corn
  • frosting bags with a #2 tips

Halloween Icing Ingredients:

  • 4 egg whites
  • 2 cup powder sugar
  • 1/2 tsp cream of tartar
  • 1 tsp vanilla
  • Black, orange, and green gel food colouring
Halloween Pumpkin Cookies Recipe

How to make the Halloween Pumpkin Cookies

  1. Cream the soft butter with the sugar until the combination is smooth and not grainy to the touch in a mixing bowl. 
  2. Add eggs and continue to mix. 
  3. Add the vanilla and continue mixing. 
  4. Sift the four, baking soda, and salt together. 
  5. Add the dry mixture to the wet mixture. 
  6. Continue mixing to make sure all ingredients are thoroughly blended. 
  7. Make the dough into a ball, wrap it in cling wrap completely covering the entire dough ball. 
  8. Put in the refrigerator for about 6 hours or overnight. Check to see if the dough is firm. 
  9. Preheat oven to 325 degrees. 
  10. Pull the cookie dough out of the refrigerator and sit it out to soften up a bit. 
  11. Put flour out on the cutting board, rub flour on the rolling-pin, and work some flour into the batter. (if needed). 
  12. Roll the dough out on the cutting board and using the cookie cutter begin to make your cookies. 
  13. Line the cookie sheet with parchment paper. 
  14. Using a metal spatula move the cut cookies to the parchment lined cookie sheet. 
  15. Bake at 325 degrees for 8 minutes. Check to see if the cookies are thoroughly baked. 
  16. Take the cookies off of the cookie sheet and put on a wire rack to cool completely (About 10 minutes).

How to make the Halloween Pumpkin Cookies Icing

  1. Combine all ingredients in a mixing bowl mixing on medium speed for 4 minutes. (except your food colouring) 
  2. If icing is not stiff enough add 1/4 Cup powder sugar. 
  3. Divide the icing into 4 equal bowls. 
  4. The first bowl of icing add in a few drops of orange food colouring
  5. The second bowl of icing, add several drops of black gel food colouring. Stir to mix. 
  6. The third bowl of icing, add several drops of  green food colouring.
  7. The fourth bowl stays white. 
  8. Spoon each colour of icing into individual frosting bags with a #2 tips. Twist the open end of the bag to push the icing to the tip. 
  9. Squeeze the majority of the white icing into a bowl then add 1 tsp of water to this icing and stir to mix the water and icing together.
  10. Using the orange piping bag, pipe an orange line around half of the candy corn shaped cookie. 
  11. Fill in with the thin orange icing.
  12. Add some green dots to the pumpkin on the corners. 
  13. Let dry for 2 hours. 
  14. Pipe on a face for the pumpkin.
  15. Pipe a black line of icing around the edge of the top half of the cookie. 
  16. Add in a half circle of white, sprinkle with some sprinkles. 
  17. Let dry for another 4 hours before bagging or enjoying. 

I hope you enjoyed my Halloween Pumpkin Cookie recipe . If you make it, make sure to share with us on Facebook or Twitter! Also, check out all of our other Halloween Recipes.

Halloween Pumpkin Cookies Recipe

Halloween Pumpkin Cookies

This Halloween pumpkin cookie recipe is perfect for sharing with friends or with classmates. Simply place one in a food storage bag, and tie it off with a festive ribbon or bakers twine for a treat anyone will want to gobble up!
5 from 1 vote
Prep Time 1 hour
keep in refrigerator 12 hours
Course Dessert, Snack
Cuisine American, Canadian

Ingredients
  

Cookie Ingredients

  • 3 Cup flour
  • 1 tsp baking soda
  • 1/2 tsp salt
  • 1 Cup soft unsalted butter
  • 1 Cup granulated sugar
  • 1 eggs
  • Halloween sprinkles
  • Cookie Cutter: candy corn

Icing Ingredients

  • 4 egg whites
  • 2 Cup powder sugar
  • 1/2 tsp cream of tartar
  • 1 tsp vanilla
  • Black orange, and green gel food colouring

Instructions
 

Cookie Directions

  • Cream the soft butter with the sugar until the combination is smooth and not grainy to the touch in a mixing bowl.
  • Add eggs and continue to mix.
  • Add the vanilla and continue mixing.
  • Sift the four, baking soda, and salt together.
  • Add the dry mixture to the wet mixture.
  • Continue mixing to make sure all ingredients are thoroughly blended.
  • Make the dough into a ball, wrap it in cling wrap completely covering the entire dough ball.
  • Put in the refrigerator for about 6 hours or overnight. Check to see if the dough is firm.
  • Preheat oven to 325 degrees.
  • Pull the cookie dough out of the refrigerator and sit it out to soften up a bit.
  • Put flour out on the cutting board, rub flour on the rolling-pin, and work some flour into the batter. (if needed).
  • Roll the dough out on the cutting board and using the cookie cutter begin to make your cookies.
  • Line the cookie sheet with parchment paper.
  • Using a metal spatula move the cut cookies to the parchment lined cookie sheet.
  • Bake at 325 degrees for 8 minutes. Check to see if the cookies are thoroughly baked.
  • Take the cookies off of the cookie sheet and put on a wire rack to cool completely.
  • (About 10 minutes).

Icing Directions

  • Combine all ingredients in a mixing bowl mixing on medium speed for 4 minutes. (except your food colouring)
  • If icing is not stiff enough add 1/4 Cup powder sugar.
  • Divide the icing into 4 equal bowls.
  • The first bowl of icing add in a few drops of orange food colouring
  • The second bowl of icing, add several drops of black gel food colouring. Stir to mix.
  • The third bowl of icing, add several drops of green food colouring.
  • The fourth bowl stays white.
  • Spoon each color of icing into individual frosting bags with a #2 tips. Twist the open end of the bag to push the icing to the tip.
  • Squeeze the majority of the white icing into a bowl then add 1 tsp of water to this icing and stir to mix the water and icing together.
  • Using the orange piping bag, pipe an orange line around half of the candy corn shaped cookie.
  • Fill in with the thin orange icing.
  • Add some green dots to the pumpkin on the corners.
  • Let dry for 2 hours.
  • Pipe on a face for the pumpkin.
  • Pipe a black line of icing around the edge of the top half of the cookie.
  • Add in a half circle of white, sprinkle with some sprinkles.
  • Let dry for another 4 hours before bagging or enjoying.

Notes

MATERIAL NEEDED

  • Cookie Cutter: candy corn
  • frosting bags with a #2 tips
Keyword cookies, Halloween cookies
Tried this recipe?Let us know how it was!

4 Fabulous Benefits of Owning a Dyson Humidifier

15

The dog days of summer have passed us, ushering in cooler days with dryer air for us to experience. The cold and flu season is also on its way. Now that all three of my kids are in school, there is the chance that more sick days will be had in or home. For days like these, we like to keep the room our kids are resting in as comfortable as possible by using a humidifier. Dyson has just released a humidifier that boasts plenty of  benefits that are you may find to be pretty amazing for your family to try and enjoy! You will find below 4 Fabulous Benefits of Owning a Dyson Humidifier!

4 Fabulous Benefits of Owning a Dyson Humidifier

Benefit #1: Dyson Humidifier Offers Clean air

Were you aware that some humidifiers can actually provide the right environment to breed bacteria? This is because the water is not being treated before it gets circulated around the room. The bacteria that has been created in the tank and spread across the room eventually finds its way into your lungs, causing illnesses to all that are taking them in. Dyson created a patented ultraviolet cleansing technology to kill 99.9 per cent of bacteria in the water. How does it do this? A piezoelectric transducer in the base of this machine vibrates 1.7 million times a second. This allows for the water to be broken down into microscopic particles. They are then led through the loop amplifier and then dispersed through the air.  Destroying the bacteria also allows for allergy suffers to breathe easier. They would not be taking in some of the agents that cause their symptoms to flare up.

4 Fabulous Benefits of Owning a Dyson Humidifier

Benefit #2: Even distribution of throughout the room

Humidifiers blast out moist air in the room they are set in, but is the air being spread around the space evenly? Dyson has identified this issue and created an Air Multiplier™ technology. It allows for the humid air it created to be evenly spread around a room. Everyone in this space can benefit from the clean, moist air this humidifier is producing.

4 Fabulous Benefits of Owning a Dyson Humidifier

Benefit #3: Dyson Humidifier Control of temperature and moisture

Dyson’s Intelligent Climate Control on the remote that accompanies this humidifier allows users to have more control over the humidity and temperature a room! With just a press of a button, users are able to change the humidity and the temperature in a room by adjusting the level of air flow or humidity level. This feature also comes in handy as it helps to keep skin moisturized, and doubles as a fan to help keep your home cooler during warmer months!

4 Fabulous Benefits of Owning a Dyson Humidifier

Benefit #4: Oh, the lack of noise!

There are some humidifiers that are just plain loud. This sound can be disruptive to the ambiance of a room or a good night’s sleep. Dyson has incorporated Quiet Mark (the international mark of approval from the Noise Abatement Society), which encourages high-performance technology to be designed to run with reduced, unwanted noise in our environment. Dyson created a quieter humidifier by improving the airway paths and an aerodynamic diffuser that allows for the machine to run quietly.

For more information about Dyson, you can connect with them on their Facebook , Twitter, and Pinterest pages!

Disclaimer: I received a product from Dyson in order to write this review. The views expressed are my own.

Self-Awareness = Happiness

14

Creating a meaningful life for myself has been an incredible journey. It has allowed me to experience and see life through a different lense. I realized that the first step in changing the way you create your life is self-awareness. Because self-awareness = happiness! We can also call it mindfulness. You cannot expect to change what you are not aware of.

As my children are growing, so am I. Feeling that what I am doing has a real purpose and meaning that matters to me makes a huge difference in my life. It makes getting up each day the most exciting thing in the world. Forget trying to force myself to work hard, it becomes more important to remind myself to take breaks to eat!

iStock-tech-fit-image

What is self-awareness

Self-awareness or mindfulness provides the clarity to choose whether you express emotions of love or express emotions out of reactions of fear. It provides the possibility to catch yourself in that moment prior to saying something harsh, or thinking and believing a negative thought.

Self-awareness allows you to identify your patterns and shed some light onto them so they can be changed. It is through self-awareness that you identify and change your core beliefs that drive negative behaviors and create happiness.

Secret of happiness

One important secret of happiness is to really know, understand, and respect your nature; your own individual blend (Like a perfect tropical drink!). We are all great and magnificent in our own unique way.

One of the 7 keys found in the Awakened Mama’s philosophy is to assess thyself, which means that it’s important to connect to the physical, mental, emotional and Spiritual aspect of ourselves, and pay attention to those intuitive hits that tell us when something is off. Mothers are known for their killer mommy instincts, so let’s learn how to use them as best we can.

Checking in several times a day can allow us to reconnect with ourself, to self-correct, and get back into balance, supporting and maintaining harmony within ourselves and our home.

How we can connect with all aspects of ourselves

Let’s go deeper into this key philosophy by first determining how we can connect with all aspects of ourselves in order to be able to use our intuition to our advantage.

Stop and listen

Pretty simple. We all need to take the time to stop multi-tasking and become quiet. Our monkey brain is usually going a mile a minute, which does not allow us to hear our inner voice.

Ways to stop and listen:

  • Take a walk outside (without the iPhone!)
  • Take a bath
  • Do a puzzle
  • Build something
  • Meditate
  • Tend to a garden
  • Or my favorite…head on over to the Nordik Spa 😉

Get moving in the right direction

There are times when we need to get our energy going. This can be tricky because not all of us are alike, which means some may benefit from jogging, while others may feel worse. We need to be in sync with our body to give it what it needs. If we feel awful after a short run, then maybe swimming or playing golf is a better fit.

Identifying how we feel

It can be very difficult at times to know what we feel, much less why we are feeling it, but knowing what we are feeling is a very important step. Absolutely every transformation in life starts with greater awareness.

Ways to do this:

1. One of the best ways to start recognizing your emotions is by answering the question: What do I feel right now? Am I lonely, jealous, resentful, stressed, angry? Pick a word that describes what you are feeling in the moment.

2. Our bodies provide great clues to our emotions. What is going on when we walk around with tension in our shoulders and back? What are we feeling when we feel tightness in our chests or are short of breath?

3. Try this: The next time you are experiencing an uncomfortable sensation in your body, see if you can identify the emotion behind the signal your body is giving you. Did you just have a fight with your partner? Did you just finished watching an episode or a movie that your eyes well up with tears? What part of this created such a feeling within you?

4. Don’t suppress what you are feeling. Find a place where you can be alone and quiet. Breathe deeply and become aware of your body. Gently bring your attention to each area of your body in which you feel tense or uncomfortable. See if you can consciously relax that area, and let yourself experience the feelings that come up. Keep in mind that you may need some practice at this before you arrive at any deep insights. Above all, just let the feelings be and don’t try to change them. They are clues for you to understand yourself better.

Self-Awareness = Happiness

The more we comprehend our individual nature and what we may be here to offer and receive, the more we can make efforts to create a life filled with purpose, happiness and harmony.  

Let’s stay connected!

@JulieCloutier6 & Facebook

Photo credit: Julie Cloutier

Dementia Symptoms, Signs, and Myths

10

Were you aware that three out of four people know someone living with dementia? I was one of them. I say this because someone close to me had lived with this condition and is no longer with my family. This very special person was my grandfather.

Dementia Symptoms, Signs, and Myths

Dementia Early Signs

I have so many fond memories of growing up with my grandfather. As a child, he made our time together fun, and I was always happy to see him. After he retired, our family began to realize that there was a change in my grandfather. We began to notice certain issues. He had trouble with his memory. His personality changed from time to time. He made decisions for himself that did not make sense. He was also beginning to have issues with his nervous system.

grand parents
Me and my grandparents at my 1st Communion!

Once we began to see my grandfather exhibiting these issues, we made sure to have him see a doctor. The diagnosis of dementia was shocking to all of us, but we made sure we found ways to make life better for him. My grandmother had to put him into a retirement home in order to help care for him.

I did not live close to my grandfather, but my husband, kids and I made sure to visit him as often as we could. We would tell him stories and listen to music to try to hold on to him for as long as his memory would let him stay with us. As time went by, it became harder for him to keep his memories of us. It was so difficult to know that we were losing my grandfather so slowly, and it was sad to finally have to say goodbye.

Dementia Friends Canada

Dementia Symptoms

Through my experiences with my grandfather and my own research, I learned that the symptoms of a person developing dementia can occur in many different forms. Here are 11 non-verbal and verbal warning signs that I encourage you to look out for:

  • Dressing inappropriately for the weather (non-verbal)
  • Standing still or looking around for long spaces of time (non-verbal)
  • Pacing (non-verbal)
  • Not able to organize words into sentences (verbal)
  • Cursing or using offensive language (verbal)
  • Repeating a word or phrase (verbal)
  • Reverting to a first language (verbal)
  • Having trouble finding a word (verbal)
  • Creating a new word to replace forgotten ones (verbal)
  • Repeating a question within a short period of time (verbal)
  • Not speaking as much or remaining silent (verbal)

*Note: An actual diagnosis of dementia should be done by a medical professional. These are symptoms you should be mindful of to help identify and help people who are or could be living with dementia.

Dementia Myth Versus Reality

The term dementia carries a lot of negative connotations. If more people understood the facts versus the myths behind dementia, it would help gain more support for the rising number of Canadians living with dementia. Take a look at some of the misunderstandings some people have about this disease:

  1. Myth: Only older people are affected by dementia. Reality: Though many people affected by dementia are over the age of 65, there is a small number of people in their 40s and 50s that do develop dementia.
  2. Myth: Dementia is hereditary. Reality: Genetics do have a hand in who develops dementia, but for most people there isn’t a strong genetic link.
  3. Myth: Finding out that you have dementia means life is over. Reality: There are many people living with dementia who live a meaningful, active life for many years.
Dementia Symptoms, Signs, and Myths

Become Dementia Friends

Dementia Friends Canada is a partnership between the Alzheimer Society of Canada and the Public Health Agency of Canada. Its goal is to bring awareness to dementia and to change the way it is perceived so those touched by dementia can live better lives. One way to do this would be to become a Dementia Friend! These individuals learn more about what living with dementia is actually like and convert this knowledge into actions that can aid those affected by dementia to live better.

Click here to learn more about becoming a Dementia Friend and to begin today!

For more information about Dementia Friends Canada, you can visit their website. You can also connect with them on their Facebook and Twitter pages!

Disclaimer: This post has been generously sponsored by Dementia Friends Canada, the opinions and language are my own.


Save

20 Treat Ideas for Halloween

20

These are some truly 20 treat ideas for halloween which could easily be served to kids or grown-ups for snacks or desserts.

Many people seem to think that Halloween is a holiday just for kids. Sure, some aspects are kid-focused, such as trick-or-treating (you’d probably get some dirty looks if you walked around your neighbourhood in a costume ringing doorbells, holding a pillowcase for your loot, without a kid in tow), but the “treat” doesn’t have to be all about the kids. In fact, as much as I love recipes with my kids in mind, it is just as much fun to spend time in the kitchen baking recipes with an adult’s palate in mind.

20 Mouthwathering Halloween Treats

20 Treat Ideas for Halloween

This list of ideas for halloween treats ranges from whimsical to chic, with everything in-between. Throw together a sweet and salty trail mix made with candy corn to take with you to the office.

Whip up a batch of delicious holiday-themed fudge for your best friend’s annual Halloween bash. Slave over (not really – everyone will just think you did) a beautiful chocolate layer cake with orange and black icing for a dinner party. No matter what the occasion, you’ll find something that will fit the bill in this collection of yummy Halloween treats.

  1. Monster Spicy Brittle Candy Bar 
  2. Halloween Bark Recipe 
  3. Goblin Haystacks 
  4. Crazy Chocolate Chip Cookie Monster
  5. Chocolate Covered Strawberry Pumpkins
  6. Chocolate Pumpkin Cake 
  7. Halloween Cyclops Cupcakes (With Edible Eyeball Toppers) 
  8. Halloween Cocoa Krispie Treats 
  9. Easy Decorated Halloween Spiderweb Cookies 
  10. Halloween Jack O’Lantern Dinner Pockets 
  11. Creepy, Crawly, Delicious Spider Cake Pops – 
  12. Quick Halloween Party Mix 
  13. Chocolate Spiders 
  14. Not-So-Spooky Oreo Bats 
  15. Frankenstein Twinkies Pops 
  16. Monster Munch 
  17. Oreo Cookie Eyeballs Halloween Treat 
  18. Halloween Frozen Oreo Pudding Cake 
  19. Candy Cookie Bars Recipe Using Leftover Halloween Candy Bars
  20. Halloween Spooky Marshmallow Witches

Easy to Make HALLOWEEN treats

If you are looking for Halloween treats that are easy to make, you can also try:

  1. 25 Super Cute Halloween Snacks
  2. Grapenstein‏: Halloween Craft and Healthy Snack
  3. 14 Spooky Snacks for Your Halloween Party
  4. Halloween Puppy Chow
  5. Jack-O-Lantern Orange Bowls

Hope you enjoy these treat ideas for Halloween as much as I did! If you have a favourite Halloween recipe, be sure to share that with us in the comment below!

Thanksgiving Classic Half Roast Turkey Recipe

132

What is the way most Canadians like to commemorate this Thanksgiving? With Turkey! Make this Classic Half Roast Turkey Recipe the centerpiece of your Thanksgiving! 

Classic Half Roast Turkey Recipe

The fall season is upon us! The days are a little cooler, and the trees are beginning to change colours all around us. These are just two of the tell-tale signs that Thanksgiving is on its way! It is one of the holidays many Canadians look forward to, whether it is celebrated with a large group of family and friends, or if it is more of an intimate affair.

Though turkey is traditionally roasted whole in the oven for this occasion, it is available in so many different cuts at your local grocery store! You can find Canadian turkey sliced, ground, as drumsticks, breasts and even as bacon! If the traditional roast turkey is not what you like to gobble during Thanksgiving, then try one of these other options to make this holiday special for you and start a Thanksgiving tradition with it!

My family loves sitting down to a roasted bird every Thanksgiving. Whether it is just our immediate family or if we are amongst a rafter of family and friends, seeing the golden-brown bird presented to the table is what we anxiously await each year.

Whole Turkey How To Tips

Some people find tackling this big bird a bit daunting, but Canadian Turkey has shared their foolproof Whole Bird How To tips to get your turkey from store to your Thanksgiving table with ease! Worried about what you will do with your turkey excess? They also give some fabulous hints in their recipe section on how to prepare some tasty turkey leftover dishes your family can enjoy for the rest of the week! If serving a large turkey is not in the cards for your family’s needs, Canadian Turkey also has on hand a large library of scrumptious recipes to enjoy a fantastic feast that works for you!

roasted-half-turkey-1

Thanksgiving Classic Half Roast Turkey Recipe

Below is a recipe for a Classic Half Roast Turkey to get you fired up about this year’s Thanksgiving meal!

Classic Roasted Half Turkey

This Classic Half Roast Turkey will get you fired up about this year’s Thanksgiving meal! It will be the centrepiece of your table!
No ratings yet
Prep Time 15 minutes
Total Time 2 hours 15 minutes
Servings 4

Ingredients
  

For turkey

  • ½ turkey 3-4kg
  • 2 tbsp olive oil
  • 2 medium onions
  • 6 large carrots
  • One bunch fresh rosemary
  • 3 large garlic cloves unpeeled
  • ½ cup white wine
  • ½ cup chicken broth

For Rub

  • 1 tbsp salt
  • 1/2 tbsp pepper
  • 1/2 tbsp garlic powder
  • 1 tbsp ground sage
  • 1/2 tbsp ground rosemary
  • 1/2 tbsp ground thyme

Instructions
 

  • If your bird is frozen, place it in the refrigerator overnight to defrost.
  • Pat the bird dry with paper towels.
  • Preheat your oven to 350 degrees.
  • Rub both sides of the turkey with olive oil.
  • Combine all spices to make a rub. Sprinkle generously onto both sides of the bird.
  • Slice your onions roughly into 1-inch rounds. Peel and wash the carrots.
  • Pour wine and chicken broth into your roasting pan. Line the bottom with onions, whole carrots, unpeeled garlic cloves and rosemary sprigs. Place the bird on top of all the vegetables, cut side down.
  • Cook the turkey for 1 ½ – 2 hours until cooked through. Test for doneness with a meat thermometer. Turkey should reach an internal temperature of 170°F (77°C) in the breast and 180°F (82°C) in the thigh.
  • Remove turkey from the oven and let it rest for 15 minutes before carving.
  • Enjoy!

Notes

Tip:
Here’s an easy and quick way to make some homemade gravy to serve with your bird.
Take your pan drippings and skim all but a few tablespoons of the fat away. Pour into a saucepan.
Unpeel the garlic. Add the garlic and half the cooked onion to the saucepan. Blend with a hand blender.
Combine 1 tbsp corn starch with ½ glass of milk until dissolved. Add to the saucepan.
Stir over medium heat and bring to a simmer.
Lower the heat until mixture thickens and serve in a gravy boat.
Tried this recipe?Let us know how it was!

22 Turkey Recipe Ideas

If you are looking for more turkey recipe ideas, you have to try some of these:

  1. Turkey Taco Party Cups Recipe
  2. One-Skillet Turkey with Mushrooms and Polenta Cakes Recipe
  3. Big-Crunch Oven-Baked Turkey Tenders Recipe
  4. Gather Around the Grill with Brazilian Style Grilled Turkey Breast Recipe
  5. Grilling Up Flavour with Canadian Turkey Mango-Chili-Lime BBQ’d Drummettes Recipe
  6. Skillet Turkey Breakfast Hash Recipe
  7. Bountiful Breakfast Bowl with Turkey Sausage Recipe
  8. Turkey Ranch Mac-n-Cheese Recipe
  9. Turkey, Cranberry and Goat Cheese Party Bites Recipe
  10. Classic Homemade Turkey Noodle Soup Recipe with Canadian Turkey
  11. Big Batch Turkey and Chard Chili Recipe
  12. Be Barbecue Ready with Canadian Turkey BBQ Turkey Mixed Grill Dinner
  13. Super Easy Roast Turkey Dinner Recipe
  14. Quick and Hearty Turkey Barley Soup Recipe
  15. One Pan Turkey Pilaf with Olives, Orange and Apricots Recipe
  16. Make Canadian Turkey All-In-One Thanksgiving Dinner Bowl
  17. Cedar Planked Grilled Turkey Breast Roast with Charred Tomato Salsa Recipe
  18. Fire the Grill for Grilled Turkey Sausage and Summer Greens Pizza Recipe
  19. Crispy Roast Turkey Recipe
  20. Oven Baked Turkey Eggplant Parmesan Recipe
  21. Savour the Holidays with a Festive Carved Turkey Recipe
  22. Canadian Turkey Sausage and Rapini Pasta Recipe

Want to find fun and unique ways to prepare turkey this Thanksgiving? Pop over to Canadian Turkey’s website to see the recipes they have in store for you to try, savour and make into a Canadian Tradition!

Classic Half Roast Turkey

For more information about Canadian Turkey, you can connect with them on Facebook, Twitter, YouTube and Pinterest pages!

The Best Lemon Meringue Cookies Recipe

22


Lemon Meringue Cookies Recipe
The Best Lemon Meringue Cookies


Lemon Meringue Cookies Recipe

I have always been intrigued by meringues. They look very complicated to make but they are oh so delicious. So what exactly is a meringue? It is a light and fluffy dessert that is usually baked in a pie. Usually, the crust is made of some sort of shortbread, a tart lemon custard filling and topped with a fluffy meringue. Now I love sweets just as much as anyone else, but sometimes a slice of pie is just too sweet. I wanted to turn my favourite pie into a classic cookie.

My Lemon Meringue Cookies are the perfect bite size treat, while still having the classic pie taste. The process to make these cookies is a lot simpler than you think. Using a stand mixer and gently folding in the ingredients is what makes the cookies turn out nice and fluffy.


Lemon Meringue Cookies Recipe
The Best Lemon Meringue Cookies


Here are a few helpful tips to make the perfect Lemon Meringue Cookies.

  • Don’t rush! It takes time to make the eggs as fluffy as they need to be.
  • Use a piping bag and a star tip to make the cookies.
  • Don’t be upset if they don’t turn out perfect the first time.

You will only need a few simple ingredients to get these going:

Ingredients 

  • 4 egg whites
  • 1/4 tsp cream of tarter
  • 1/2 cup sugar
  • 2/3 cup powder sugar
  • 1 TBSP lemon extract 
  • 1-3 drops of yellow food dye


Lemon Meringue Cookies Recipe
The Best Lemon Meringue Cookies


They are very simple, but follow these directions closely:

Directions 

  • Preheat the oven to 225 degrees 
  • In a standing mixer, add in the egg whites and cream of tarter. 
  • Mix on medium speed until soft peaks form and then increase to faster speed.  
  • Alternating between the sugar and powder sugar, add in 1 Tablespoon at a time until stiff peaks form.  
  • Add in the lemon and the food dye and mix until combined.  
  • Using a pastry bag with a star tip, pipe on the meringues onto a baking sheet lined with parchment paper.  
  • Bake for 1 hour

I hope you enjoyed my Lemon Meringue Cookies as much as my family and I did. If you make it, make sure to share with us on Facebook or Twitter! Also, check out all of our other Recipes.


The Best Lemon Meringue Cookies Recipe
The Best Lemon Meringue Cookies

Lemon Meringue Cookies

5 from 1 vote

Ingredients
  

  • 4 egg whites
  • 1/4 tsp cream of tarter
  • 1/2 cup sugar
  • 2/3 cup powder sugar
  • 1 TBSP lemon extract
  • 1-3 drops of yellow food dye

Instructions
 

  • Preheat the oven to 225 degrees
  • In a standing mixer, add in the egg whites and cream of tarter.
  • Mix on medium speed until soft peaks form and then increase to faster speed.
  • Alternating between the sugar and powder sugar, add in 1 Tablespoon at a time until stiff peaks form.
  • Add in the lemon and the food dye and mix until combined.
  • Using a pastry bag with a star tip, pipe on the meringues onto a baking sheet lined with parchment paper.
  • Bake for 1 hour
Tried this recipe?Let us know how it was!