We find ourselves now in the midst of Apple season now and of course what better way to celebrate apple season than 13 Recipes Made with Delicious Apples?! There are literally thousands of desserts, drinks, breakfasts, etc you can make with apples. If you are looking for a great after dinner dessert or even a dish to take to a holiday gathering, you have come to the right place.
Dishes made with apples
Do you happen to have a favorite recipe using apples? Maybe a dish that you call your “to go recipe” for holiday entertaining? Share it in the comments with us. We would love to give your recipe a try.
We used to always make a version of Apple Nachos for a dessert or even a great Apple Pie was a staple item. With apples being in season right now you are likely to find them on a great sale at your local grocery store for the entire fall season. Watch your sales ads for the best deals and stock up while you can. Local orchards may allow you to come pick them yourselves as well for a flat fee.
Dishes made with apples
Having apples on hand for baking needs also helps with serving a healthy snack for your kids. Serve them with peanut butter or caramel to dip them in and your kids will love it.
Fall is a great time to cook with apples! Not only do they taste better because they’re in season, but they’re cheaper too! Here are what we feel are the best 13 Recipes Made with Delicious Apples.
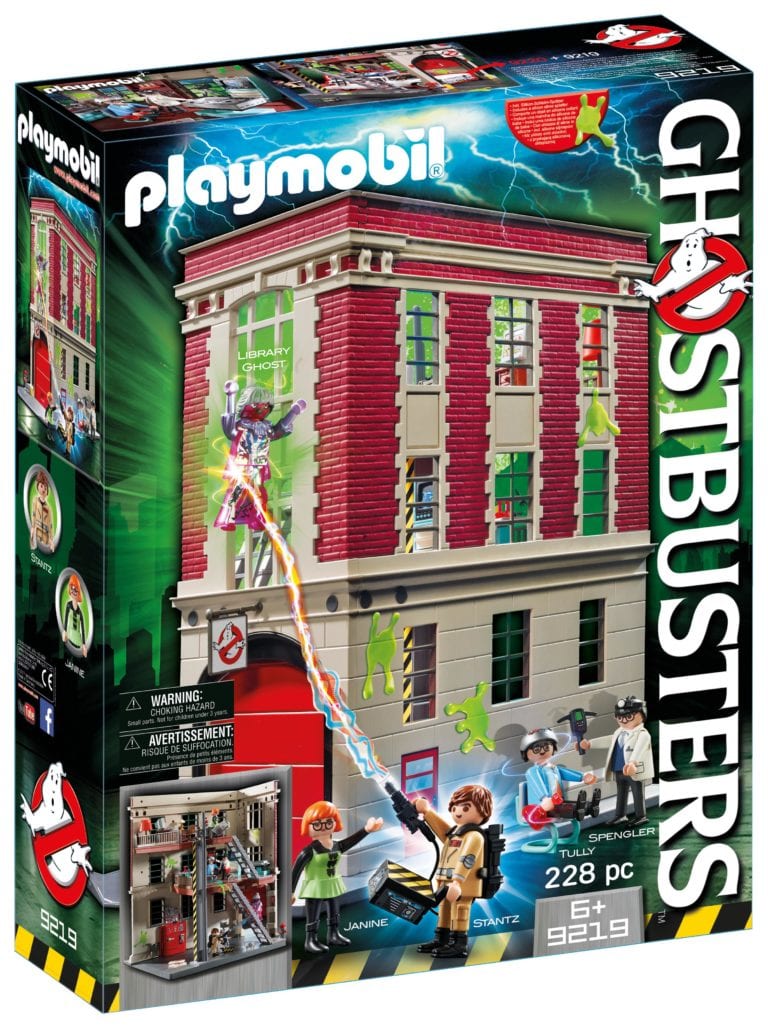
One of the hottest new trends for kids’ gift ideas lately has to be those that are nostalgic to the parental units at home. My other half and I have been keen to get toys that we enjoyed as kids. Playmobil Canada has one of the most iconic playsets kids big and small would love to play with: The Ghostbusters™ Firehouse! My family was asked if we would like blasting “ghosts’ out of our home.
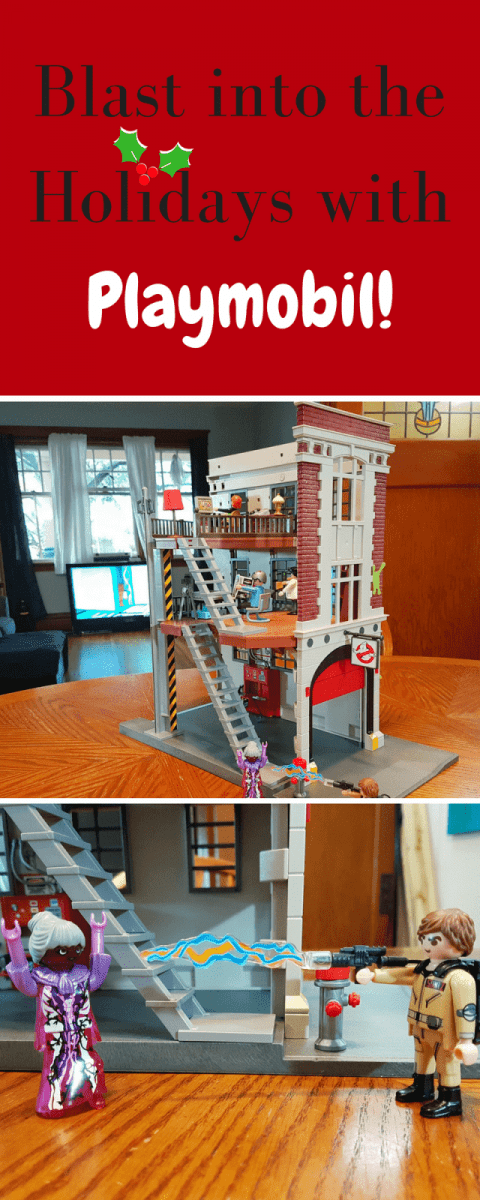
Once it was assembled, it looked very impressive! There are three floors of Ghostbusting fun to be had! I think they did a great job of bringing the Firehouse to life to be played with. Play slime can be added to the building or to characters to add to the grit of this playset. Ray, Egon, Louis, and Janine were included to help kids bring the fun of this playset to life. Their adventures could not be complete without a ghost to battle! Playmobil added a Library Ghost for these heroes to battle.
Ghostbusters™ Firehouse playset on a table.
Back view of Ghostbusters™ Firehouse on a table.
The first floor is the garage. It holds the “Ghost Containment Unit” and room for the Etco-1, The Ghostbusters’ car, to be housed. It is really cute how you are able to slide the ghost trap into the slot and can flip the switch in order to deposit a “ghost” for safe keeping. The best part about this floor is the garage door. It rolls up by pushing or pulling the door handle.
Garage Door view of Ghostbusters™ Firehouse on a table.
“Ghost Containment Unit” in the Ghostbusters™ Firehouse playset.
Climbing up the stairs, you reach a floor where work and play are combined for the Ghostbusters. It is a kitchen/lab where these characters can work on the many experiments they conduct to improve their ghost-busting capabilities, can grab a snack, or catch up on the latest news of the day. What I thought was pretty cool was that there is a version of Tobin’s Spirit Guide that the characters can read to figure out how to deal with each ghost they encounter.
Egon and Louis characters on lab/kitchen of Ghostbusters™ Firehouse.
Ghostbuster character in the lab of the playset
Equipment in the lab of the Ghostbusters™ Firehouse.
The top floor is dedicated to one of the more important and humorous members of the Ghostbusters’ team: Janine! This is her hub where she gathers reports on the latest ghost sighting around New York City (or your home) while being her sassy self. It was so funny to see that a pot was thought of for the leaky roof the Firehouse has. It added to the details Playmobil kept in mind when creating this set.
Janine close up in her office.
An added perk to this playset has to be the fireman’s pole! It is great that it can stay in a locked position or can be easily unlocked so the characters can slide into action when the alarm bell sounds warning of a new ghost to be captured.
Janine character holding onto handle of fireman’s pole handle.
My kids loved every bit of the Ghostbusters™ Firehouse! They loved trying to blast the librarian ghost so they could trap her in the ghost trap. The sliding pole was a huge success as they kept figures zipping down into action. My daughter also playing with Janine and getting her to be a part of the action.
Boy playing with Ghostbusters™ Firehouse on a table.
Boy playing with Ghostbusters™ Firehouse on a table.
Playmobil’s Ghostbusters™ Firehouse got the thumb’s up from both of my littles. They loved how interactive aspects of the set and the characters were when playing with them. The multiple floors of fun also a huge hit for them. The big kids at home loved the little details they added to this set to bring one of our favourite series to life for our kids (and us) to play with! Hours of fun can be had by the family by adding this playset to your home!
Genetically speaking, human beings are wired to get up as the sun rises, and to go to sleep as it sets beyond the horizon. However, because of a huge advancement in technology in just the last hundred and fifty years and of our modern, hectic lifestyle, more and more people are starting to deviate from this golden rule and altering their natural sleep cycles. According to most studies out there, this is not particularly healthy and can lead to a number of issues over the years.
So how do you train yourself to “become a morning person” and actually get up in the morning instead of at noon? This was particularly hard for me to do in my teenage years; I hated waking up early and always wanted to stay up as late as possible. Nevertheless, after I finished college and got a steady job, I managed to force myself to actually be awake in the morning, and today I want to give you some advice on how to accomplish that yourself.
Routine
What’s amazing about our bodies is how much they actually like order; things like getting up at the same time every day, brushing your teeth, doing some yoga, whatever your morning ritual might consist of. As long as you do these things every day for an extended period of time, your body will learn to expect and prepare itself for these activities by making sure you’re awake. My father was a factory worker before he retired, and had to get up at 6 o’clock every day except for weekends.
What’s interesting is that he never used alarm clocks; his body would just naturally wake him up at 6 AM on the minute, because that’s when he needed to get up. Whether he went to bed at 9 PM or 3 AM made no difference, because the habit was as strong as it was. As long as you can form this sort of habit, you’ll find it much easier to get up when you need to and wake up naturally, which is always a plus.
Woman fingers making a heart shape
Less Caffeine
Caffeine might seem like a logical choice in the morning if you always need a little pick-me-up, and that’s fine as long as you don’t overdo it. I used to drink four or five cups of coffee every day, and until I quit I simply thought that it was impossible to stay awake otherwise. Once I realized that it was just an addiction, I dialled it down to one cup in the morning and I think it’s safe to say that my energy levels haven’t diminished since then.
Making your body used to caffeine and expect it as a means to stay awake will affect your quality of sleep, as well as your sleep cycle (especially if you drink your coffee before you go to bed). Again, some caffeine is okay, just don’t overdo it and you’ll find that it is much easier to return to a normal sleep cycle.
No Smartphones in Bed
As I mentioned at the beginning of this post, it’s normal for our bodies to be asleep during the night, and awake during the day. Our bodies can actually “tell” which time of day it is from the amount and the type of sunlight that reaches our eyes. During the day, the sun’s rays are composed of blue light, at around 6500K – but during sunrise and sunset it’s a different story; there’s a lot more red in there and it’s obviously far darker than at noon.
The thing is that when our brains sense that it’s getting darker and “redder” outside, they slowly start secreting the sleep hormone melatonin, which helps us transition from our waking life into sleep. This natural process can be easily interrupted, however, by staring at a computer screen or your smartphone before you go to bed. All your devices emit a particularly blue light (because blue light is great for visibility) virtually all the time, so looking at such a screen fools your brain into thinking that it is still day, and this inhibits melatonin production.
The simple solution is to not bring your smartphone into bed with you, and limit screen exposure in the hours before your bedtime. Alternatively, if you do have to work from your laptop close to your bedtime, it’s a good idea to install some type of automatic screen dimming software that can alter your screen color to compensate for the difference in illumination. I personally use F.lux, and since I’ve started using it I’ve noticed that my eyes hurt a lot less, and I actually feel sleepy when I should, even if I have to work late.
Vanessa Davis
Vanessa Davis is a former personal trainer, mother of two and blog writer at www.diet.st. When she isn’t writing she usually spends her free time playing with her children and her dogs. Vanessa Davis is a former personal trainer, mother of two and blog writer at www.diet.st. When she isn’t writing she usually spends her free time playing with her children and her dogs.
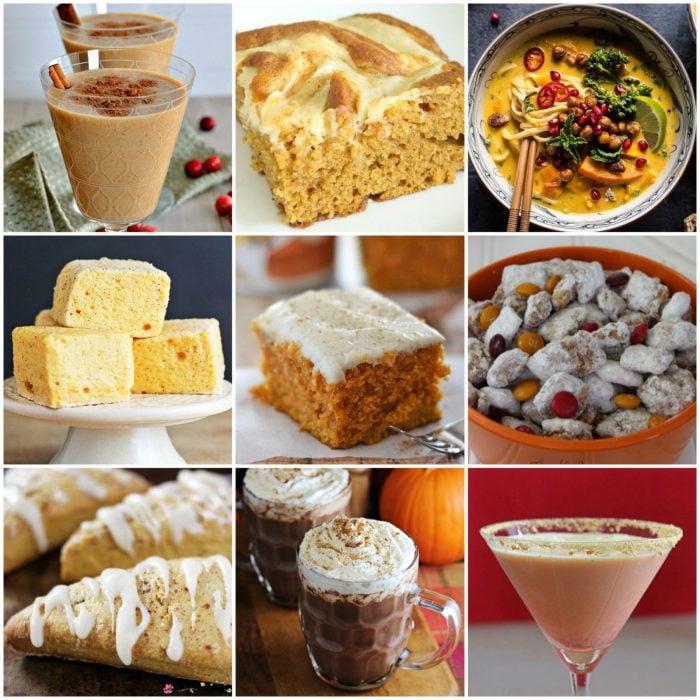
Pumpkin is the essential fall ingredient. Everyone I know loves and appreciates pumpkin spice in the fall. Not only are pumpkin recipes delicious in the fall, pumpkin is in season which means it’s incredibly affordable.
Pumpkin Dishes
Pumpkin recipes don’t have to be limited to just desserts either. Many people use it in hearty soups and sauces for the perfect fall dinner. It’s an excellent alternative to carb-filled soups and sauces without skimping on the flavour.
Pumpkin desserts are also a favourite in our house this time of year! It never ceases to amaze me at all the amazing desserts people can come up with that include pumpkin! I’ve seen pumpkin bundt cake, cookies, No Bake Pumpkin Cheesecake, loaves of bread, pies, pumpkin cinnamon rolls, and so much more! I love them all, and always have to struggle to choose which ones I’m going to bake and include in our Thanksgiving meal each year!
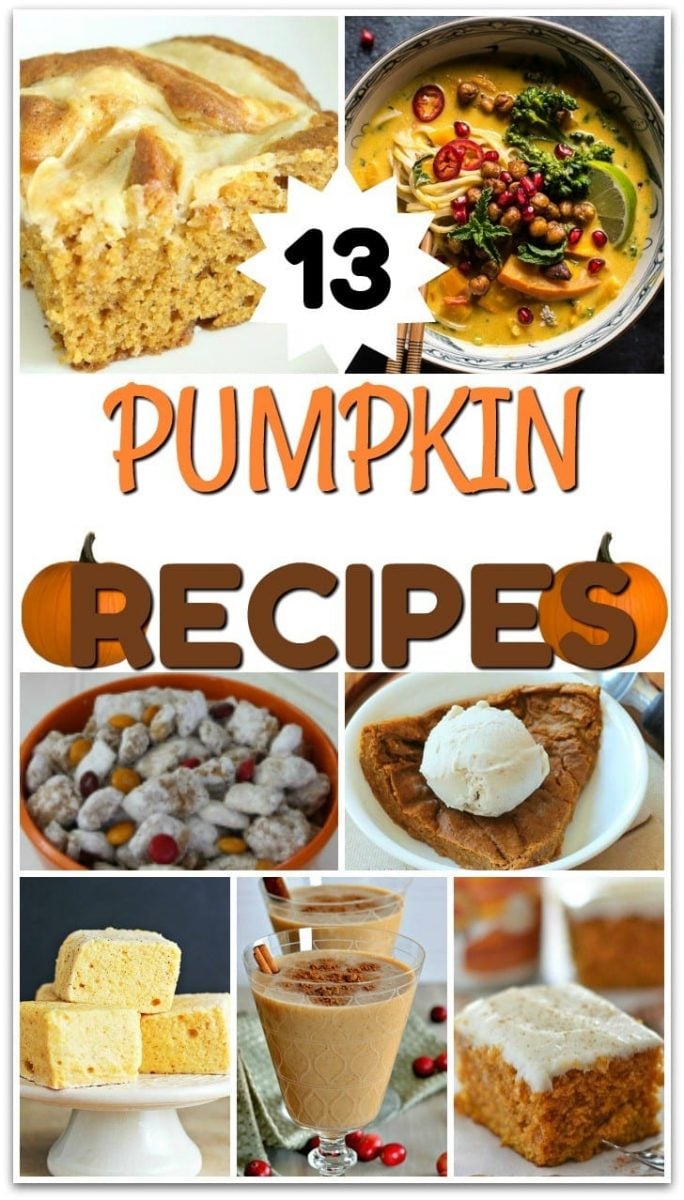
13 Delicious Pumpkin Recipes
I’ve put together a list of thirteen of my favourite pumpkin recipes for you to try! They’re all different, but they’re all delicious! If you started now, you could try one of each of these a week for the next thirteen weeks and make them all by Thanksgiving! Take advantage of the low price of pumpkin right now and make some cheap treats for your family this fall by using this list of 13 pumpkin recipes!
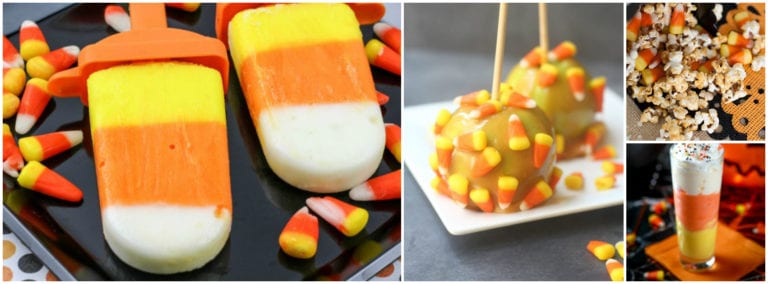
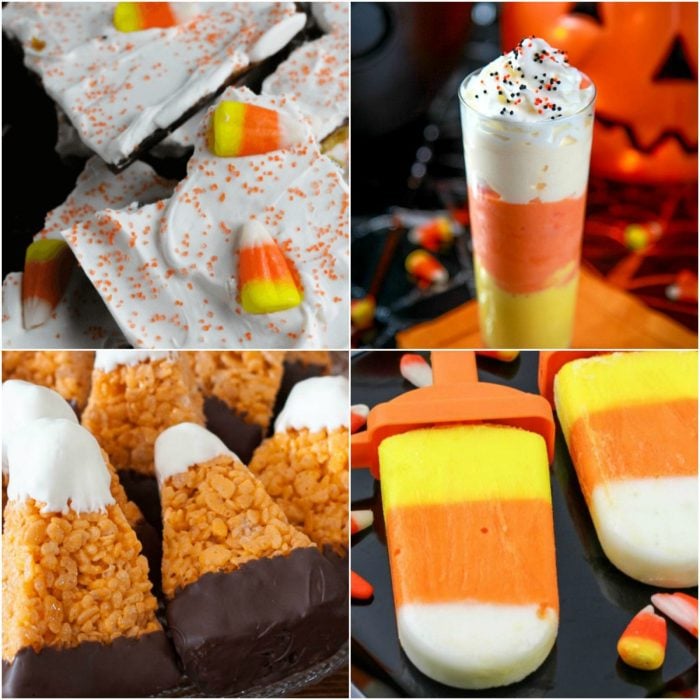
Candy corn is one of the most hotly debated fall candies. All over the Internet, you can find debates between people who LIVE it and people who HATE it. In our house we really enjoy candy corn and not only do we like to snack on it, but we like to decorate with it too! You will find below 17 Candy Corn Treats Your Family Will Enjoy!
The colours for candy corn are so perfectly fit for fall, but did you know that it’s actually designed to look like a real-life piece of corn? If you stack candy corn just right, it actually looks like a whole corn on the cob! Make a circle out of the candy corn on a flat surface, with the white points touching. Stack row after row on top of that circle and you’ll see the corn on the cob start to appear. Do this and watch your kids be amazed at what you know!
On top of being true to what they’re called, they’re so much fun to make into Halloween themed treats! There’s so many awesome candy corn treats out there, that I had to come through to find this list. I’ve assembled seventeen of the best candy corn treats so you can make some fall treats this season!
I love all these great Candy Corn snack ideas, and I hope you do too! What will you make first? Share with us in the comments below!
Fall is a great time to get out and about and do things with your family. The weather is usually cooler, but not cold yet, and there are many things happening in fall that you can’t enjoy at other times of the year. These fall family fun activities listed below will be enjoyed by everyone!
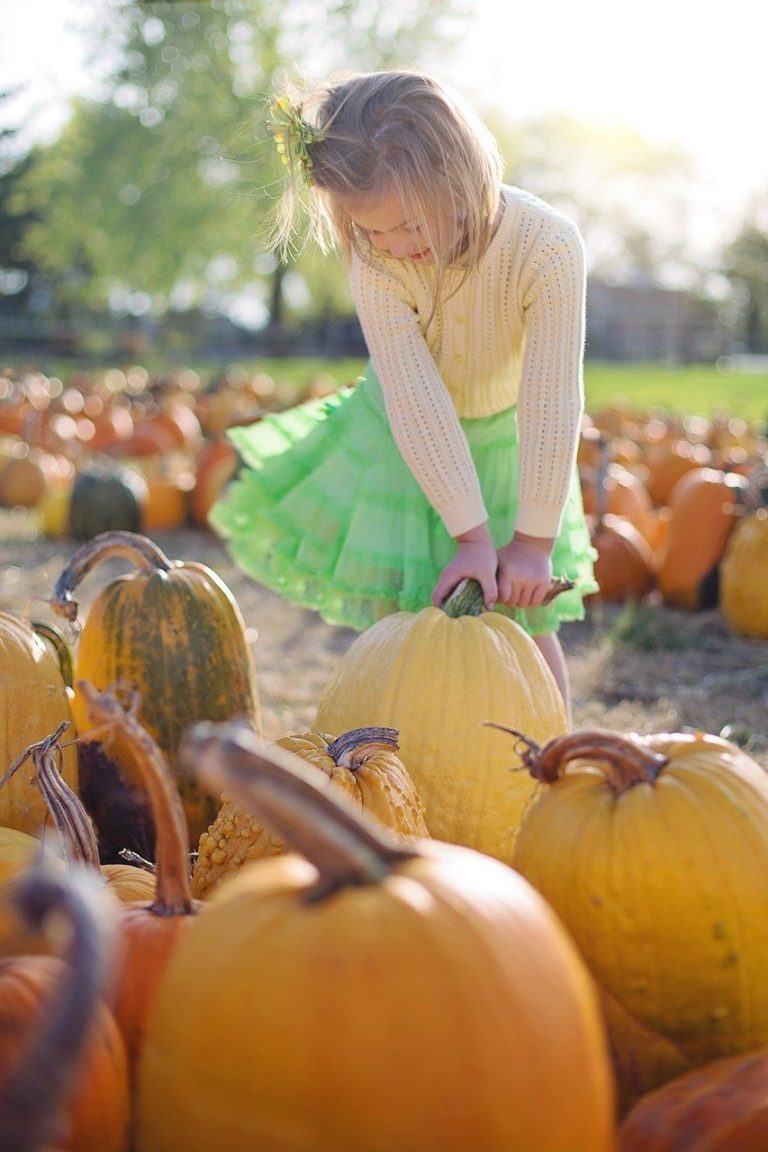
Pumpkins and hay bales beside a wagon
Here are 5 fall family fun activities you can do together
1. Go for a bike ride
If you don’t have bikes of your own, considering borrowing or renting some to enjoy a nice fall ride. You can choose your own pace, bring the whole family, and get a great workout while enjoying quality time together.
2. Hayride and pumpkin patch
This is the only time of year where you can find great pumpkins and hayrides. If you’re new to it, do some research into your area and find where they host these types of events. Most local farms will do these festivities in the fall.
3. Go apple picking
This is another great fall tradition that you can do together as a family. It doesn’t require any special skills and you can bring some delicious apples home with you to enjoy afterwards.
4. Go to a haunted house
This is also the time of year that haunted houses will start opening up all over the country. They vary from the very scary to mild and family-friendly. Do some research first, especially if you have young children or those who scare easily, and pick some haunted houses that will work for you.
5. Go on a nature hike
Fall is a great time of year to enjoy a nature hike because you get to see all the many beautiful fall colours.
Now that you know about these fall family fun activities, you’re ready to start planning your fall season.
What other things do you enjoy doing with your family that we don’t have on our list here?
I, like most people, did not drink as much water daily as suggested. The Hidrate Spark helped me to get on a better track to a more healthy lifestyle. This product and associated app (Hidrate Spark in your phones App Store) let you set a recommended daily intake based upon your specific recommended amounts or you can set a higher amount. Then it tracks your daily intake and shows progress against recommendations throughout the day. If you drink tea, coffee, or other sports drinks, you can manually add these to your totals.
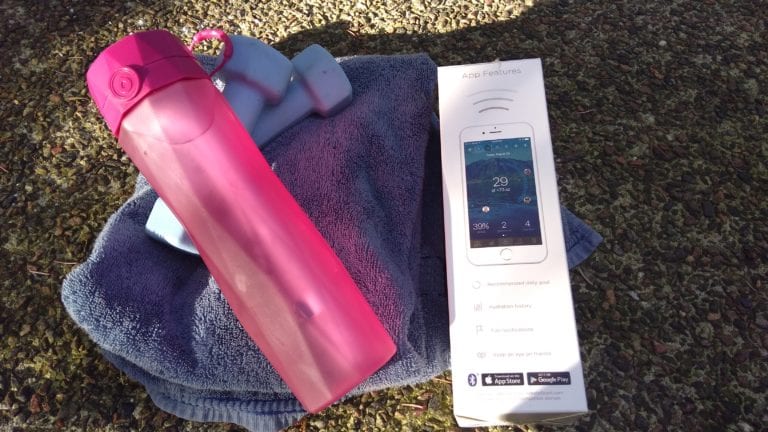
Hidrate Spark 2.0 Water bottle in Pink
I love this water bottle. Since this has arrived at my home, I have not missed one day in meeting my water goals. I usually don’t remember to drink my water, but the flashing grabs my attention and reminds me to drink up.
It has a unique design. The Hidrate Spark 2.0 holds 24 fl oz (710 ml) and comes in five eye-catching colours (I chose the PINK colour!), and it syncs your phone and/or Fitbit (I have also found it syncs to Google Steps! It is compatible and the carrying loop is so convenient!
I am not always able to keep track of how much fluid I’ve been drinking in a given day. I usually try to drink as much as possible, but then again, I don’t like to be stopping to go to a bathroom every 20 minutes, either. Enter the Spark 2.0, which through the app’s simple circular tracking bar, I know if I have been drinking enough for the time of day, temperature, and the number of steps I’ve taken. It has been VERY helpful to have my Spark water bottle reminding me to keep drinking. The bottle also stores up to two days worth of data, if you do not have your phone handy! (COOL!)
Hidrate Spark 2.0 water bottle in pink
The bottle itself is BPA-Free Titan plastic and without a straw. This helps prevent breaks and spills. Your bottle comes included with a sensor stick, powered by two coin cell batteries. (That means no charging to worry about!) When you drink out of the bottle, the sensor measures how much you drank and transfers this info to the hydration app, which tracks your progress throughout the day, week and month.
The bottle and lid are completely dishwasher safe. Just pop out the sensor stick, and let the dishwasher do the rest. The sensor stick does need to be washed by hand.
A fan of extra cold water? Add ice to the bottle or put the bottle in the fridge! Just don’t put it in the freezer; it might damage the sensor stick.
Adding fruit or using other liquids (like soda or coffee) in the bottle might be tempting, but please use your bottle for water only to avoid sensor damage.
The bottle: Glows to remind you to drink. Sends fun reminders to your phone. Automatically tracks water intake. Syncs with hydration app via Bluetooth (the sensor is in the lid). Syncs with Google Steps, Fitbit, Apple Watch, MyFitnessPal and more. Calculates a personalized daily water goal.
My bottle (which was given free of charge by the company for this review), costs about $54.95 PLUS TAX, which does not include shipping. All bottles cost that price, but there are several colors to choose from: teal, black, purple, white and pink! I HAVE THE PINK ONE! Right now they have a BUY 2 for $95.00 on the website.
PLEASE REALIZE THEY SHIP FROM THE U.S., SO PRICE IS IN US DOLLARS.
Fall. It’s the time of year when the mornings get chilly, and the afternoon sun is warm. The leaves start to fall and all the amazing colours in the trees come out to give us a show. It’s also the time of year when you can find just about any recipe you want to include pumpkin. This Whipped Pumpkin Pie Butter Recipe is super easy to make and is so delicious on bagels!
Whipped Pumpkin Pie Butter in a red bowl
I am the type of person that gets really excited for the start of fall because I know that pumpkin flavoured everything is coming! I love pumpkin in a LOT of recipes and I spend all of the fall season cooking up as many of them as I dare to try! My family loves it too because it just means they get a lot of seasonal treats!
This recipe for whipped pumpkin pie butter recipe is so good, I just had to share it with you all! It’s got all the goodness and flavour of pumpkin pie, but there’s no baking involved! It’s the perfect recipe to make and keep around so you can spread it on your toast in the morning, or even in the evening if we’re being honest. If you really want to see how delicious it is, you need to spread it on a fresh-from-the-oven biscuit and see how it melts in your mouth.
This whipped pumpkin pie butter is also great to put in a jar and give as a gift during the holidays. I add a cute homemade tag and a ribbon tied into a bow and my friends and family love it. I’ve even given it to the mailman to let him know I’m thankful for him, and he just loved it! I can’t wait for you to try it too!
2. In a large mixing bowl, whip together the milk and butter with an electric mixer on medium speed. Beat for one minute or until mixture is creamy and smooth.
Milk and butter being whip with an electric mixer
3. Add canned pumpkin or puree and beat for one minute.
4. Add powdered sugar, nutmeg, allspice, cinnamon and vanilla. Beat until all the ingredients have mixed.
Ingredients being whip into the Pumpkin Pie Butter
5. Transfer the whipped butter into an airtight container. Store in fridge for 7-10 days.
6. Serve with hot biscuits, bread or bagels.
Enjoy!
I hope you enjoyed the Whipped Pumpkin Pie Butter Recipe. If you make it, make sure to share with us on Facebook or Twitter! Also, check out all of our other Recipes.
In a large mixing bowl, whip together the milk and butter with an electric mixer on medium speed. Beat for one minute or until mixture is creamy and smooth.
Add canned pumpkin and beat for one minute.
Add powdered sugar, nutmeg, allspice, cinnamon and vanilla. Beat until all the ingredients have mixed.
Transfer the whipped butter into an airtight container. Store in fridge for 7-10 days.
Much of Canada’s interior harbours an ancient, virtually uninhabited boreal forest riven by an intricate network of marshes, streams, rivers and lakes. It’s the perfect place to explore by kayak. Avid kayaker Lori Janeson, who lives on the shores of Manitoba’s enormous Lake Winnipeg with her husband David, loves introducing native Canadians and outsiders alike to her beloved sport of kayaking. But she’s adamant that novice kayakers take basic precautions to stay safe out on the water. She recommends four in particular.
Man kayaking
4 Things to Remember About Kayaking in Canada
It’s cold. Surprise, surprise. Read up on appropriate cold weather kayaking clothing and gear before venturing out.
It’s remote.You don’t have to go far to find truly unspoiled wilderness in Canada. The lack of a human presence is problematic when you’re in trouble, however. If you plan to be out of cell phone range, bring a satellite phone, emergency radio, flares, or all three.
It’s rustic.Three words: Bring a tent. Truly life-changing Canadian kayaking experiences demand rough edges — and a willingness to sleep under the stars.
It’s not a year-round pursuit.In most of Canada, surface water freezes at some point during autumn and remains solid until spring. The kayaking season runs accordingly: June through October or November in the south, June or July through September further north. Sea kayaking is a different matter — if you can bear the cold, you can do that year-round in southern Canada.
A kayak on water
6 Great Places to Kayak in Canada
Lori and David have kayaked more places than they can count. They’re especially fond of these six spots.
Hecla Island, Manitoba: The Janesons’ home base happens to be a world-class kayaking destination. Nearby Black Island is a rarely visited treasure that hosts countless water birds: cormorants, herons, ospreys, and more.
Lac Manicouagan, Quebec:The so-called “Eye of Quebec” is actually an ancient impact crater. The ring-shaped lake takes several days to paddle around, but the mountainous central island provides endlessly entertaining views.
Devil’s Nostrils, Newfoundland:This distinctive sea cave complex is a remote but worthy destination for adventurous kayakers. If you’re up for a longer paddle out onto the open waters of the Atlantic, you can almost certainly get up close and personal with icebergs drifting down from Greenland.
Quetico Provincial Park, Ontario:Quetico is a maze-like warren of small and medium-sized lakes and rivers, many of which go days or weeks without hosting a boat. The park nestles up against the equally pristine Boundary Waters Canoe Area Wilderness, in the U.S. state of Minnesota.
Manitoulin Island, Ontario:This gigantic island marks off Georgian Bay from the rest of Lake Huron. An extension of the waterlogged mainland, it’s has an unusual distinction: It’s the world’s only freshwater island that has a lake with an island with a lake with an island on it. Got that? Now find it!
Lake Bras d’Or, Nova Scotia:This brackish lake is calmer than the ocean feeding it, and the views of the Cape Breton Highlands are nothing short of spectacular.
Where’s your next kayaking trip? Tell us in the comments section.
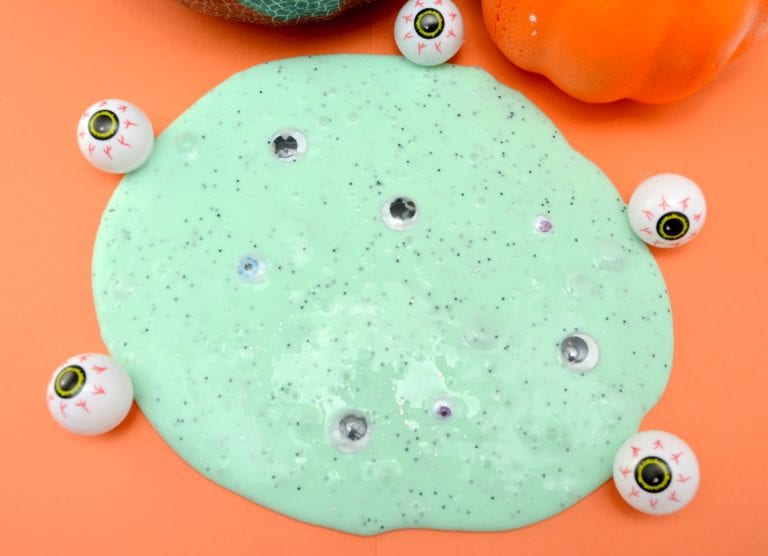
Halloween is a favourite occasion for almost every kid out there. During this time of year, kids are overwhelmed with candy and not all treats have to be candy. Have you ever given out non candy items during Halloween night? If you have then this Halloween Monster slime will be a perfect addition.
Halloween Monster Slime
I have never heard of a child who does not love slime. Just mention slime and kids will be squealing with joy. It’s a great activity to do at home or in the classroom. Making their own DIY Halloween slime keeps them listening, watching and is a fun sensory activity. If you allow your kids to watch videos on YouTube then they may already know more than you. Here are 10 DIY Slime recipes you can choose to make as well.
Making Slime with Borax
Making homemade halloween slime sounds pretty easy but it can sometimes be a bit tricky to get the right consistency. It can take some experimenting to get the right combination of ingredients to make the best slime possible. You want the slime to be stretchy and not sticky, it won’t be fun if your hands are all icky from it.
There are many different easy homemade slime recipes, but this one uses Borax, glue, and water. Borax is used as a slime activator. While you can make slime without an activator, but the texture and feel will be different. Some children may get a rash from using so if your child has sensitive skin, it may not be a good idea. It is just something to be aware of just in case some sort of skin irritation occurs.
Whether you use borax, contact solution, or shampoo with cornstarch mix, it will not be safe and putting your hands near your eyes or face should be avoided. Make sure to wash your hands after making and playing with your monster slime.
Halloween Monster Slime
Halloween Monster Slime
Your children will love making this ooey gooey Halloween Monster Slime! The secret to countless fun slime time is to use a safe, nontoxic, and washable glue. To make the simple slime sparkle, I used black glitter. Adult supervision is required at all times for this craft project as it’s not edible since it’s made with glue and Borax and has small parts which can be a choking hazard. It is not suitable for children under the age of 3 years old.
Materials Needed
You will only need a few simple supplies you can purchase at the grocery and dollar stores to make the simplest slime recipe.
Borax
White school glue
Water
Green food colouring
Googly eyes
Black glitter
Two large bowls
How to make slime for kids
1. In one bowl, mix together ¾ of a teaspoon of Borax with 1 ⅓ cups hot water until the Borax is dissolved.
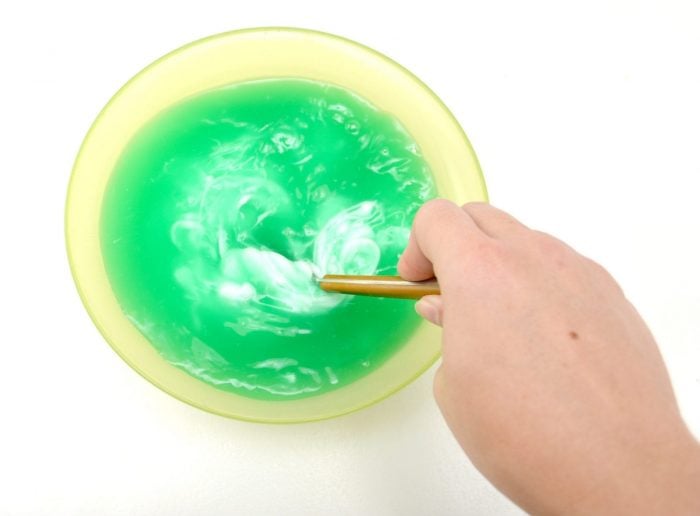
2. In a second large bowl, combine 2 cups of white school glue with 1 ½ cups of hot water and 8-10 drops of green food colouring.
3. Combine the contents of both bowls into one, and mix thoroughly. First, use a spoon to combine, and eventually switch to using your hands. Keep kneading and squeezing the mixture until all of the liquid has been incorporated into the slime, and you come out with the right consistency.
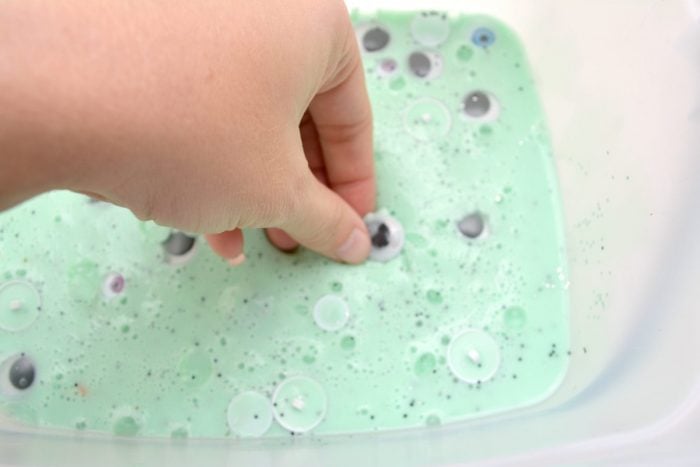
4. Add in black glitter and the googly eyes. You can mix to combine these, but they will naturally combine as you play with the slime. Disposable gloves are optional at this point if you want to keep the glitter from sticking to your hands initially. Once the glitter is incorporated into the slime, it will not stick to your hands.
Halloween Monster Slime
I hope you enjoyed this DIY Halloween Monster Slime. If you make it, make sure to share with us on Facebook or Twitter! Also, check out all of our other Halloween recipes and crafts.
Happy Halloween!
Halloween Monster Slime
Yield: 1
Prep Time: 5 minutes
Active Time: 15 minutes
Total Time: 20 minutes
Difficulty: Easy
Estimated Cost: $5
Making homemade halloween slime sounds pretty easy but it can sometimes be a bit tricky to get the right consistency. It can take some experimenting to get the right combination of ingredients to make the best slime possible. You want the slime to be stretchy and not sticky, it won’t be fun if your hands are all icky from it.
No Ratings
Materials
Borax
White school glue
Water
Green food colouring
Googly eyes
Black glitter
Two large bowls
Instructions
1. In one bowl, mix together ¾ of a teaspoon of Borax with 1 ⅓ cups hot water until the Borax is dissolved.
2. In a second large bowl, combine 2 cups of white school glue with 1 ½ cups of hot water and 8-10 drops of green food colouring.
3. Combine the contents of both bowls into one, and mix thoroughly. First, use a spoon to combine, and eventually switch to using your hands. Keep kneading and squeezing the mixture until all of the liquid has been incorporated into the slime, and you come out with the right consistency.
4. Add in black glitter and the googly eyes. You can mix to combine these, but they will naturally combine as you play with the slime. Disposable gloves are optional at this point if you want to keep the glitter from sticking to your hands initially. Once the glitter is incorporated into the slime, it will not stick to your hands.
Notes
Adult supervision is required at all times for this craft project as it's not edible since it's made with glue and Borax and has small parts which can be a choking hazard. It is not suitable for children under the age of 3 years old. Thoroughly wash your hands before and after making and playing with the slime.
Ah, Fall! Truly the perfect season for bundling up in sweaters, cozying up by the fireplace as a perfect escape from the cold, picking pumpkins and/or apples at your local farm, and…..achooooo! Unfortunately, with Fall, also comes another season we all dread. You might have guessed it already: yucky cold and flu season! Despite our best efforts to prevent it, catching a nasty case of the sniffles is often beyond our control, and retreating to bed with plenty of water, warm, herbal tea and a seemingly endless supply of tissues always seems to be the perfect home remedy.
Woman holding a cup of tea outdoors
While you wait for your immune system to claim victory, there are a few things you can do to help you feel better and get back during the cold and flu season and be on your feet sooner!
Six Tips for Symptom Relief this Cold and Flu Season
hydraSense® product
1. Clear that stuffy nose!
Having a blocked nose can definitely be one of the worst parts about being sick! If cold medications still leave you feeling stuffed up, try pairing them with a saline spray like hydraSense®. hydraSense® is 100% naturally-sourced seawater that is clinically proven to reduce and relieve nasal congestion so you can breathe better and concentrate on getting the rest you need.
hydraSense® saline nasal spray bottle with box of tissues
2. Soothe your throat!
Sucking on ice chips (or better yet, yummy popsicles!) can temporarily relieve a sore and scratchy throat by calming the inflammation causing you pain and discomfort upon swallowing or coughing. If that isn’t working well enough for you, other methods to consider are gargling salt water and sipping on herbal tea with a dash of honey.
3. Take on some light exercise!
I know what you’re thinking: who feels like exercising when they’re sick? But did you know that light exercise can actually help clear up your nasal congestion? Unless you happen to be very contagious and/or are experiencing either chills, fever, or fatigue, consider taking a brief walk outside to clear your mind and help you feel restored instead of staying inside all day; however, be sure not to overdo it. Getting the rest your body needs is just as equally important to beat the cold and flu season!
4. Remember to stay hydrated and get some rest!
Don’t feel guilty about taking the day off to feel better! Stressing while what you may be missing in school or at work during your cold and flu won’t help you feel any better. So relax, take it easy, and remember to drink plenty of fluids! Whether it be tea or water, staying hydrated will prevent dehydration and keep your throat from getting dry! It’s a win-win situation!
5. Clean up those germs!
Nobody is interested in catching whatever bug you’ve caught, especially close friends and family members! Prevent the spread of bacteria by cleaning surfaces with antibacterial wipes/sprays and by keeping your hands disinfected with hand sanitizer. Keep in mind, however, that the best way to prevent the spread of gems is by washing your hands frequently throughout the day with soap and water!
6. Give your body a (delicious) boost!
Redoxon® bottle and box in front of black laptop bag
When you’re sick during the cold and flu season, making nutritious meals may feel like more of a chore. If your sick-day meals are more microwave friendly than health conscious, it’s also important to make sure you’re getting the nutrients you need with the help of a multivitamin. If you’re not a fan of pills, try One A Day® Gummies. They taste great and help the body to metabolize carbohydrates, fats and proteins. For some added Vitamin C, pop Redoxon® into a ½ glass of cold water. You get 10 oranges worth of vitamin C in one tablet†!
Nobody likes having to go to the store while they’re sick! This cold and flu season, stock up with the help of this handy Cold & Flu Season Checklist! You’ll have the reassurance of knowing you’re ready for the upcoming winter with the added bonus list of which symptoms to look out for!
To download the free printable PDF, click on the picture below!
Cold and flu season checklist
Which home remedies do you use to help relieve your cold and flu symptoms? Share below!
This post is sponsored by Bayer. To make sure these products are right for you, always read and follow the label.
†Equivalent to the vitamin C of 10 raw oranges. Data on file. When diet is not enough – Redoxon is not meant to replace food.
Halloween is such a fun time of year, especially for kids! It can’t get any better for them than dressing up as their favourite characters and getting free candy, chocolate, and chips while roaming the streets when it’s dark outside! It’s almost unbelievable for them! Another fun aspect of Halloween is throwing your very own Halloween party for your children and their friends. It takes lots of preparation and planning, but is well worth the effort. Don’t forget to get your kids involved in the process! After all, it is for their friends!
Spooky Skeleton Rice Krispies Treats by Gym Craft Laundry
Kids enjoy cooking with their parents in the kitchen and it’s also an excellent opportunity to teach them about recipes, ingredients, measurements, baking, boiling, steaming, broiling, and the fun part of cleaning up after. This Halloween, consider making Spooky Skeleton Rice Krispies Treats as a family. It really can’t be an easier treat to prepare and they are as adorable to make as to eat them! Your guests will love them!
The Fab Gab Blog shares fun and unique Halloween ideas such as how to make easy kids Halloween costumes that you can make at home like a China Doll, making healthier Halloween treat ideas for kids, and a Haute Halloween Decor and F&B. These Halloween ideas will inspire you to have an amazing kids Halloween themed party!
3. Grapenstein: Halloween Craft & Healthy Snack by the Ottawa Mommy Club
Grapenstein: Halloween Craft and Healthy Snack
Double the fun! Your kids will enjoy preparing a Halloween craft and a healthy snack all at once! The Grapenstein is easy to make and will surely please every critter attending the party! You can even have them make it as part of a craft during the party.
Halloween Decor on a table ~ Photo credit by Mommy of a Princess
Mommy of a Princess offers fun tips for a fresh Halloween decor such as using bright colours to make a more festive look. You can also download a free 5×7″ “A Witch and her little Monsters Live Here” printable to compliment your home decor. On her blog, you will find great tips for an awesome Halloween home decor.
5. Halloween DIY & Craft | Disney Haunted Mansion Decoration by Jones Family Travels
Disney Haunted Mansion Mason Jar Halloween Craft ~ Photo credit by Jones Family Travels
This is such a fun DIY Disney Haunted Mansion Mason Jar Halloween decoration idea by Jones Family Travels that is super easy to make even for kids! The stencil of the Haunted Mansion is available to download and you can watch an instructional video on how to make it. Add a candle in the Mason Jar and illuminate a table or home decorations for your guests to see!
With these 5 Ideas for a Successful Halloween Kids Party, your children and their guests will certainly be impressed with your party!
Halloween Kids Party Ideas
Do you have any Halloween ideas for a kids party to share with our readers?
Mobile App Simplify Long Distance Calling From Canada
The days of calling cards are numbered, and for many who have been burned by unexpected fees, it’s come none too soon. Today, there are now pay-as-you-go and subscription-based long distance calling solutions that are cheap, reliable, and high-quality. But besides all that, you can also make international calling really simple by using a mobile app on your smartphone. A long distance calling app can make international calls from Canada reliable, easy-to-make, and even easier to manage.
Tap to Call
If you’re sick and tired of having to dial long PINs or access numbers when you’re making an international call, a mobile app like the one from G3 Telecom has the solution. One-tap calling makes calling long distance as easy as making local calls. Simply open your contact list and tap, no need to dial the PIN or an international calling code.
Flexibility
When you want to make long distance calls from a cell phone, it’s important that you have options. Find a service that lets you route calls from your mobile carrier or by using Wifi or data. With more flexibility, you don’t have to worry about where you’re calling from.
Woman holding a cell phone
Manage Your Account
One of the problems with calling cards is that you never know how much money you have left on your account until it’s gone. You may be able to call a number to find out your balance, but it’s inconvenient and time consuming. The advantage of a mobile app is that you can find out what your remaining balance is just by tapping an icon. It should also let you top up your account and manage payments quickly and simply.
Savings
Last but not least, a long distance calling service that uses an app should be cheap – and show you exactly how much a call is going to cost. An app should be able to locate where you are and calculate the cost of your call destination, showing you exactly what you’re going to pay. It takes the guess work out of long distance calling and can help you manage your budget in a big way.
Apps make international calls from Canada easier, but the main reason you’re looking for an alternative to your phone carrier is a better deal. Monthly plans can be a lot more affordable than pay-as-you-go options, which makes them ideal if you regularly call the same place. If you’re calling friends and family back home, you can pay as little as 1 cent a minute with a country-specific bundle. There are also multi-country bundles you can sign up for that work well if you’re doing business in a number of different countries.
The cost of long distance calling has gone down in recent decades, but Canadians still overpay for international calling. You don’t have to pay the excessive rates charged by major phone companies or put up with the underhanded tactics of most calling card companies. Sign up for something better and start saving when you place calls overseas.
Creating the perfect Halloween experience may be your goal for October. The spookier the better, right? What about Kid Friendly Halloween Drinks? I know, added another to-do to the list.
Halloween Drinks Collage
You can make the whole day Halloween themed. From breakfast, decor, lunch, movies, and dinner. The last thing most people think about is what your kids are drinking on Halloween. I know I usually don’t give it a second thought. It’s always water or milk because that is better for them than most other things. However, on holidays, it’s fun to make an exception! Your kids will love it and you will gain those “Cool Mom” points. So, what to give them? We have you covered.
Halloween Drinks Collage
Once again, searching the web, we have gathered for you 15 of what we feel are the best Kid Friendly Halloween Drinks out there. Some look a little iffy on if I would even try them but the kids will go crazy over them!
The names of the Halloween drinks may detour your child from even trying it, which could be interesting in itself.
Which of the drinks listed do you think your child would absolutely love to try? Do you think your child may put their foot down and not try one? Which one? Halloween is so much fun and it brings out a lot of creativity from kids.
So, Let’s do this. Here are your top 15 Kid-Friendly Halloween Drinks to try out on your kids this year! Share with us in the comments if you will be giving them a shot.
Our family’s latest trip to Toronto was one we could not wait to start. This was partly due to our decision to make a stop at an attraction my other half and I had not visited in decades: The Royal Ontario Museum! Now, many may think that a trip to a museum is not that exciting but they have not been to visit this museum. We knew we were in store for different adventures at the numerous galleries that lay under the roof of this historic building.
Main foyer dinosaur display at the Royal Ontario Museum.
Delight in Different Adventures at the Royal Ontario Museum
Originally five separate museums, the Royal Ontario Museum (ROM) became reorganized into one single museum. It houses several exhibitions and galleries that capture the amazement of its visitors. We knew that we would not be able to take in all of the areas the ROM has to offer. We had to do some research before our visit to narrow down which galleries we were going to see on this visit to Toronto.
After some debate, these were the three exhibits my family explored at the ROM:
James and Louise Temerty Galleries of the Age of Dinosaurs
Galleries of Africa: Egypt
Patrick and Barbara Keenan Family Gallery of Hands-on Biodiversity
Fun, fangs and fossils
Our first adventure at the ROM had to be to see the dinosaurs. All of us get a kick out of seeing these larger than life figures, so this was an easy decision to make. With hundreds of specimens displayed for visitors to view,
With hundreds of specimens displayed for visitors to view, The James and Louise Temerty Galleries of the Age of Dinosaurs shows how they shared the planet with each other in the seas, on land and in the air. This section of the museum covers the Jurassic and the Cretaceous periods when these creatures ruled the world. Many of the specimens found in this gallery are from the northern hemisphere, mostly from North America.
Dinosaur fossils at the Royal Ontario Museum.
Our kids did not know where to look first. There was so much for us to see in these galleries. Yes, the dinos are the star of the show, but it was amazing for us to see the animals and lived among them. Seeing the fossils and replications of the animals that once shared this world with the dinosaurs were fascinating to see. Some of them have not changed much from their relatives we live with today.
Animal fossil display at the Royal Ontario Museum.
Giant Sloth display at the Royal Ontario Museum.
Fossils of sea sponges, coral and shells at the Royal Ontario Museum.
The insects and plant life of this time were also fun to take in. We loved seeing how beautiful they once were and how they interacted with the giants of their time.
Plant fossil display at the Royal Ontario Museum.
Insect fossil display at the Royal Ontario Museum.
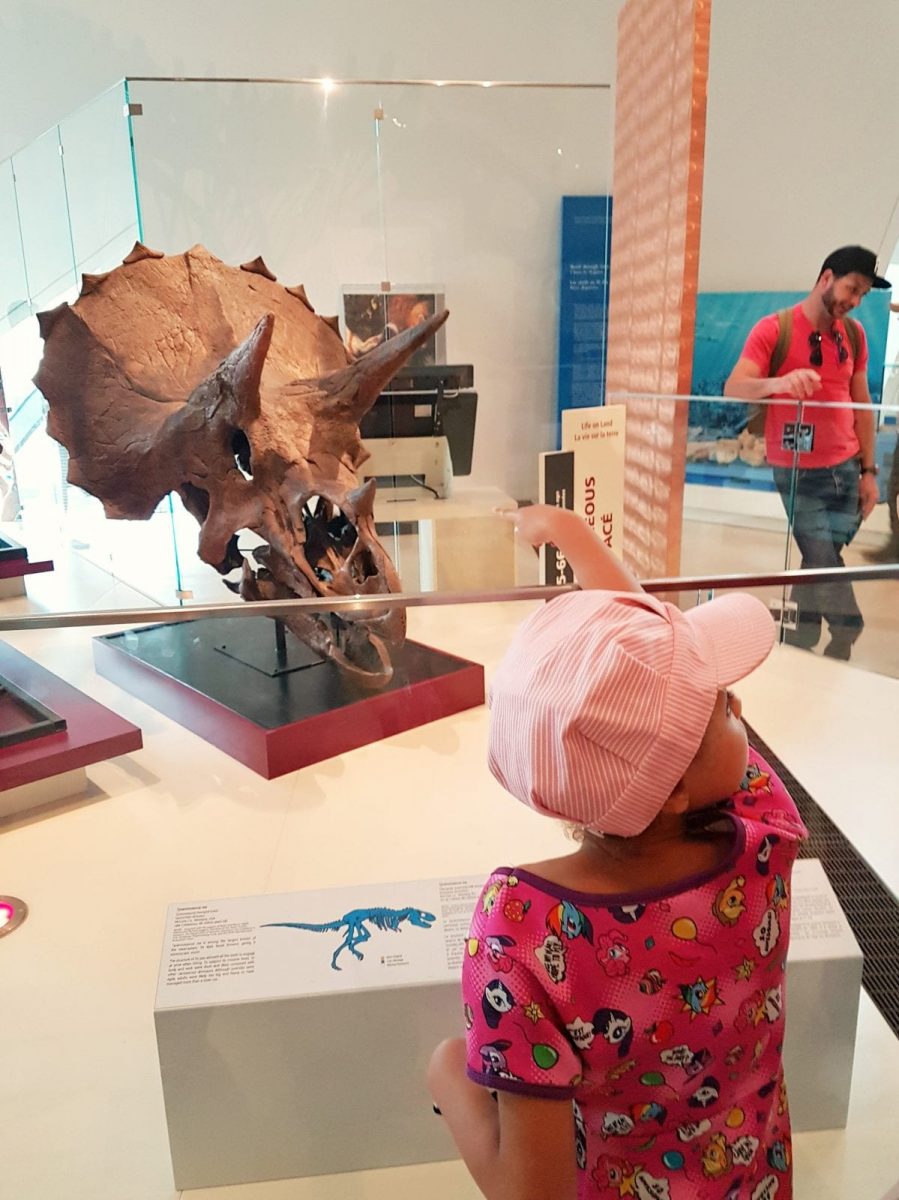
I could not forget to talk about the dinos! These fossils got our kids jazzed for the remainder of our visit. They marvelled at the gigantic T-Rex, and Triceratops fossils. The smaller dino fossils made them oooh, aww and giggle. Our kids learned so much and enjoyed this adventure into the prehistoric past.
Dinosaur fossils at the Royal Ontario Museum.
Girl pointing to Triceratops skull fossil at the Royal Ontario Museum.
Dinosaur skull fossils at the Royal Ontario Museum.
Walking like an Egyptian
Traveling a bit into the future, we planned a trip to Egypt. Well, not actually Egypt, but to the Egyptian Gallery within the Galleries of Africa at the ROM. We wanted our kids to get a bit of a civilization lesson, and this was a great place to do this.
This part of the Museum displays different areas of Ancient Egyptian culture, from architecture to religion to daily life over 5 000 years ago. This gallery is made up of about 2 000 of the 25 000 artefacts the ROM’s Egyptian collection holds. The time period captured in this gallery is from 4 000 BC to AD 400.
Hieroglyph display at the Royal Ontario Museum.
This was such a change from seeing the dinos. It was as though we had stepped into another world. We learned about what life was like for the Ancient Egyptian, as well as what they believed about the Afterlife. The hieroglyphs and the walls of the tomb were a sight to see! It was amazing to be able to see history so up close.
Ancient Egyptian tomb wall display at the Royal Ontario Museum.
Hieroglyph block display at the Royal Ontario Museum.
My favourite part of this gallery had to be seeing how affluent women lived. Seeing the accessories and makeup tables was interesting to see. It showed how much things have changed and how other things have stood the test of time as to how people care for themselves.
Ancient Egyptian woman applying makeup display at the Royal Ontario Museum.
Ancient Egyptian women’s jewellery display at the Royal Ontario Museum.
My son LOVES Halloween. He is particularly interested in zombies and mummies. He enjoyed seeing this resident of the ROM up close. He was so excited and fascinated to find out that mummies are not just creatures he sees in the cartoons he watches on television. This was one of the hot spots of the gallery and our son could have stayed here all day.
Mummy and casket display at the Royal Ontario Museum.
An adventure for the senses
A hands-on gallery that allows families to learn through sight, sound and touch is what the Patrick and Barbara Keenan Family Gallery of Hands-on Biodiversity is all about. Visitors are able to find out how animals and plants exist among one another, explore the interactive stations to see how certain animals functioned and ask questions of the Museum’s staff about certain specimens in the Natural History collection displayed just about everywhere.
(Embed IG post of the celling of marine life here)
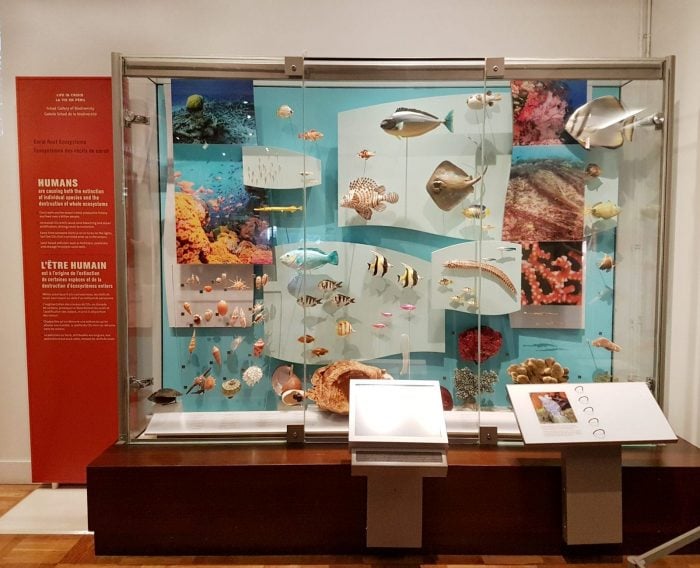
This was the gallery my kids collectively enjoyed the most. There was something that all three of them could learn from and take with them after this visit was over. They were able to learn about the relationships animals have in different ecosystems and what these areas look like.
Coral Reef display at the Royal Ontario Museum.
My kids were so happy to be able to do what they were not able to do in the other exhibits: Touch specimens. Everywhere they turned, there was something to learn with their senses. My little guy took this gallery hands-on, trying these batwings on to try to fly away.
Boy playing with bat wings in Biodiversity Gallery at the Royal Ontario Museum.
Another great part of this gallery is the interaction visitors get with the staff from the ROM. My son’s interest was piqued when he chatted with one of these individuals for about a half an hour. He learned about the importance jaws for different animals. The ROM staff member was so great with him. Our little guy asked her a lot of questions about the specimens in front of them, and he had an amazing time during his impromptu private lesson.
Boy and woman talking about an animal jaw at the Royal Ontario Museum.
Boy and woman looking at an animal tusk at the Royal Ontario Museum.
My family really enjoyed our visit to the ROM. Each gallery and exhibit holds so much wonder to experience. They also had something for everyone to take in and be fascinated with. We were sad that there were so many other areas to discover, but this just means that another visit is in order that will give us a different adventure to delight in. We can’t wait for our next visit!
Delight in Different Adventures at the Royal Ontario Museum
Are you ready to plan your visit to the Royal Ontario Museum? We were able to find out more about what to expect on our visit by visiting their website. We also connected with the ROM on their Facebook, Twitter, Instagram and YouTube pages to take a look at what we were in store to see during our visit!
Disclaimer: I receivedcomplimentary tickets to the Royal Ontario Museum in order to write this review. The views I shared are my own.
When many people think about Disney, they think about young children and their families living it up, wearing those iconic Mickey ears, and taking photos in front of Cinderella’s castle. That said, there are many things that teens and young adults can appreciate about Disney as well. You certain never grow too old for Disney, but the things your kids may want to do when they grow older could change from what they enjoyed at Disney as small children.
Disney Magic Kingdom with spectacular fireworks display ~ Photo Credit: Disney
Reasons Why Teens Will Love Disney
1. The shows – One thing Disney is famous for is their shows. There are so many different types, from Broadway-like shows to funny shows, so there is sure to be something to meet your teen’s taste.
2. The classics – Even a teenager can get into the Disney classics. They are nostalgic and they take us all back.
3. Thrill rides – Disney has no shortage of thrill rides. Most teens love these fun coasters and other thrill rides. There are also movie-themed rides that your teen will enjoy.
Teens and a woman enjoying the Miss Adventure Falls at Disney’s Typhoon Lagoon ~ photo courtesy of Disney
4. Independence – Walt Disney World transportation also allows your teen to get around the park on their own. For a teen itching for independence, this can be a welcome feature. They can sleep in later than the rest of the family and catch up to you later, or just explore some things on their own.
5. Adventures by Disney (ABD) – Your teen can see the world with Adventures by Disney, which gives the opportunity to see some of the most unique locations around the globe.
6. Teens on Adventure by Disney – Another feature that is catered specifically to teens is Teens on Adventure. Your teen can enjoy ziplining, horseback riding, snorkeling, and much more. There is something for every age group and personality types and they will build great memories that last a lifetime.
Now that you know these great reasons teens will love Disney, you can start planning your next trip with your teens. In fact, you may even want to let them help you plan it.
Miss Adventure Falls at Disney’s Typhoon Lagoon and Disney Magic Kingdom ~ Photo credit: Disney
Halloween is a time for kids, and adults alike, to dress up in Disney magical costumes and for a single night, pretend they’re someone else. Have a look below at 20 DIY Disney Costumes for kids and adults that you can make yourself!
Halloween has changed so much from when we were kids. We used to buy so little, and make so much when it came to our Disney costumes each year. My mom was so creative and would always help us create whatever Disney character we would prefer to wear. She always did it with a flair of perfection and we left the house confident in the Disney character we had created and were embodying.
For kids especially, Halloween night is about so much more than just a costume, it’s about getting to be a character they’ve imagined themselves as a thousand times. You don’t need to spend $50+ on a Halloween costume to make your little one into the character of their dreams when there are so many awesome tutorials on how to do it yourself! We love Disney in our house and it never fails that one of us, if not all of us, dresses up like a Disney character for Halloween. Some of the ways people have come up with to create your own costumes are amazing!
DIY Disney Costumes for Kids and Adults
I’ve rounded up some of my favourite DIYDisney Halloween costumes to make your Halloween magical! You won’t believe how simple some of these are to make, and how great they turn out. I can’t wait to see what my kids choose to dress up as this year so I can help them be that for one night. Have your kids decided on what they want to be yet? Maybe these ideas will give you and your kids some inspiration!
So, how do we care for our whole selves when, as mothers, we lead busy, other-focused lives? We start, little by little, weaving true sweetness into our days. We choose to honour all the parts of ourselves with small tokens of acknowledgment. And the beautiful thing is, when we start filling up one part of ourselves, so often it naturally spills over and fills other parts of ourselves…they are all connected.
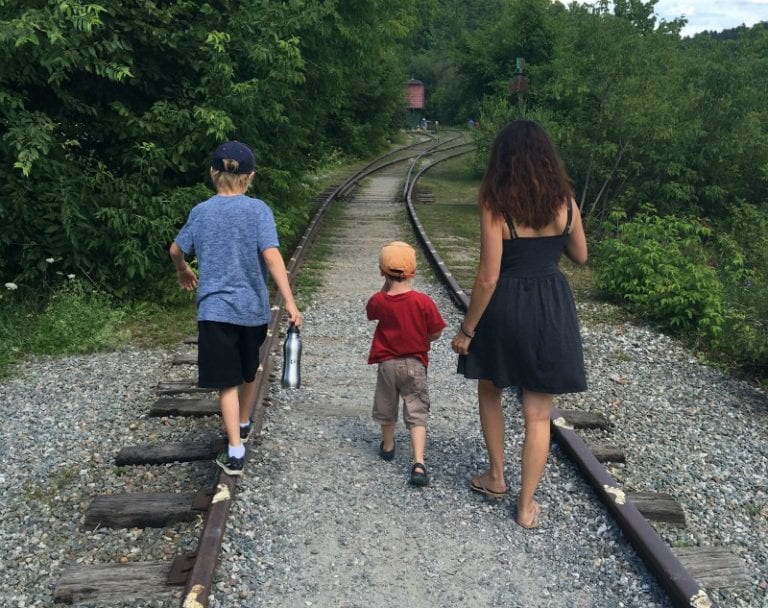
2 boys and a woman walking on train tracks ~ Photo credit: Julie Cloutier
That being said, a client of mine recently confessed that she has an “insatiable” appetite for all things sweet. She felt that it was a bit of an addiction and asked me for any suggestions I might have. I told her that many times, craving the sweet taste has a very strong emotional connection. It’s not always simply a blood sugar imbalance or a dietary problem.
If you find yourself constantly craving a sweet taste, ask yourself this:
Take a warm bath with healing essential oils such as Neroli. This high-vibe essential oil is a must-have! A complex aroma that blends citrus and floral undertones, it powerfully uplifts and relieves heavy sadness. It can help us break up with our most beloved food items thanks to its ability to reduce anxiety as mediated by the brain’s serotonin receptors.
Watch a warm and fuzzy movie.
Put on some great musicand dance.
Reconnect with nature and take a walk in a forest.
Open your children’s finger paintsand dabble a little.
Tend to a garden. I turn to gardening as a way of calming my mind, a kind of decompressing after a busy week. Thoughts inside my head somehow clear and settle as the weed bucket fills up. A session in the garden can leave you feeling renewed inside.
Brew your favourite cup of tea with honey and sit near a window, sipping and staring. Chamomile and Lemon Balm are some of my favorites!
Call your sister, best friend, your mom or whoever you adore and tell them how much they mean to you!
Give your child, your partner, your parent or your friend a big, long bear hug.
Slow down and take a few deep breaths.
Stop the self-criticism. There are enough people in the world that are more than happy to be critical — from your boss to your siblings. So don’t add to the insult by being critical of you. Love yourself just the way you are. You are your own best cheerleader!! And believe it or not, the universe actually isn’t against you.
Smile at others! Especially those who might trouble you. This is a very POWERFUL. Thinking negative thoughts only increases stress hormones associated with ill-health for you. You will be absolutely amazed what happens when you send a loving smile off in the direction of someone who needs it.
2 boys and a woman walking on train tracks ~ Photo credit: Julie Cloutier
List all the things that make you happy, fulfilled, loved, joyful, and recharged. Things you find beautiful and meaningful. Keep the list growing. Keep it posted so you see it everyday to remind yourself of these things. Overtime, you will be less and less tempted to reach for that sweet piece of cake or that sugary cookie 🙂
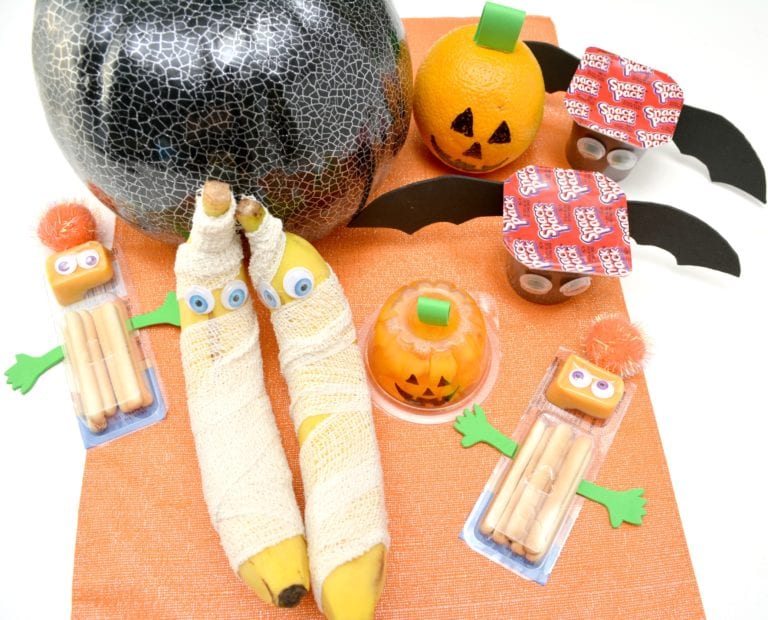
These fun Halloween snacks for school lunches are so easy to make! Just imagine the look on your child’s face when they open up their lunch bag during snack time or lunch. Classmates will go home and ask for these fun Halloween treats for school too.
Halloween Kids Snacks
Kids are starting to get excited for Halloween. They are thinking about what costume they will wear and how much fun they will have. Not to mention all the sugary treats they will get. If you want to add to the excitement of the season, why not count down the days to October 31 with one of these fun Halloween kids snacks for school lunches.
Halloween Crafts with Food
When it comes to crafts, have you ever thought about using food? There are many ideas that you can come up with using food and they don’t all have to be scary like these 14 Spooky Snacks for Parties. To make these easy Halloween food crafts, just go to your cupboard or fridge, you probably have some of these food items for regular lunch snacks.
Here are a few food items that will make fun ideas for Halloween:
marshmallows
fruit
candy gummy worms
cookies
hot dogs (dressed as a mummy)
cooked noodles (for brain)
eggs (evil eggs)
chocolate bars
No matter the crafty snack you make, kids and adults will love them for their parties, work, or school. These even make great Halloween treats for teachers!
Sometimes it isn’t always about the food, making easy crafts for Halloween decor or gifts gives the family or classroom time together creating memories that will last forever. I find when making gifts, I like to use mason jars because there are so many uses for them. Whether you are filling them with candy, painting them or just adding ribbon here are 15 Mason Jar crafts to get you started.
Halloween Kids Snacks for School Lunches
Your kids will love these fun Halloween snacks in their lunch boxes at school. These classroom Halloween treats are super easy to make and will bring a smile to any child’s face!
You will only need a few simple materials you can purchase at the grocery store, pharmacy, and dollar store to get these going.
Materials Required:
Packaged cheese and cracker sticks
Packaged chocolate pudding
Packaged peaches or oranges
Oranges
Bananas
Scissors
Low temperature hot glue gun
Gauze roll
Sharpie
Craft pom poms
Googly eyes
Black and green craft foam
Halloween Mummy Bananas Craft
1. Starting at the bottom of the banana, begin randomly wrapping the gauze roll around the length of the banana. You can crisscross the gauze or leave gaps to give it more of a mummy feel. Be sure to leave a small gap near the top of the banana where you would like the eyes to be. Secure the gauze at the back of your banana with tape or hot glue.
2. Using a low temperature hot glue gun, attach the googly eyes to the front of your banana where you have created a gap in the gauze.
Halloween Chocolate Pudding Bats Craft
1. Cut out two bat wing shapes from the black craft foam. Be sure to leave a small bit of extra foam space on the inside of the wing to attach it to the back of the pudding cup.
2. Attach the wings to the back of the pudding cup with hot glue. Let the glue partially dry and cool down a second before attaching the wings to help eliminate the chance of the glue melting the plastic container.
Materials to create the Halloween Kids Snacks
3. Using the glue gun again, attach two googly eyes to the front of the pudding container.
Halloween Monster Cheese and Crackers Craft
1. Begin by gluing a craft pom pom to the top of the backside of your cheese and crackers package, above the cheese compartment.
2. Glue two googly eyes on the cheese compartment of the package below the craft pom pom that you just applied.
3. Use scissors to cut two arm and hand shapes out of the green craft foam.
4. Hot glue the arms to the sides of the cracker compartment of your snack.
Halloween Jack-O-Lantern Orange or Peach Slices Craft
1. For this snack, you can use either an actual orange, or a package of orange or peach slices.
2. Begin by drawing the face of a Jack-o-Lantern onto the front of the orange itself, or on the front of the peach or orange slices container.
3. Cut out a long rectangular piece of the green craft foam.
4. Fold the rectangle in half forming a loop, and hot glue the loop to the top of the orange or orange/peach slice container to form the stem of your Jack-o-Lantern.
Your kids will love these fun Halloween snacks in their lunch boxes at school. They are super easy to make and will bring a smile!
No Ratings
Materials
Packaged cheese and cracker sticks
Packaged chocolate pudding
Packaged peaches or oranges
Oranges
Bananas
Sharpie
Craft pom poms
Googly eyes
Black and green craft foam
Tools
Scissors
Low temperature hot glue gun
Gauze roll
Instructions
HALLOWEEN MUMMY BANANAS CRAFT
1. Starting at the bottom of the banana, begin randomly wrapping the gauze roll around the length of the banana. You can crisscross the gauze or leave gaps to give it more of a mummy feel. Be sure to leave a small gap near the top of the banana where you would like the eyes to be. Secure the gauze at the back of your banana with tape or hot glue.
2. Using a low temperature hot glue gun, attach the googly eyes to the front of your banana where you have created a gap in the gauze.
HALLOWEEN CHOCOLATE PUDDING BATS CRAFT
1. Cut out two bat wing shapes from the black craft foam. Be sure to leave a small bit of extra foam space on the inside of the wing to attach it to the back of the pudding cup.
2. Attach the wings to the back of the pudding cup with hot glue. Let the glue partially dry and cool down a second before attaching the wings to help eliminate the chance of the glue melting the plastic container.
3. Using the glue gun again, attach two googly eyes to the front of the pudding container.
HALLOWEEN MONSTER CHEESE AND CRACKERS CRAFT
1. Begin by gluing a craft pom pom to the top of the backside of your cheese and crackers package, above the cheese compartment.
2. Glue two googly eyes on the cheese compartment of the package below the craft pom pom that you just applied.
3. Use scissors to cut two arm and hand shapes out of the green craft foam.
4. Hot glue the arms to the sides of the cracker compartment of your snack.
HALLOWEEN JACK-O-LANTERN ORANGE OR PEACH SLICES CRAFT
1. For this snack, you can use either an actual orange, or a package of orange or peach slices.
2. Begin by drawing the face of a Jack-o-Lantern onto the front of the orange itself, or on the front of the peach or orange slices container.
3. Cut out a long rectangular piece of the green craft foam.
4. Fold the rectangle in half forming a loop, and hot glue the loop to the top of the orange or orange/peach slice container to form the stem of your Jack-o-Lantern.
Being a parent is probably the hardest job in the world. You will try anything to make sure that your child is happy and safe. However, it can sometimes be difficult to know what that thing is that they need. This is often the case when your child is having trouble getting to sleep, or staying asleep all night. It can be tricky to isolate the exact problem that is causing your child to have trouble sleeping. One major reason is that your child is not using the right mattress. Picking the perfect mattress for your child can be easily done! Make sure to fully read the bed for you kids guide so that you understand what to look for when buying.
How to choose a mattress for your child
Check out our tips below on how to pick a mattress for a child!
Choose the Right Materials
What the mattress is made out of makes a big difference. Some children prefer firmer mattresses, while other like plusher material. Plush mattresses are usually more comfortable to the user. As well, if your child has aches for some reason, they may benefit from a plush mattress. Firmer mattresses have more support for their backs. If your child has a habit of slouching, they could use a good firm mattress to work towards correcting it. If your child is as comfortable as possible, they will get the best night’s sleep that they can. Or, if you are not sure which model is best for your child, try reading some mattress reviews. This may give you an idea as to what the best choice would be.
Choose the Right Size
Children grow up quickly, sometimes more quickly than we would like to admit. If your child is taller than average, you cannot just go by the recommended average size. A twin size mattress is usually what is chosen for a child’s bed. It is inexpensive, and is typically the most suited for a single child using the bed. However, a twin XL will add more length to the mattress. This is good for a taller child, or one that likes to stretch out all the way. Having the right size mattress is imperative as your child grows older and taller. They need enough space to grow, otherwise they will not be comfortable at night on the small space. If your child rolls over in their sleep, you may need a bigger mattress in terms of width. That way, they will not roll off the side of the bed.
Do Not Re-Use Old Mattresses
When siblings get older, it can be tempting to give their old mattress to a younger child. If a mattress is getting old and saggy, it will not be providing enough support. A growing child will need a lot of support in a mattress, and a second-hand one probably is not going to cut it. This is also the case if you are looking to buy a mattress in a thrift shop. It might be better not to cut corners in this regard, and buy a mattress brand new. As well, old mattresses tend to carry more allergens as they age. Dust, pet dander, and dead skin cells tend to build up and affect the children who are sleeping on the mattress. Getting a new one will be best for everyone, especially your children.
Choosing Mattresses with Allergies in Mind
Some children have difficulty sleeping at night because they have allergies. These might include allergies to pet dander or dust mites. There are specific mattresses that take allergies into consideration. Some products are made naturally, with less synthetic materials. These are less likely to trigger allergic reactions. Natural materials are hypoallergenic because bacteria does not grow on these types of surfaces. If you know which materials in particular that your child is allergic to, you can keep a watchful eye out for them. Some mattresses release all their VOCs within a couple days, so that the chemicals will not bother your child. Another thing you can do is leave the mattress in an open environment for a few days before you set it up for your child to use. This will reduce the amount of harmful chemicals that may bother your child while they sleep.
Conclusion
If your child is having issues sleeping at night, you might be able to help. By trying a few different options, your child can experience bedtime in a whole new light. Mattresses have a huge impact on whether your child gets a good night’s rest. By taking the time to select the perfect mattress, you will be taking everything into consideration. All the aspects that your child is looking for in a mattress will be brought forward. Choosing the right size, the right materials and hypoallergenic products are all key variables. Your child will definitely thank you when they realize the difference it makes!
Animals. We all have a soft spot for one or many different types of two, four or multi-legged creatures that inhabit our world. My kids are always curious to learn more about their favourite animals and find out about others they discover. Do you want to enjoy learning about animals? You can go wild about DK Canada books and the animal kingdom!
DK Canada Books Review
Below are the three books my family received to read and enjoy:
Photo Credit: https://www.dk.com/ca; Book covers of Sharks and Other Deadly Ocean Creatures, The Horse Encyclopedia and Animal.
Sharks and Other Deadly Ocean Creatures: Visual Encyclopedia
The world’s oceans and seas are filled with countless wonders. Some of these beings can also prove to be powerful predators, which makes them so captivating. Sharks and Other Deadly Ocean Creatures: Visual Encyclopedia highlights many of these animals for kids to learn and become fascinated about.
Photo Credit: https://www.dk.com/ca; Book cover of Sharks and Other Deadly Ocean Creatures: Visual Encyclopedia.
My kids loved learning about all of the different types of powerful sea creatures, but they were fixated on one of the most popular sharks out there: The Great White Shark. They loved learning about why Great White Sharks look the way they do, why they live in the upper layers of the ocean and how powerful these giant creatures could be.
Great White Shark section of Sharks and Other Deadly Ocean Creatures: Visual Encyclopedia.
The Horse Encyclopedia
Regal. Powerful. Loyal. These are just a few words used when people think of horses. Since I have loved horses from a young age, I had to get The Horse Encyclopedia book to learn more about these animals with big personalities. This title details the characteristics and origins of each bread of horse, as well as sharing information about some of the most famous horses in the history of this animal. This encyclopedia also talks about how horses have fit into living with humans throughout various aspects of history.
Photo Credit: https://www.dk.com/ca; Book covers of Sharks and Other Deadly Ocean Creatures, The Horse Encyclopedia and Animal.
This title was such a wonderful read! Each horse was beautiful to look at, but I had fell in love with the Connemara. Being able to learn about this horse’s background, how it has been bread with other horses to create new breeds of horses and why it is such a great performance horse are what made this book such a good read.
Connemara section of The Horse Encyclopedia on a table.
Animal
After learning about all of these animals, I knew that my kids were going to ask to read about more beings around the world. That is why I chose to have Animal to read with my kids. This book shares many details about animals found around the world, from mammals and birds to reptiles and fish and beyond!
Once of the great reasons why this book is such a page turner in our home is how the information is laid out about each animal. One of our favourite to flip over to was the penguin. My kids and I really liked to read about the different varieties of penguins. It was also interesting to learn out about the various different locations penguins can be found and how different they can be from different penguins around the world.
My family went wild with these books from DK Canada. We learned so much about some of our favourite animals as well as discovering breeds and animals we had never heard about before. The way the information was laid out for readers to take in made reading each title very enjoyable. The photos in every book were all breathtaking, making turning each page a feast for the eyes. These three titles are fun reads that we will love going through for many years to come.
Go Wild with DK Books!
Want to find more titles to help your family go wild? Visit DK Canada’s website, and connect with them on their Facebook, Twitter, Instagram, and Pinterest pages to find out!
Whether this will be your first or twentieth Thanksgiving you are hosting, Canadian Turkey would like to help you enjoy this holiday by making this All-In-One Thanksgiving Turkey Dinner Bowl!
Thanksgiving. It is the time of the year that family and friends get together to catch up and make memories over a sumptuous meal. What is one of the most popular traditions Canadians like to celebrate during this time of year? Sitting down to dig into a Canadian turkey dinner.
Whether your gathering includes a few or a flock of people, Thanksgiving can be a celebration for everyone to enjoy. Canadian turkey is a perfect protein to serve to your family, regardless of the number assembled at your table. It can be prepared to also fit size of celebration you are planning.
How to roast a turkey?
Will it be an intimate affair at your home this year? Roasting a half turkey is a great solution to enjoy! It cooks just as well as a whole bird. This would be great for single parents, empty nesters or romantic couples that want to have a fabulous Thanksgiving meal but on a smaller scale. Canadian Turkey has put together a large collection of recipes to make bringing this plan to fruition. Another tip to keep in mind for smaller Thanksgiving gatherings is to ask your local butcher or grocer for a hand in helping you bring turkey for a small group of people to your table easier.
What is one of the best parts of roasting a whole bird for many Canadians? It has to be the leftovers available to enjoy for days after the meal has been eaten and cleared away. Having Thanksgiving leftovers from a whole bird allows you to have amazing meals in the freezer ready to heat up and eat for a busy weeknight meal. Turkey leftovers also allows for the creation of new meals for your family. This popular protein pairs with so many different flavours that it can substitute for other meat to create a new family favourite dish. Even the leftover bones are useful. They can be used to make a yummy stock or soup!
All-In-One Thanksgiving Turkey Dinner Bowl Recipe
Curious as to what you can come up with when using your Canadian turkey leftovers in a meal for your family? Take a look at this recipe for All-In-One Thanksgiving Turkey Dinner Bowl and a video to guide you through putting it together for some inspiration!
2cupsleftover Thanksgiving turkeychopped (either white or dark meat or a combination of both)
2cupsstuffing
2cupsmashed potatoes
2/3cupcranberry sauce
2/3cupgravy
4-6individual sized ovenproof containersportions will vary according to size of containers
Instructions
Place 1 tablespoon of gravy in the bottom of each container and spread around.
Layer on a portion of turkey meat.
Top with another tablespoon of gravy.
Add a layer of stuffing.
Dollop with 1-2 tablespoons cranberry sauce.
Top with a layer of mashed potatoes.
Bake at 350°F (177°C) for 20-25 minutes until leftovers are heated through and potatoes are lightly browned on top.
Serve with any extra gravy or cranberry sauce on the side.
Notes
These casseroles are so versatile you can easily customize them! Add in a layer of any extra veggies you might have on hand like chopped brussel sprouts, greens, sweet potatoes, carrots or mushrooms for an easy recipe twist and veggie boost. You can use this same technique with your turkey any time of year.
For other Canadian Turkey recipes, you can visit our recipe category!
Need a bit of assistance to put your Thanksgiving meal underway? Check out these tips that will help you get through your holiday meal from the grocery bag to your Thanksgiving table and beyond!
5 WAYS TO MASTER THANKSGIVING PREP AND PLANNING
Want to have leftover turkey after your meal is done? Order a turkey that is several pounds bigger than what you need. Extra turkey can be stored and frozen to use for quick and easy meals later on.
Save a step and reduce clean up time by making your side dishes in oven-to-table Dutch ovens and cast iron or casserole dishes that work double-duty as cooking dishes as well as serving dishes.
Extra turkey broth is an invaluable tool to keep on hand – perfect to heat up mashed potatoes that have become solid, add to mashed cauliflower or squash, add juiciness to breast that may be overcooked or to top up gravy when you need a little more.
To cut down on cooking time, cook your stuffing on the side. This gives you more of your favourite crunchy bits and saves you time in the oven.
Leftover turkey freezes well. Store in an airtight container in the freezer for a quick start to a weekday meal. Visit www.canadianturkey.ca for recipe inspiration and make salads, soups, pastas or casseroles in a snap!
With all of these tips and tricks at hand, this year’s Thanksgiving festivities are sure to be a success! Canadian Turkey can help to make your turkey preparations easy! You can visit them on their website to find recipe ideas to try and to create soups, salads, pastas or casseroles in a flash! No matter how many people are seated around your table for this holiday, make this #CdnTradition special with Canadian turkey!
Want to see what Canadian Turkey can do to help make your Thanksgiving holiday memorable? You can visit them on their website or connect with them on their Facebook, Twitter, Instagram, Pinterest, and YouTube pages!
Disclaimer: This post was generously sponsored by Canadian Turkey.
Before it gets too cold to drive out and take in some of that crispy and cool ocean air, or the freshness of a nearby lake, get your friends or family together and take advantage of last-minute cottage time, and your last chance to take an uplifting beach-side walk. When planning a retreat later in the year however, it’s important to be prepared – bear in mind it can often get colder, windier, and wetter the farther out of the city you go. The last thing you want is to have a trip ruined on the account of poor preparation.
Keeping the cottage open for as long as possible allows many Canadians the opportunity to enjoy the colder weather for a while before having to muscle through it. Many will agree however that how appropriately you choose to dress for the season will determine how much fun you end up having – no one wants to feel chilled on a getaway. That being said, comfort and style also play a role in deciding what pieces people choose to wear everyday – the key is to bring outfits that’ll keep you warm, resist wear and tear, while also allowing you to feel good while wearing them.
Person walking on a trail wearing a backpack and rubber boots
Something many people struggle with in late Fall is footwear – particularly for outdoor activities, particularly if you hail from the city and haven’t yet needed to invest in a good quality pair of shoes or boots for the approaching season. Too often, it is on an adventurous outing that people learn how easily their boots accumulate holes, how uncomfortable they are when wearing them for long periods of time, and how resistant to water they, in fact, are not.
This unfortunately has the potential of spoiling an entire trip, preventing people from engaging in the activities they went away to do. Therefore, before packing your backpack, ask yourself honestly what your footwear can weather. If the answer is ‘not much’, consider checking out what retailers like Aigle Store Canada have to offer – their boots combine authenticity, style and practicality. They have been made in the same painstaking manner since 1853, offering style as well as durability and excellent quality, and are made from 100% organic material including handcrafted natural rubber. For the seaside, consider their Malouine rubber or Chelsea boots that are great for keep feet dry while strolling along wet terrain. They come in 4-6 fashionable colours and designs that will go with any outfit. Furthermore, they are easy to slip on and off and are versatile enough to wear for combatting rainy weather back home as well. If you’re unsatisfied, they also offer a 30-day money back guarantee.
Person walking on a trail wearing a backpack and rubber boots ~ a cottage near water
Don’t wait until you arrive at the cabin, or the lakeshore to realize how ill-equipped your footwear is for keeping you dry, comfortable, or even safe. Rather than wasting your money purchasing shoes that you’ll need to throw out time after time, invest in good quality rubber boots that’ll last many years, survive many excursions, and have you looking forward to wearing them and showing them off on each of your escapades.
Since the dawn of time, women have produced life-sustaining nourishment for their babies. This nourishment helps a baby grow, creates a bond between mother and baby, alleviates financial stressors, and is said to have many life-long benefits. But, what if breastfeeding was such a bad experience that you would rather accept “failure” then continue, regardless of the potential benefits?
Breastfeeding: Nature’s way of making you feel like a maternal failure.
In the past decade or so, breastfeeding has been re-established as the perfect nourishment for growing babies. During the 60’s and 70’s, formula was pushed as more beneficial than breast milk and became slightly more popular; as little as 63% of mothers breastfed. However, new research conducted in 2003 found that close to 82.9% of mothers breastfed,[1] and has only increased in popularity since then. The breastfeeding movement’s campaign for this natural goodness is quite aggressive and (in my opinion) insensitive . Look at this article’s intro, written by Dr. Todd Wolynn, Pediatrics:
Breastfeeding—So Easy Even a Doctor Can Support It
Imagine, if you will, a Super Medicine. It’s stable and palatable. It reduces and prevents multiple diseases. It reduces and prevents deaths. One dose treats two patients simultaneously. It can even be manufactured safely and legally at home. It requires no insurance coverage. It’s free to anyone who needs it…You don’t have to imagine that Super Medicine, because it already exists. Breast milk is all that, and a whole lot more. Which begs the question: Why are so few people using it? [2]
The article goes on to explain the importance of breast milk, as well as the lack of support and education delivered in hospital after birth. And although I do agree with his main point for the article, his intro is a very good example of how the mentality of the breastfeeding movement: generating a sense of shame and judgement to push non-breastfeeders into breastfeeding.
As I’m sure you’ve guessed by now, I couldn’t breastfeed. Let me elaborate: I wanted to breast, I couldn’t breastfeed. And I am writing this article for all those moms who wanted to breastfeed, but couldn’t, and felt like they were sacrificing their child’s health and future in the process.
My Story
I have a disorder called PCOS (Poly-Cystic Ovary Syndrome –more info here ) which largely affects the hormones, including the much needed breastfeeding hormone progesterone and another lesser known, androgen (read about the link between low androgen and breast milk here). After 3 years, a miscarriage, multiple tests and a fertility medication called Provera, we finally conceived. From the beginning, we had planned on breastfeeding, and there were two reasons for this: a. because I appreciated all the benefits, and b. because it’s hella cheaper. We went through all the normal doctor’s appointments; however, one thing I don’t recall having was a breast exam, which I realize now was probably something that should have been done – for multiple reasons.
On July 16, 2011, our beautiful 9.1 lbs baby was born. He was huge and immediately hungry. The minute I held him he was rooting. I mentioned this to the nurse and although she said babies are generally not hungry for 3-4 days due to their fluid retention, and that my milk most definitely had not yet come in, she showed me how to get him to latch. It was when I was trying to get him to open his mouth that I noticed he was tongue tied; his tongue barely reached his gum line! I showed the nurse and she scheduled a frenotomy for the following day. At this time, I was feeling pretty good in my maternal instincts, but that didn’t last long.
Becoming a Failure
Around 11 pm, my husband woke me up, saying the baby was crying (from where he was in the room, he couldn’t get to him), and I said, “No he isn’t. It’s the neighbour’s baby; I’m his mother, I would know.” But sure enough, when I looked up, he was red-faced. I sat up, pulled out my breast and attempted to replicate the motions the nurse had shown me earlier, but I couldn’t do it! The overnight nurse, Stacey, was amazing: she came in about every 20 minutes to help me latch. Eventually, I was so frustrated that when Stacey came back, I just asked her to do it for me. She took one breast in her hand, squished it flat like a pancake and shoved my son’s face into my breast. He latched for about .2 seconds.
The following day, he got his tongue clipped, and I thought that would be it. It wasn’t. He still couldn’t latch and he still wouldn’t stop crying. I was so frustrated; it was getting increasingly painful, and regardless of what they were telling me, I knew he was hungry. I had a lactation “consult” (the woman stood by the curtain the whole time) and was told that I should not be giving him a soother or a bottle, that he could not be hungry, but she did mention we could rent a hospital-grade breast pump and something about a nipple shield. But still, nothing changed, and he continued to cry and I continued to try.
At 7 in the morning on discharge day, I went to the day nurse (who was kind of terrifying) and told her I couldn’t do it. I said, “He’s clearly hungry, and I really want to breast-feed, but he needs something. Would I be able to just get a little bit of formula to supplement until my milk comes in?” She showed no emotion, but all I felt was judgement. It’s horrible to think, in hindsight, that I would feel so ashamed in simply wanting to feed my child. I put the bottle in my son’s mouth, and he drank so hard and so fast, looking at me with wide eyes, as if thanking me. I felt both relieved and ashamed all at once. After his bottle, he finally fell asleep! Although I should have been relieved, I was still frustrated: I knew my son had been hungry, yet I hadn’t trusted myself enough.
Before we left the hospital, I met with a different nurse. I told her how defeated I was feeling and explained why. For the first time in two days, she offered to examine my breasts. Apparently, I have flat nipples. I didn’t even know that that was possible! For the second time, we were told about the nipple shield.
Meeting Society’s expectations vs Using Maternal Instincts
We left the hospital with an 8.8 lbs baby (normal due to fluid loss), a hospital-grade breast pump, a nipple shield, and hope that being home would help the stress. But the problems continued. He would fall asleep within seconds of hitting the breast, the nipple shield seemed too big for me (I was not informed that there were different sizes), and he never seemed to get anything. What was I doing wrong?
I vividly remember one afternoon, after telling my husband that he would never see my pumping, I sat with my shirt down to my waist, a pump on each breast, the machine at my feet going whur-whur-whur, and my nipples dripping into plastic bottles; I felt totally and utterly dejected. He walked into the living room and looked at me sadly. I said, “Don’t look at me, I look like a cow.” He said, “You look like a mother desperate to feed her son.”
Although we had supplemented in hospital, I was still hell-bent on breastfeeding, so I wouldn’t supplement, I was just pumping and feeding as often as I could. A week after we got home, the City nurse came, and we were hopeful that our son had gone back to his birth weight (as was expected), but my fears were quickly confirmed: he was still only 8.8 lbs. He hadn’t gained 1 oz, which meant I had been starving him the entire week! This was a wake-up call for me: I needed to stop being so stubborn and start supplementing. I researched, I called around, I asked friends and I spoke to my doctor, but I couldn’t find the support I needed. Nevertheless, I kept going. Every 2 hours, I would breastfeed for 20 minutes each side, then hubby would feed him a 2 oz bottle while I moved to the chair and pumped for 40 minutes; this became our routine.
Eight weeks later, I was getting increasingly frustrated. He was up to 4 oz of supplement, while the most I had ever pumped in one shot was 3 oz. Why couldn’t I provide my son with what he needed? I went to my doctor (who kept telling me we would figure it out), and demanded he do something; I had no milk and I was in so much pain. After confirming that we both had thrush (I mean, really?!), my doctor prescribed me a medication called domperidone which was supposed to increase my milk supply. This had to be the answer!
One morning, I sat on my couch and decided I was going to fill his belly if it took me all morning. For 2.5 hours, we sat there, switching from side to side when he finally fell asleep. Yay! We did it! But within seconds, he was awake again, looking for food. Frustrated and defeated I fed him a 4 oz bottle and he drank it like he hadn’t eaten in hours! That was it, I was done.
Coming To Terms
The part that got me the most was that I felt like I had missed out on time; I’d spent so much time being frustrated and angry, that I didn’t feel like I had that “bond” all other mothers talk about. In fact, around that time, a man asked me, “Can you imagine your life without him?!” And I don’t think he was expecting me to say, “yes, yes I can”. I was just so incredibly overwhelmed, I questioned why I’d wanted this in first place. So, the day he turned three months, I stopped breastfeeding; it just wasn’t worth the heartache. I kept telling myself that he’d gotten the colostrum, so that was better than nothing.
A few days after I stopped, it was passed 11 pm, and I couldn’t get him to settle. Desperate for anything, I attached him to my breast. I knew I didn’t have milk, but it was the only thing I could think of. Even though there was nothing to eat, within minutes of attaching, he was asleep. That’s when I realized that he had gained something from this nightmare: a place of comfort and security.
I spent three months fighting against nature, judgement, and expectations, and all that did was waste time I could have spent enjoying and loving my newborn baby. Rather, I spent his first three months obsessed with figuring out how to do something I was never meant to do. I regret those days and nights I spent in tears, frustrated with him and frustrated with me. I wish I’d had more of a support system, more information, and fewer expectations. I wish I had been comfortable enough with my maternal instincts to admit “failure” and move on with our lives. I had allowed everyone else’s opinions and judgments terrorize my relationship with my child. Society may claim that “Breast is Best,” but not when it affects your confidence, your self-worth, and your relationship with your newborn blessing. My only advice to you is this: You do you, that’s all your child really needs.
[1] “Rates of Breastfeeding” (PDF). Canadian Perinatal Health Report 2003. Archived from the original (PDF) on November 16, 2009. Retrieved 2007-01-26.
[2] Wolynn, Todd. “Breastfeeding—So Easy Even a Doctor Can Support It.” Breastfeeding Medicine, Mary Ann Liebert, Inc., Oct. 2011, www.ncbi.nlm.nih.gov/pmc/articles/PMC3192361/. Accessed 14 Sept. 2017.
We use cookies to ensure that we give you the best experience on our website. If you continue to use this site we will assume that you are happy with it.