Home Blog Page 56

How To Decorate Your Home for Fall

6

Are you looking for some great ways to decorate your home for fall? There’s no better way to get into the mood of a good season than by pulling out the decorations and setting the stage yourself. If you’re the type of person who loves fall, then you have good ideas for home decor and may delight in decorating your home when the seasons change. You can decorate inside and out to help give it all that great fall feel.

HOW TO DECORATE FOR FALL

The great thing about fall—aside from it signaling cooler weather—is that it is the beginning of the holiday season. This means that you now have a real excuse to start decorating your home. Fall is also the perfect season to take family photos, check out these 4 Steps to the Perfect Fall Family Photo Session. If you don’t know what a fall home looks like, it’s all about cozy comforts and an inviting atmosphere. Still stumped? Check out these 9 best home decor ideas.
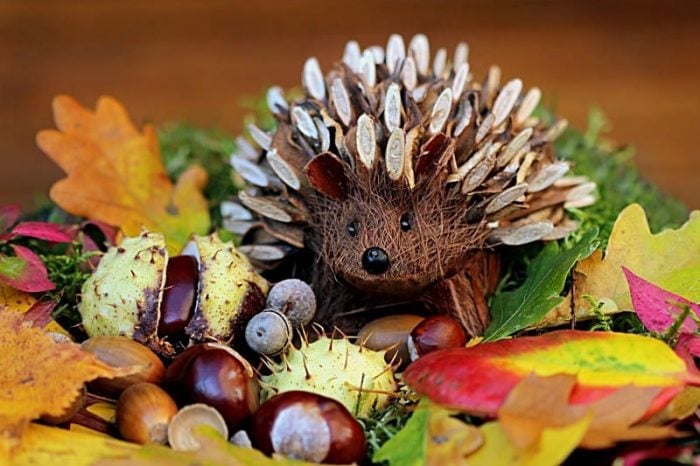
Brown porcupine artwork

1. CREATE A FALL TABLE CENTREPIECE

Nothing says fall like a great table centrepiece. You can make your own from fall items you find outside, buy one from the store, or use items you buy to create one. White pumpkins, hydrangeas, leaves, acorns, and pine cones are some examples of items that might work for your fall table centrepiece.

2. CHANGE YOUR TABLE SETTING

In addition to the table centrepiece, decorating your home by changing your table setting can also be a great way to decorate for fall. Whether you’re having guests over for dinner, or just doing it for your own family, it will really set the tone for the space.

3. Decorate Your Home For Fall By ADDING A ROCKING CHAIR

There’s something soft and homey about an old-fashioned rocking chair on the front porch or in the living room. You can toss a fall-inspired throw over the back and it makes a cozy little reading spot. You can sit in front of the fireplace, or rock on your front porch with some pumpkins and seasonable fruits around. That’ll get you in the mood for the season!

4. CHECK, CLEAN, AND DECORATE YOUR FIREPLACE

Whether you have a gas or an electric fireplace, it’s important to check if it’s working properly. You should make it a point to clean a traditional wood fireplace once in a while to avoid the build-up of soot. If it’s old and non-functional, then it’s high time to replace or upgrade your fireplace.

For a newly constructed home, fall is the best time to install a fireplace. If your house cannot accommodate a traditional wood fireplace, that’s not a problem because you can choose to add a gas or electric fireplace instead. However, do note that each type must be installed differently. 

Electric fireplaces are plugged into an electrical outlet like any electric appliance. On the other hand, gas fireplaces can be installed without modifications. But since this type uses real gas and produces real flames, it’s important to clear the fireplace area from flammable materials. 

Since electric fireplaces don’t create real flames, they are easier to decorate than gas fireplaces. You can place pumpkins, topiaries, family photos, decorative sculptures, or anything you like on a wood wall-mounted electric fireplace. Also, you can place wooden tealight holders and other accents on your wall-mounted electric fireplace. This cannot be done with a gas fireplace since the surrounding decors may be at risk of catching fire.

5. COZY UP WITH SOME THROWS

Nothing says cozy quite like soft throws, which is why you should immediately get a few to strategically place around your home. These make cute ways to decorate your room for fall. Unlike blankets, throws are much smaller and intended for cuddling up on a couch or in front of a fireplace—maybe with some wine. Plus, throws double as décor items, so you have an endless array of textures, fabrics and colours to choose from. We recommend getting a least two cable knit throws and a few cute throws with tassels.

If you are looking for a one-stop-shop, visit Hudson’s Bay and just throw a bunch into your virtual shopping cart. They even have a cute faux mohair throw, which comes in two different colour options, and a plush faux mink throw that is quilted. Don’t forget to use coupons to your advantage as you shop at this superstore; check out some awesome coupon codes. While you’re at it, fill your home with accent pillows. While you should make sure to select ones that pair well with your home’s overall look (and those throws you just bought), you should also feel free to experiment with textures and colours. You might even consider getting a few massive pillows to arrange on the floor in front of a fireplace.

candle with fall decorations

6. CANDLES

This one really is a given, but we’re including it anyway. Adding candles in strategic places works wonders when going for a comfortable fall atmosphere. Easy to work with, you can pretty much dress a candle up however you want and place it anywhere. For instance, place a simple white candle in a decorative bowl and surround it with fresh chestnuts, just-picked leaves or miniature pumpkins—voila! You suddenly have a designer-looking centrepiece. 

7. INVEST IN SOME AREA RUGS

If you have hardwood floors, this one is definitely for you. Nothing says fall quite like cold floors on your bare feet, so go out and find some really cool area rugs that you can dress your hardwood up with. Look for interesting shapes, patterns, colours and of course, textures. You might also want to think about layering some of them up if you have a large open space, like a living room. 

8. ADD NATURAL-LOOKING FALL ACCESSORIES

Sometimes, less is more, and that is certainly the case for fall decorations. If you just want a touch of seasonal décor, consider grabbing a few natural-looking accessories for your home, such as a burlap table runner paired with a vase of just-picked greens from your yard; burlap is super cheap and incredibly versatile. You can even use it to wrap up your holiday gifts once December comes around.

pine cones

9. BRING THE OUTSIDE IN

Fall marks the transition from summer to winter, meaning that the days are a bit shorter and the temperature starts cooling down. This also means that leaves start changing colour, trees start shedding and harvests are ripe for picking. By bringing a little bit of Mother Nature into your home, you will be evoking images of fall in the best way possible.

You can use pine cones in a wood bowl as a centrepiece or make a wreath out of them. Think about neat ways you can use cinnamon sticks, like surrounding an otherwise boring candle with the spice and wrap them up in some twine. Not only will it look super cute, it will also smell amazing. Forage for some colourful leaves and fill a vase with your favourite finds. While you are looking for leaves, keep an eye out for some tree branches that have shed naturally (or snip some from your own trees) and arrange them in a massive vase for an elegant arrangement.

How to Decorate Your Home for Fall
Fall centrepiece decoration

10. DECORATE YOUR HOME FRONT DOOR FOR FALL

This is usually the main entrance to the home and nothing says fall like a great wreath or other door decorations in fall design. You can create your own wreath or buy one if you’re not the crafty type. You can also consider wood slices, signs made of wood and fall designs, and trees or fall flowers to decorate your front porch or around the door. What a great way to greet your guests!
WHICH ITEMS DO YOU USE TO DECORATE YOUR HOME FOR FALL? Share some ideas for home decor!

Super Easy Pumpkin Bundt Cake

30

It seems once the air starts feeling a little cooler and the leaves start to turn those gorgeous fall colours everyone goes all Pumpkin crazy, Pumpkin Bundt Cake, crazy that is. You know what I’m talking about? Everywhere you turn is a Pumpkin this or that.

Super Easy Pumpkin Bundt Cake Recipe

Once the air gets that little touch of chill to it, we head straight to the kitchen and make this easy pumpkin bundt cake with cake mix.

Glazing a Bundt Cake

When it comes to icing or glazing any type of cake it needs to be cooled or refrigerated for at least 30 minutes so the glaze will set. The glaze should be thick but pourable otherwise it will be a big mess. Once the glaze has been prepared, (I like to put it in a glass measuring cup or a small bowl) you can begin pouring following these simple directions:

  1. Hold the bowl with icing over the center of one side of the cake. Begin pouring with one hand while slowly turning the plate or cake stand with the other hand.
  2. If you want some of the icing to flow down over the sides in certain areas of the cake, just slow down a bit, then continue going around the cake.
  3. Once you have reached where you started, you can stop or add a bit more depending on how much you like icing.
  4. If you plan on adding nuts or sprinkles, it is best to add them before the glaze has set. The glaze should be set within an hour.

Recipe for a Bundt Cake

Did you know that making a bundt cake is one of the easiest cakes to make? There are different styles of bundt cake pans and only 1 pan is required so there is no dividing the cake mix between 2 pans. You can also add powdered sugar instead of a glaze making it the perfect dessert to take on the go when visiting friends and family.

Youtube video

Do you have a go to recipe for when Fall approaches? I love to have my home smell like pumpkin and cinnamon, therefore, we bake a lot. Give our Pumpkin Bundt Cake recipe a try today, you may even have all the ingredients in your pantry to do it without having to run to the store. I’d love to hear your thoughts in the comments.

Pumpkin Recipes

If you are looking for more Pumpkin recipe ideas, you can try these:

  1. Pumpkin Cookie Donut Recipe
  2. Pumpkin Crème Brûlée Latte Recipe
  3. Witches Hat Pumpkin Yogurt Bites Recipe
  4. Super Easy Pumpkin Pie Recipe
  5. 13 Delicious Pumpkin Recipes To Make This Fall
  6. Whipped Pumpkin Pie Butter
Super Easy Pumpkin Bundt Cake Recipe
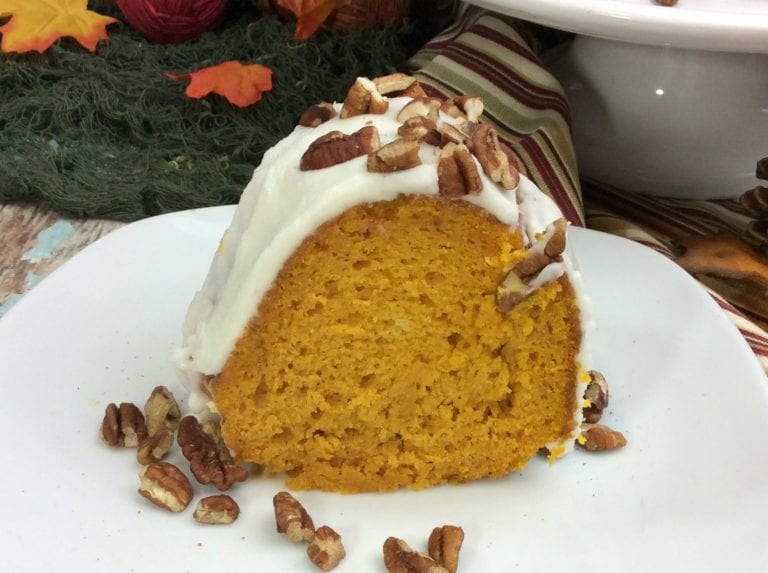
Piece of a Pumpkin Bundt Cake

Recipe for a pumpkin bundt cake

Fall and winter have some of the bests flavours and it is even better when the taste and smells of pumpkin overlaps with the Christmas season. If you still have a jar of pumpkin puree or pumpkin spice still sitting in your spice rack then the easy pumpkin bundt cake is just for you. What makes this recipe so easy? Well the base is a boxed cake mix so it saves a bit of time and ingredients.

How To Make The Pumpkin Bundt Cake

This Pumpkin Bundt Cake recipe is literally made from a box cake mix with a few extra tweaks. Topped with an amazing homemade glaze and your home will be smelling like fall in no time.

Recipe for a pumpkin bundt cake

EQUIPMENT Needed

  • Bundt pan
  • Stand mixer
  • bowls
  • spatula
  • Whisk

Bundt Cake Recipe

Ingredients

  • 1 box yellow, golden yellow, or golden cake mix
  • 1/2 cup white sugar
  • 1/2 cup vegetable oil
  • 1 – 15 oz can pumpkin or 2 cups of homemade pumpkin puree
  • 1/4 cup water
  • 1 tsp ground cinnamon
  • 3 eggs room temp

Directions

  1. Preheat oven to 350 degrees.
  2. Spray your bundt pan with non-stick baking spray 
  3. In a bowl of a stand mixer add all ingredients and beat on medium speed for 2 minutes or until well combined. 
  4. Add batter to the bundt pan and bake for 40-50 minutes.
  5. Cool for 15 minutes in the bundt pan.
Super Easy Pumpkin Bundt Cake Recipe

Pumpkin Bundt Cake Glaze

Ingredients for the glaze

  • 1 cup powder sugar
  • 1/2 cup unsalted butter, melted
  • 1/4 cup whole milk 
  • 1 tsp vanilla

Instruction for the glaze

  • In a sauce pan, melt butter. You can also place the butter in microwave-safe bowl and heat it at 50 percent until melted (usually between 30 to 45 seconds). Remove butter as soon as it is melted.
  • In a medium bowl, combine all ingredients and mix with a whisk until combined and smooth.
  • Pour over cooled cake and let sit for 10 minutes to harden before cutting.
  • If the glaze is too liquidy, add more powder sugar, 1/4 cup at a time, and mix well.
Super Easy Pumpkin Bundt Cake Recipe

I hope you enjoyed the Easy Pumpkin Bundt Cake Recipe. If you make it, make sure to share with us on Facebook or Twitter! Also, check out all of our other Recipes.

Super Easy Pumpkin Bundt Cake Recipe

Super Easy Pumpkin Bundt Cake

Lyne Proulx
This Pumpkin Bunt Cake recipe is super easy to prepare since it's made from a box cake mix and topped with an amazing homemade glaze.
3.85 from 20 votes
Prep Time 15 minutes
Cook Time 50 minutes
Cooling 25 minutes
Total Time 1 hour 30 minutes
Course Dessert
Cuisine American, Canadian
Servings 8 serving
Calories 613 kcal

Equipment

  • Bundt pan
  • Stand mixer
  • bowls
  • spatula
  • Whisk

Ingredients
  

Cake Ingredients

  • 1 box yellow cake
  • 1/2 cup white sugar
  • 1/2 cup vegetable oil
  • 1 15 oz can pumpkin
  • 1/4 cup water
  • 1 tsp ground cinnamon
  • 3 eggs (room temperature)
  • non-stick baking spray

Ingredients for the glaze

  • 1 cup powder sugar
  • 1/2 cup unsalted butter melted
  • 1/4 cup whole milk
  • 1 tsp vanilla

Instructions
 

Cake Directions

  • Preheat oven to 350 degrees.
  • Spray your bundt pan with non-stick baking spray
  • In a bowl of a stand mixer add all ingredients and beat on medium speed for 2 minutes or until well combined.
  • Add batter to the bundt pan and bake for 40-50 minutes.
  • Cool for 15 minutes in the bundt pan.

Directions for the glaze

  • In a sauce pan, melt butter. You can also place the butter in microwave-safe bowl and heat it at 50 percent until melted (usually between 30 to 45 seconds). Remove butter as soon as it's melted.
  • In a medium bowl, combine all ingredients and mix with a whisk until combined and smooth.
  • Pour over cooled cake and let sit for 10 minutes to harden before cutting.
  • If the glaze is too liquidy, add more powder sugar, 1/4 cup at a time, and mix well.

Notes

Glazing a Bundt Cake

When it comes to icing or glazing any type of cake it needs to be cooled or refrigerated for at least 30 minutes so the glaze will set. The glaze should be thick but pourable otherwise it will be a big mess. Once the glaze has been prepared, ( I like to put it in a glass measuring cup or a small bowl) you can begin pouring following these simple directions
  1. Hold the bowl with icing over the center of one side of the cake. Begin pouring with one hand while slowly turning the plate or cake stand with the other hand.
  2. If you want some of the icing to flow down over the sides in certain areas of the cake, just slow down a bit, then continue going around the cake.
  3. Once you have reached where you started you can stop or add a bit more depending on how much you like icing.
  4. If you plan on adding nuts or sprinkles, it is best to add them before the glaze has set. The glaze should be set within an hour.

Nutrition

Serving: 8gCalories: 613kcalCarbohydrates: 86gProtein: 5gFat: 29gSaturated Fat: 20gTrans Fat: 1gCholesterol: 93mgSodium: 502mgPotassium: 185mgFiber: 3gSugar: 58gVitamin A: 9280IUVitamin C: 2mgCalcium: 175mgIron: 2mg
Keyword Bunt cake, Fall recipe, pumpkin, Pumpkin Bunt Cake, Pumpkin cake
Tried this recipe?Let us know how it was!

15 Fall Crafts For Kids

13

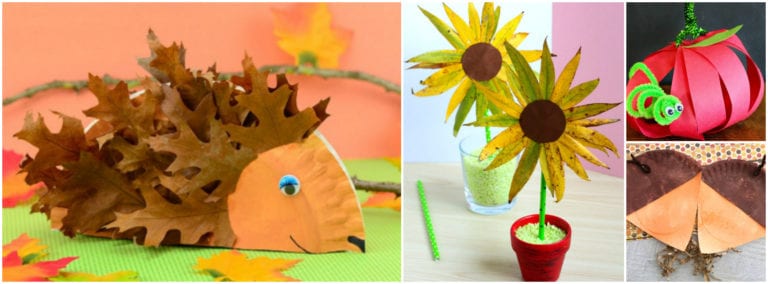
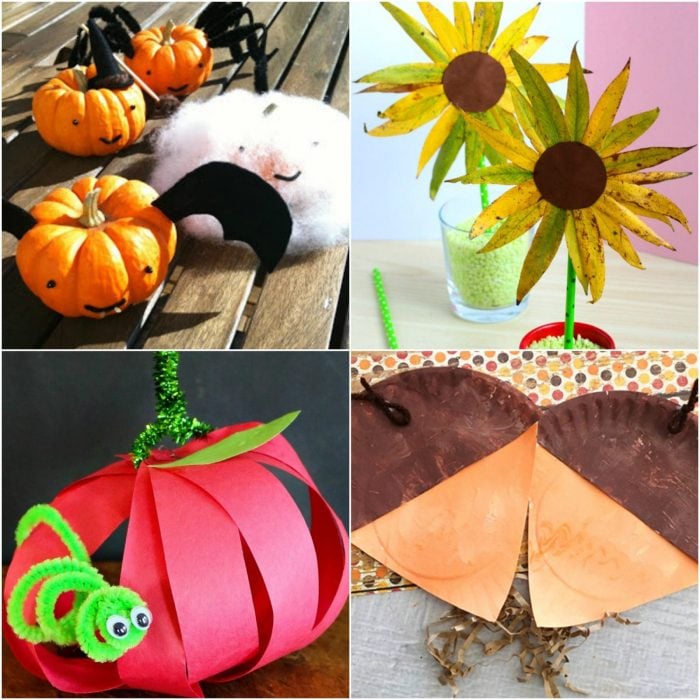
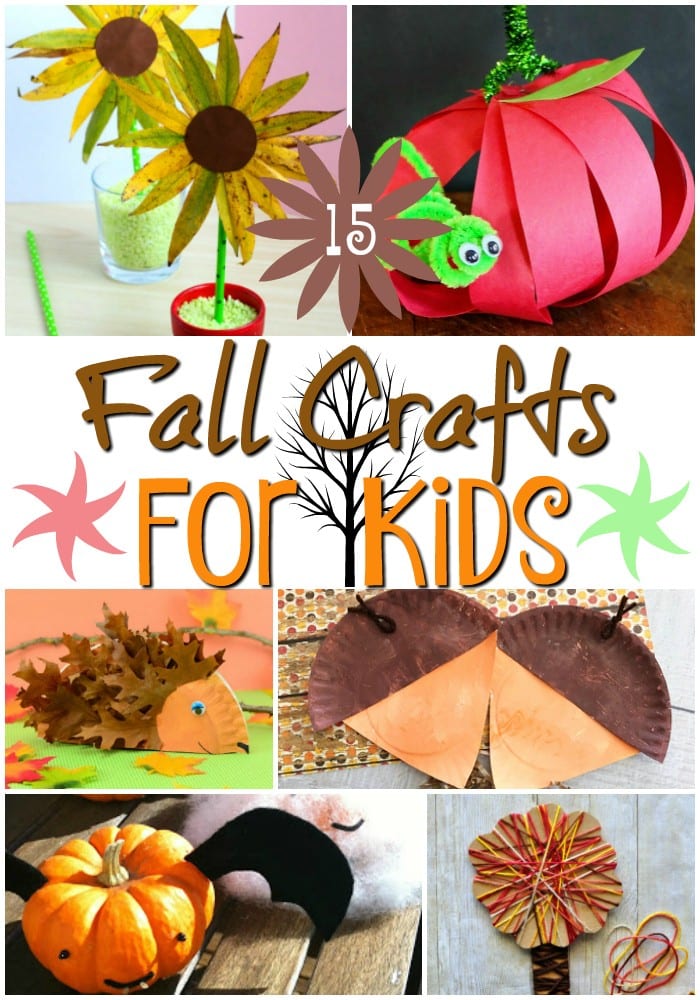
Fall Crafts for kids never disappoint. If your kids are anything like mine they live and breathe craft time. It doesn’t even matter if they have a craft project to do, they just want to doodle and glue and cut and glue some more. It’s the best thing since sliced bread at times it seems. To make things a little bit easier for you we scoured the web and rounded up 15 great Fall Crafts for kids so you didn’t have to.

15 Fall Crafts For Kids
Collage of Fall Crafts For Kids

No matter how advanced or not your littles are with being creative there is always something for every level of creativity. From the simplest of projects to the more detailed, they will have a blast and be occupied for hours. I understand having multiple levels of creativity.  From one being as detailed as they can possibly be to another who just squirts glue all over and randomly sticks objects on the page. However, they are beyond proud once they are done.

I love seeing all of their Fall Crafts hanging on the fridge.  They are always so excited over them and I can’t help but share that with them.

15 Fall Crafts For Kids
Collage of Fall Crafts For Kids

Now, all that is left is to round-up your children, get your crafting supplies out (don’t forget a tablecloth so you’re not gluing googly eyes to the kitchen table) and get crafting. You’re Welcome!

Of course, we would love to share in your kids’ joy so be sure to come back and share with us their finished craft projects. 

15 Fall Crafts For Kids

15 Fall Crafts For Kids
Collage of fall crafts for kids

Ovarian Cancer Awareness Month: Let’s Break Out the Teal!

11


Ovarian Cancer Awareness Month: Let's Break Out the Teal!
Ovarian Cancer Awareness Month Fact Sheet


Ovarian Cancer Awareness Month: Let’s Break Out the Teal!

It’s September again. School is starting back up for the kids. Cooler temperatures are on the horizon. And women all across Canada and the United States are breaking out their teal to support Ovarian Cancer Awareness Month! This year while we don our supportive apparel and fundraise for research effects, let’s take a moment to learn about the disease we are fighting so hard against.

Ovarian cancer is the fifth deadliest cancer for women in Canada. Roughly 2,500 women are diagnosed with ovarian cancer per year, and for over half of those women, the cancer will be fatal. What makes this disease so deadly? Many have referred to ovarian cancer as a “whispering disease”because its symptoms are so subtle. With symptoms like menstrual changes, fatigue, frequent urination, bloating, back pain, upset stomach, pelvic or abdominal pain, and constipation, many women confuse symptoms of ovarian cancer with symptoms of their regular menstrual cycle or menopause.

As hard as it can be for women to spot these symptoms in their body, it can be just as hard for doctors to see the signs and diagnose the problem as well. Unlike cervical cancer, which is tested for annually with a woman’s Pap test, ovarian cancer has no specific test to diagnose the disease. There are several tests that can indicate the development of ovarian cancer cells or identify tumors, including a pelvic exam, imaging scans like an MRI, ultrasound, and several blood tests. However, none of these tests on their own will fully diagnose ovarian cancer. Typically, multiple tests are done followed by a biopsy of the tumor, which is the only definitive way to determine if it is ovarian cancer.


Ovarian Cancer Awareness Month: Let's Break Out the Teal!
Ovarian Cancer Awareness Month Fact Sheet


All women have some risk of developing ovarian cancer no matter their age, race, or lifestyle habits, but some women are more at risk than others. A woman’s risk increases with age; as she approaches 50 and when she enters post-menopause, her chances become even greater. Women who have lower chances of developing ovarian cancer include women who have given birth or have used oral contraceptives consistently for 5+ years. A woman’s chances are also lower for ovarian cancer if she has had a hysterectomy or other gynecological surgery in which her ovaries or fallopian tubes have been removed.

Looking into a woman’s medical history or her family’s medical history is also important when determining risk factors. Women who have had cervical, breast or colorectal cancer will have a greater risk of developing ovarian cancer. Women who have relatives with breast cancer or ovarian cancer are also at a higher risk. The presence of genetic mutations like BRCA1 and BRCA2 (most commonly associated with breast cancer) indicate a higher risk for ovarian cancer. It’s important for a woman who suspects that she might be at risk due to her family’s past experiences with cancer to undergo genetic testing.


Ovarian Cancer Awareness Month: Let's Break Out the Teal!
Ovarian Cancer Awareness Month Tips


Some other possible increased risk factors include obesity and the use of talcum powder around a woman’s vagina. Studies have found that women who are considered obese with a BMI of 30 or above are at a greater risk for ovarian cancer. Truth be told, not only will a woman’s risk for ovarian cancer increase, but obesity has been linked to diabetes, heart disease, and several other cancers. Living a healthy active lifestyle is greatly recommended to reduce everyone’s risk for many life-threatening diseases. Another risk factor according to many scientists, doctors, and juries is the use of talcum powder around a woman’s vagina for personal hygiene use. Studies have found a threat of ovarian cancer in talcum powder. While the exact correlation is still to be determined, talc particles have been found in an alarming number of biopsied tumors. With these findings, many doctors and scientists recommend keeping talc-based baby powders and other cosmetic products containing talc away from a woman’s genitals. With even a hint of doubt, it’s best to protect yourself and your family from the dangers of this disease.

Now that you know the dangers and risks of this silent killer, it’s time for teal! This September, honor the doctors searching for a cure. Honor the women fighting for their lives, and honor those who have lost their lives because of ovarian cancer. Share this new knowledge with the women in your life – mothers, daughters, sisters, and friends – and be apart of this awareness movement!

Peace,

Caitlin Hoff
ConsumerSafety.org

6 Dependable Hosting Tips for Thanksgiving With Printable

14


In June, the Ottawa Mommy Club had the pleasure of being invited by Maytag for a sneak peek at Canada’s Home, a home that honours our country by displaying dependable products for Canadians to use such as Maytag appliances that stand for durability and reliability! At the event, we picked up some amazing tips on how to be the ultimate dependable host on Canada Day. This time around, Maytag wants to showcase their commitment to dependability by asking me to share dependable hosting tips to Canadians for Thanksgiving! You will find below 6 dependable hosting tips for Thanksgiving that will help you stay calm, organized, and have fun.

6 Dependable Hosting Tips for Thanksgiving #DependOnMAYTAG
Fall meal served on a table

Maytag offers a full range of kitchen appliances built with dependability and power in mind and they know how much your family depends on you to run a well-organized household. You can depend on Maytag to help with a range of features:

  • Maytag dishwashers with the Power Blast cycle,
  • Maytag refrigerators with the PowerCold option, as well as
  • Maytag ranges and ovens with Power Preheat options.

1. Make lists with timelines

It’s very helpful to write down a grocery and guest list, a meal plan, a cooking schedule, and a preparation list with timelines. I still use the old-fashion method of writing everything down on a piece of paper, but you can use apps to help make meal planning super simple.

2 weeks before Thanksgiving:

Now is the time to plan for Thanksgiving! To make it easier for you, I created a Thanksgiving Planner Printable that you can download for free. You will find:

  • a guest list
  • a grocery list
  • a meal plan
  • a cooking schedule

Simply click here or on the photo below to download the PDF!

Thanksgiving Planner Printable


A week before Thanksgiving:

  • Bake the pies, desserts, and casseroles and freeze them
  • Take out the Thanksgiving decorations and choose the ones you will be using

2-3 days before Thanksgiving:

  • Shop for fresh produce and the meat
  • Clean your refrigerator and oven
  • Clean glasses and dinnerware
  • Make the cranberry sauce and the rolls

1 day before Thanksgiving:

  • Cook the turkey/meat and store in the refrigerator
  • Cut the vegetables and store in the refrigerator
  • Take frozen pies, desserts, and casseroles from freezer to the refrigerator to begin thawing
  • Make the gravy and store in the refrigerator
  • Set the table
  • Clean the kitchen, living/family room, foyer, and bathroom

Thanksgiving Day:

  • Prepare easy-to-make appetizers or store-bought
  • Reheat pies, turkey, gravy, casseroles
  • Cook the vegetables and make a salad
  • Enjoy a glass of wine!

2. Prepare the Food in Advance

You can definitely ask for lots of help on Thanksgiving Day and have everyone prepare part of the meal, but for my guests to enjoy themselves, I prefer to prepare the food ahead of time! I now even cook the turkey the day before, which frees up time to accomplish other tasks the day of. I cut it in halves and save it in plastic containers with its juice in the refrigerator.

Maytag Front-Control Range offers Power Preheat so your oven is ready for cooking in as little as 8 minutes, which is ideal for cooking or reheating the turkey. The warming drawer of the range is also used to keep some of the food warm such as the pies. Also, with the Maytag Four-Door Refrigerator PowerCold comes with a feature that chills the refrigerator compartments quickly – even if you have been browsing with the door open while preparing the food. 

6 Dependable Hosting Tips for Thanksgiving #DependOnMAYTAG
A piece of pumpkin pie on a white plate

3. Cleaning

Your home should look presentable and clean before your guests arrive, but they won’t be going around your entire house. Ideally, focus on cleaning the washroom, the living room/family room, front entrance, and the kitchen. Clean the glasses, dinnerware, and cutlery, and most of all clean your refrigerator and oven. As you clean your refrigerator, take out all unnecessary food items or eat them soon to make room for all the dishes to come. With the Maytag kitchen appliances, you don’t have to worry about cleaning fingerprints all over them since they have Fingerprint-resistant stainless steel. It doesn’t matter how many times you open the oven, refrigerator, or dishwasher doors on Thanksgiving, no fingerprints will show on them! 

4. Set the table the night before

This is definitely one of the tasks that can be done the night before Thanksgiving. Take out the tablecloth and iron it, and add the decorations, glasses, napkins, dinnerware and cutlery on the table. It’s time-consuming to decorate the dining room table, so this is the perfect time to ask your kids to help you set it up and put their personal touches such as creating handwritten place cards and flower arrangements. 

6 Dependable Hosting Tips for Thanksgiving #DependOnMAYTAG
Glasses of wine and a cheese tray on a table

5. Cooking

On Thanksgiving, it’s not the time to experiment with new recipes as they can come out totally amazing or be a bust. Make your favourite dishes and stick to the meals you know best. After cooking such a big feast, it usually means cleaning lots of dishes and pots and pans! Rely on/Depend on Maytag Top Control Dishwasher with the PowerBlast cycle that removes stuck-on food with high pressure spray jets, increased temperature, and hot steam to finish the job. Your dishes will be sparkling clean!

Don’t stress out with baking pies, rolls, and other Thanksgiving desserts if you are a novice baker or simply don’t have the time to make them. Head out to your favourite bakery and purchase them. This also applies to the cranberry sauce and the gravy that can be bought at a grocery store. What’s important is to enjoy a meal with your guests! 

6 Dependable Hosting Tips for Thanksgiving #DependOnMAYTAG
A casserole dish

6. Embrace the moment

As the busy day goes by, it’s important to remember the meaning of Thanksgiving and find moments to be grateful and thankful for all the blessings that we have received throughout the year. It’s the perfect time to enjoy the company of family and friends with many laughter and smiles while you eat a delicious meal together.

Preparing a meal for a large number of guests can be stressful and hosting a themed meal like Thanksgiving can also be very demanding, exhausting, and time-consuming! Planning ahead will be your best option, so you can actually enjoy spending time with your family members and relatives instead of being cooped up in the kitchen cooking for them all day. With these dependable hosting tips for Thanksgiving, you will definitely be on top of the day! 

Do you have any hosting tips for Thanksgiving that you would like to share with our readers?

Please leave a comment below!


Happy Thanksgiving!


Disclaimer: Whirlpool has compensated me for my services and my posts, but all posts represent my own opinion.

4 Ways to Encourage Reluctant Readers

4

Some kids love to read. They can’t get enough of it but others, not so much. Children can be reluctant readers. It’s hard to get him/her to even pick up a book much less read a little every day. Reading encourages kids to use their imaginations and can help teach life lessons in fun and interesting ways. Therefore, it’s important to keep motivating reluctant readers and encourage them no matter how much your child protests.

4 Ways to Encourage a Reluctant Reader

Here are 4 Ways on how to engage reluctant readers to read more books:

1. Find out why your child does not like reading.

It could be that he has trouble figuring out the words or maybe he doesn’t really understand what he’s reading. It could also be possible that he is simply not interested in the types of books you’re offering. Once you find out why he doesn’t want to read, it will help you figure out what to do to solve the problem.

2. Try different types of reading material.

For example, if your child is into superheroes, then perhaps a superhero comic book might spike his interest in reading. Once he discovers that reading can be fun and interesting, you can add new age-appropriate books to his collection.

3. Continue reading to your child daily, but don’t just read the words.

Be expressive and show enthusiasm when reading to show your child that you find it fun and interesting. This sets a good example for him and encourages him to want to read more.

4. Make visiting the library part of your weekly routine.

It helps to expose your child to a wide variety of books that makes it easier for him to find something he is interested in. The librarians may also suggest books that your child might find interesting.

4 Ways to Encourage a Reluctant Reader

There are many ways to help a struggling reader. Above all else, be patient with your child. It can be frustrating for parents, especially if you love reading. However, getting frustrated or pushing too hard will only make things worse. Reading is a fun and satisfying activity that your child can greatly benefit from so never give up. Keep encouraging your kids to read even if they’re not interested now.

Do you have any tips to encourage reluctant readers?

4 Reasons To Love Fall Season

11

There are so many great things to love about this season, it’s hard to narrow it down to only four reasons. Here are 4 reasons to love fall season!

reasons to love fall season

For many, fall is a favourite time of year. The weather, the food, the leaves turning colours on the trees… it’s all a beautiful time of year. Even if you never thought it was your favourite time of year, you’re going to love fall after you see this list.

1. The weather is calming

Many people think that the fall weather is relaxing and calming. It can help you unwind at the end of a long day. Imagine sitting on the front porch watching the leaves fall from the trees and

2. It’s the best time to break out all your favourite sweaters

Bring out the chunky sweaters in all of your favourite colours. Darker hues are great for fall and the weather will be perfect for layering things up. Fall fashion doesn’t end there; you can also bring out the fall boots.

3. There is pumpkin spice everywhere

Seriously, what other time of year can you find so much delicious pumpkin spice? It’s in coffee, pies, sweets, and more. You can also get candles, body sprays and other goodies in pumpkin spice scents.

4. Kids go back to school

Fall is more than just time for new seasons of your favourite shows to start again, it’s also when the kids go back to school. This can be a great time for many parents aching for some more free time in their day.

reasons to love fall season
Woman looking at autumn leaves

Now that you know these reasons to love fall season fall, you can start celebrating yourself. Are there other things you would add to the list?

What is your favourite part of the fall season?

Copycat Red Lobster Cheddar Bay Biscuits and Buttermilk Biscuits Recipes

31

What could possibly be better than a wonderful dinner at Red Lobster? Bringing the delicious taste of their Cheddar Bay Biscuits to your home, of course! The pair-up possibilities are endless: add it as a tasty entrée to your lunches, dinners, or even as the new biscuit to your cup of tea! This homemade copycat Red Lobster Cheddar Bay Biscuit and scratch buttermilk biscuit recipes are bound to become a new family favourite (especially if it keeps a few extra dollars in your pocket)!

Copycat Red Lobster Cheddar Bay Biscuits and Buttermilk Biscuits Recipes
Cheddar Bay Biscuits and Buttermilk Biscuits

Recipe Red Lobster Biscuits

You will only need a few simple ingredients to make recipe for Bisquick biscuits:

Ingredients Red Lobster Cheddar Bay Biscuits

  • 2 Cup Bisquick Baking Mix
  • 2/3 Cup whole Milk
  • 1/2 Cup Triple Cheddar Cheese (Finely Shredded)
  • 1/2 Cup Margarine
  • 1 tsp Garlic Powder
Copycat Red Lobster Cheddar Bay Biscuits and Buttermilk Biscuits Recipes
Cheddar Bay Biscuits

They are very simple, but follow these directions closely:

How To Make Red Lobster Biscuits

Step 1: Preheat oven to 450 degrees. Place parchment paper on a cookie sheet

Step 2: Mix Bisquick, whole milk, and cheese with your hands until thoroughly combined. Scoop dough into a large ice cream scoop. Use a butter knife to level the dough in the scoop. Drop this on the lined cookie sheet.

Step 3: Bake at 450 degrees for 6-10 minutes or until lightly brown on top. Check at the 6 minute mark to make sure they are not overdone.

Step 4: Melt the margarine. Add garlic powder. Stir well. Use a kitchen brush to apply the melted butter and garlic to the biscuits.

Copycat Red Lobster Cheddar Bay Biscuits and Buttermilk Biscuits Recipes
Cheddar Bay Biscuits and Buttermilk Biscuits

Buttermilk Biscuits Recipe

Ingredients for the best buttermilk biscuits recipe

  • 4 cup flour, self rising
  • 1 TBSP baling powder
  • 1 TBSP sugar
  • 3/4 Cup shortening
  • 2 Cup buttermilk
Copycat Red Lobster Cheddar Bay Biscuits and Buttermilk Biscuits Recipes
Buttermilk Biscuits

How Make Biscuits with Buttermilk

Step 1: Preheat oven to 400 degrees. Line a cookie sheet with parchment paper.

Step 2: Sift four, baking powder, salt and sugar. Make sure all dry ingredients are well blended in a bowl. Add the shortening to the dry ingredients. Using your fingers work the shortening thoroughly into the dry ingredients. Pour the buttermilk into the bowl, stir until all ingredients are well blended.

Step 3: Flour a wooden cutting board. Roll out the biscuit batter onto the floured board. Using a roller pin, roll out the batter to a consistent thickness. Using a round cookie cutter, cut out the biscuits. Place them on the cookie sheet leaving space between the biscuits.

Step 4: Bake at 400 degrees for 12-14 minutes or a light golden brown. Cool on a wire rack or EAT them hot.

Copycat Red Lobster Cheddar Bay Biscuits and Buttermilk Biscuits Recipes
Cheddar Bay Biscuits and Buttermilk Biscuits

I hope you enjoyed the Copycat Red Lobster Cheddar Bay Biscuits and Buttermilk Biscuits Recipes. If you make it, make sure to share with us on Facebook or Twitter! Also, check out all of our other Recipes.

Copycat Red Lobster Cheddar Bay Biscuits and Buttermilk Biscuits Recipes

3 from 1 vote

Ingredients
  

Copycat….Red Lobster Cheddar Bay Biscuits

  • 2 Cup Bisquick Baking Mix
  • 2/3 Cup whole Milk
  • 1/2 Cup Triple Cheddar Cheese Finely Shredded
  • 1/2 Cup Margarine
  • 1 tsp Garlic Powder

Buttermilk Biscuits Recipe

  • 4 Cup flour self rising
  • 1 TBSP baling powder
  • 1 TBSP sugar
  • 3/4 Cup shortening
  • 2 Cup buttermilk

Instructions
 

Copycat….Red Lobster Cheddar Bay Biscuits

  • -Preheat oven to 450 degrees.
  • -Mix Bisquick, whole milk, and cheese with your hands until thoroughly combined.
  • -Place parchment paper on a cookie sheet
  • -Scoop dough into a large ice cream scoop.
  • -Use a butter knife to level the dough in the scoop.
  • -Drop this on the lined cookie sheet.
  • -Bake at 450 degrees for 6-10 minutes or until lightly brown on top.
  • -Check at the 6 minute mark to make sure they are not overdone.
  • -Melt the margarine.
  • -Add garlic powder.
  • -Stir well.
  • -Use a kitchen brush to apply the melted butter and garlic to the biscuits.

Buttermilk Biscuits

  • -Preheat oven to 400 degrees.
  • -Line a cookie sheet with parchment paper.
  • -Sift four, baking powder, salt and sugar.
  • -Make sure all dry ingredients are well blended in a bowl.
  • -Add the shortening to the dry ingredients.
  • -Using your fingers work the shortening thoroughly into the dry ingredients.
  • -Pour the buttermilk into the bowl, stir until all ingredients are well blended.
  • -Flour a wooden cutting board.
  • -Roll out the biscuit batter onto the floured board.
  • -Using a roller pin…roll out the batter to a consistent thickness.
  • -Using a round cookie cutter, cut out the biscuits.
  • -Place them on the cookie sheet leaving space between the biscuits.
  • -Bake at 400 degrees for 12-14 minutes or a light golden brown.
  • -Cool on a wire rack or EAT them hot.
Tried this recipe?Let us know how it was!

Personalize a Special Day with Betty Crocker

12

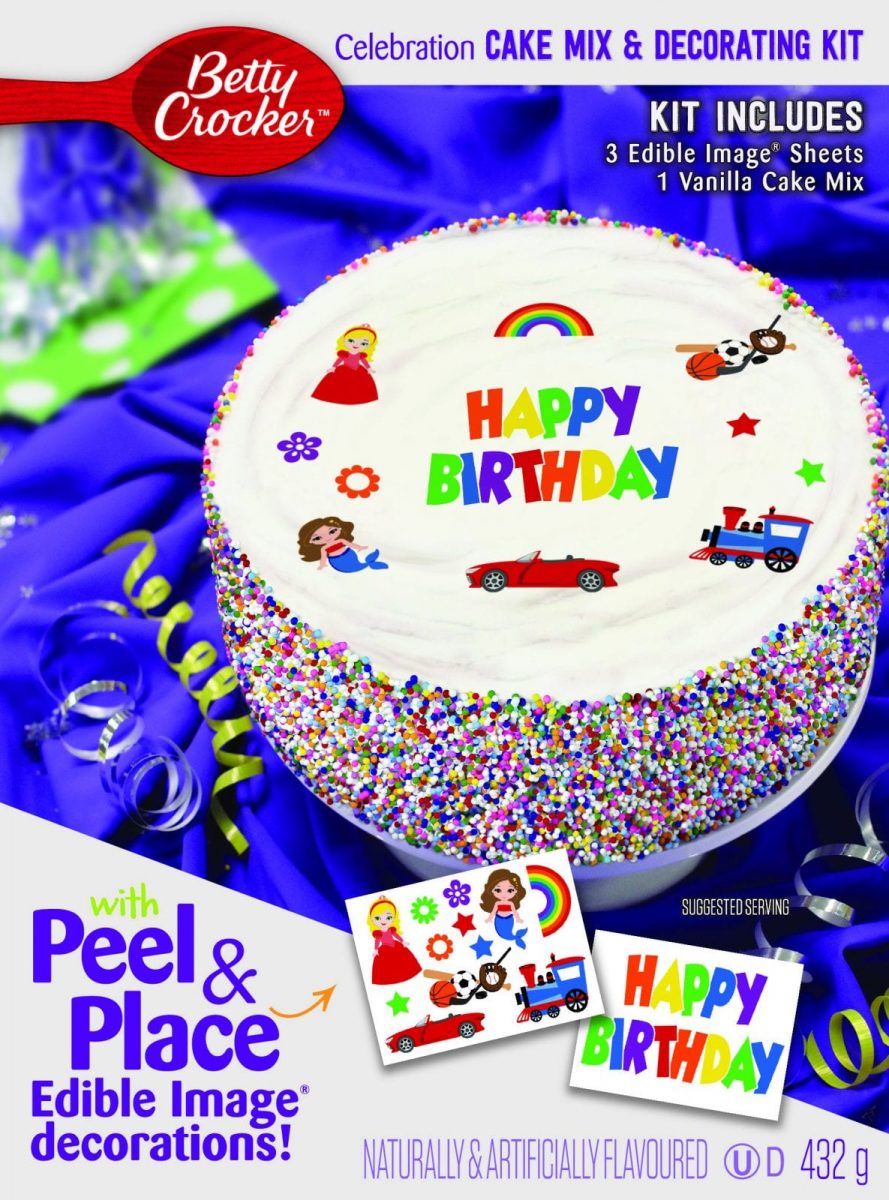
Celebrations are always a fun occasion to put together, but what is the one thing that everyone remembers about a special day? The food! Kids big and small are able to pin point how great a party was by the fun and festive the food served at the event was. I am not a great a home baker. There are so many things I cannot execute the way I map it out in my head. Luckily, Betty Crocker wants to lend a hand to home bakers to help personalize a special occasion. They have introduced edible image baking kits this summer for both cookie and cake decorating! These kits are a new product innovation for Betty Crocker and are exclusively available in Canada.

Personalize a Special Day with Betty Crocker!
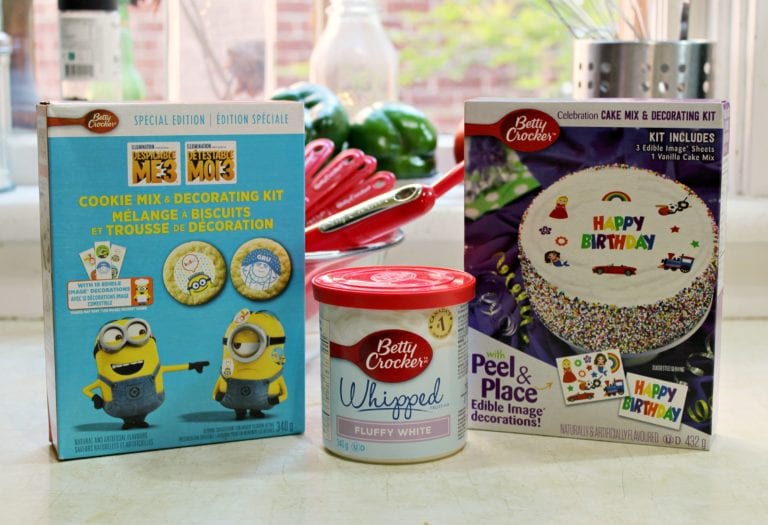
Betty Crocker mixes & decorating kits and frosting on frosting on a counter.

What is great about both of these kits is that they are easy to use. All you have to do is peel edible images off of the sheet they are attached to, then add them to your cakes and cookies! Want to see how easy it is for kids to get in on the baking and decorating action with Betty Crocker? Take a look at Betty Crocker’s “Celebration Cake 3 Ways” Video to find out!

Youtube video

Celebration Cake Mix & Decorating Art

My daughter loves being a little baker. Whether it is savoury or sweet, she likes to pitch in to put her mark on any treat we make. My little girl was so excited to find out she was going to help me make these delectable desserts. She could not wait to get started.

The Celebration Cake Mix and Decorating Kit allows for homemade cakes to have that unique touch with a variety of fun, edible image decorations. Each kit comes with vanilla cake mix and three sheets of designs for home bakers to choose from to make their special creations. Some of the edible designs included in this kit are:

  • Mermaids
  • Stars
  • Rainbows
  • Cars; and
  • Trains.
Personalize a Special Day with Betty Crocker!
Photo Credit of bettycrocker.com; Cover of Celebration Cake Mix & Decorating Art

My daughter had fun adding the ingredients into our bowl to make our cake. It only took a few minutes to go from simple ingredients to having our cake batter in the pan ready to bake.

Personalize a Special Day with Betty Crocker!
Cake mix being added to a bowl.
Personalize a Special Day with Betty Crocker!
Cake ingredients being blended in a bowl.
Personalize a Special Day with Betty Crocker!
Cake batter in a cake pan.

Once both layers were out of the oven and cooled, we were ready to put our cake together. To help gussy up our sweet treat, we were given a container of Betty Crocker™ Whipped Fluffy White Frosting.

Personalize a Special Day with Betty Crocker!
Container of whipped frosting with a cake on a counter.

I was really surprised that this frosting was so light and whipped for being in a container. I was tempted to whip out a spoon and devour all of it on my own.

Personalize a Special Day with Betty Crocker!
Open container of whipped frosting.

It took no time at all for us to frost both layers of our cake. It went on so easily. I was worried that I would not have enough to cover our treat. This crisis was averted as there was more than enough to get the job done.

Personalize a Special Day with Betty Crocker!
Frosting being added to the top of a cake.

My kids are also HUGE cookie gobblers! They enjoy helping out in the kitchen to help us whenever we bake a batch of cookies. Betty Crocker also sent us their Special Edition Cookie Mix and Decorating Kit for my kids to try so they can create their own delightful treats to add to a special occasion. This kit include Despicable Me 3 themed edible image decorations and cookie mix. These edible images can help kids be a part of the baking and decorating processes with parents for a fun kitchen activity anytime.

Personalize a Special Day with Betty Crocker!
Photo Credit of bettycrocker.com; Cover of Special Edition Despicable Me 3 Cookie Mix & Decorating Kit

This kit made my daughter feel as though she was a seasoned baker. It was great that there were only four ingredients needed to mix these cookies together.

Personalize a Special Day with Betty Crocker!
Ingredients for cookie mix on a counter.

I also was pleased to see that it only took a few instructions to go from box to cookie sheet.

Personalize a Special Day with Betty Crocker!
Girl mixing cookie mix with a whisk.
Personalize a Special Day with Betty Crocker!
Cookie dough balls being smashed by scraper on a cookie sheet.

My little took the lead when adding the edible images. It was an easy task to peel the images off of the sheets and place them onto each smashed cookie dough ball.

Personalize a Special Day with Betty Crocker!
Adding edible image to smashed cookie dough ball.
Personalize a Special Day with Betty Crocker!
Edible images on smashed cookie dough balls on a cookie sheet.

After removing them from the cookie sheet, we were so pleased with the end result. Each of the kids were divvying up which cookies were going to be for them to eat.

Personalize a Special Day with Betty Crocker!
Decorated cookie on a cooling rack on a spatula.

To celebrate making these yummy desserts, we decided to throw a small tasting party.

Personalize a Special Day with Betty Crocker!
Decorated cake and cookies on a party table.

Once our dining table was set up, the kids excitedly put on their party hats and gobbled up these treats. My daughter was so happy to try the cake she helped to decorate that she forgot about using utensils to enjoy it.

Personalize a Special Day with Betty Crocker!
Girl enjoying cake wearing a pink party hat.

The treats we made using the Celebration Cake Mix and Decorating Kit and the Special Edition Cookie Mix and Decorating Kit were a gigantic hit with our family.

Personalize a Special Day with Betty Crocker!
Decorated cake on party table.
Personalize a Special Day with Betty Crocker!
Decorated cookies on a plate on a party table.

It took baking and decorating our treats to a new level of fun. We can’t wait to for the next special occasion to happen in order to use these kits. It will come in handy to personalize that day for our family!

Personalize a Special Day with Betty Crocker!

Curious about other fun ways to give a special day a unique touch with products from Betty Crocker? You can visit them on their website. You can also connect with them on their Facebook, Twitter, Instagram, Pinterest, and YouTube channels!

Disclaimer: I was generously compensated by Betty Crocker to share this post with you! The views I shared are my own.

Save

Save

How to Prevent Tearing During Childbirth

10

One of the things I hear the most from women when we talk about labor, is the fear of tearing during childbirth. It is the not knowing how bad you will tear, the pain you might feel from it. I truly understand that fear. Almost 90% of all women will experience vaginal tearing during childbirth. These tips below on How to Prevent Tearing During Childbirth will help, but it’s not a guarantee. 

How to Prevent Tearing During Childbirth
Pregnant couple with their hands forming a heart on the woman’s belly

Disclaimer: Let me just say tearing during childbirth, is not bad. It is normal and like I said above happens to so many of us. These tips can just help you to possibly prevent it. 

Tips on How to Prevent Tearing During Childbirth

1. Finding the right doctor

You need to make sure to find the right doctor for you and your baby. Some doctors are not open to certain things so make sure you have an idea of the way you want to have your labor and birth and see if your doctor is comfortable with it. Make sure to ask your care provider questions, to get a feel for how they take care of patience. Ask their opinion on natural tears versus episiotomies. You might decide to try a midwife, they have a lower rate for patience tearing during labor. You just have to do what feels right for you and your child at the end of the day.

2. Kegels

Make sure that during your pregnancy your are doing your kegels. You need your pelvic floor to be as strong as it can be, and kegels are a pelvic floor exercise. It strengthens those muscles so it gives you the strength to push your baby out. My doctor told me when I was pregnant it can help the pushing process go faster, because the stronger you are the quicker it can go. 

3. Perineal Massage

If you have never heard of this, that is okay. Perineal massage is “massaging” the vulva/vagina/perineum during pregnancy to pre-stretch mom’s perineum before birth. It is a good idea to do a perineal massage, it has been known to help reduce tearing in mothers in their first vaginal birth. This stretching and opening your pelvic floor and helps reduce pelvic trauma during labor. Your nurse or doctor can teach you how to do this if you want to do this during your pregnancy. Your health care provider can also do the massage during the pushing stages of labor. Just make sure to talk to your doctor ahead of time to ensure they will do this for you. 

How to Prevent Tearing During Childbirth
Woman comforting a pregnant woman on her knees and elbows facing a beige couch ~ Photo credit: greendoula via Foter.com / CC BY-ND

4. Hire a Doula

Having a doula for labor is something you see so much these days. A doula can really help relieve stress and tension during labor. They are very knowledgeable and will help teach you different positions to be in during labor and methods to keep you relaxed. Their job is to help you have this baby the easiest and calmest way you can. 

5. Pushing Positions

Finding a good pushing position during labor is a great way to help from tearing. Now you need to ensure your doctor is okay with trying different positions. Some hospitals require you to just lay on your back and push.

How to Prevent Tearing During Childbirth

Here are some great positions:

  • Being on all fours, on hands and knees. 
  • Lying on your side. 
  • Squatting or kneeling. just don’t have your knees to far apart if you are in this position. That can cause you to tear easier. If you have a doula they can teach you the right form. 

6. Warm Compress During Labor

If your doctor allows, they can apply a warm cloth when your baby is crowning. The warmth of the compress is said to increase blood flow to the area, which can help prevent tearing. It is also said the pressure can feel very relieving for the mom. 

free2b Snack Breaks Chocolate Mousse Recipe

68

BRAND NEW TO CANADA, free2b Snack Breaks and Sun Cups are stress-free, no-brainer treats everyone can enjoy. Made in small batches without the top 10 food allergens and fortified by superfoods like sunflower seeds and blueberries, free2b are made WITHOUT peanuts, tree nuts, dairy, soy, wheat, and are verifiably vegan, Kosher, and non-GMO certified!

Did you know 2.5 million Canadians self-report having at least one food allergy?* And that 300,000 Canadian children under 18 live with food allergies? (*Overall Prevalence of Self-reported Food Allergy in Canada, 2015) Canadians commonly suffer from food allergies and the dangers associated with them are so severe that many schools across Canada outright ban allergy-inducing foods like peanut butter from school lunches and snacks.

Thankfully, there’s good news! Back to school season has arrived, and NEW free2b chocolate treats are free of Canada’s top 10 food allergens. This new tasty treat is here to take the stress off parents and provide chocolate lovers (of all ages) with a delectable answer to allergy and dietary restrictions. Newly launched in Canada and distributed nationally by Layda’s Yummies Inc., free2b is high-quality, small batch chocolate and confectionary that answers the call for allergy sufferers and dietary conscious consumers from coast to coast.

free2b Flavours

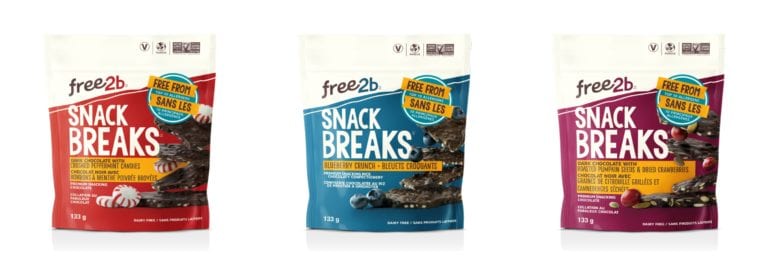
An allergen-safe alternative to traditional chocolate bark, free2b Snack Breaks come in three delicious flavours: 

  • Dark Chocolate with Dried Cranberries and Pumpkin Seeds;
  • Dark Chocolate with Organic Crushed Peppermint; and
  • Rice Chocolate with Dried Blueberries and Rice Crisps.

They are snackable, shareable, and packed with superfoods like pumpkin seeds and blueberries! Perfect on their own for a mid-day lunchbox treat, guiltless dessert, fail-safe gift, and inclusion in your favourite recipes. This premium confectionery is top 10 allergen free, vegan, and over-the-top-tasty. 

Snack Breaks retail from $7.99 – $9.99 in-store at Shoppers Drug Mart and Pharmaprix locations nation-wide now.

They are even more delicious into a recipe such as in a Chocolate Mousse!

free2b Snack Breaks Care Pack Giveaway
Chocolate mousse in a glass ~ Photo credit: free2bfoods.com/blog

Chocolate mousse

No ratings yet

Ingredients
  

  • 2 oz. free2B Blueberry Crunch Snack Breaks broken up
  • 2 tablespoons cocoa powder
  • 2 teaspoons instant espresso powder
  • 2 teaspoons ground cinnamon
  • ¼ cup margarine look for a vegan, dairy-free, or soy-free version
  • 2/3 cup chickpea flour
  • ½ cup tapioca starch
  • 1/8 teaspoon salt
  • 1 ½ cup rice milk
  • 2/3 cup organic cane sugar
  • 3 teaspoons vanilla extract
  • free2b Blueberry Crunch Snack Breaks for garnish

Instructions
 

  • In a small bowl, combine the crumbled Blueberry Crunch Snack Breaks, cocoa powder, espresso powder and cinnamon. Set aside.
  • In a medium saucepan, melt the margarine over medium heat.
  • Sift together the chickpea flour and tapioca starch. Whisking constantly, gradually add the flour mixture to the saucepan.
  • Cook for 1-2 minutes.
  • Add the sugar to the pan and whisk to combine.
  • Whisking constantly, gradually add the rice milk and vanilla extract. Cook over medium heat until thickened and just bubbly.
  • Remove the saucepan from the heat. Immediately whisk the chocolate mixture into the saucepan until melted and smooth.
  • Pour the mousse into small bowls or glasses and allow them to cool. Chill for 2 hours before serving.
  • Garnish with Blueberry Crunch Snack Breaks
Tried this recipe?Let us know how it was!

free2b crafts high quality, small batch chocolate and was founded in 2008 by chocolatier David Lurie, who began by making Sun Cups, nut-free chocolate cups. free2b has expanded into making other dietary law and allergen-conscious chocolate bars and barks. Their product range includes Snack Breaks and a variety of other treats.

You can found out more about free2b by connecting with them on their Facebook pageTwitter page, Pinterest page, and Instagram page!

4 Tips to Create Your Family Budget

15

Are your finances getting a little out of hand? Are you having a hard time keeping up with when the bills are due? It’s time to sit down and create a family budget. Before you get started, gather all of your bills together. You’ll need to record all of your expenses along with all income to create a budget plan that works for your family. Include all expenses even if it’s something you pay annually or semi-annually.

4 Tips to Create Your Family Budget
Photo credit: Got Credit via Foter.com / CC BY

How To Create Your Family Budget

Once you have collected the necessary paperwork, here are four tips to help you create a family budget:

1. Determine your goals. Do you want to pay off your debts, your mortgage early or do you need to do home repairs? Do you need to start saving for retirement? Set a financial goal so you have something to work toward and it will help you view your finances from a different perspective.

2. Determine where your money goes each payday. For example, next to each payday record which bills to pay and how much of your income it will take. Include gas, groceries, savings and any other weekly expense you have even if it’s a few dollars for your morning cup of coffee.

3. Separate your priorities from luxuries. Start with your home and work down to the things you’re paying for that you don’t really need. Then use this information to look for ways to save money.

4. Keep it simple. If your family budget plan is too complicated, you’ll get frustrated and give up before you have a chance to make a difference. Therefore, choose a method of recording your budget plan that is simple and easy to use, even if it’s pen and paper.

Once you have the family budget in place, stick to your plan. The more you deviate from it, the longer it will take you to reach your financial goals. Make sure you and your partner are on the same page and it will be easier for you to stick to the budget and save for your future.

25 Delicious Chocolate Recipes

25

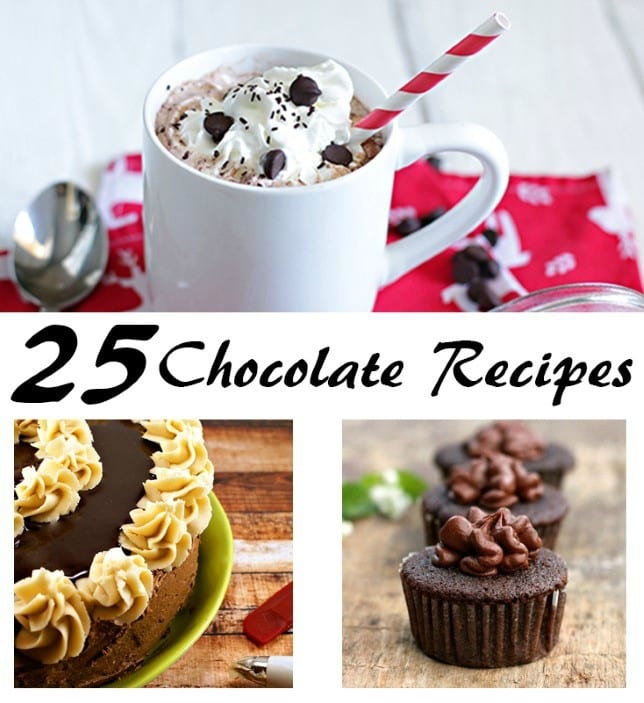
There’s just something about chocolate that makes it so easy to fall in love with it, especially when it is incorporated into such a variety of desserts and drinks. Just thinking about them already has my mouth watering… Hot chocolate, chocolate dipped strawberries, chocolate chip cookies…and the list could carry on! The possibilities to incorporate chocolate into dessert recipes are endless, so why not start with 25 Delicious Chocolate Recipes? One will be sure to pique your interest (or your kiddos’)! Consider trying one of these delightful and undoubtedly delicious chocolate recipes this summer! (And falling even deeper in love with chocolate afterwards!)

25 Delicious Chocolate Recipes

Check out our chocolate recipes too!

  1. French Chocolate Macarons with Toffee
  2. The Best Chocolate Eggnog Cupcakes
  3. Crazy Chocolate Chip Cookie Monster
  4. Smooth Chocolate Frosting
  5. Rolo Stuffed Chocolate Cookies
  6. Oreo Knibbler Cookies Recipe
  7. Chocolate Peppermint Truffles
  8. Holiday Double Chocolate Cookies
  9. Be Merry with the Peppermint Hot Cocoa Chocolate Cupcakes
  10. Divine Chocolate Peanut Butter Eggs
  11. Strawberry White Chocolate Scones

Back-to-School Bento Box Lunch Ideas with Lunch Box Jokes Printable

17


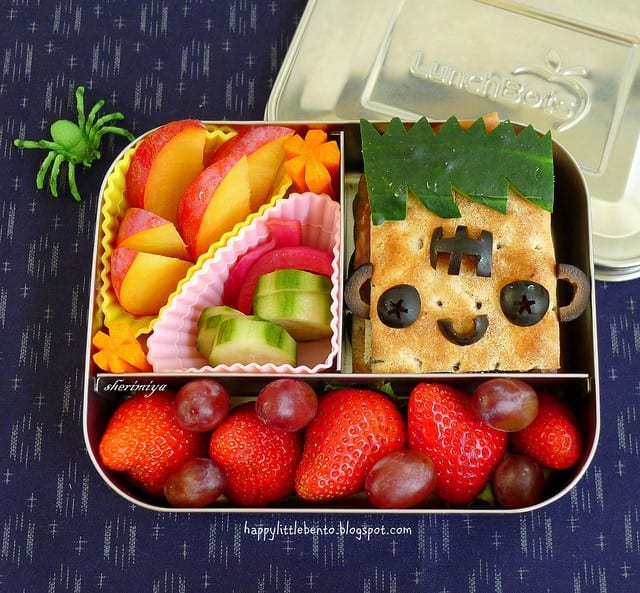
Are you searching for new ways to make your child’s school lunches healthier and fun for this upcoming school year? Look no further! These Back-to-School Bento Box Lunches Ideas are bound to have your kids only asking to have one every day once they’ve had a taste of these during lunchtime! But what is a Bento Box? The word Bento (弁当 bentō) signifies “convenient”, as it is indeed a convenient single portion on-the-go style, or even a home meal, originating from traditional Japanese cuisine.

Bento Boxes usually consist of meat and/or fish, regular white rice, and pickled or cooked vegetables packed into any box-sized container. They can come in a variety of different shapes and sizes, and can nowadays even be found as a ready-to-go meal in some supermarkets or convenience stores.

Back-to-School Bento Box Lunch Ideas
Bento Box Lunch Ideas

What makes Bento Boxes so special, however, is that Japanese homemakers can often be found dedicating precious time and energy to carefully prepare and ornately decorate the boxes to make the meals much more special for their spouse, children, or even themselves. Meals can even be intricately designed to look like animals, people, buildings, or even monuments! Honestly, what kid wouldn’t get excited at the mere thought of eating a sandwich shaped like a fish or a cute bear at school? 
Whilst Bento Boxes can be time-consuming to prepare, the effort will have been well worth it once your child comes home from school well-fed with an empty lunch box! Spruce up your child’s lunches in a healthy way this school year with the use of Bento Boxes!

Back-to-School Bento Box Lunch Ideas
Bento Box Lunch Ideas

Back-to-School Bento Box Ideas


What type of food do you like to put in your child’s bento lunch box?

Comment below!

Lunch Box Jokes Printables

Put a smile on your child’s face by placing a joke in his/her lunch box! To print the PDF, simply click on the photo below!

Lunch Box Jokes Printables

How to Keep Your Pet in Good Health

17

An important part of family life is keeping everybody healthy – and the food we eat is a big part of that. Today’s definition of family has expanded to include our beloved pets. In addition to being a trusted companion, having a dog or cat is a great way to teach children about responsibility and empathy.

Tip To Keep Your Pet Healthy

As we learn about ingredients such as GMOs, artificial colours and added growth hormones, we know it’s important to consider options. When determining a healthy diet and lifestyle for our furry companions, here are some things you can consider.

How to Keep Your Pet in Good Health
Dogs playing with toys (as seen in the picture) is one way to keep them active and healthy.

The Quality of Ingredients in Pet Food Matters

When selecting a pet food, it’s best to look on the food label for whole food ingredients, like fresh meats, fruits, vegetables and grains. These provide the essential nutrients your dog or cat requires. These ingredients also contain other important elements like antioxidants and plant-based nutrients.

Omega 3 fatty acids are also important, especially to promote joint health and reduce inflammation. Some examples of ingredients that contain omega 3 fatty acids are salmon oil, flax oil, and canola oil. 

Make Smart Protein Choices

If your pet doesn’t have food sensitivities, you have a lot of options.

When checking the label, look for a species-specific meat or meal as the first ingredient – something like de-boned turkey, salmon meal or de-boned salmon. The protein in these ingredients have a high biological value, which means the protein contains a high percentage of essential amino acids.

If your pet has food sensitivities, choosing their food may be a little trickier. In these cases, look for a protein source your pet has not eaten before such as duck or venison. Additionally, a diet that has a limited number of ingredients as well as all the nutritional requirements that your pet needs will lessen the chance of an adverse food reaction. In these situations, your vet is a great resource to work with to determine the best diet for your pet.

How to Keep Your Pet in Good Health
A cat enjoying a bowl of healthy and balanced food made from whole food ingredients.

Active Pets are Healthy Pets

It’s important to keep your dog or cat at a healthy weight. This reduces their risk of kidney problems and type 2 diabetes – all of which are on the rise in pets.

Just like for the rest of our family, keeping a healthy weight involves looking at the calories. If your dog is overweight, you need to explore ways to cut down on calories. One option could be leaving their bowl down for limited periods of time, instead of leaving it out all day. If your dog still seems to be hungry, you can also find food options with fewer calories per serving. If you go this route, it’s important to look at the nutritional information to make sure you pick the right one.

In addition to managing weight, exercise promotes healthy muscle mass, which takes pressure off joints. This has been shown to reduce the likelihood your pet will develop joint problems as they age.

How to Keep Your Pet in Good Health
Healthy lifestyle choices will keep our pets happy and loving life (as seen in the dog and cat pictures above)

Your Healthy Lifestyle Choices Can Make a Difference

We live in a world where we are surrounded by choice in terms of lifestyle and diet – our pets are deeply impacted by these choices too. The quality of food and an active lifestyle will benefit your family – even the four-legged furry member.  Now more than ever, doing research and being informed about ingredients in their food and their nutritional requirements, as well as maintaining your pet’s healthy weight are important to making the right choices. 

How to Keep Your Pet in Good Health
Dr. Jennifer Adolphe

This article has been brought to you by Dr. Jennifer Adolphe. Dr. Jennifer Adolphe graduated with her PhD in companion animal nutrition from the Western College of Veterinary Medicine at the University of Saskatchewan. She has a Master of Science degree in human nutrition and is a registered dietitian. She is currently the Senior Nutritionist at Petcurean Pet Nutrition, a Canadian, family-owned company committed to offering superior quality pet foods.

Easy School Breakfast Ideas

19

Breakfast is the most important meal of the day, but many students go to school every day without having breakfast. As a result, these kids don’t have the energy needed to stay focused throughout the day. They’re tired and sometimes, irritable and cranky. However, getting kids, especially teens to eat breakfast can be a challenge with the limited time you have to work with in the mornings. So, how do you solve this problem? Here are easy school breakfast ideas to make your morning easier!

Back to School Breakfast Solutions - The Most Important Meal of the Day

Back to School Breakfasts

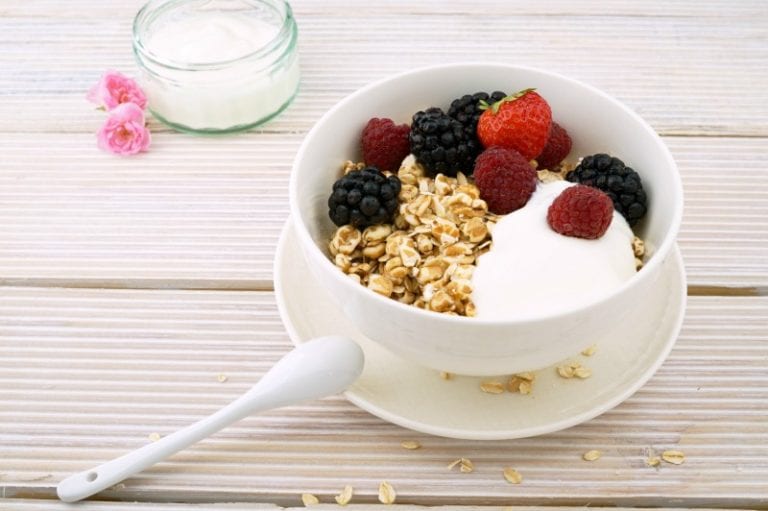
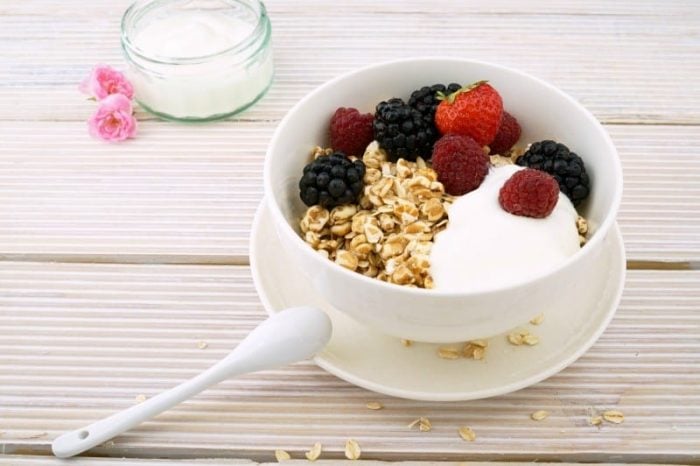
1. Serve oatmeal or whole grain cereal for a healthy breakfast for back to school. Add a banana or strawberries to the cereal to make it more appetizing and healthy.

2. Both fresh and dried fruits make a wonderful breakfast option that is healthy and delicious.

3. For teens that simply don’t have time to sit down and even eat a bowl of cereal, granola bars or breakfast bars are a healthy quick back to school breakfast.

4. For the picky eater, a fun breakfast presentation is ideal. How about a sundae? A banana split sundae with cottage cheese, peanuts or almonds, and fresh fruits topped with a drizzle of maple syrup.back to school breakfast for kids

5. Protein is key. Make Peanut Butter Toast by spreading 2 tablespoons of peanut or almond butter on 2 whole wheat toasts, cook 2 eggs with kale or eggs and bean for a breakfast burrito sandwich, or use greek yogurt over a banana. These healthy breakfast ideas are full of protein.

Back to School Breakfast Solutions - The Most Important Meal of the Day

Set a good example for your kids by making sure you eat breakfast every day. They follow in your footsteps and if you don’t eat, they’ll make up excuses to not do it either.

If your mornings are too hectic to cook, sit down, and eat breakfast before heading to school, try one or more of these easy school breakfast ideas mentioned above to make sure your kids are getting a nutritious meal every morning. After all, it is the most important meal of the day.

What is your favourite breakfast recipe?

Welcome the New School Year with DK Canada Books ~ Reviews

45

Do you hear that? It is the sound of the first bell of the new school year about to ring in the next few weeks. Are your kids not enthusiastic to head back to class this year? DK Canada wants to change this feeling with their collection of books to help kids to want to learn and get back into the swing of things this September. They asked if my family would want to welcome in the new school year with DK Canada and review some titles from their huge catalogue.

DK Canada Back to School Books

Since my kids are always curious about themselves and the world around them, I chose to review these three titles:

Welcome the New School Year with DK Canada! #Review #Giveaway ~ CAN 09/25
Photo Credit: dk.com/ca; A collage of book covers The Elements Book, Super Earth Encyclopedia, and Human Body!


The Elements Book

Remember those glorious days in science class learning about the different elements found on our planet? Do you ever want to learn more about them? The Elements Book allows readers to discover the 118 chemical elements found in the periodic table through incredible images and fantastic facts.

Welcome the New School Year with DK Canada! #Review #Giveaway ~ CAN 09/25
Photo Credit: dk.com/ca; The Elements Book book cover.

My kids and I learned so much about each of the elements. Many of them I had rediscovered and became fascinated with. One of the sections I really enjoyed was the one designated to oxygen. Its importance to life on Earth is undeniable, but it amazing to learn about the numerous ways we use it.

Welcome the New School Year with DK Canada! #Review #Giveaway ~ CAN 09/25
“Black smokers” section of Super Earth Encyclopedia book on a table.

Super Earth Encyclopedia

It is hard to explore everything on Earth in order to see how miraculous it is. Super Earth Encyclopedia helps readers to experience various geographical features, structures and patterns that are a part of our planet without having to leave home.

Welcome the New School Year with DK Canada! #Review #Giveaway ~ CAN 09/25
Photo Credit: dk.com/ca; Super Earth Encyclopedia book cover.

We were not aware of the black smokers that reside on mid-ocean ridges. To know that these chimneys of dissolved minerals from ocean-floor rocks help to regulate the temperature of the Earth’s core was awesome to learn about. We also find out that the hottest water on the planet is located near the bottom of the ocean.

Welcome the New School Year with DK Canada! #Review #Giveaway ~ CAN 09/25
“Black smokers” section of Super Earth Encyclopedia book on a table.

Human Body!

Why do we blink? What is our hair made of? Why do our knees bend the way they do? These are just a few of the questions we get get peppered with by our kids about their bodies. That is why I thought it would be perfect for them to have Human Body! at home. The 3-D imagery used in this title helps readers to learn more about our bodies from the inside-out and from head to toe.

Welcome the New School Year with DK Canada! #Review #Giveaway ~ CAN 09/25
Photo Credit: dk.com/ca; Human Body! book cover.

My eldest was curious about the inner workings of her mouth. She loved the “Teeth and chewing” section of this book because she was able to see the amount of teeth a child has compared to an adult, why teeth are so important, what they are made of and the about of chewing power we have when eating.

Welcome the New School Year with DK Canada! #Review #Giveaway ~ CAN 09/25
“Teeth and Chewing” section of Human Body! book on a table.

What sets these three books apart from others books is the imagery. Whether it is an actual photo or an image, learning pops off the page. Readers can take in the information they are learning and enjoy what they have picked up.

We really enjoyed reading these three books from DK Canada to welcome the new school year. The information they learned from each title will help them get a base knowledge of what they will be learning in their studies. The details shared on each of the pages also makes learning easier and fun, so it will be retained for future reference. These books are enthralling that they will be read over and over by our family for years to come!

Welcome the New School Year with DK Canada! #Review #Giveaway ~ CAN 09/22
DK Canada Back To School 2017 

Want to find more titles to help your kids welcome the new school year?  Visit DK Canada website, and connect with them on their Facebook, Twitter, Instagram and Pinterest pages to find out!

To read more DK Canada book reviews, click HERE!

Disclaimer: I received products from DK Canada in order to write this review. The views I share are my own.

6 Surprising Health Benefits of Ginseng

23

6 Surprising Health Benefits of Ginseng

Whether you prefer Asian, American or Canadian ginseng, using it as part of your health regimen is beneficial to both your mind and body. These are just a few of the great health benefits of ginseng.


6 Surprising Health Benefits of Ginseng
Ginseng


            Helps Manage Diabetes

Ginseng has been shown to lower fasting blood sugar levels as well as after-eating levels. It helps the body to regulate the absorption of glucose, which prevents sudden increases or decreases in blood sugar. This makes ginseng consumption a factor in both preventing diabetes and keeping sudden changes to blood sugar levels from being so dangerous.

            Relieves Stress

Consuming ginseng, in one form or another, has the number of positive effects on the nervous system. It boosts metabolism and generally leads to an increase in energy levels. It also lowers the levels of stress hormones in your body. All of this combined leaves you feeling less anxious and in an overall better mood.

            Fights the Effects of Aging

Ginseng is popularly used as an antioxidant. Ingesting it can help to prevent diseases like heart disease and even certain types of cancer. Ginseng’s antioxidant properties also help it maintain a healthy brain as you get older. This, in turn, helps to prevent the onset of disorders such as Alzheimer’s and dementia.

            Curbs Hunger Cravings

Ginseng is excellent at helping you lose weight due to the fact that the combination of chemicals within ginseng suppresses feelings of hunger. Because of this, ginseng is often used as part of a weight loss treatment, either in the form of tea or powder.

6 Surprising Health Benefits of Ginseng
Woman’s hair and a scale with measuring tape


           Soothes Menstrual Cramps

Not only is ginseng an anti-inflammatory, it’s also soothing. This makes it an effective natural remedy for menstrual cramps and stomach pains. It’s stress reducing properties mean that it also helps with the mood swings that are commonly associated with menstruation.

            Promotes Healthy Hair

Ginseng is packed with carbohydrates which aid in fighting the effects of male pattern baldness. To combat the issue, simply make a ginseng paste and apply it directly to the scalp. This helps to reduce dandruff and prevent hair loss in one fell swoop.

Ginseng Photo: Photo credit: Tianyake via Foter.com / CC BY-NC-ND

The “I Waited Too Long” Best Anniversary Gift Ideas for Husbands

5


The “I Waited Too Long” Best Anniversary Gift Ideas for Husbands

OK, so you almost forgot. Take some deep breaths. Now is NOT the time to panic. You’re certainly not the only mom who’s nearly forgotten her own anniversary while she was busy dealing with life. You won’t be the last.

Fortunately for you, a great anniversary gift is still attainable. Here are some of the best, and fastest, anniversary gifts for your special someone.


Brass Frame Brown Wooden Barrel
Two hearts made of metal


For the Fun of It

When it comes to the psychology of gift giving, generosity fills a need in the giver. Giving just makes people feel good. It’s important to remember, however that the most meaningful gifts are those loved most by the recipient. So, your feelings aside, think about what your husband would truly enjoy. Here are a few suggestions.

  • Personalized Poker Cards: If he loves poker, think of how impressed he’ll be when he shows up at the game with a deck of personalized poker cards. Or, if golf is more his style, perhaps a display quality golf ball and tee set would be best. Either way, he’ll love it.
  • Personal Distillery: Give him a way to distil his favourite liquor at home with a personalized whiskey barrel. A mini-distillery is just like those professional distilleries use, but has a much smaller footprint. The petite size of the barrel speeds up the ageing process for a faster processing time. Or, if he thinks beer is better, he’ll love a home brew kit.
  • His Very Own Grooming Kit: For the husband who works and plays hard, purchase his favourite shaving items, soaps, scrubs, deodorant, foot salve and hand lotions and arrange them in an attractive gift box. It’s a gift that not only impresses, but it’s useful as well. 

Make It Meaningful — To Him

Great gifts are gifts that make the recipient happy. If you want to have a romantic anniversary getaway, that’s great. Make it a gift you give each other. But your anniversary gift to him should be a gift that’s his alone.

What does your husband like to do? Has he expressed interest in learning or improving his knowledge about something, anything from basic engine mechanics to cooking? How about enrolling him in a class so he can learn more? Does he love to fish? He’d probably love a fishing trip. Or fishing gear.

Or maybe your husband is the traditional type. If that’s the case, consider getting a gift that matches your anniversary year theme. The modern theme for 17th anniversaries, for example, is furniture. So you could get him a new ergonomic chair for his desk. Need some more ideas? Check out this list of anniversary gifts by year.  


The "I Waited Too Long" Best Anniversary Gift Ideas for Husbands
Brass Frame Brown Wooden Barrel and two hearts made of metal


Still Stuck? How About a New Take on Something Old?

If your husband has everything, maybe it’s time to think about what he already has. What has he had for years but uses every day? Is it a watch? He loves that watch. He always wears it. But it’s a good bet the old watch doesn’t have a lot of the features a new watch would.

How about his wallet? Is it the same one he’s had since your wedding? Maybe it’s time for a wallet upgrade. It’s amazing how new old standbys can be.

Go for the Play

If you’re still stuck, how about something playful and fun? There are lots of “toys” for men that give hardworking husbands a little playtime. Drones make great gifts. Radio controlled cars are also fun and many places have community tracks for hobbyists to compete against one another. Playful gifts like these can also lead to family activities. Everybody wins!

Do you have a suggestion for a wedding anniversary gift to your hubby?


16 Spiderman Themed Ideas

6

These Spiderman Themed Ideas are inspiring and out of the box creative. I was unaware just how many ideas you could turn into a Spiderman Theme. The ideas were unreal and totally genius. A few I even thought to myself, ” Why didn’t I think of this?”.  

Spiderman Themed Ideas

Do you have a little one who eats, sleeps and breathes all thing Spiderman?  If they or even you are a lover of the comics or the movie series you can not pass up the opportunity to go beyond the normal “Mom” duties for Spiderman party ideas. You are in for a real spidey treat here.

Spiderman Themed Party Ideas

You can turn any old party into a Marvel heroic superhero adventure and you will be the talk of the town for weeks to come. Not kidding! Your child’s birthday party will be packed full of webs, goodie bags, pinatas, crafts and so much more. These are sure to get everyone’s spidey senses tingling.

Whether you take on just one craft idea or go all out and turn your house into a Spiderman Haven, is your choice. We have simply made it easier for you to make your child’s or even your birthday wishes come true. How, did you ask? Well… Looks at our Spiderman themed party ideas below!

16 Spiderman Themed Ideas

Spiderman Themed Ideas

We decided to scour the web for the best Spiderman Themed Ideas out there. Below we list out the 16 we felt were top notch. Don’t forget the napkins, plates, tablecloth for easy cleanup and paper cups!

  1. DIY Spiderman Party Web Blaster
  2. DIY Pinata
  3. Spiderweb Cupcakes
  4. Spiderman Candy Apples
  5. Spiderman Goodie Bags
  6. Superhero Cupcake Toppers
  7. Split Pin Spiderman Craft
  8. Spiderman Cupcake Toppers
  9. Superhero Hoodies
  10. Spiderman Pumpkin
  11. Amazing Spiderman Punch
  12. Superhero Inspired Coloring Pages
  13. Spiderweb Cupcakes
  14. Spiderman Cake In a Jar
  15. Spiderman Loom Band
  16. Spider-Man Candy Popcorn

Did you host a Spiderman Themed event? Share your photos with us in the comments.

4 Back to School Shopping Traditions You Can Start Now

7

Back to school is an emotional time for many parents and kids. You’ve fallen into a comfortable routine for the summer but now, everything from what you eat for breakfast to when you go to bed will change to accommodate the new school schedule. However, you can turn this hectic time into a positive experience with 4 back to school shopping traditions you can start now.

4 Back to School Shopping Traditions You Can Start Now
Painting and Drawing Tools Set

Here are a few good ideas to help you started on Back to School Shopping Traditions:

  1. When shopping for clothing and other school supplies, make it a tradition to have lunch at your kid’s favourite restaurant. The kids will love it and it’ll help get them excited about going back to school.
  2. Look for discounts and sales throughout the spring and summer to pick up a few specialty items like designer clothing or shoes that might otherwise be hard to fit into the budget.
  3. Clean out the closets and drawers before going shopping for new back to school outfits and recycle the clothes you can no longer wear. This way, you’re helping others and making room in your closets for new items.
  4. Buy each child something special at the beginning of the school year. Allow your kids to decide what to buy (within reason, of course) and it gives them something exciting to look forward to each year.
4 Back to School Shopping Traditions You Can Start Now
Painting and Drawing Tools Set

Starting a back to school shopping tradition is a great way to help get kids excited about school. It gives them something to look forward to and makes the transition from summer vacation to going to school a little bit easier. Making them part of the shopping process also helps them see the value of money and be aware of your budget spending.


Do you have any back to school shopping traditions with your kids?

Please share them in the comment below!

Cedar Planked Grilled Turkey Breast Roast with Charred Tomato Salsa Recipe

127

Yes, the dog days of summer may be over soon, but that does not mean that the good times have to end! Barbecue season is in full swing. This is the perfect time to fire up the grill to prep some scrumptious and healthy meals on the grill. You can make the Cedar Planked Grilled Turkey Breast Roast with Charred Tomato Salsa Recipe!

Those of us living above the 49th parallel will carry on cooking outdoors well after the sunny days of summer have passed us. Some of the regular favourites will highlight many meals on Canadian grills, but would you like to shake things up where flavour is concerned? Canadian Turkey wants to help Canucks to get into the swing of the season. They shared some easy meal solutions with us to get you out of the kitchen and enjoying what is left of the gorgeous weather in our fair country.

Can you count the amount of times you have either been at the helm of the grill or have been the recipient of a meal that has been created on the grill? Canadians love barbecue season. Whether it is seared, braised, roasted or smoked, turkey is a fabulous fowl to serve to family and friends.

Turkey on the grill? Are you serious?

YES! Turkey is the perfect protein to prepare on the grill. This bird makes meal planning, prepping and cooking your meal simpler and quicker. Marinating turkey earlier in the day makes prep time shorter. This gives the cut of bird more flavour and is ready to go right on the grill when you are ready. Did you know you are able to choose turkey cuts that cook in a flash while you watch over them, or, with a watchful eye, cook larger cuts low and slow. With a few choice veggies to cook alongside your turkey, you can prepare your whole meal at the same time on the grill. Not only does it make cooking your meal easier, it makes your post-meal cleanup super quick since there are less pots and pans used.

Cedar Planked Grilled Turkey Breast Roast with Charred Tomato Salsa Recipe
Photo Credit: Canadian Turkey; Cedar Plank Grilled Turkey Breast Roast with cherry tomatoes and grill utensils on a table.

Isn’t Canadian turkey only served on special occasions? 

No way! Canadian turkey is a fabulous choice for any time of the year, especially when barbecuing. It is great to cook for a family or a large group when entertaining in your backyard. Turkey is also a fantastic choice to make for weekend get-togethers, neighbourhood gatherings, picnics, family celebrations, outdoor sporting activities, parties during long weekends, or to pack for kids to put into their lunches and snacks for day camps. A whole bird makes it easy to feed a gaggle of people economically, and are fabulous to use as leftovers for another meal. Canadian turkey should be a constant on your table all summer long!

How hard is it to add flavour to Canadian turkey?

It is not hard at all! Need a bit of help figuring out how to do it? Take a look at these tips to help get the most flavour out of some of the more popular turkey grilling recipes:

  1. Use dry and wet rubs to season your turkey cuts. Turkey loves a wide variety of herbs and spices, so feel free to experiment with your favourite flavours to enhance taste and texture.
  2. Flip it! Use the flip-often method when cooking over direct heat to avoid burn spots and achieve even browning and crisping.
  3. Leave it alone! When cooking over indirect heat, leave your turkey cuts alone without turning or flipping very often to allow for even cooking and browning.
  4. Know when your meat is done! Use a meat thermometer to check doneness and avoid overcooking.
  5. Cook your entire meal on the BBQ – appetizers, side dishes, vegetables and even desserts can be cooked over the grill. Visit canadianturkey.ca to explore all kinds of amazing grilled turkey recipes.

Wait! You need a recipe to start your grilling adventures this summer?

Don’t worry! Canadian Turkey has you covered! They shared this Cedar Planked Grilled Turkey Breast Roast with Charred Tomato Salsa recipe to inspire you to get grilling this summer!

Cedar Planked Grilled Turkey Breast Roast with Charred Tomato Salsa Recipe
Photo Credit: Canadian Turkey; Cedar Plank Grilled Turkey Breast Roast with cherry tomatoes on a plate on a table.

Cedar Planked Grilled Turkey Breast Roast with Charred Tomato Salsa Recipe

It is one of the many recipes they have available for download in their Summer Grilling Guide on their site. Take a look at it here!

Cedar Planked Grilled Turkey Breast Roast with Charred Tomato Salsa Recipe

Cedar Plank Grilled Turkey Breast Roast with Charred Tomato Salsa

No ratings yet
Servings 4

Ingredients
  

  • 3 lb Canadian turkey breast roast boneless and skin-on
  • 2 tsp salt
  • ¾ inch thick cedar plank soaked at least 6 hrs to overnight

Marinade

  • 1 cup white wine or beer
  • ½ cup olive oil
  • 6 cloves crushed garlic
  • 4 sprigs of sage

Salsa

  • 1 pint cherry tomatoes
  • 1 tbsp fresh thyme
  • 1 tbsp apple cider vinegar
  • 1 tbsp olive oil
  • Salt and pepper to taste

Instructions
 

  • Combine marinade ingredients in a medium-sized deep glass bowl or Ziploc bag. Marinate the turkey breast roast for a minimum of 2 hrs, turning at least once every hour to coat.
  • Wipe the roast of any excess marinade. Season with salt.
  • Place roast on cedar plank.
  • Heat BBQ to medium. Cook the roast over indirect heat (turn one burner off and place plank over this burner. Leave the other burners on).
  • Cook for 50 mins – 1 ½ hrs until meat is cooked through and registers 165°F (74°C) on a meat thermometer inserted in the thickest part of the meat. (Heat setting and cook time will depend on the power of your BBQ.)
  • Once cooked, remove the roast from the grill and let rest for 20 mins before slicing.
  • While the roast is resting, make the tomato salsa.
  • Grill tomatoes over high heat until soft and blistered, 3-6 mins. Leave the tomatoes on the vine or use a grill basket for easier handling.
  • Remove from heat and season with olive oil, thyme and vinegar. Add salt and pepper to taste. Serve with sliced roast.

Notes

Use any turkey roast leftovers to make a hearty and healthy salad for dinner or lunch the next day.
Visit canadianturkey.ca and search for ‘salad’ to access our library of inspirational recipes.
Tried this recipe?Let us know how it was!
Cedar Planked Grilled Turkey Breast Roast with Charred Tomato Salsa Recipe

9 Canadian Turkey Recipes

If you are looking to make other delicious Turkey recipes, you can try:

  1. Gather Around the Grill with Brazilian Style Grilled Turkey Breast
  2. Thanksgiving Classic Half Roast Turkey
  3. Grilling Up Flavour with Canadian Turkey Mango-Chili-Lime BBQ’d Drummettes
  4. Be Barbecue Ready with Canadian Turkey BBQ Turkey Mixed Grill Dinner
  5. One-Skillet Turkey with Mushrooms and Polenta Cakes
  6. Big-Crunch Oven-Baked Turkey Tenders
  7. Skillet Turkey Breakfast Hash
  8. Skillet Turkey Breakfast Hash
  9. Big Batch Turkey and Chard Chili Recipe

With all of these tips and recipe ideas, are you ready to grill with Canadian Turkey? You can connect with them on their Facebook, Twitter, Instagram, Pinterest, and YouTube pages!

Disclaimer: This post was generously sponsored by Canadian Turkey.

5 Healthy Meal Ideas for Back to School Lunches

19

When the kids head back to school, things can get pretty hectic. There is always so much to do and not a lot of time to take care of things. In addition to establishing a good nighttime routine and getting the kids up and out the door in time for school in the mornings, you have the challenge of packing your child a nutritious lunch. Here are five healthy meal ideas for back to school lunches you have to try!

5 Healthy Meal Ideas for Back to School Lunches
Bento lunch

You have to be careful to meet the school’s requirements for a healthy school lunch so what you send to school with your child is important. You want the food to be nutritious, but at the same time, it has to be something your child will actually eat.

5 Healthy Meal Ideas for Back to School Lunches

1. Pack finger food

Put together a variety of fruits and healthy vegetables for snacks such as baby carrots, bananas, strawberries and blueberries for your child’s lunch. These foods are healthy and they’re fun to eat so kids love them.

2. Put together your own lunchables

Fresh sliced chicken or turkey, cheese and whole wheat crackers make a great lunch that most kids, even picky eaters will love. You can also make homemade pizza for dinner and send a slice of it to school the next day.

3. Pasta and salad

Make a bow-tie pasta salad with veggies and serve with 1 cup baby greens salad with 2 tablespoons low-fat dressing. Definitely a healthy and quick lunch idea that most kids will love. 

4. Veggies and hummus

Put your child’s favourite veggies and 2 tablespoons hummus. You can also add whole wheat pita bread or crackers. Yummy and nutritious lunch!

5. Fiesta meal

Perfect for a fun lunch idea: 1 cup of bean salad, 1/2 cup of fruits, whole-grain tortilla chips with 2 tablespoons salsa, and cube shape reduced-fat cheddar cheese.

Be sure to add a water to your child’s lunch so he’ll also have something healthy to drink.

5 Healthy Meal Ideas for Back to School Lunches
Wraps and fruits


Do you have any Healthy Meal Ideas for Back to School Lunches to add to these? Comment below!

Photo on top: Photo credit: sherimiya ♥ via Foter.com / CC BY-NC

Workout in Comfort and Style this Summer with Gaiam Canada Apparel!

67

Working out has become a part of my regime to make me a better me. One of the things I realized I needed to feel good while completing my fitness routine was the right apparel. Sporting the right pieces can make getting through a routine that much easier, especially during the summer months. Gaiam Canada knows how important the right apparel can be to making a workout feel good. They have come out with a collection of summer apparel that focuses on looking and feeling good. I was asked to sport some items from this line to see if I would be comfy while looking good this season.

From all of the pieces available in this summer collection, I chose to review the Riley Yoga Graphic Tank Top in Odyssey Grey and the Nova OM Bootcut Pant with Adorned Nova Print in Odyssey Grey.

Gaiam Canada Review

Workout in Comfort and Style this Summer with Gaiam Canada! #Review #Giveaway ~ CAN 09/15
Photo Credit: Gaiam Canada; A collage of women wearing Gaiam Canada’s Riley Yoga Tank Graphic Top and Nova OM Bootcut Pant with Adorned Nova Print.

Gaiam Riley Yoga Graphic Tank Top

Find it hard to move around and not feel weighed down by moisture on your upper body? To keep arms and back cool this summer, Gaiam Canada designed the Riley Yoga Graphic Tank Top to get the job done.

Workout in Comfort and Style this Summer with Gaiam Canada! #Review #Giveaway ~ CAN 09/15
Photo Credit: Gaiam.ca; A woman wearing Gaiam Canada’s Riley Yoga Tank Graphic Top in Odyssey Grey.

 This piece has the following features:

  • A solid design
  • Lightweight fabric
  • Mesh material
  • Scoop neckline
  • Soft touch fabrication
  • Text screen print
  • A racer back with back keyhole opening.
Workout in Comfort and Style this Summer with Gaiam Canada! #Review #Giveaway ~ CAN 09/15
A collage of features of the Riley Yoga Tank Graphic Top in Odyssey Grey.

It was great to wear this top while I workout a sweat. Whether I was out for a run, at home doing a workout or yoga routine, this shirt kept me feeling cool and comfortable. The breathable mesh lining helped to ventilate my back. It felt wonderful to have air constantly on my back while moving around on my Gaiam yoga mat.

The material of this shirt was also really soft to wear. It was cozy and helped to take some of the moisture away from my skin, leaving me feeling drier once my workout was complete. The text on the back of the top helped to give me that little bit of an extra boost to step up my game on my terms.

Nova OM Bootcut Pant with Adorned Nova Print

Are you always fidgeting with your yoga pants while performing certain yoga moves? The Nova OM Bootcut Pant with Adorned Nova Print has got your back.

Workout in Comfort and Style this Summer with Gaiam Canada! #Review #Giveaway ~ CAN 09/15
Photo Credit: Gaiam.ca; The Nova OM Bootcut Pant with Adorned Nova Print in Odyssey Grey.

Here are some of the fabulous features of this pair of leggings:

  • They are completely opaque
  • Soft to the touch
  • Made out of material that dries quickly
  • A stay-put waistband that helps to make you look slimmer and helps to you covered.
Workout in Comfort and Style this Summer with Gaiam Canada! #Review #Giveaway ~ CAN 09/15
A collage pf photos showing features of the Nova OM Bootcut Pant with Adorned Nova Print in Odyssey Grey.

I fell in love with these pants as soon as I saw them. Just looking at them, I could tell that they would be comfy to wear. When I did slip them on, I knew I was right about my initial thoughts. I felt like I was wearing the softest pants EVER! At first, I worried about the length of these pants. I’m just lightly taller than the average woman, so I have issues finding pants that cover my ankles. These pants reached the ground when worn, which brought a smile to my face.

Workout in Comfort and Style this Summer with Gaiam Canada! #Review #Giveaway ~ CAN 09/08
Woman sitting on a yoga mat in a deck outside.

It was fabulous that the waistband was wide. When unraveled, it reached halfway up my ribcage. The coverage this pair of pants provided was fabulous. I did not have to worry about accidentally playing peek-a-boo with anyone. Once my yoga routine was complete I was dry and comfortable enough in them to wear them for the rest of the day. This is a fabulous piece to wear anytime!

Workout in Comfort and Style this Summer with Gaiam Canada! #Review #Giveaway ~ CAN 09/15
Woman wearing Gaiam Canada yoga apparel performing a tortoise pose on a yoga mat outside.
Workout in Comfort and Style this Summer with Gaiam Canada! #Review #Giveaway ~ CAN 09/15
Woman wearing Gaiam Canada yoga apparel performing a plank on a yoga mat outside.

In Conclusion

I really enjoy sporting the pieces I reviewed from Gaiam Canada’s summer collection. Both pieces are so comfortable that I would want to wear them to my workout or all the time. The Riley Yoga Graphic Tank Top allowed my skin to breathe while working up a sweat. The OM Bootcut Pant with the Adorned Nova Print drew sweat away from my skin and stayed in place while moving. Both pieces are also strong and durable. They did not rip or tear as I contorted myself into different positions. These pieces have become staples in my wardrobe, not only this summer, but throughout the year!

Workout in Comfort and Style this Summer with Gaiam Canada! #Review #Giveaway ~ CAN 09/15
Gaiam Canada Summer 2017 Pinterest Image

Curious to find out more about what Gaiam Canada can do to help you work out in comfort and style this summer? Visit them on their Facebook, Twitter, Instagram, YouTube, and Pinterest pages!

Disclaimer: I received products from Gaiam Canada in order to review. The views expressed are my own.