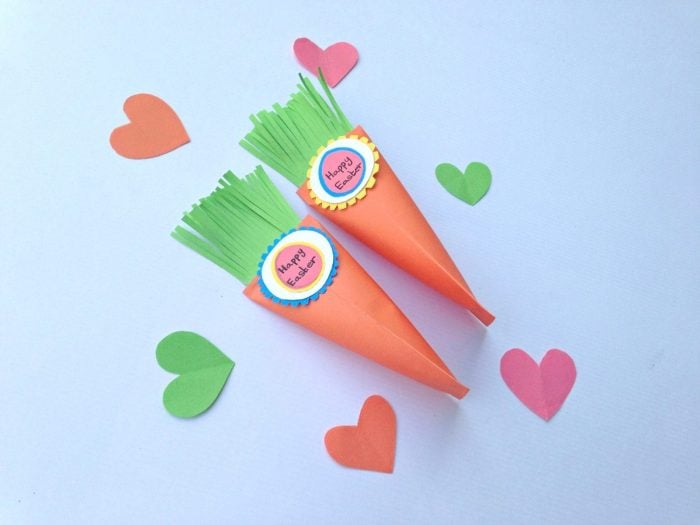
Are you looking for something cute to make for your little ones this Easter? These Easter Carrot Treat Boxes are so adorable and so easy to make. You can fill these with everything from jelly beans to M&M’s. If you’re going to a large gathering, make several so that all the kids can enjoy these. You could even make these for your kids to take to school and give to their teachers or classmates.
Supplies Needed For the Carrot Treat Box
Chances are you have everything you need for this craft on hand. All you need is craft paper, scissors, glue, a pencil, and the included template. That’s it. This craft is more about the use of the different coloured craft paper to create different shapes. In other words, it’s an extremely easy craft that is quick and fun to make. It’s not something you’ll spend a lot of money on and hate making.
Carrot Treat Box
There’s just something fun about filling this little treat box with delicious candies. What’s even more fun is watching your little ones open these and finding the surprise inside. These would make a great addition to an Easter basket as well.
Make Carrots in Different Colours
If you really want to have fun, and teach your kids something, make carrots in orange, yellow, and purple. If your kids haven’t seen yellow and purple carrots before, they’ll be in disbelief that they come in colours other than orange. You could make several of these and completely fill an Easter basket. Put something different in each box so that every time your child opens one, there will be something different inside.
This is such a fun craft not only because it’s quick and easy to make, but it’s so fun to watch people open these. If you want to bring a smile to your coworkers’ faces, consider making some for the office as well. After all, even grownups need a sweet surprise every now and then.
PAPER CRAFT IDEAS
If you are looking for more paper craft ideas for your kids, you might like these:
Print and cut out the large square pattern from the template. Fold the square paper along the 2 dash lines and unfold again. Now the paper is divided into 3 parts, 2 equal parts and 1 thin part.
Step (2)
Apply glue along the thin part.
Step (3)
Fold up the other side of the paper and join it with the thin part. Also glue any one of the open ends.
Step (4)
Now we have 1 open end. Place the treats inside the package through the open end.
Step (5)
Take a 3 inches long and 1 inch wide green craft paper and fold it into half. Cut small fringe on the open ends of the paper.
Step (6)
Place about a cm of the fringed green paper’s intact side inside the orange package and secure the open end using glue.
Step (7)
Choose some coloured craft papers to trace and cut the 4 round labels from the template.
Step (8)
Glue each labels one on the top of the other (gluing the smaller ones on the bigger ones). Write something on the label if desired and glue it with the carrot box.
Done!
Easter Carrot Treat Box
EASTER KIDS CRAFT IDEAS
If you are looking for more Easter craft ideas, you can make one of these:
I hope you enjoyed my Easter Carrot Treat Box as much as I did! If you make it, please share your photos with us on Facebook or Twitter! Also, check out all of our other crafts!
Easter Carrot Treat Box Paper Craft
Yield: 1
Prep Time: 10 minutes
Active Time: 15 minutes
Total Time: 25 minutes
Difficulty: Easy
Estimated Cost: Under $5
Are you looking for a cute craft for your kids to make this Easter? These Easter Carrot Treat Boxes are so adorable!
No Ratings
Materials
Coloured Craft Papers – orange, green and 2 or 3 more colours
Fold the square paper along the 2 dash lines and unfold again.
Print and cut out the large square pattern from the template. Fold the square paper along the 2 dash lines and unfold again. Now the paper is divided into 3 parts, 2 equal parts and 1 thin part.
STEP (2)
Apply glue along the thin part.
STEP (3)
Fold up the other side of the paper and join it with the thin part. Also glue any one of the open ends.
STEP (4)
Now we have 1 open end. Place the treats inside the package through the open end.
STEP (5)
Take a 3 inches long and 1 inch wide green craft paper and fold it into half. Cut small fringe on the open ends of the paper.
STEP (6)
Place about a cm of the fringed green paper’s intact side inside the orange package and secure the open end using glue.
STEP (7)
Choose some coloured craft papers to trace and cut the 4 round labels from the template.
STEP (8)
Glue each labels one on the top of the other (gluing the smaller ones on the bigger ones). Write something on the label if desired and glue it with the carrot box.
Releasing March 9, A Wrinkle in Time is Disney’s latest animated film and is based on the 1962 award winning book of the same name by Madeline L’Engle. This is a wonderful film for the family to go see if you love science fiction! To celebrate the release of this movie, why not bake these delicious Inspired A Wrinkle In Time Cupcakes?They are not only beautiful to look at, but so yummy. Kids are going to love the colours and decorations! And who wouldn’t love that tall pile of frosting? These are the prefect release party snack or for A Wrinkle in Time birthday party theme. And, don’t be intimidated by the swirled frosting, the technique is easier than you might think!
Disney Inspired A Wrinkle In Time Cupcakes Recipe
Speaking of pre-release, why not read the book in the days leading up to the premier and then spend the day before the premier watching the original movie from 1983? These cupcakes would make the perfect addition to the movie and help get the kids excited for the release!
If you’re interested, A Wrinkle in Time is part of the A Wrinkle in Time Quintet series. The books following A Wrinkle in Time include A Wind in the Door, A Swiftly Tilting Planet, Many Waters, and An Acceptable Time. This is a wonderful series if you’re looking for a new one for the kids to enjoy or to read together as a family.
Disney Inspired A Wrinkle In Time Cupcakes
It’s great to read books with your family and then see the Disney movie versions. Chances are your kids will love the book and movie, but they’ll definitely love these cupcakes! And, if you don’t have time to make the cakes from scratch, don’t be afraid to use a mix to save time! Your kids will be just as impressed with the colourful frosting and edible decorations. It’s more about the looks than the taste, though the taste is perfectly incredible!
Disney Inspired Wrinkle In Time Cupcakes
Makes 18 cupcakes
Disney Inspired A Wrinkle In Time Cupcakes
Ingredients
1/2 cup sugar
1/4 cup unsalted butter, softened
1 large egg, room temperature
1 tsp baking powder
1/4 plus 1/8 tsp baking soda
1 cup all-purpose flour
1/4 plus 1/8 tsp salt
1/4 cup heavy cream
1/4 cup sour cream
1-3 drops of teal food colouring
Cupcake directions
Preheat oven to 350 degrees and line cupcake pan with liners
In a standing mixer beat sugar and butter until creamed
Add egg and mix until fully incorporated
Beat in vanilla extract, salt, baking soda, baking powder
Combine the heavy cream into the wet mixture
Add in flour, a little at a time.
Add in the sour cream
Mix in food colouring
Spoon batter about 1/2 full
Bake in oven for about 22 minutes or until the centre of the cupcake comes out clean with a toothpick.
Frosting ingredients
1 cup unsalted sweet cream butter
3 cup powder sugar
5 tbsp heavy whipping cream
1 tsp vanilla
Teal food colouring
1 large piping bag fitted with a large star tip
Gold cake spray
Gold cake sprinkles
1 piece of paper
Frosting directions
Combine all ingredients, except the food colouring, into a standing mixer and mix on low speed until combined and stiff peaks form
Split the frosting into three bowls
In one bowl add 2 drops of teal food colouring and mix until you have a light teal colour
In the second bowl, add 3-5 drops of teal food coloring until you get a dark teal color
Leave the third bowl white
Place your piping bag into a large cup and fold the sides over the edge of the cup.
Take a medium spoonful of the light teal frosting and spoon it onto one side of the piping bag
Take a medium spoonful of the white frosting and spoon it next to the teal colour
Take a medium spoonful of the dark teal frosting and spoon it next to the white icing
Take the piping bag out of the cup and squeeze it together
Frost the top of the cupcake with the frosting. The frosting should come out in a swirl of colours
Using the paper, cut a circle out of the edge of the paper, big enough to cover the exposed cupcake under the frosting
Careful place the paper over the cupcake so that the frosting fits into the circle
Using the cake spray, lightly spray the white part of the frosting
Using the paper will help protect the cupcake from being sprayed gold
Once you sprayed the white lightly gold, spray the dark teal lightly with the gold spray
Add some of the gold cake sprinkles on top of the cupcake
Enjoy!
I hope you enjoyed my Disney Inspired “A Wrinkle In Time” Cupcakes Recipe! If you make it, please share with us on Facebook or Twitter! Also, check out all of our other delicious Recipes.
Is there anything better than chocolate and mint? It’s an amazing combination and one that becomes quite popular around Saint Patrick’s Day. After all, we need a green dessert to celebrate the holiday. Instead of reaching for that same green milkshake you get at your favourite fast food place, why not celebrate St. Patrick’s Day with some delicious Thin Mint Brownies!
Thin Mint Gooey Brownies Recipe
Brownies Baking Tips
These Thin Mint Brownies are sure to rock your world. The mint and chocolate ganache layers take these boxed brownies and turn them into something truly special. No one will ever guess that these brownies weren’t made from scratch. Oh, and did I mention that the ganache layer is topped with Fudge Mint Cookies? Oh, yeah. These are the brownies you’ve been dreaming out. Of course, if you want to take them over the top, you can also add mint chocolate chips to the brownie mx.
If you’re looking to save time, you can make the brownie layer ahead of time. You can make it the day before or you can make it several days in advance and pop it in the freezer. Allow the brownies to thaw and come to room temperature before adding the other layers.
How To Serve the Mint Brownies
These brownies are an absolute must for those that love chocolate and mint. Whether you’re making these for your family, a bake sale, or just to eat by yourself as a treat after a hard day, these will be a big hit. And, if you happen to top these with mint chocolate chip ice cream, a bit of hot fudge sauce, and even some whipped cream – well, I promise not to tell.
In all seriousness, these Thin Mint Brownies are the perfect addition to a child’s St. Patrick’s Day party, but are also something that parents are going to enjoy. Make sure to have plenty of milk and coffee on hand to enjoy with these delicious brownies.
Brownies Recipes
If you are looking for more brownie dessert recipe ideas, you might like these:
1/2 Package of mint creme sandwich cookies or Thin Mint cookies (think Think Mint Girl Guide Cookies)
Material Needed
1 9×13 baking dish fitted with parchment paper
1 piping bag fitted with a star tip
How To Make The Mint Brownies
Preheat oven to 350 degrees
Using a standing mixer, prepare the brownie mix according to the box
Bake in the oven for 20 minutes
While the brownies are baking, prepare the frosting
Using the standing mixer, combine all ingredients and mix on medium speed until combined and smooth
Scoop frosting into the piping bag
Once the brownies are baked, let cool to room temperature
Once the brownies are cooled, pipe the frosting around the brownies
Using a flat spatula or knife, smooth the frosting out over the brownies
Set aside while you make the chocolate ganache
Using a small sauce pan, heat up the heavy whipping cream until it start to simmers
Pour the chocolate chips into a medium bowl
Pour the heavy whipping cream over the chocolate chips and let sit for a few minutes
Using a whisk, mix until smooth
Pour ganache over the frosting
Using a ziplock bag and a rolling-pin, crush up the mint cookies into crumbles
Sprinkle the crushed cookies over the ganache
Place into the fridge for an hour or until ganache hardens
Cut into bars and enjoy!
I hope you enjoyed the Thin Mint Gooey Brownies Recipe. If you make it, make sure to share with us on Facebook or Twitter! Also, check out all of our other Recipes.
Thin Mint Gooey Brownies Recipe
Thin Mint Brownies
Lyne Proulx
These Mint Brownies are easy to make and the mint and chocolate ganache layers take these boxed brownies and turn them into something special for St. Patrick's Day.
Do you have children who love music? The Manotick Arts Camp is offering weekly music classes for typically developing children and children with developmental delays aged 2-7. All kinds of children can really benefit by this activity! Many children with autism spectrum disorder, for example, have enhanced memory music and may be very motivated to engage to this type of music class. Through games of singing, and movement, children learn to play in ensemble with one another on real instruments. This is great fun for kids and great for their overall development! Music education enhances many cognitive abilities that are necessary for success at school.
Children playing music instruments
Why It’s Important To Take Music Classes
Learning to sing and play instruments trains the auditory system and can be beneficial to children with language delays. In order to play music together, children learn to synchronize their movements to a common beat, which improves fine and gross motor movement as well as self-control. Playing music together involves teamwork and requires social engagement! Besides getting early musical training, which is so important to future musical education, children will be engaging in an activity which has so many other developmental benefits as well.
Music Classes Benefits
Developing your child’s musical ear is so beneficial for learning to play an instrument later on. Like learning a language, similar principles apply to learning music. The more exposure we have to hearing and speaking a language early on, the more natural that language becomes for us. In contrast, languages learned later in life, in general, are not spoken or understood with the same kind of ease.
Exposing your child early to listening and playing music can really develop the auditory system and give your child the fundamentals for learning to play music later on. Singing in tune, playing to a common beat and distinguishing individual notes on xylophones, bells and percussive instruments are skills which are so important to further musical development.
Woman playing the piano while children watch
Music Education
Music education can be very beneficial for children with developmental delays. Musical training can improve the distinction of consonant sounds and can improve language comprehension. Playing music with your peers can strengthen the emotional bond within the group. Music provides a structure with social rules of engagement. When everyone plays in rhythm with one another, there is a great feeling of unity and satisfaction.
Music Classes in Manotick For Children Aged 2-7 For All Kinds Of Children
These experiences can be a guide for knowing how to interact in group situations. Many other areas of cognition are affected by musical training. In fact, studies have shown that there are so many benefits of music education in children that brain development seems to speed up. Most children LOVE music. The activities in our classes are so enjoyable that the children do not even realize they are learning!
Children in costumes
Music for Wee ones weekly Classes are on-going during the school year and through the summer in the beautiful village of Manotick. Check our their website for location, time and cost. You can follow them on Facebook and Twitter!
This blog post is sponsored by The Manotick Arts Camp.
Playdough isn’t toxic, so there’s no need to worry, but if you want your kids to have a bit of fun, why not make some edible St. Patrick’s Day Jello playdough recipe?
Children love playdough and with good reason. It’s so much fun to play with. It’s something that inspires your children’ to be creative and use their imagination. The only problem is kids often want to eat it. While the makers of playdough have tried to curb this behaviour by making the dough taste horrible, kids are simply too curious for their own good.
This edible St. Patrick’s Day Jello playdough is not only fun to play with, but tasty as well. Your kids will love cutting out shamrocks and eating their tasty creations. The Jello gives the play dough a fun green tint and the sprinkles are an added bonus. In other words, kids are going to flip for this edible playdough.
Edible Playdough with Jello
This edible playdough with jello is extremely easy to make and this one is a nice spin on the other varieties because it offers a holiday twist. Best of all, you may have everything you need to make it in your pantry. Your kids will love making this recipe.
Playdough For Every Holiday
What’s really fun is that you can easily change this recipe for edible playdough up to match whatever holiday you want. You could use orange Jello for Halloween, cherry or strawberry for Valentine’s Day, etc. You can also find sprinkles in any holiday theme. Just have fun and allow your kids to be creative.
Playdough Stem Activity
This would be a great STEM activity for your children. It’s also a great craft for the classroom. You could also make a large batch of this and place in airtight containers for your kids to give to their friends. Tie on a shamrock cookie cutter with some St. Patrick’s Day ribbon and you’ll have a cute gift.
ST. PATRICK’S DAY CRAFTS
If you are looking for more St. Patrick’s Day craft ideas, you can make one of these:
1. Mix all of your ingredients together in a saucepan. Make sure that the water is warm when you add it to the mixture.
2. Stir the mixture constantly over medium heat on the stove until all of the lumps are gone and the consistency is smooth.
3. Continue to stir the mixture until it starts to thicken and clump together. This will take some time, close to 10 minutes in some cases, so just keep stirring so the mixture will not stick to the bottom of the pot or burn.
4. When you can no longer stir the mixture anymore, and it has formed one big lump that does not stick to your finger, remove it from the heat.
5. Place the playdough mixture onto a cutting board or counter lined with flour.
6. Let the mixture cool completely.
7. Once cooled, knead the playdough with some extra flour until it is no longer sticky when played with.
8. Add some St. Patrick’s Day sprinkles to your playdough mixture and knead them in well.
9. Let little ones play with and enjoy the St. Patrick’s Day playdough. Store it in an airtight container in the fridge for up to a week.
I hope you enjoyed my Edible Playdough Recipe For St. Patrick’s Day as much as I did! If you make it, please share your photos with us on Facebook or Twitter! Also, check out all of our other crafts!
St. Patrick’s Day Edible Jello Playdough
This edible jello playdough is not only fun to play with, but tasty as well. Your kids will love to make this craft for St. Patrick's Day!
Mix all of your ingredients together in a saucepan. Make sure that the water is warm when you add it to the mixture.
Stir the mixture constantly over medium heat on the stove until all of the lumps are gone and the consistency is smooth.
Continue to stir the mixture until it starts to thicken and clump together. This will take some time, close to 10 minutes in some cases, so just keep stirring so the mixture will not stick to the bottom of the pot or burn.
When you can no longer stir the mixture anymore, and it has formed one big lump that does not stick to your finger, remove it from the heat.
Place the playdough mixture onto a cutting board or counter lined with flour.
Let the mixture cool completely.
Once cooled, knead the playdough with some extra flour until it is no longer sticky when played with.
Add some St. Patrick’s Day sprinkles to your playdough mixture and knead them in well.
Let little ones play with and enjoy the playdough. Store it in an airtight container in the fridge for up to a week.
Do you want to make a fun treat for your kids to enjoy on St. Patrick’s Day? These Pot O’Gold Oreo Cookies are perfect. Not only are they fun and easy to make, but they are so cute. Everyone is going to love these. No one will believe how easy these were to make. You’ll look like a culinary goddess when you show up with a plate of these.
Pot O’Gold Oreo Cookies on an orange plate
EASY COOKIE RECIPE TO MAKE
What really makes these so cute are the edible gold sequin sprinkles and the Airheads candy. These two simple ingredients will make these chocolate-dipped Oreos look amazing. You’ll truly be blown away at how you can make something so adorable without spending a lot of time in the kitchen.
ST. PATRICK’S DAY GIFT IDEAS
While you may be tempted to make a huge batch of these, you really won’t need to. These are made with double stuffed Oreos that are then dipped in chocolate. In other words, these are really rich. Most people will be satisfied eating only one or two. Pop a couple into treat bags and tie with green, white, and orange ribbon for a cute gift. Who doesn’t want to celebrate St. Patrick’s Day with a wee bit of chocolate?
ST. PATRICK’S DAY KIDS RECIPE
If you want to get your kids interested in spending time in the kitchen, these are perfect. Your kids will have so much fun creating something so adorable. It’s something that will encourage them to try more recipes. And, we all know how important it is for kids to learn to cook and bake.
WHAT TO DRINK WITH THE ST. PADDY’S OREO COOKIES
Serve these with milk that’s been tinted with green food colouring and you’ve got a treat that your kids won’t be able to resist. You can also prepare a super easy and fun Lime Shamrock Punch Recipe to celebrate St. Patrick’s Day
Pot O’Gold Oreo Cookies Recipe
POT O’GOLD OREO COOKIES RECIPE
Whether you’re looking for something fun to make for St. Patrick’s Day for the kids or want something that will motivate your kids to spend time in the kitchen, these Pot O’ Gold Oreo Cookies are wonderful. Not only that, but they taste amazing.
Makes 12 Oreo’s
INGREDIENTS
1 package of regular or double stuffed Oreo’s
2 bags of 8oz dark or milk chocolate melting wafers
1 bag of gold cake sequin sprinkles
1 package of Air Head Extreme rainbow berry sour candy
Equipment Needed
1 cookie sheet fitted with parchment paper
1 water bottle
HOW TO MAKE THE POT O’GOLD OREO COOKIES
1. Place the water bottle into the freezer for about 30 minutes
2. Using a double boiler, melt the dark chocolate wafers
3. Once melted and mixed till smooth, dip a Oreo into the chocolate
4. Using a fork, flip over the Oreo so that it becomes fully coated
5. Carefully pick it up using the fork and lightly tap the edge of the pot to get ride of the excess chocolate
6. Place Oreo onto the cookie sheet and finish dipping the rest of the Oreo’s
7. Allow the Oreo’s to completely dry before cutting off the top and bottom of the Oreo
Pot O’Gold Oreo Cookies in process
8. Once the chocolate covered Oreo is completely hard carefully pick it up off the parchment paper
9. Place Oreo onto a cutting board and cut off the top and bottom of the Oreo to kind of square it off
Place Oreo onto a cutting board and cut off the top and bottom of the Oreo to kind of square it off
10. The sides of the Oreo don’t get cut off
11. Dip the bottom or the Oreo into the chocolate and lightly shake off excess
Dip the bottom or the Oreo into the chocolate and lightly shake off excess
12. Place the Oreo standing up onto the parchment paper
13. Repeat step with remaining Oreos
14. Once the bottoms have hardened, slightly dip the top of the Oreo into the melted chocolate
slightly dip the top of the Oreo into the melted chocolate
15. Carefully place the gold sequin sprinkle on the top where the melted chocolate is
16. Using tweezers, carefully dip the back of the gold sequin into the chocolate to act as a glue and place onto the gold sequins that are already on the Oreo
17. Randomly place more sequins throughout the already placed gold sequins. Place more onto the centre on the top and build up to make it look like a full pot of gold
18. Take the Airhead candy and cut each strip into 1/3 rd piece
19. Using a knife, spread on some chocolate onto the bottom of the candy to act as a glue
20. Pull out the water bottle and place onto the cookie sheet
21. Place the candy, chocolate part, onto the back of the Oreo
22. Place the Oreo against the water bottle to help secure the candy piece so that it won’t fall off the Oreo. The water bottle will be cold enough to quickly harden the chocolate on the candy
23. Repeat steps with remaining Oreos
24. Once all done with the decorating, enjoy!
I hope you enjoyed my Pot O’Gold Oreo Cookies Recipe! If you make it, make sure to share with us on Facebook or Twitter! Also, check out all of our other Recipes.
Pot O’Gold Oreo Cookies Recipe
Lyne Proulx
These Pot O’ Gold Oreo cookies for St. Patrick's Day are not only fun and easy to make, but they are so cute. Everyone will love eating them!
2bags of 8oz dark or milk chocolate melting wafers
1bag of Wilton gold cake sequin sprinkles
1package of Air Head Extreme rainbow berry sour candy
Instructions
Place the water bottle into the freezer for about 30 minutes
Using a double boiler, melt the dark chocolate wafers
Once melted and mixed till smooth, dip a Oreo into the chocolate
Using a fork, flip over the Oreo so that it becomes fully coated
Carefully pick it up using the fork and lightly tap the edge of the pot to get ride of the excess chocolate
Place Oreo onto the cookie sheet and finish dipping the rest of the Oreo’s
Allow the Oreo’s to completely dry before cutting off the top and bottom of the Oreo
Once the chocolate covered Oreo is completely hard carefully pick it up off the parchment paper
Place Oreo onto a cutting board and cut off the top and bottom of the Oreo to kind of square it off
The sides of the Oreo don’t get cut off
Dip the bottom or the Oreo into the chocolate and lightly shake off excess
Place the Oreo standing up onto the parchment paper
Repeat step with remaining Oreos
Once the bottoms have hardened, slightly dip the top of the Oreo into the melted chocolate
Carefully place the gold sequin sprinkle on the top where the melted chocolate is
Using tweezers, carefully dip the back of the gold sequin into the chocolate to act as a glue and place onto the gold sequins that are already on the Oreo
Randomly place more sequins throughout the already placed gold sequins. Place more onto the center on the top and build up to make it look like a full pot of gold
Take the Airhead candy and cut each strip into 1/3 rd piece
Using a knife, spread on some chocolate onto the bottom of the candy to act as a glue
Pull out the water bottle and place onto the cookie sheet
Place the candy, chocolate part, onto the back of the Oreo
Place the Oreo against the water bottle to help secure the candy piece so that it won’t fall off the Oreo. The water bottle will be cold enough to quickly harden the chocolate on the candy
The hustle and bustle of Canada’s largest city, Toronto, can be an adventure to navigate, especially if it your first visit there. While using your car to get you everywhere may be convenient, it could also take a bit of the fun away from experiencing everything this amazing city has to offer its visitors. Lets look at Transit Travel in Toronto: TTC and Taxi.
Using transit is often a great option to choose while getting around Toronto because it allows travellers to get a view of the city you would not get from your car. Visitors can also save a bit of green on parking fees and gas when giving their car a rest while using transit. Whether you are just visting or live in this metroplitian area, two of the more popular methods of transit in Toronto are the TTC and taxi. Take a look here to see why these forms of transit can make your next visit to Toronto convenient and memorable.
Photo Credit: tourismtoronto.com; Street cars on street in Toronto.
Transit Travel in Toronto – TTC and Taxi
The Toronto Transit Commission (or the TTC) is constantly evolving to make travel for the citizens of Toronto and those who live in the city’s suburban areas more convenient. Since 1921, it went from street cars to including buses and Canada’s first subway. It now has three subway lines that connect with each other at different points, one intermediate capacity transit line, over 160 bus routes, and 11 street car lines.
TTC subway train.
Costs and conveniences
Whether you are a visitor or a resident of Toronto, the TTC is a great way to get around the city. All of the stations downtown connect you to the pulse of this metropolis. The numerous bus routes and street cars are also helpful in getting people to the places in around the city to their destinations, either right in front or steps away from it.
The fare is not expensive for riders to pay. It is comparable to the fare commuters pay in other major cities across Canada. There are many options riders can use to get around Toronto. They can pay a one-time fare using cash, tickets (which are becoming phased out) or tokens. A more economical choice for one person any day or a family on select days can use a day pass to get around at their leisure.
TTC Day Pass
Zooming across downtown on “The Rocket”
To get downtown, we took the UP Express from Pearson International Airport to Union Station. Once we wre finished seeing the sights around the this part of town, our next stop for the day was to the Royal Ontario Museum. This destination was a bit of a distance away. Since our kids were not up to walking this distance, we decided to hop on “The Rocket” to make the travel faster and easier. Other great features of the TTC is that travellers and visitors with cars are able to park their cars at select stations and accessibility is taken into consideration on buses, streetcars, and trains.
We were able to take a train from Union Station to Museum along the Young-University Line in a few minutes. Our kids loved zipping under the city to our stop in our train car to our next destination. For my younger daughter, it was her first time riding the subway in Toronto and she loved her subterranean adventure.
TTC Subway car door open.
Once we reached Museum Station, we were amazed the sight that was waiting for us. Many of the stations around the downtown core along this subway line are themed with the main attractions found around this area of town. For us, Museum Station is one of the most impressive stops along the subway. The pillars are designed beautifully to mimic hieroglyphs and carved mummy caskets. We stayed here for a few minutes after the throng had left the station to get a snap with these pieces of art. We then exited the station and found ourselves just around the corner from the main entrance to the museum as well as to other must-see locations around the area.
Woman standing in front of pillars at Museum Station in the TTC subway line.
The ability to get around Toronto while using the TTC was invaluable to all of the stops we had to make while in Toronto. It allowed us to get to so many of the points we wanted to see in a quick amount of time. The day pass made all of these stops more economical for us to do for the day as well.
There are times that travellers need to get from Point A to Point B without a break for stops. This is where a taxi (or cab) really comes in handy.
Costs and conveniences
Having the convenience of a cab is great when time is not on your side, you are wiped out from have had a fun-filled day of exploring, or when normal methods of transit are not feasible, or when weather suddenly turns for the worse. This method of transportation is also more costly than those previously mentioned, but it costs more for this premium service.
Photo Credit: tourismtoronto.com; Taxi cabs in front of office buildings in downtown Toronto.
A great convenience after a day packed with fun
After our whirl-wind day around Toronto’s downtown core, our kids were whipped out. We had taken the subway to the end of the line to catch a bus back to the airport and then onto our short term rental apartment. We were able to see that a meltdown was on the horizon, and frankly, we were getting a bit weary from our day. We called a taxi service and they arrived to our location within minutes of contacting them. After giving our driver our destination, we zoomed to the doors of our weekend rental apartment to get our kids ready to end our day. It was great to know we were able to cut our commute short by hopping into a taxi to get “home” quickly.
Having a car is great to have for convenience when visiting Toronto, but it is not always the most practical. Transit Travel in Toronto, in many instances, is easier and more cost-effective. We did not have to worry about how long we were staying in a particular location, if parking was available, and how much it costs. Also, using a lot of gas to get from place to place is not a worry. Getting around the Toronto is a great idea because you can get to see the city instead of passing it by. My family really enjoyed ditching our car for a day and commuting on different methods of transit was an adventure within our adventure during our vacation. It made our time together memorable and fun.
Transit Travel in Toronto – TTC and Taxi
Which mode of transit would you want to use in Toronto if you were giving your car a break?
Disclaimer: We were given fare to use the TTC and taxi service while visiting Toronto. The views I shared are my own.
A woman’s body is designed for pregnancy and birthing, right? So why do so many mommas tell me their backs hurt, their knees are shot, their stomachs are full of stretch marks, they’ve had c-sections and episiotomies, and they can’t stand their mummy tummies and uncontrollably peeing when they lift their leg to get into the car! If we are designed for this, why does it take such a toll on our bodies? And more than that, does it take a toll on our babies too? Here are 5 of the top things that I wish more mommas knew about their postnatal bodies!
I’m going to preface this by telling you that I’ve had two babies, and I desperately wanted to have a natural birth with my first (not because I knew all that much about it, or because I felt it was the right thing to do, but honestly it was because my competitive edge made think that if any other woman could do it, I HAD to be able to as well… It wasn’t a selfless notion once-so-ever at the time.).
As it turned out, when I hit transition (about 7cm dilated) I freaked out. I couldn’t breath anymore and that was the one thing that was saving me. I essentially had an anxiety attack and yelled that I needed an epidural. And I felt guilty and terrified of the needle. And then even more terrified when it didn’t work properly. But then suddenly I had a baby on my chest and I forgot all about it.
So in writing this, please understand that I am not the saint of natural and intervention-free birthing, but having gone through it, and experiencing a lot of after-effects from some poor choices I didn’t even know I was making, and now being a pre and postnatal corrective exercise coach who works with mommas daily, I simply think it’s time for some of this stuff to be common knowledge.
5 Things You Need to Know About Your Post-Pregnancy Body
5Things You Need to Know About Your Post-Pregnancy Body
So! Wherever you are coming from momma, maybe this will shed some light on why we experience some of what we go through.
1.) Core Amnesia. (This will be the longest one I chat about!)
What is it? Who has it? What does it MEAN?
Let’s think about what the core is and what it does for a second. When I say core, most people think just of their abs (like your ‘6-pack’ abs), but what I am really talking about is much more than that. Can we agree that a good definition of your core might include some muscles running up your spine, some muscles you use to breathe, of course the muscles within your belly (not just your abs but also the deeper muscles that keep you all together there), and we can’t forget the pelvic floor, right?
So we know what the core is, but why do I say core ‘amnesia’?
Well, let me ask you this.. (Sit up straight for me for a second as you read this – make sure your head is up, shoulders down, spine is straight, and you are not leaning against the chair or anything).
How often do you use your core throughout the day? This is not a trick question by the way, I think we all assume we are using it in 100% of our movements consistently, but let’s really think of it:
Do you use it when you are sitting down to hold yourself up in proper alignment?
Do you use it when you pick up your kids?
Do you use it when you go for a run, walk, or climb your stairs?
If you are not sure, there are a few key indicators: neck and shoulder pain, low back pain, knee pain, and constantly feeling stressed. How do I know that? Because if you are slumped over and feeling neck and shoulder pain, then it’s your neck and shoulders that are holding you up instead of your core which is actually meant to stabilize you. If you have low back pain, your low back is stabilizing you instead of your core. If you have knee pain your knees are taking the brunt instead of your core and the list goes on. do you feel constantly stressed? then I can assume (bare in mind this is just an assumption) that you are breathing into your shoulders, neck, and/or upper chest and not into your belly and through your core.
And in these instances I can derive that you have forgotten to use your core properly and are suffering from core amnesia. [HINT: most people are these days because we sit so much and are completely supported by a chair instead of using our own bodies.]
Now, go into a pregnancy with core amnesia, where your joints and tissues become lax for birth and your belly makes ‘good posture’ a thing of the past, and any issues you may have had get exacerbated a million fold:
you can’t hold your belly in so stretch marks get worse, low back pain is debilitating, your neck hurts, your knees hurt, you’re swelling, you don’t feel like exercising, you feel unprepared for birth, you may have some kind of intervention through birth
then you come out with a baby, and a body that feels nothing like your own and after this single most physically demanding experience you will ever have, there is no prescribed rehab
add in that you now have no time and no money to help yourself and voila! It’s not too far fetched to see why so many moms come to me with pain or no desire exercise even though they aren’t at all comfortable in their own skin..
Step one? Reconnect to that core momma. Because the side effect of this is that our wee ones begin to model our physicality at around the age of three. Let’s make core amnesia skip the new generations shall we?
So I’ll ask for another favour real quick and get you to sit up straight again. (Don’t worry, everyone just had to re-adjust;).)
2.) Interventions & Rehab
Again mommas, this is not slam anyone who had interventions during the birthing process – I did myself, but is meant to shed some light.
Let’s start with drugs. I had a strange experience with my second child as I was on bed rest for the last four months due to inexplicable, excruciating episodes of pain I would go through about once or twice a week. I could never tell if I was going into labour or not because the pain was worse than my contractions with my first. When they finally told me that yes, this was it, I was in labour and asked if I wanted an epidural, my husband literally looked at me like, “You’ve already spent months in pain.. you’ll probably want it.” And in truth I was so tired of pain I just said yes even though by that point the pain episode had stopped and I literally couldn’t even tell I was having contractions.
A few hours later, when they told me they were giving me drugs to speed up the birth, I just went along with it – because I was the only one in the FULL labour and delivery floor that wasn’t having a C-section and the doc was pressed for time.
But what are the implications of these interventions? Let’s think about what happens to your pelvic floor (PF) when it’s not ready to let baby pass yet, but baby is pressing up against it because you’ve been given drugs that speed up the process. Baby’s head is essentially kind of slamming up against your PF until finally comes through. It’s no wonder that I have to be careful of peeing when I sneeze, is it? The barrier was compromised! It’s no longer gesundheit, but gesund-LOOSE. Not to mention, what could possibly happen to baby’s head when it’s slamming against an unforgiving surface? Their poor brains!
Luckily, my babies were the size of peas when they came out, but when you can’t feel what’s happening down there because of an epidural, you can’t feel if or when you are tearing etc because you aren’t as connected to when your body is naturally ready. This contributes to a lot of episiotomies mommas.
Now if you’ve had a c-section (and while I speak with many mommas who knew they needed one, some are still in the dark as to why it HAD to happen), there’s a really important dialogue that I think needs to be brought up. If you have different kinds of surgeries, like on your knee for a torn ligament, or a hip replacement, or a shoulder injury, you get a certain amount of rehab factored in, correct?
When you cut into your transverse abdominus (TVA), the corset that keeps your belly together, you get told to rest.
Does this make sense? The next time you are around another human being, ask them to put their hand on your lower abdomen, then reach down and pick up something heavy-ish off the ground. Ask them if they felt your belly tighten when you picked it up. Most times, after a c-section? The answer will be no. And if your belly isn’t working to stabilize you, what is momma?
5 Things You Need to Know About Your Post-Pregnancy Body
3.) Exercise.
I’ve covered the fact that you need to connect to your core to reduce pain and that that generally will help more mommas to feel good enough to exercise, but if you weren’t aware of any of this and were exercising through pregnancy (even when it became uncomfortable and a little awkward in the latter stages of pregnancy) and postpartum and are now suffering from “mummy tummy”, split abs, or incontinence then this may apply to you.
So I know that you are currently sitting up perfectly straight as I previously advised, but I want you to slump forward like you are sitting at a computer or checking the Facebook on your phone. Just in that movement can you imagine the difference in this balance of pressure happening internally? Do you feel like your belly might be taking the brunt of it?
Now, in your mind, go back to your pregnancy and imagine your abs or pelvic floor when the hormone relaxin is flowing through you making your tissues more lax.
Can you see how you may be adding to the pressure your belly is already under, and how that may cause your abs to split further apart?
Without correcting your posture, stand up and imagine being pregnant and going for a run this way, or doing a Zumba or body pump class. That added pressure is just killing your desires to recover your abdominals, but think of your pelvic floor! Slam, slam, slam, slam! I see incontinence in your future.
And this doesn’t just happen with exercise, just getting in and out of bed will do it too when you haven’t learned to stabilize yourself properly, allow the correct muscles to take on the loads they are supposed to, and keep this internal pressure as balanced as you can given the circumstances.
I am 100% FOR exercise during pregnancy and recovery, but you’ve got to be aware of what’s going on in your body momma!
4.) Stress
You have a baby now, or toddler, or kids, or a baby and a husband who seems like a kid (I kid, I kid..), and it’s insanely stressful. I am four years into this motherhood thing and I actively pursue de-stressing activities daily and I STILL feel it 24/7.
I mentioned that ‘stress breathing’ is when you are breathing into your chest and neck instead of into your lower ribs and belly and how that is a good indicator for where you are at.
But here’s the big thing mommas. If you are trying to loose baby weight or weight of any kind, and you are in a state of constant stress, it’s going to be really hard. Because stress creates fat (especially around your belly) while simultaneously cutting off your ability to tap into your fat burning mechanisms. Add in that it feels awful and it shuts off your immune system and it’s just a lose/lose/lose/lose situation.
Here are the basics: if you are stressed your body responds by pumping sugar into your blood stream so that you have the energy to FIGHT or RUN AWAY from the immediate danger that is going to kill you. Except that you are just stressed over your Visa bill and won’t be needing that sugar to fight or run away from anything. When that sugar doesn’t get used, it gets stored as fat.
When your body is stressed, and therefore thinking it needs to save you from imminent death, it doesn’t care about trying to fight off a cold (you’re about to die anyway!), or the spare tire around your middle (who cares if you are going to die anyway?), or – if you are pregnant, providing baby with the best nutrients and other resources it requires (who cares if momma is about to die?). Get the picture?
Hard as it is, you HAVE to allow space for a mental commitment to de-stressing. Meaning, you don’t have to physically go to a yoga class, but you do have to put some mental focus on calming strategies.
Woman’s knee showing joint/knee pain
5.) Processed Food
We’ve covered a lot so I’ll make this one quick – because most of know we shouldn’t eat processed food, but it helps to know why.
Remember before you were pregnant and you’d have a bout of really good, clean eating, and you felt amazing?
Then you got pregnant and everything hit the fan?
Well, the stuff you ate before you were pregnant that made you feel amazing, was both the stuff you needed to eat during pregnancy to deliver amazingness to baby, but also the stuff you needed to eat to help you to recover from your pregnancy.
Sometimes (sometimes) we use pregnancy, and then the stress of motherhood, to justify eating some pretty awful food – and doing it consistently.
There are a lot of factors to consider here, but when many of my clients first come to me one of the biggest things I encourage them to deal with is the health of their gut. A healthy gut means a happy momma. Literally. The majority of your serotonin (your natural happy drug) is produced in your gut.
Remember that I said many moms tell me about both pain and no desire to exercise despite feeling unhappy with themselves?
Let’s break down an example of how processed foods can contribute to this:
It takes the human body around 30,000 years to evolve and adapt to environmental changes (think the evolution to being a two-legged species).
Processed foods are a fairly new phenomenon. It’s not rocket science to assert that chemical additives and different food colourings and flavourings are things we have not yet evolved to process in our digestive systems just yet.
These things create small holes or leaks or cracks, whatever you want to call it, in your gut. Then weird things that are not supposed to get through that barrier, get through the barrier. The implications of that are:
food sensitivities/allergies
joint pain
depressions/anxiety
skin problems (that stuff has to come out somewhere, right?)
digestive issues
and well, disease.
All from eating too many crackers and packaged thingamabobs. Ugh. But remember, this happens to baby too!
So while we want to keep our food as unprocessed as possible if we want to reduce gas, burps, sensitivities, mood disorders, acne and eczema, acid reflux, IBS, join pain (arthritis too!), and inflammation that causes disease, we especially want to for baby as rates of food sensitivities and childhood disease are – for lack of a better word – soaring. And the truth is, is that it is very hard to maintain a healthy weight when your gut simply isn’t functioning properly no matter how hard you try!
So there you have it mommas!
This stuff is my jam and I could chat about it at great length – I think I’ve demonstrated that already, but these are the core five that I think serve as a great foundation of knowledge to help you discover why you may not feel like YOU after baby.
All of that to say.. connect to your core and eat well?
Breathe momma. Take some solace in the fact that it’s not as complicated as it seems.
And also that I am still laughing at that gesundheit joke.
How do you choose where to go for your family vacation? The location must satisfy you all, and that is no mean feat when you all have different ideas on what you want your vacation to be like – especially if it must cater for differing age groups. To help you decide on where to make your reservations, read on for some top tips to help you choose a family vacation you will enjoy!
A sandy beach
Tips to Help You Choose a Family Vacation
Journey duration
Your idea of bliss may be an idyllic tropical island, but that type of destination may be a long-haul flight, which is hard work with young children. You know your children, some children are great to travel with, and others less so. You need to consider the time that it will take to get you to the location, and your children’s needs. Remember to include transfer times to and from the airport, the time for passing through security and checking in time; all this additional time spent traveling can impact massively on the level of stress you may experience! You do not want to feel like you need another vacation to get over the trauma of the journey home.
3 Tips to Help You Choose a Family Vacation You Will Enjoy
What is there to do?
Traveling with a mix of age groups can cause issues. You may wish to spend most of your time on the beach, but others in your party may not be so eager to. Check out what attractions are near to your planned destination. Most tourist destinations have a nearby city that can be explored for alternative days to the beach, and so it is worth your time researching the locality. For example, there are many spectacular Vancouver Island points of interest to keep you all happy, but you are only a ferry ride from Vancouver and what the city has to offer. You do not need to compromise on your vacation for everybody to be happy.
Where are you going to stay?
There are many different types of vacation accommodation, and you need to decide which one will give you a vacation too. Finances are the main consideration, but equally, you do not want to find that you are spending the whole time in the kitchen preparing food for your family if you have chosen a self-catering option. You must carefully budget for what you can afford. Often it is cheaper in the long run to have meals included in hotel costs, but this limits you to where and what you eat, and if you are traveling overseas, you may miss out on experiencing the local cuisine as a result.
A family on the sea shore
Your family vacation is an opportunity for you to all spend much needed time together; however, in order for you to enjoy it, you need to spend time choosing the right vacation destination. Whether your party involves different generations with grandparents joining you, or a mix of young and older children, they all will have different expectations and needs for the vacation. Have discussions about the budget and sharing of the chores and childcare before you make your decision, so that you can make sure you get the vacation you want.
Do you have any tips on how to choose a family vacation? Share them with our readers?
If you’re on the Keto diet and find yourself struggling to come up with meal ideas, you’re in luck. Below you’ll find 15 Keto recipe ideas that will keep you interested in the plan. Everything from creamy cheesecake to bacon wrapped pork chops will keep your Keto diet plan interesting and delicious.
What is the Ketogenic Diet?
If you’ve never tried, or even heard of, the ketogenic diet, you may want to consider it. When you limit the amount of carbs going into your body to 100 grams or less per day, your body is forced to use fat as fuel. This causes you to lose weight much faster. The problem is people focus too heavily on what they can’t have rather than all the delicious foods they can have.
What happens when you cut carbohydrates from your body? Your body begins to use fat as fuel. In other words, you begin to lose weight. It sounds simple enough, right? You cut grains and sugar from your diet and are rewarded with a body that is now burning fat instead of carbs. The problem arises when you try to plan your meals. There’s only so much grilled chicken you can eat, right?
Ask yourself if bread and carb-heavy foods are more important than losing excess fat. Sure, we all love carbs, but our society consumes way more sugar than we should. Take the leap and ask your doctor if this diet is safe for you. Each person is different, but this diet has made a huge difference for many people.
Must Try Keto Recipes
15 delicious keto recipes
Remember, you may not be able to eat the foods you once did, but there are so many delicious Keto foods out there. Shellfish, fish, low-carb vegetables, cheese, meat and poultry, berries, nuts and seeds, and much more. Let these easy Keto recipes for beginners serve as inspiration to expand your recipe collection. Get creative and create new Keto recipes!
Hope you enjoy these Keto recipe ideas as much as I did! Also, check out all of our recipes! If you have a favourite parfait recipe, be sure to share that with us in the comment below!
There are so many ways to make hot chocolate recipes! Scores of people, who love this delicious drink, swear by their own secret recipe. If you don’t have your own recipe, the following list of hot cocoa recipes is for you. I think I’ve included a little something for every taste. You be the judge.
Delicious Hot Chocolate Recipes
Bailey’s Irish Cream is an ingredient in one of the hot chocolate recipes. So, is Nestle Strawberry Quik. If you want to go in the other direction, temperature-wise, I’ve also included a super easy version of frozen hot chocolate that you can whip up in 5 minutes flat! It’s a great alternative to ice tea or soft drinks, on a hot summer day. You can even make some chocolate spoons to dip in your hot winter beverage.
If you’re making hot chocolate for a crowd, a crockpot is the way to go. Combine the ingredients, set the timer and this yummy treat is ready before you know it!
These’s no rule that says hot chocolate MUST be served in a cup. This easy-to-make bark is a chocolatey alternative that will have everyone coming back for more.
This “skinny” hot chocolate has a the taste of its full-calorie counterpart. Vanilla almond milk and added Sugar-free Torani syrup does the trick for a count of 40 calories.
This yummy beverage mix calls for instant pudding and Nestle Strawberry Quik. Prepare several batches and gift it to family and friends for a special holiday treat.
This recipe is something completely unexpected. Instead of the traditional milk chocolate flavour, this Cupid Hot Cocoa recipe has white chocolate. That’s not all though. It also has the unexpected flavour of strawberry.
Hope you enjoy these hot chocolate recipes as much as I did! Also, check out our recipes! If you have a favourite hot cocoa recipe, be sure to share that with us in the comment below!
If you’re currently researching diet plan options, you’re probably already familiar with the popular ketogenic diet or “keto” diet. Scads of celebrities and well-known public figures seemingly swear by it, just like millions of other people. Here’s a little bit about what a Ketogenic diet is along with some of the benefits attached.
Chicken breasts
What is the Keto Diet Plan?
A ketogenic diet (or low carb) is all about keeping your body in a state referred to as ketosis. Ketosis occurs when glucose levels run low. During this period, the body uses fat to produce molecules called ketones, which can be used to produce energy instead of glucose. This means if you avoid eating carbs to be converted into glucose, your body will burn fat to produce ketones instead.
Normally, your body enters ketosis when you stop eating. But, you don’t have to starve yourself in order to appreciate the benefits of the diet. By avoiding foods with lots of carbs (which your body can easily convert into glucose) in favour of foods high in fat, you can make sure your body stays in a state of ketosis and has enough fat to fuel itself.
Hard cheese
What to Eat or not Eat?
Plan ahead if you want to have a successful ketogenic diet. The more you eat less carbohydrates, the faster you will enter ketosis. You want to keep your carbohydrates to vegetables, nuts, and dairy. Don’t eat any refined carbs like grains, starch or fruits. This keto food list will come in handy!
What not to eat on a keto diet?
Grains – corn, rice, wheat, cereal, etc.
Sugar – maple syrup, honey, agave, and others
Starch – potato, beans, yams, etc.
Fruit – oranges, grapefruit, apples, bananas, etc.
What can you eat on keto diet?
Meats – chicken, turkey, beef, eggs, fish, lamb, etc.
Above ground vegetables – broccoli, cauliflower, etc.
Leafy Greens – spinach, lettuce, kale, cabbage, etc.
High Fat Dairy – butter, hard cheeses, high fat cream, etc.
Avocado and berries – raspberries, blackberries, and other low glycemic berries
Nuts and seeds – macadamias, walnuts, sunflower seeds, etc.
Sweeteners – erythritol, stevia, monk fruit, and other low-carb sweeteners
Other fats – high-fat salad dressing, coconut oil, saturated fats, etc.
The ketogenic diet is very low in carbs, high in fat and moderate in protein. Your nutrient intake should around 5% carbohydrate, 25% protein, and 70% fats.
Keeping your body in this particular state has a number of benefits. First of all, you’re burning fat to turn into energy, which means you’ll typically shed a few pounds.
Cutting carbs from your diet means your levels of HDL (or “good” cholesterol) will increase, leading to better overall heart health. Keeping your glucose levels low also means that your insulin levels will stay low, reducing your risk of developing diabetes.
Kale salad
I hope you take time to learn more about the ketogenic diet. In this case, your favourite search engine is your friend. A simple search will bring up thousands of Keto recipes, success stories as well as general information about the plan. If your goal for the new year is to get healthier, ketogenic diet just might be what you’re looking for!
Have you tried the ketogenic diet? What did you like or dislike about it?
Math Scores Plummeting At Ontario Elementary Schools
In 2017, Ontario elementary schools received a rude wake up call when the Educational Quality and Accountability Office (EQAO) released the news that as little as 50% of students were able to meet the math standards set by the province. This is a number that has been decreasing at an alarming rate over the last decade. Third grade assessments aren’t proving to be much stronger and scores in this bracket are also staggeringly low. When asked whether students believe they are good at math, only 53-57% of them responded favourably, and this is nothing to say of whether they enjoy the subject, whether they feel confident learning new material, or whether they feel anxiety around how it’s taught.
Boy looking at a book
Some people wonder whether the standardized model of testing is part of the issue. Asking multiple choice questions does not allow those assessing to see the steps and strategies students are using to find the answer to a problem, which hinders their ability to properly teach. The test might show them which facets of math students are struggling with, but not why. Furthermore, these types of assessments often fail to accommodate atypical learning styles, creating false negatives, and there is also the pressure of a testing environment to consider.
These low numbers are likely the result of two incompatibilities – a less than optimal testing style coupled with the students’ struggle to initially grasp material. What educators need is a broader, long-term, comprehensive, and individualized assessment option. This will help improve students’ scores by giving teachers clear and immediate insight as to how well children are absorbing their lessons. In today’s digital world, many educators are turning to app-based assessments that are engaging and entertaining for students. Because subscription apps allow students to be tested incrementally throughout the year, they alleviate duress, which can offer teachers more honest results as to their students’ overall performance.
Math Scores Plummeting At Ontario Elementary Schools
Programs such as those on offer at Knowledgehook.com allow educators to log important information, including where each student is having issues, and district-wide packages allow student progress to be tracked across multiple schools. Quizzes and games that are a part of these applications also give students incentive to find solutions, but more importantly, context for practicing and improving their math skills. They are encouraged to implement math in real-life, in real-time — to achieve a goal rather than just a grade. Introducing these technologies into the classroom is also appealing to policy makers as they offer a cost-effective solution to a larger problem (the accessibility of math in the classroom). Utilizing them can allow for more positive engagement with what many students consider a difficult and discouraging subject.
Standardized testing on the provincial level may not be eradicated for the currently foreseeable future, but that does not mean individual schools and educators cannot take steps to do their own analyses. They can find more productive ways to assess student performance, using methods that provide them with more transparency over the course of a semester, and offer more than a percentage or statistic at the end. When half of the elementary school students in Ontario are failing at math, it’s important for educators and policy makers to find new avenues to support their finding success.
On select Sundays and Tuesdays, Walt Disney World offers a special event at Disney’s Magic Kingdom Park called Disney Early Morning Magic – Fantasyland. Tickets to this event must be purchased separately, it is not included with your Walt Disney World park tickets. Theme park admission is required to attend this event. While it does not come cheap, it does have some benefits. Let’s see what you get.
Review: Disney Early Morning Magic – Fantasyland
Walt Disney World in Florida and especially Magic Kingdom Park is a magical experience for most families. My 2 little princesses are very much still into princesses and would be more than happy to fill their days with meet & greets. During our visits, the list of must-do attractions has only increased. The one ride that the girls just cannot get enough of at Magic Kingdom is the Seven Dwarfs Mine Train. They are clearly not the only ones as the attraction has an average standby wait time close to 2 hours. Participating in the rope drop (opening) mad dash is just about the only time that you can enjoy this attraction without a long wait.
This event includes a breakfast buffet and Early Access from 8 am to 9 am, with little to no lines, to 3 rides: Seven Dwarfs Mine Train, Peter Pan’s Flight and The Many Adventures of Winnie the Pooh. These are all very popular rides with very long wait times for standby, 2 of the 3 typically require a Fastpass.
The Fastpass for Seven Dwarfs Mine Train were “sold out” when we booked 35 days prior to arrival. I continued to check every now and then but it did not become available.
Play-by-play
The buses started running for all the parks at 6:45 (maybe earlier). Our bus arrived at 7:10 and we were on our way with 2 princesses still half asleep.
At check-in, we received some information and our event bracelets. By 7:45 we were in the park.
After a few pictures of a somewhat empty park. We were off to the races to ride the 3 rides as many times as possible. The little legs walking as fast as they could. We managed to do a total of 8 rides in 1 hour; Winnie the Pooh 1, Peter Pan 2 and Seven Dwarfs Mine Train 5.
As the rush of people came into the standby line at 9 am, we headed over to enjoy a delicious breakfast buffet. The food was continuously replenished and everything was available until 10 am. The best items were the vegetable frittata, various cheese & meats as well as the bacon (of course).
My opinion
Overall we thoroughly enjoyed the experience of the Disney Early Morning Magic – Fantasyland and would recommend it. The breakfast buffet was delicious with a good variety. It was a great opportunity to get pictures of Cinderella’s Castle with little to no one in them. This was a great way to get access to Seven Dwarfs Mine Train since we were unable to get a Fastpass for it, plus we were able to use our Fastpass for another attraction. We had the rest of the day to enjoy the other attractions and not spend hours in line for these 3 attractions.
Valentine’s Day is fast approaching. It will be here before you know it! That means it’s time to start thinking about kid friendly treats to celebrate the occasion. Of course, there’s no hard and fast rule that says you can’t make these Valentine’s Day treats during other times of the year, just to show your kids or other family members how much you love them.
Valentines Day Treats
This roundup of recipes includes a variety of yummy desserts including mini pies on a stick, Jell-O hearts, cookies, cupcakes and a whole lot more. The burning question is which one do you want to make first!
Brownies are so moist and divinely delicious! Your family will definitely enjoy these Brownie Chocolate Chip Bars Filled with Strawberry M&Ms. It’s a perfect treat for Valentine’s Day!
Who does not like Oreo Cookies? These chocolate dipped Oreo cookies look so fancy and seem like they are difficult to make, but it’s really the cookie candy mold that does all the work!
Nothing quite says “I love you” to those special people more than a homemade batch of Valentine’s Day Crinkle Cookies with a White Chocolate Drizzle! Sometimes, the best gifts are the ones that were made from the heart.
Valentines Day Treats
MORE VALENTINE’S DAY RECIPE IDEAS
If you are looking for more Valentine’s Day recipe ideas, you might like these:
Who doesn’t love Valentine’s Day? It’s a time for romance, love, and even pampering ourselves a bit. After all, we want to look our very best, don’t we? Of course, with Valentine’s Day falling in the middle of winter, that’s not always possible. The cold wind can leave our skin chapped, dry, and even flakey. That’s not exactly what you may have had in mind for your Valentine’s Day look. Well, why not make a batch of this whipped sugar scrub to keep your skin looking gorgeous?
Whipped Sugar Scrub
This Valentine’s Day whipped sugar scrub is not only easy to make, but it’s also all natural. You only need three ingredients: coconut oil, sugar, and food colouring. The food colouring is also completely optional. Of course, if you wanted to take things one step further, you could also add a couple drops of your favourite essential oil. There are many essential oils that are great for the skin. Lavender is an excellent option as it is great for dry skin and also has a wonderful scent. Just make sure you’re using 100% pure essentials oils.
Use the sugar scrub anywhere you have dry skin. It’s even safe enough to use on your lips. And, who doesn’t want soft, silky lips on the most romantic day of the year? Just be careful about using sugar scrub that you’ve added essential oils to on your lips or any other sensitive areas.
This also makes a wonderful gift for your girlfriends. Place the scrub in small mason jars and add a cute label and ribbon to dress it up a bit. Your friends will love getting homemade beauty products to help them get ready for Valentine’s Day. You can make small batches, or you can double or even triple the recipe. If the scrub seems too thin, add more sugar.
Valentine’s Day Whipped Sugar Scrub
This is a great lip or hand scrub!
Valentine’s Day Whipped Sugar Scrub
What you need:
¼ Cup Coconut oil (solid form)
¾ Cup White sugar
1 drop of red food colouring (optional)
Whipped Sugar Scrub
Instructions:
Using a Kitchenaid, or electric mixer, whip coconut oil for 30 seconds.
Place in freezer for 3 minutes.
Whip again for 1 minute.
Add sugar and whip for another minute.
If you are using food colouring, add and whip until combined.
Whipped Sugar Scrub
How to:
Use a small amount and gently rub onto skin.
Rinse.
**Tip: if your coconut oil is too liquidy, place in freezer until firm.
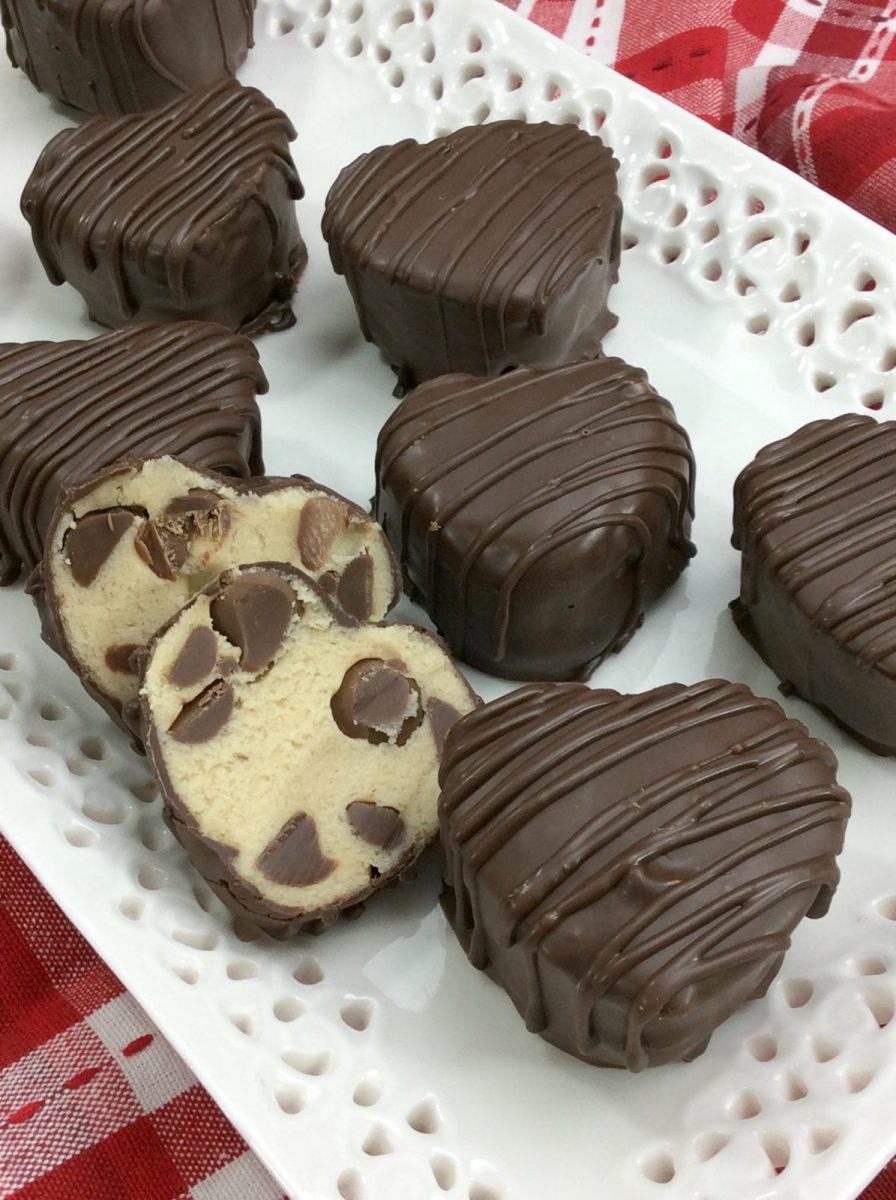
Who doesn’t love cookie dough? It’s absolutely one of the most decadent treats one can get their hands on. Of course, we all know that consuming raw cookie dough can be iffy. No one wants salmonella poisoning, especially on Valentine’s Day. Thankfully, there’s a way to enjoy cookie dough without the risk. These heart cookie dough truffles are an excellent treat to make for that special someone that loves cookie dough.
Not only are these truffles shaped like a heart, but they are drenched in dark chocolate. It’s a flavour combination that is truly rich and decadent. You’ll definitely not be able to sit down and eat a lot of these at once.
Heart Cookie Dough Truffles Recipe
Anyone that loves chocolate and cookie dough is going to flip for these. If you’re having a girls’ night in around Valentine’s Day, these would be a big hit. You could also make these for a bake sale and watch them sell out faster than anything else. People simple can’t resist truffles, especially when cookie dough is involved.
Heart Cookie Dough Truffles Make The Perfect Valentine’s Day Gift
If you’re giving these as a gift, consider placing them in a heart-shaped box along with some colourful tissue paper. This will make the gift just as beautiful as something purchased from a fancy chocolate shop. You can find everything you need to turn this into an expensive-looking gift at your local dollar store.
How To Modify The Valentine’s Day Truffles Recipe
You can also be really creative with this recipe. Instead of chocolate chips on the inside, you could use peanut butter chips or any other flavour. You could also cover these in any type of melted chocolate. If your significant other isn’t a fan of dark chocolate, cover them in milk chocolate or even white. There is so much room for creative changes with this recipe.
This is truly a simple, fun, and delicious Valentine’s Day recipe that everyone is sure to love.
Using a double boiler, melt the chocolate and mix until smooth.
Pour the chocolate into the silicone mold.
Carefully flip the mold over so that the chocolate can fall back into the pot. This will leave you with a chocolate shell.
Set aside.
Using a standing mixer, combine the brown sugar, butter, salt and vanilla and mix until combined.
Mix in your milk.
Gradually mix in the flour and chocolate chips.
Scoop about 1 tablespoon of the cookie dough into your hands and lightly press down into the chocolate molds.
Cover the top of the molds with a layer of chocolate.
Place into the fridge for overnight.
Remelt the chocolate and place into the piping bag.
Carefully remove the chocolate hearts from the molds and place onto a cookie sheet.
Cut the tip off the piping bag and drizzle the chocolate onto the hearts.
Let hearts harden for 20 minutes.
Enjoy!
I hope you enjoyed the Heart Cookie Dough Truffles Recipe. If you make it, make sure to share with us on Facebook or Twitter! We also have a blog post on Valentine’s Day heart shaped treats that will please everyone! Also, check out all of our other Recipes.
Heart Cookie Dough Truffles Recipe
Heart cookie dough truffles are an excellent treat to make for that special someone that loves cookie dough on Valentine's Day.
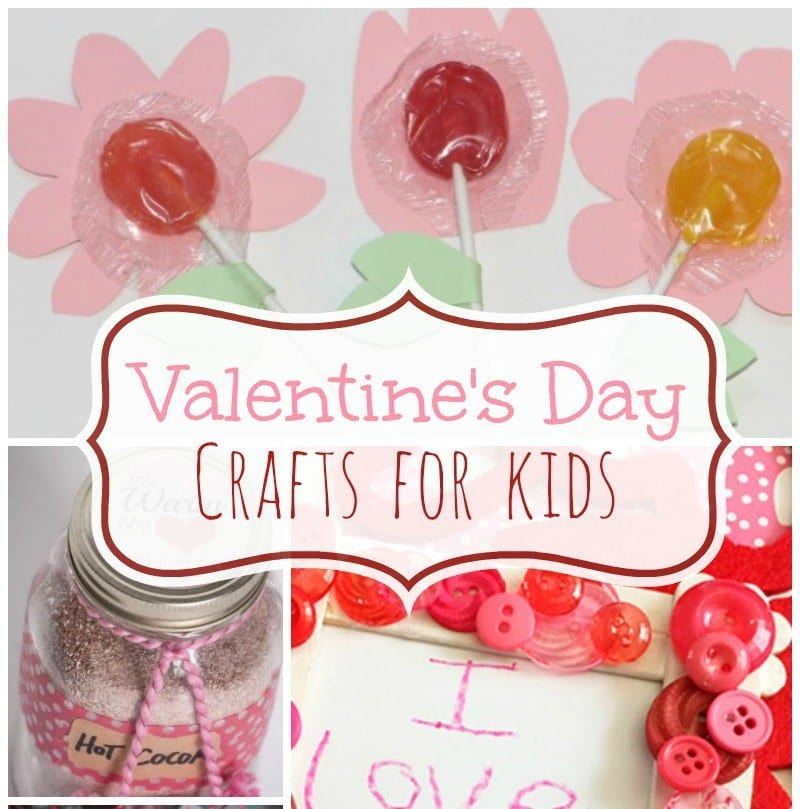
Valentine’s Day is a fun holiday for everyone. Not only is there chocolate and exchanging Valentines with family and friends, it’s also a “crafty” occasion. I compiled a list of 10 Valentine’s Day Crafts for Kids and many of them are suitable for the younger ones. Better yet, some of these things make really adorable gifts!
10 Valentine’s Day Crafts for Kids
The majority of supplies are probably things you already have in your craft cupboard or around your home. This makes it easier to start a fun project whenever the mood hits you. Get ready, Get set, Craft!
Salt dough crafts have been around forever, probably because it’s so easy to make. Grandparents and aunts and uncles will definitely appreciate a memento like this.
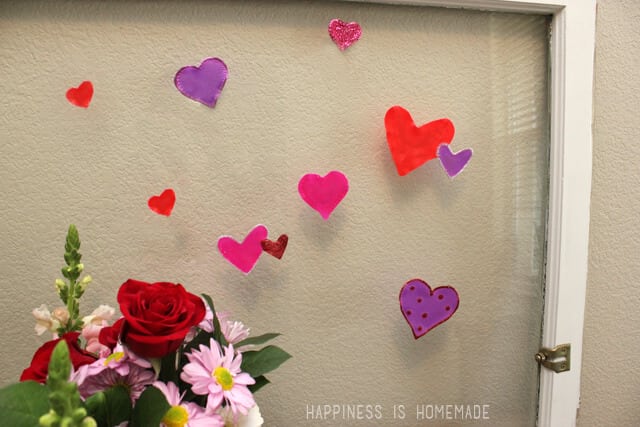
If you’re careful when you’re removing these Valentine’s Day window clings, you can use them for several seasons. The finished product is only limited to your imagination!
This Valentine’s Day tissue paper flower wreath is perfect to hang on a window or your child’s bedroom door. Make them big or make them small… the choice is up to you!
If your kids love to read books, why not encourage him to make these adorable Valentine’s Day bookmarks? They’ll never complain about losing their place again.
10 Valentine’s Day Crafts for Kids
MORE VALENTINE’S DAY CRAFT IDEAS
If you are looking for more Valentine’s Day craft ideas, you might like these:
With February just around the corner, and the excitement and buzz from the holiday season now long gone, it’s easy to start feeling the “Winter blahs” from our dreadful Canadian winters! You will find below easy tips for beating the Winter blues!
All this snow, sudden (and unwanted) temperature changes, and ice, combined with shorter days and some that feel like they never end, it’s easier than ever to feel your energy depleting. Blah! While hiding under the comfort of a warm blanket, with a warm cup of hot chocolate next to a fireplace can seem like the perfect at-home winter escape, everyone has their own ways of uplifting themselves to stay ahead.
Tips for Beating the Winter Blahs!
Five Easy Tips for Beating the Winter Blahs!
1. Don’t forget the importance of your nutrition
Staying healthy is so important to staying happy! It is hard to stay energized and at our best If our body is not getting the vitamins it needs. I find it can be challenging to consistently get the vitamins I need on a daily basis, so I use a multivitamin to fill in the gaps. One a Day® Gummies helps with this, plus I look forward to the delicious taste of the gummy every day. Don’t forget about the kids, they can have the winter blahs too! FLINTSTONES Active Kids® Gummies can help bridge dietary gaps as a source of vitamins and minerals in a convenient and tasty gummy, and are great for picky eaters.
One a Day® Gummies bottle, Flinstones Active Kids® Gummies bottle, and hydrasense® Daily Nasal Care box on table next to a cup of tea, candles, and a blanket
2. Get moving!
I personally find there’s nothing more energizing when those blues hit than to pick up my water bottle, gym bag, and head on over to the gym! A good workout significantly improves my mood and gives me the surge of energy I need to tackle on the rest of the day. Burning off the last of those holiday calories is also a helpful bonus! Don’t let winter be an excuse to cut back on your exercise routine!
3. Keep nasal cold symptoms away
Does anyone else feel like they always have at least a BIT of a cold this time of year? There’s nothing worse than walking around with a stuffed or runny nose. I like to use hydraSense® Daily Nasal Care, made with 100% naturally-sourced sea water, to alleviate these nasal cold symptoms. It’s effective at relieving nasal congestion, making it easier to breathe, so you can stop being the friend or coworker who sniffles all day
hydraSense® Daily Nasal Care bottle and box on a table next to candles, a cup of tea, and a blanket
4. If you’re stuck inside because the weather is so horrible, why not take the time to wind down and read a good book?
Not only is it a great distraction and temporary escape from the busy world around us, but I personally think that there’s no better feeling nothing to the thrill you get when you’re so immersed into a story you can’t bare to put the book down! With so many genres to choose from, there’s bound to be a book out there that will capture your interest(s)!
Listen to upbeat music that makes you happy
It sounds easy, but I often forget how much music can change my mood and make a dark, cold day a little bit more cheerful. Music has been linked to improvements in mood and decreased anxiety when you listen to tunes that make you happy on a regular basis. That’s reason enough for me!
What are some of the little things you do to stay positive? Do you find it a challenge at this time of year?
This post is sponsored by Bayer. To make sure these products are right for you, always read and follow the label.
Imagine a place where the musky scent of fresh-burning logs forever fills your senses; where the notes of nostalgia envelope you like an old friend, where the air is crisp and invigorating. Imagine a place that is surrounded by snow-capped hills and lush, green mountains; a place that brings you warmth even when it’s cold. Imagine a place where you glide along a white canvas creating your own beginning and your own end, where the world stops turning and life momentarily pauses, where the wind in your ears creates a silence that has no likeness. Imagine a place where, no matter who you are or where you’re from, you are instantly and wordlessly a part of a family. That place, my friends, is called Titus Mountain Family Ski Center in Malone!
The Pensive Girl and Leslie in Malone, New York. Photo Credit: Samantha McKeag
A few weeks before Christmas, I was asked by Ottawa Mommy Club Blog if I would be interested in taking a weekend trip to Malone, New York, to review the ski resort. I am a mom to a 6-year-old and I have a full-time job on top of all my additional freelance writing work so when I was offered the opportunity for a girl’s weekend, I jumped at the chance. As we continued to lay plans and the excitement grew, I failed to recognize one thing: This winter trip meant that I would have to learn to ski!
So, here’s the deal: About 12 years ago, I decided to try skiing for the first time in my life and, well, let’s just say, it wasn’t successful. In fact, it was a complete failure: I ended up taking my skis off halfway down the hill and scooted down the rest of the way on my butt. It was embarrassing and I wasn’t exactly interested in trying again. However, just like childbirth, when I realized I would have to ski, I thought, “Well, it really can’t be that hard.” It may have been my bravado speaking, or maybe it was my desperate need to get away, but either way, I was very much looking forward to my weekend at Titus Mountain.
Titus Mountain Family Ski Center
Titus Mountain Family Ski Center is located in the village of Malone, New York, just on the other side of Cornwall, Ontario. Malone, New York, was established in 1805 and many of the homes and buildings are first generation.
Me and my girlfriend, Leslie whom I brought with me on this adventure, have an annual tradition in which we seek out small, quaint towns to spend a girl’s weekend. We have a slight obsession with historical architecture, visiting quaint boutiques, and getting to know small, tight-knit communities. So, you can imagine how excited we were on the first morning as we made our way to the resort to see all the adorable little stores and houses. In fact, on our second morning, as a little side adventure, we drove around through the smaller streets bordering the downtown area, with our 4-ways on, gawking at all the adorable houses. And, as we always do, we carefully sought out and chose the lucky house that would probably have been ours had we lived there.
My House (if we lived there of course) Photo Credit: Samantha McKeag
Residential Area Looking Onto Downtown in the Village Photo Credit: Samantha McKeag
Leslie’s House (if we lived there of course) Photo Credit: Samantha McKeag
The Cutest Parking Sign I Have Ever Seen Photo Credit: Samantha McKeag
Downtown Area in the Village of Malone Photo Credit: Samantha McKeag
Beautiful Home In Malone, New York Photo Credit: Samantha McKeag
When I spoke to Tim from ROOST, I asked him if he had any preferences as to what parts of the resort I spent time reviewing, among some resort areas, he also mentioned the hotel and the restaurants. He said it because Titus Mountain is a part of a community, a part of a large family, and whatever helps the community also helps Titus. I was really surprised to hear this, to be honest; it’s refreshing to step into a small town and know that they’re all working together to take care of one another (after all, it takes a village…).
Imagine This: Titus Mountain Ski Center in Malone, NY
The Hotel
Before I talk about the hotel, you must know two things about me: My family loves to travel; from one-nighters in Montreal to a week in Cuba, we’ve stayed in a lot of hotels. And secondly, I am a bit of a princess; I am the first to admit it. When my husband and I consider going on a trip in another country (Cuba or Mexico for example), I scroll through Trip Advisor and other such websites looking for personal uploads of whatever resort we are thinking of going to for bathroom pictures. I know – it’s weird. But to me, the way a bathroom looks is an indicator of the care staff puts into the rest of their hotel or resort. There are other things I consider as well, like (obviously) how you’re treated by the staff, as well as (and this is super weird, but bare with me OK?) what their door frames look like. Again, door frames are an indicator of the care they put into their hotel.
Well, let me tell you – the Holiday Inn Express in Malone has beautiful door frames! In fact, our room as a whole was fabulous! We arrived in Malone around 9 at night and we were exhausted after working all day, and I was really looking forward to going to bed. However, I was a little nervous about check-in. I had no hand in making any of the reservations and I was nervous they would have no idea what I was talking about.
Well, I was pleasantly surprised that check in took less than 30 seconds, and even more so when we walked into our gorgeous room. The room was very impressive: a small kitchenette, two fluffy beds, and a giant – and clean – bathroom (go ahead, roll your eyes). Sometimes when you go to a well-known, older hotel there are little things that, although the room is clean, indicate “wear and tear,” like small tears in the curtains, chipped door frames, chips in the furniture and so forth. There was none of that in our room. And to top it all off, there was a welcome basket on our table stocked with snacks, drinks and even a bottle of Moon Valley Syrup.
Basket Left To Us by Holiday Inn Express, Malone Photo Credit: Samantha McKeag
Picture taken from the entrance, so big! Photo Credit: Samantha McKeag
Breakfast At The Holiday Inn – exactly what we needed to start off our day! Photo Credit: Samantha McKeag
Each morning, the first thing we did was go down to the main level for breakfast. The majority of Continental Breakfasts I have had in hotels consist of stale pastries, watered down juice, a toasting area with just white bread, and a small cooking area with runny eggs and under-cooked bacon and sausages. But not the Holiday Inn! The Holiday Inn’s continental breakfast consisted of a buffet with a coffee area (with cream, milk, and multiple different cream flavours), fresh pastries, to-die-for fresh cinnamon rolls, a toasting area with bagels, English muffins, and white and whole wheat toast, 4 cereal dispensers with different cereals, fruit, yogurt, and freshly cooked sausage patties, bacon, turkey sausage patties, perfectly cooked scrambled eggs, and even omelets! Also, in the back corner, a pancake machine (Leslie was like a kid in a candy store) that dispensed fluffy, delicious pancakes.
And, as if that wasn’t enough, on Saturday night upon returning to the hotel after spending the entire day on the mountain, there was a nice little note from Nicole, our room cleaner, saying she hoped we had a nice day and that we enjoy our stay (and don’t worry, I left her a tip when we left for Ottawa).
All in all, our hotel stay was extremely pleasant. We didn’t have any nuisance noises, the food was fantastic, and that bed…I might dream about that bed for months to come!
The Food
I like food; there’s no secret there. But what I like most about eating in new restaurants is seeing the way the same dishes are prepared differently. While in Malone, we had the opportunity to try out a few different places: Mo’s Grill & Pub, Shredding Betty’s Bistro, and Moon Valley Grill. In every place we visited, the food was fantastic! And not only was the food fantastic, the service was, as well. When we arrived at Moon Valley Grill, it was ridiculously busy and we were told there may be a 45-50 minute wait. When I frowned (because I was starving) a staff member swooped in and whispered to us that there were two people she thought might be leaving and that if we didn’t mind sitting at the bar, we could sneak in there – and remember, this woman didn’t know what we were doing there. To her, we were just another couple of girlfriends, but I felt like a celebrity regardless.
The Upper Restaurant on the Hill
Absolutely delicious Buffalo Chicken Salad from Moon Valley Grill Photo Credit: Samantha McKeag
Moon Valley Grill
Chef’s Salad from Moon Valley Grill Photo Credit: Samantha McKeag
Shredding Betty’s Bistro – lower floor cafeteria
Titus Teddy Nachos for lunch! Photo Credit: Samantha McKeag
Mo’s Pub & Grill – where we had our girl’s night out Photo Credit: Samantha McKeag
Half Nachos from Mo’s Photo Credit: Samantha McKeag
The Resort
Although I had never stepped foot in a ski boot before I was 22, all my friends either skied or snowboarded while I was growing up, so it wasn’t my first time at a ski resort. Although I didn’t ski, I would still go to the resort and hang out in the chalet with my other friends who didn’t ski, so I’m familiar with what a ski resort is all about, and out of all the resorts I’ve been to, Titus Mountain has the most to offer by far. Not only does it have three (yes, three) separate places to fill your stomach and re-energize, but it has countless more activities, programs, and events than all the other ski resorts I’ve been to combined.
Since neither of us had ever been skiing before (cause let’s face it, what I did last time cannot be considered skiing), we met with a ski instructor named Ron, along with his instructor-in-training, Reagan. They were both extremely understanding when we told them we’d never skied before and, it seemed, that there was no doubt in their minds that at the end of the hour we would know how to ski. Ron explained that he’d been skiing for the better part of his life and had been teaching for over 30 years. He was very sweet and encouraging, and his explanations were easy to understand. It wasn’t until we were well into the lesson that he found out we were there for a blog article, so I am confident that this is how Ron is and wasn’t amusing us because he knew why we were there.
Leaving the hotel for our ski day! Photo Credit: Samantha McKeag
The view of the mountains from the parking lot were beautiful…also Leslie likes to Photobomb 🙂 Photo Credit: Samantha McKeag
View Photo Credit: Samantha McKeag
Reagan, the junior ski instructor Photo Credit: Samantha McKeag
Our instructor, Ron. Made me feel like I would actually be able to learn to ski! Photo Credit: Samantha McKeag
First thing he did was check to see if our boots were properly fastened Photo Credit: Samantha McKeag
Learning to ski on two skis Photo Credit: Samantha McKeag
Learning to push off with one foot Photo Credit: Samantha McKeag
Unfortunately, after about 30 minutes, I was in a quite a bit of pain (the reason turned out to be simple, however, I didn’t realize the source of the pain until a little while later), but Leslie continued with Ron. In fact, about 5 minutes before Ron was to start his next lesson, one of the other instructors said he would cover him and so Ron continued with Leslie.
I’ll admit, once I’d sat down with Regean (during which time I found out that Reagan was not only a junior ski instructor and avid skier, her dad was also on the ski patrol – talk about a family business!), I thought I was done with skiing. I had come to the conclusion that I would just never ski and I would have to accept that.
When Leslie was done, she came down from the mountain smiling from ear to ear; I don’t think I’d ever seen her so happy. Like me, she’d thought she would never ski. After she made sure I was OK, I asked her about the rest of the lesson and she didn’t have enough good things to say about it. This is what she said about Ron:
“[Ron] was exceptional! It was as if he knew from the get-go that I had the potential to learn how to ski. And even though he knew I’d never set foot in a ski boot before, he was encouraging and supportive[…]I think I actually feel confident enough now to be able to do this on my own…”
We decided then to have lunch and I promised, given how badly I didn’t want to let Leslie down, that I would think about trying again, as much as I was convinced that it would never happen. I attempted to stuff down the disappointment with a delicious Buffalo Chicken Salad.
After lunch, I gave in and decided to try again. I watched Leslie go down the hill a few times, and while I expressed how nervous I was to go down the hill, a family – who was snowboarding for their first time – took time to show us how to lean and bend our knees to ensure that I would be able to zig-zag down the mountain, while also helping their kids, and helping another young girl they didn’t know buckle into her snowboard every time she got back to the top. And, you won’t believe when I tell you, after watching Leslie go down six times and listening to the man and woman (who, I might add, had two of their own children but also spent time teaching me and Leslie as well as helping a random little girl buckle up her snowboard every time she got back to the top), I went down the hill! It took me 2 minutes to get down the bunny hill and I was convinced I was going about 100 km an hour, but I had done it, and when I got to the bottom I almost cried (and then I went again and made Leslie take a video so I could send it to my husband as proof). On my last run, I happened to pass the little snowboarding girl, and as I did, she yelled, “See? You can ski!”
The fireplace in the dining room of Moon Valley Grill Photo Credit: Samantha McKeag
Even their lockers are adorable Photo Credit: Samantha McKeag
The second fireplace I found when I got lost looking for the bathrooms Photo Credit: Samantha McKeag
Enjoying our lunch Photo Credit: Samantha McKeag
We stayed until after dark and this fire was still going…and the smell was beautiful Photo Credit: Samantha McKeag
Why I Was Able To Do It
I’ve discovered recently that I have this incessant need to feel safe in most situations in my life. Since I was a young child, I have been painfully shy, but as I’ve grown up, I’ve started to figure out which situations make me shy (ie: feel uncomfortable) or which situations lessen my insecurities; in order to lessen my shyness or insecurity, I must feel safe. I must feel as though those around me are interested in my well-being and are rooting for me rather than against me.
The Saturday I went to Titus Mountain, it was Pass Holder Appreciation Day; during our lesson, there were at least 75 adults standing at the bottom of the hill watching their children. Normally, a situation like this would have made me feel unbelievably uncomfortable and insecure, and I will admit, in the beginning, it did. But once I had been with Ron and Reagan for roughly 10 minutes, all those insecurities went away, and even more so after I’d had to sit down due to my mystery pain. Here’s why:
While I was sitting on the bench trying to find the source of my pain, four different instructors asked me if I was OK as they walked by, and seemed genuinely concerned. Even the “Ski Guy” (the guy who gave me my rented skis) asked how it was going when he walked by. And when I decided to try a second time and approached the end of the bunny hill full of people, a woman who was not a part of the resort lent me her shoulder when I almost fell over trying to get my second ski on. And while I sat on the bench at the top of the hill trying to gain my courage, the family I mentioned before tried to help, as well as 2 other random people. The entire atmosphere, from the waitresses to the instructors to the staff to the actual environment, felt safe to me.
This was posted on the bottom of the menu at Mo’s. Just an example of how family-oriented this community is Photo Credit: Samantha McKeag
Three girls on a chairlift Photo Credit: Samantha McKeag
This little boy and the boy in the next picture were the kids of the family who helped me and Leslie figure out how to masterfully zig zag down the hill – it was their first day snowboarding Photo Credit: Samantha McKeag
Photo Credit: Samantha McKeag
Later, when the sun went down and we were still skiing and the eternal fire’s scent wafted up the mountain, I felt like I’d been visiting this resort forever; it no longer felt strange and scary, it felt comfortable and home-like.
Why I Loved Titus Mountain
Besides the fact that I loved the atmosphere on the mountain, I noticed that it’s not just about skiing – it’s about gathering the families together and giving them somewhere to spend precious time together. I looked through some of the events coming up in the next few months, and honestly, I’m already planning my next trip! Here are some of their upcoming events:
The Challenge Race Series: Every weekend, they have these race challenges in a specific part of the mountain. While we were there, we got to witness this first hand!
Moon Valley Maple Sugar Shack: I was really disappointed that we didn’t have time to check this out, however, I will make it a point to go back when we return (although, I did try the syrup the hotel gave me and it was to die for.)
LAFFTER Hash House Hide The Chicken: I’m sure you can guess what this is by the title and it sounds hilarious!
Howl At The Moon: An annual party where runs go until midnight with live music and giveaways!
Mountain Madness: A family fun day with activities like the Challenge Race Series, Sugarhouse Tours, Outdoor Grill, Face Painting, Penguin Paddle, Cardboard Shred Race, Pond Skimming, cook s’mores over the fire pit, a torchlight parade, and fireworks! Also, live music, awards and prizes, and appearances by Titus Teddy and Shredding Betty throughout.
Live music and open mike: Every week, a band or singer performs in the main lodge for whoever is attending that night. Also, open mike is quite literally “open mike” anyone can have their turn in the spotlight, regardless of their talent (what do you think they would think about my ability to yodel?)
And these are all just until March!
Photo Credit: Malone Tourism
Titus Mountain isn’t just a ski resort. It’s a place where families, kids, teenagers, singles, couples, and seniors come to experience a shared love for skiing. It’s a place where people like me (who would prefer to hibernate until May) come out to embrace winter, to take part in an old-fashioned activity that will never go out of style.
I’m planning a trip back there very soon and I absolutely cannot wait to show my son what it’s like to be a part of a community, part of a group of people who all have the same motivation in mind: To be part of something bigger than themselves.
The Pensive Girl, signing off.
_________________________________________________
If you’ve liked what you’ve read and would like to get more information about Titus Mountain you can connect with them on Facebook, Twitter and YouTube!
Canadian Turkey has a gaggle of nutritious meal and soup options for families to help you and prep ahead for their busy weekly meals! You definitely have to make this Quick and Hearty Turkey Barley Soup!
The beginning of a new year signals a fresh new start for many Canadians. Some people like to set goals to start eating better. Picking a protein that is versatile is key to making meal planning an easy task to perform for busy families. With all of the choices available, which one should you turn to? Have you considered turkey? Yes! Even after the holidays, this bird is a great choice!
Choosing healthier ingredients to create tasty meals is not a compromise families have to make! Did you know how many ways turkey can be incorporated into a meal that is not only nutritious but delicious as well? This power-packed protein can be used to substitute other meat protein in nearly every recipe. It can also be a welcome addition to every meal you enjoy during the day (lunch, dinner, and yes, even breakfast!) to help supply your family with enough energy to get through a hectic day.
Were you aware that both the dark and white meat of a turkey work well with different spice profiles? This way, you are able to switch up how you prepare your meals according to their tastes without sacrificing on flavour. Canadian turkey is also a terrific ingredient that can also be repurposed into other meals throughout the week. Having the knowledge that your meals for the week are in your fridge or freezer, ready to go, takes a lot of the “What’s for Dinner” stress off of your shoulders.
Turkey is also a protein that is a healthy option for families to eat and enjoy, it would be great to add to your meals if you are planning to eat healthier this new year! Not sure where it would fit in to your new meal plans? Use these five “back to basics” tips to eat healthier throughout the year with lean, nutrient-rich turkey!
5 “back to basics” tips to eat healthier with turkey
1. Choose nutrient-rich foods first
Instead of removing certain foods from your diet, change this thought into focusing on adding food to your diet. Choose foods that are nutrient-rich first, such as whole grains, veggies and fruit, nuts, seeds, yogurt and lean meats (you know, like turkey). This allows you to enjoy what you eat and to still have room for fewer of those foods you might be wanting to eat less of. Why is turkey such a power-packed protein? It is packed with nutrients like vitamin B12 (key in keeping your nervous system working well), selenium (an antioxidant mineral) and zinc (for a strong immune system).
2. Create a balanced plate: pair protein plus produce
A healthy plate combines protein-rich foods, such as turkey, with plant-based foods, such as veggies, to get as many nutrients as you can in a meal. Having as many balanced nutrients during every meal also creates a super food synergy that increases your body’s abilities to take in other nutrients. A great aspect of turkey is that it pairs well with all produce. There are so many flavour combinations that can accompany turkey on a plate to make a delicious and nutritious meal.
3. Cook more meals at home
There have been many times when the hustle and bustle of a busy life makes us turn to convenience foods to serve for families. When more of your meals are made at home, you are able to control the ingredients being served to your family. When you make your foods “from scratch”, you will be more likely to get more good-for-you nutrients and save money in your pocket! Check out this turkey time-saver tip: Cook once, eat twice with planned leftovers. On the weekend, roast a whole turkey, a large turkey breast or extra thighs to eat for Sunday dinner and then add the leftovers to create quick meals during the week.
4. Bump up the protein
Are you looking to be more active, feel more energized, or maintain a healthy weight this New Year? Once way to help accomplish this goal is by adding protein to your plate! Along with your workout routine, eating 20-30 grams of quality protein with your meals can help you build and maintain muscle. Turkey is a great power protein to turn to. It is an excellent source of high quality protein. Each 100-gram serving is lean and contains about 30 grams of protein.
Winter is a great time to enjoy a pipping bowl of soup. Take a look here to see how to create this Quick and Hearty Turkey and Barley Soup for your family to sip on and enjoy from scratch!
QUICK AND HEARTY TURKEY BARLEY SOUP
It's time to enjoy a pipping bowl of soup during colder months. Why not make this Quick and Hearty Turkey and Barley Soup for your family!
Heat olive oil in a medium size frying pan over medium heat.
Add onions and carrots and sauté for 4-6 minutes until softened and just beginning to brown.
Add celery and crushed garlic. Cook 4-6 minutes.
Add ground turkey, garlic powder, Italian seasoning and salt and pepper to taste.
Cook an additional 7-10 minutes, until turkey is cooked through and is no longer pink. Mix to break up any larger chunks.
Add tomato puree.
Add turkey broth.
Bring to a boil.
Add barley. Lower heat to a simmer and cook for 35-45 minutes until barley is cooked.
Add 2 cups frozen vegetables. Quality frozen veg will help cut down on prep time. If using fresh vegetables, extend cooking time until cooked through.
Cook for 3-5 minutes until vegetables are cooked through.
Serve!
Notes
This recipe makes a large quantity perfect for batch cooking. You can make it ahead, re-heat half for a weeknight meal and then freeze the other half for a quick weeknight dinner or weekend lunch later on.
Do you get peckish in between meals? Turning to small snacks made with nutritious foods can give you a hand to help maintain your energy levels and deter you from overeating at your next meal. Leftover turkey is ideal choice when you need a snack to keep you nourished between meals. Proteins help to manage munchies and fight cravings for sweet treats. Combine turkey with a veggie or fruit to create a smart snack!
Are you excited to see other ways to #PowerUpWithTurkey this New Year? Head over to Canadian Turkey’s website to get inspired with a wide variety of recipes that will help you put together heathy and tasty meals your family will enjoy eating!
Want to see what Canadian Turkey can do to help make your New Year a more nutritious one? You can visit them on their website or connect with them on their Facebook, Twitter, Instagram, Pinterest, and YouTube pages!
Disclaimer: This post was generously sponsored by Canadian Turkey.
Small washrooms can be frustrating to live with; especially in smaller homes or condos. A bathroom should be an oasis in many ways, so lacking enough space can be a problem. Luckily, we can implement a number of different tricks to make the space feel a lot bigger than it is. All of these things can be done without having to tear the place up and start from scratch. Below are some quick and easy ways to make your bathroom feel a little larger.
Simple Ways to Make your Bathroom Look Bigger
Smaller Furniture
The most logical thing to do when confronted with a small space is to find furniture that takes up less room. These pieces can utilize the room the most effectively because they’re made with efficiency in mind. Items like pedestal sinks offer a sleek look that leaves a lot of floor room. It can also make the space look bigger.
Storage Furniture
Pieces that provide storage are also available. Storage is important to keep in mind because people will always need more storage than they think they do. Wall storage cabinets are best in these cases as they leave extra floor space. This can keep the space clean looking and open.
Bathroom
Consistent Colours
Distinct colours can emphasize the limited space of a small bathroom. Dividing the room into smaller sections by colour create a bathroom that feels cluttered and claustrophobic. To combat this effect, one of the best ways to give the illusion of space is to have a unified colour pallet in the room. This is effective in opening up the space and unifying the room so that the eye will take the whole room in at once, rather than cutting it up into smaller pieces visually. This principle extends to the ceilings and the walls, as well. Painting the ceiling a similar colour is an easy trick to trick the eye into thinking there is more room.
Light Colours
Colours are very important when trying to achieve an overall effect, tone or mood in a space. Soothing colours are best for bedrooms as this can lull you to sleep, while bright colours for kitchens can help to motivate or stir conversation. Lighter colours in smaller spaces can help make a room feel airy makes a room feel bigger and will reflect light, opening up the space. Do not hesitate to have white-on-white, for the fixtures, walls, ceilings, and even the floor.
Bigger Tiles
Unlike bathroom furniture which should be small, bathroom tiles should be made larger. Tiny tiles create a cluttered appearance, while larger tiles open up the room and make it seem sleeker and more spacious. This is the goal after all. Affordable tiling is easy to find. Just be sure to check quality at your local store or by researching online to ensure that the tiling will last for years to come.
Bathroom Mirror
Mirrors
The easiest way to make any small bathroom seem more spacious is to install a mirror. A mirror will both reflect light and space back, making the bathroom appear larger — even double in size. Not to mention it doesn’t require any home renovations or even painting. Just a possible hammer and nail for installation. If possible an oversized mirror would be the most effective, but there are many different options that would work. For instance, floating mirrors are perfect for bathrooms with limited wall space. Looking at online furniture stores are good for getting an idea of what’s available and could be used in the space.
Simple Ways to Make your Bathroom Look Bigger
There are a lot of resources for furniture available to those looking to improve the look of their bathroom; especially if it’s to modify the feeling of space and comfort. It can be as simple as a fresh coat of paint and a new big mirror, so why not invest a little bit of time, and an even smaller amount of money to enjoy your bathroom a little more? Your bathroom oasis is yours, and you shouldn’t hesitate to personalize your own private place.
What will you do to make your bathroom a personal haven?
It’s snowing like crazy outside, the truck in front of you keep splattering mud and slush ice in your windshield, it’s nighttime and you’re driving on a country road. Winter apocalypse. But wait! Your trusted windshield wipers might just save the situation! Except you don’t really know how to take care of them properly, and now they’re sloppily smearing dirt all over your windscreen while seemingly laughing at your distress with that annoying squeaking sound. That does it. Girl’s night is ruined (and you didn’t even notice that your wipers left a long scratch on your new windshield yet).
Windshield and a wiper
Well, here are some little tips and tricks that can help you avoid that kind of situation.
Taking care of windshield wipers and glass: you’re doing it wrong!
Leaving your windshield wipers raised when it snows
This little technique might prevent the blades from sticking to the windshield when it rains, snows or hails, but lifting the wipers are putting them at big risk of breaking (and damaging your windshield) on windy days. This could not only cost you new blades, but also a new mechanism if they freeze while up, and need to be forced back down.
Although there are other solutions to prevent the wiper arms from freezing, like sheathing them with a plastic bag or sliding a piece of flexible cardboard or plastic between the glass and the blades, you’re better off leaving them be and de-icing them carefully by hand. In extreme cases, unfreeze them with cool water or antifreeze, or wait for your windshield heating element to do its job.
Not turning them off when you park
Determined as the #1 cause of windshield wipers system and mechanism failure, not turning off the wipers (regardless of the weather or the season) is a good example of a small mistake with big consequences. The replacing cost of a wiper linkage ranges from 200$ to 700$ (I know, right…) and although you can get some parts, a home repair kit or duct tape for a few bucks, you’re better safe than sorry.
Turn wipers off when you park, it could save you a lot of trouble.
Not cleaning the blades and glass properly
You should clean your windshield AND windshield wipers every time you fill up your gas tank. In fact, an awful lot of windscreen scratches and marks (and a costly windshield replacement or auto glass repairs) could be avoided by developing that simple habit.
The glass should be taken care of with premium windshield washer liquid or neutral detergent. You can use a mild abrasive non-chlorinated cleaner, if it’s reaaally dirty. Applying an hydrophobic windshield treatment once in a while, such as the Aquapel® treatment offered by Uniglass Plus, can also greatly improve the performance of the wipers.
The blades can be cleaned with windshield washer fluid or rubbing alcohol and a soft cloth. If they’re the – unbearably annoying – squeaking kind, you can wipe the blades with a paper towel moistened with WD40. It should soften them and prevent the squeak noise to drive you completely crazy.
Letting snow and ice accumulate at the bottom of the windshield
Even if de-icing the car isn’t the nicest thing to do in hellish cold, you should still take the time to do it properly. Removing ice and snow from the bottom of the windshield could save the wipers from skipping and streaking, and spare the system from overworking itself.
Oh and… Be gentle. I know it can be frustrating, but hitting the car at full strength with the ice scraper to break the ice is not the way. Think of warm exotic white sanded beaches and try to remove the ice as delicately as possible.
Take extra care of the washer liquid jet nozzles mounted on your car’s hood. The resin inside eventually dries out and can become brittle with time, making the little plastic units quite fragile and incompatible with a daily snow broom beating.
Not buying decent wipers to begin with
All windshield wipers are not created equal; actually, the fact that the model and size fit your car is far from being the only criteria to look for. Different kinds of wiper include:
beam blades (also called frameless, spineless, bracketless or flat wipers), which became standard equipment on certain car models since 2000
blades with a Teflon® coating which supposedly ensures a smooth, quiet wipe and non-adhesive performance
blades that leave a hydrophobic, water-repellent film on the glass
silicone blades – a lot more durable and water repellent, and more.
5 Things You’re Doing Wrong When Taking Care of Your Windshield Wipers
Replacing the wipers
For safety matter, you should change your windshield wipers as soon as they start to chatter or smear, reducing the driving visibility in any way or showing signs of wear. If they don’t make contact with the glass in certain spots anymore, you can try prying them gently or softening the rubber with WD40, but don’t hesitate to replace them if homemade fixing doesn’t work out.
The wiper arms cost range between 10$ to 50$, and you can generally have them installed as part of routine maintenance. They are also fairly easy to install by yourself.
While you can rush out last-minute to grab a few cards for friends and loved ones, why not make a homemade Rose Filled Heart Card? It also comes with a template to help make the roses. Many homemade cards are easy to make, they just take a bit of time. If you’re willing to put in a bit of time, you can make something gorgeous for your loved ones. This is a great craft to make while watching TV or to make with your kids.
Rose Filled Heart Card
Speaking of kids, this is a great craft to keep them busy on a snowy afternoon. It’s a craft that they will need to concentrate on, which usually means they’ll keep quiet for a little while. What parent doesn’t need a bit of quiet time when the kids are home from school? You could even use a variety of colours of paper so that your kids can be creative. Roses do come in a variety of colours after all.
Make Heart Cards for Friends or Classmates
If your kids have the time, this would be a cute card for them to make for their classmates. Of course, it will take quite a bit of time to put together that many cards, but your kids will have something unique rather than handing out the same cards as someone else in the class. If your kids want, they could attach a sucker to the cards for an added treat.
Whether you want to make homemade cards for your friends or want a craft to keep the kids busy, this is such a cute craft. These rose filled heart cards are very easy to make and you can use whatever colours you want. Remember to print the included template so that you can get started making these cards right away. And, don’t just make these for Valentine’s Day or Mother’s Day. These cards would be great for any holiday where you want to show love for someone.
Prepare the card by using a cardstock paper or craft paper; the card should be square but the size of would depend on choice. I used white craft paper to make the card, it’s better to use a lighter colour for the card for this project. Use a pencil to trace the heart shape on the card.
Rose Filled Heart Card
Step (2)
Take a small piece of coloured craft paper and cut it into a spiral as like the spiral template.
Rose Filled Heart Card Step 2
Step (3)
Take the spiral paper and start to roll it from its outer edge.
Rose Filled Heart Card step 3
Step (4)
Keep rolling the spiral pattern until reaching the centre.
Rose Filled Heart Card step 4
Step (5)
Apply glue on the centre area of the spiral pattern, which now should be positioned below the rolled pattern. Press the roll with the centre to make sure that it is secured and glued with the centre part.
Rose Filled Heart Card step 5
Step (6)
Similarly make lots of rolled roses.
Rose Filled Heart Card step 6
Step (7)
Done making the roses? Take the card and start gluing the roses inside the traced heart pattern on the card. Start gluing the roses along the border of the heart.
Rose Filled Heart Card step 7
Step (8)
Fill the heart pattern with the paper roses neatly. Once done filling the heart allow the glue to dry for a while.
Rose Filled Heart Card step 8
Step (9)
Take 4 thin strips of coloured papers and glue them along the sides of the card.
We use cookies to ensure that we give you the best experience on our website. If you continue to use this site we will assume that you are happy with it.