We all want to eat better. We all also know that eating healthy food will make us feel better. So, obviously, we want to put good food into our bodies. These 25 healthy snack ideas to fight cravings listed below will help you stick to your diet!
These cravings are one of the reasons we remain overweight and can’t seem to stick with a healthy eating plan. The problem is that unhealthy food tastes so good. Whether it’s chocolate cake or ice cream, we all have those foods that we can’t seem to resist. Instead of beating yourself up why not look for ways to beat those cravings.
Snacks that curb cravings
Believe it or not, there are a number of healthy snack ideas that will help you curb your cravings. It may sound too good to be true, but the right food can feed your body and your cravings. It doesn’t matter if you crave salty, crunchy snacks or ooey gooey treats, there’s a healthy snack out there that will satisfy you.
If you’re tired of being controlled by your cravings, try some of these snacks. When you have things like this on hand, it’s much easier to choose something healthy even when your body wants something bad. Remember, the biggest problem for many of us is convenience. Prepare a couple of these snacks so that you have them available when a craving strikes. When you can just as easily grab a healthy snack, you’re more apt to do so.
25 Healthy Snack Ideas
The following list features amazing healthy snacks ranging from peanut butter fudge and chocolate chip pumpkin bars to zucchini pizza bites and skinny taco dip. Imagine eating foods that seem decadent, but are actually good for you. No longer do you have to feel guilty for enjoying delicious food. Best of all, these snack ideas are just a starting point that can inspire you to create your own healthy snacks.
Hope you enjoy these healthy snack ideas to fight cravings as much as I did! Also, check out our recipes! If you have a favourite healthy snack, be sure to share that with us in the comment below!
As mothers, we want what is best for our families as well as for ourselves. This includes making the right eating choices and helping our kids develop eating habits and proper nutrition which will benefit them as they enter adolescence, leave for college, and subsequently pass into adulthood. You will find below Dieting and Nutrition Tips to Ensure a Healthy Life for You and Your Kids!
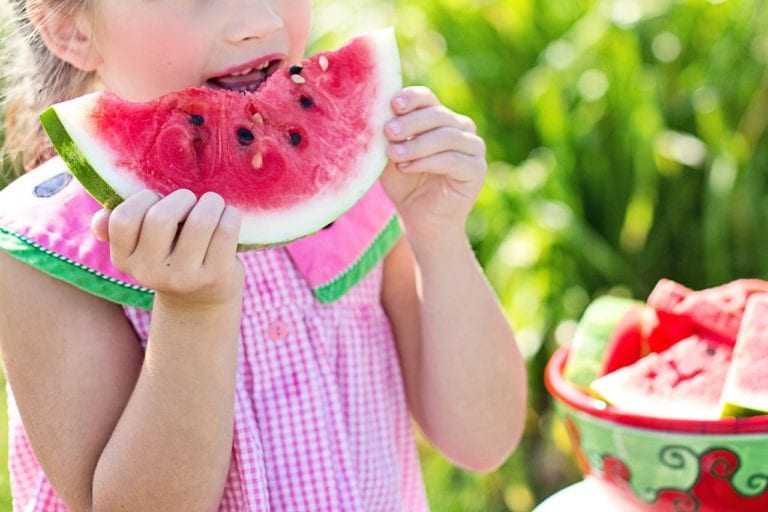
Girl eating watermelon
In various pieces of research, such as that done by Dr. Steven Gundry of Gundry MD, it has been found that the eating habits and patterns which individuals develop (whether good or bad) from childhood stay with them for most of their lives.
It is therefore a good idea to start, from an early stage, to guide our kids to eat right. It is also important for us, as mothers, to adopt the right dietary plans which will keep us healthy and strong and ensure that we are available for our families when they need us, because mothers are the grease which keeps the family engine running.
Dieting and Nutrition Tips to Ensure a Healthy Life for You and Your Kids
Dieting and Nutrition Tips to Ensure a Healthy Life for You and Your Kids
Taking balanced diets and eating right
Balanced nutrition is a term which I believe that everyone must have come across. It involves having regular meals which consist of foods from each of the basic food groups: fruits and vegetables, nuts, grains, milk, meat and eggs, the healthy kind of oils (e.g. olives), and drinking good, clean water. These foods are made up of the six classes of nutrients which include proteins, carbohydrates, fats and oils, minerals and vitamins, and water (yes, water is also a basic nutrient). To be able to grow, be energetic and healthy, and be able to live an active lifestyle, a person must regularly consume each of these food and nutrient classes in adequate proportions.
According to experts, taking dietary supplements is not required as long as an individual maintains a nutritionally balanced diet, and is able to consume the six basic food groups mentioned above on a daily basis. One might then ask whether a vegetarian diet meets all the basic requirements for a healthy lifestyle. The answer is yes. A vegetarian diet which includes a sufficient intake of grains, legumes, and nuts, which is enough to provide the protein requirements of the body, is good to go.
Healthy food
Essential Dieting and Nutrition Tips to help you and your family to develop the right eating habits
Let us now review some basic dieting and nutrition tips which will help us to ensure an active, fun-filled life for ourselves, our kids, and our families as a whole:
1. Meals should be prepared using fresh ingredients.
We should also ensure that every meal contains lots of fruits and vegetables. This will help to make meal time colourful as the table is richly spread with a variety of fresh, wholesome food.
2. It is always healthy to adopt more beneficial methods while preparing meals.
For instance, you should consider steaming, boiling, grilling, etc., rather than frying or roasting. However, there’s nothing wrong with having fried chicken, for instance, as long as heart friendly cooking oils are used in adequate amounts.
This will help us to spend less, cook better and healthier, and to be able to avoid processed and fast foods. Eating fast foods inhibits the development of good eating habits, especially in children, and I believe we all want our kids to eat right.
4. Meals should be eaten together as a family.
Eating meals while watching television or handling mobile devices and PCs should be avoided as it promotes poor eating habits.
5. As much as possible, try to incorporate yogurt into diets as they encourage the growth of body friendly microbes which help to keep us healthy.
Also try to reduce or completely eliminate processed sugar and other sweeteners from your diets. Intake of processed sugars encourages the growth of bad microbes which affect the body negatively.
6. Finally, you should keep to a decent exercise routine as it is a key factor for a healthy lifestyle.
Also try to get lots of sunlight (especially early morning sunlight which loads the body with lots of vitamin D).
Yogurt in a bowl with fruits
If you follow these Dieting and Nutrition Tips, it will ensure a Healthy Life for you and your kids
Spring is almost here, and your kids are probably looking forward to getting outdoors. While there are several ways for them to play and have fun, there are also ways for them to learn. Whether you let them plant flowers or harness the power of the sun, there are several outdoor STEM activities to celebrate spring.
5 Outdoor STEM Activities to Celebrate Spring
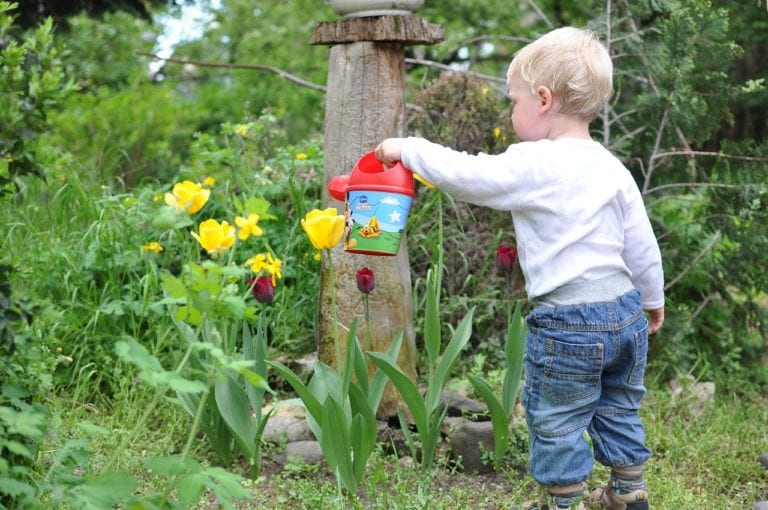
1. Plant Flowers
There is so much to learn from planting flowers. Not only do your children follow hands-on instructions to plant flowers, but this is something they can observe over the next few months. They can even keep a journal to draw pictures of how the flowers look each week along with any notes. Use a variety of plants, seeds, and bulbs so your kids can make different observations.
2. Grow a Garden
Something else they can observe is the growth of a garden. You can start with seeds or plants. Not only can your children observe the plants growing and producing fruits and vegetables, but you can take things further by allowing your children to harvest the produce. You could then cook or preserve the fruits and vegetables for future use. There’s so much that can be learned from gardening. Even tasting different colours of bell peppers and making observations is a good activity.
3. See How Rain Water Travels
On a rainy day, grab the umbrellas and go outside to see how water travels through the yard. You may have to look for a few moments to see a spot where there’s enough water flowing. An alternative would be to use a hose to create a rain shower and watch how the water travels. A good spot to start would be around spouts from the gutters. This is where you’ll find a good flow of water.
4. Build a Birdhouse
Building a birdhouse is another great outdoor STEM activity to celebrate spring. Not only is math used, but you can also use science to observe the birds in your yard to see how big the birdhouse needs to be. You can also paint and decorate the birdhouse before finding the perfect place to hang it.
5. Harness the Power of the Sun
Last, but not least, purchase some solar decorations or toys for the yard and let your kids discover how the power of the sun can be used to power them. Your children can also choose the spots to place the decorations and check on them at night to see if the decorations got enough sun. If the spot isn’t a good one, they can try again.
Outdoor STEM Activities to Celebrate Spring
It’s nice to get outdoors once the weather warms up. It’s also nice to have activities for your kids to do that are educational, but also fun. Many of these activities can be spread out over a few days. Whether your kids grow a garden or build a birdhouse, these STEM activities are a great way to spend a warm spring day. Choose a couple different ones for the first day of spring to help celebrate the beginning of the season.
Exciting Changes and Additions Coming to Disney Parks
Similarly to how Disney is constantly evolving their movie franchise by adding in new movies and characters, they are also improving and evolving their parks to fit the themes of the new Disney movies and characters as well. Throughout the next few years Disney has revealed several changes and additions that they are adding to their parks to create an even greater and more diverse park for everyone to have a good time. Today I am sharing with you a few of my personal favourite additions that I think are going to make for some really great experiences at the Disney Parks.
Toy Story Land at Walt Disney World Resort ~ Photo Credit: Disney
1. Toy Story Land
I am most excited about the addition is the Toy Story Land! It is probably the biggest change coming to Disney that everyone is talking about. This part of the park will be located at Hollywood Studios and is scheduled to open June 30th, 2018! Toy Story Land will feature two new rides in addition to the current Toy Story themed ride, Toy Story Mania!. The new rides include Slinky Dog Dash, a rollercoaster that sends you twirling around in circles, over hills, and falling in drops, and also Alien Swirling Saucers which is a ride where you get to climb in your very own rocket and go on a fun trip through space. Toy Story is one of my favourite Disney movies so I am definitely stoked for Toy Story Land to open up!
2. Guardians of the Galaxy Roller Coaster
The Guardians of the Galaxy movies have become a big hit among Marvel fans the past couple years which is why I am so very excited about a new Guardians of the Galaxy attraction. There are not a ton of details released quite yet about this new attraction other than that it is going to be an enclosed roller coaster featuring a great story line. This ride will be featured in Future World at Epcot parks and is scheduled to open in 2021.
TRON Attraction ~ Photo Credit: Disney
3. TRON Attraction
There is a TRON attraction currently open at Disneyland in Shanghai and Disney has said that it is their highest rated attraction at that park, so they have officially decided to bring it to the states. It will be added to the Magic Kingdom park closely located to Space Mountain in Tomorrowland. On this attraction riders get to enjoy the experience on a two-wheeled Lightcycle and dive into all of the lights and excitement that is TRON. This one is also scheduled to open in 2021 for Disney World’s 50th Anniversary Year.
Exciting Changes and Additions Coming to Disney Parks
4. Disney Skyliner
They will be releasing a brand new transportation system called the Disney Skyliner in which guests will be able to travel from various resorts and parks while getting a beautiful Birdseye view of the Walt Disney World resort. Disney has not yet given a specific date or time that this transportation system will open but I think it will be a great way to experience Disney in a whole new way.
X-wing Starfighter pictured under development for Star Wars: Galaxy’s Edge ~ Photo Credit: Disney
5. Star Wars: Galaxy’s Edge
Another new “Land” that will be released in the Disney Parks is a brand new Star Wars themed Land called “Galaxy’s Edge” located in Hollywood Studios as well. Galaxy’s Edge is going to have two brand new rides. These two brand new attractions put you right in the middle of a battle between the First Order and the Resistance. On one of these attractions you get to get the experience of being on a Star Destroyer and on the second one you get the opportunity to feel like you are flying the Millennium Falcon and go to battle yourself. This land is scheduled to open in 2019!
These are just a few of the many new and exciting attractions that are coming to the Disney Parks over the next few years. I am so excited for all of these things and I cannot wait to hear about any other exciting attractions that Disney will announce in the future. Personally, my family is a Disney family and whenever we can visit the parks and have the opportunity to try new things while we are there, it makes it that much more exciting and fun for us.
A new year has arrived and you made the resolution to lose some weight, but how? Often we make these resolutions without a clear plan in mind. It’s not enough to just say that you’re going to lose weight, you need to have a plan. Which diet plan is right for you? The truth is there are many diets to choose from. Let’s look at some of the most popular plans to see which diet is best for you.
Which Diet Plan Is Best for You?
Paleo
The Paleo diet plan focuses on healthy protein, fruits, and vegetables. The things that are okay to eat on this diet include fruits, vegetables, lean meats, seafood, nuts and seeds, and healthy fats. You will need to avoid dairy, grains, processed foods and sugars, legumes, starches, and alcohol. This diet is perfect for those that not only care about losing weight, but being healthier.
Atkins
The Atkins diet plan has been extremely popular for many years. The only real rule is that you eat a very low carb diet that is high in protein and fats. This diet has been successful for many people because it got them away from eating refined sugars and flours. However, the diet has been called out for the high levels of fat people consume while on the plan.
Vegetables wrapped with a measuring tape
Ketogenic
The ketogenic diet plan is another plan that focuses on eating lots of high- fat protein and limiting carbs. Through this diet, the body is forced to burn fat for fuel rather than carbs. This diet can help with weight loss, but you need to be aware of the problems of a high-fat diet. High-fat protein can be unhealthy for the heart and lead to cardiovascular problems.
Vegan
The vegan diet plan is straight forward. On a vegan diet, you can eat anything that doesn’t contain animals or animal products. This means you cannot eat dairy, eggs, or even honey. The problem with this diet is that sugar, oil, refined flour and other foods that are allowed on the diet are extremely unhealthy. To simply be vegan doesn’t guarantee weight loss. This diet can be healthy, but you need to be smart about the choices you make.
Vegetarian
The vegetarian diet plan is a lot like the vegan diet in that you can eat animals, but you can eat animal products. You’re allowed to have dairy, eggs, and honey. Again, it’s hard to base weight loss on these changes alone. Being vegetarian alone isn’t enough to lose weight.
Measuring tape on top of a scale
The Zone
The Zone Diet plan is about more than just weight loss, though you will lose weight. The plan also focuses on reducing the symptoms of chronic disease, while improving mental and physical performance. On this diet, you eat meals in which 1/3 of your plate is protein the size and thickness of your palm and the other 2/3 of your plate is colorful fruits and vegetables. You also want to add a tiny amount of fat to your meals. This diet is one of the most balanced plans you’ll find that focuses on both protein and healthy carbs.
So, which diet plan is right for you? It depends. If you’re looking to lose weight and be healthy, the Paleo and Zone diets are pretty hard to beat. The reason being is they’re balanced diets. Diets that completely cut out carbs are not healthy. Your body needs carbs – it just doesn’t need bad carbs.
Speak to your doctor about the different plans and work together to find the best plan for your needs.
There are so many hearty healthy breakfast recipes for busy mornings. Whether you’re looking for something sweet or savoury, you can find a recipe that is not only healthy, but satisfies you.
You’re constantly on the go and breakfast just doesn’t seem that important. A coffee and a muffin from your favourite coffee shop is fine, right? Not exactly. Many coffee drinks are loaded with sugar and that “healthy” muffin can carry over 500 calories. It’s not uncommon for these quick breakfast options to have a total of over 800 calories. That a huge amount of calories for your first meal, especially when you consider that there’s little nutritional value. Thankfully, you don’t have to rely on coffee shops and fast food restaurants for a quick breakfast.
Healthiest Foods To Eat For Breakfast
You already know that the breakfast is the most important meal of the day, and choosing the right foods for your breakfast can make a huge difference in your energy levels throughout the day, and can give you the kick start you need.
Keep reading to discover the top healthiest foods to eat for breakfast and that are perfect for you to serve on the menu as a nutritious meal. Try to eat more of them each week!
EGGS
You probably knew this one was coming- eggs are super versatile and packed full of choline, antioxidants and even protein. Starting your day with some eggs can help you feel full for a longer period of time and can also prevent eye disorders and keep your blood sugar levels steady. You can make this healthy breakfast pizza that is loaded with cheese, sausages, and eggs to start your day on the right foot!
OATS
Oats, especially the steel cut variety, is another top choice to consider. It is both heart and waist friendly, and can give your body a good dose of protein and beta glucan- a fiber that helps keep you feeling full. In addition, oats are also super rich in antioxidants that help boost heart health and keep your blood sugar levels in check.
GREEK YOGURT
What could be better than a bowl of creamy Greek yogurt to start your day with? Greek yogurt has been found to contain more protein than regular yogurt, which is exactly what you need to start your day with. Plus, it has also been found to help boost metabolism and since it is also a rich source of probiotics, it boosts your digestive health as well!
BERRIES
Literally all kinds of berries are another superfood you should start your day with. Blueberries are probably the richest source of antioxidants, and are also very low in calories, making them the perfect healthy breakfast item for weight-watchers.
CHIA SEEDS
Apart from being one of the top sources of fiber, chia seeds are also very rich in antioxidants that help reduce inflammation in the body. Topping your breakfast bowl or smoothie with it can help regulate your blood sugar and blood pressure levels too!
GREEN TEA
Green tea is one of the healthiest drinks on the planet. It contains antioxidants which protects the heart and nervous system from damage due to free radicals. What’s more, it also contains caffeine which helps improve your alertness and concentration levels and increases your metabolic rate too! Swapping your cup of coffee with this one can really make a difference!
NUTS
Nuts are incredibly delicious and packed with minerals like potassium, magnesium and selenium, which makes them another top breakfast food choice. They don’t just add that satisfying crunch to your breakfast bowl, but also offer some great heart-healthy fats.
Make Ahead Breakfast – Meal Planning
The trick to many of these breakfast recipes is making them ahead of time. These are recipes that can easily be reheated in the microwave or eaten on the go. Best of all, making these foods at home allows you to control the ingredients. For example, if you love muffins, why not make a healthy version? Below you’ll find a recipe for chocolate banana marble muffins that give you that sweet morning treat without all the fat and calories.
Hearty healthy breakfast recipes For Busy Mornings
Truly, there’s something for everyone. From freezer breakfast burritos to berry yogurt smoothies, you’ll find something that everyone in the family is sure to love. Whether you’re a mom on the go or a busy businesswoman trying to get a healthy breakfast into her kids before school, you can enjoy a healthy breakfast without slaving over a stove all morning. Pretty soon, you’ll have absolutely no excuse to hit your local coffee shop or fast food drive thru for a quick breakfast. A bonus is the fact that you will save a lot of money by fixing breakfast at home.
hearty healthy breakfast recipes
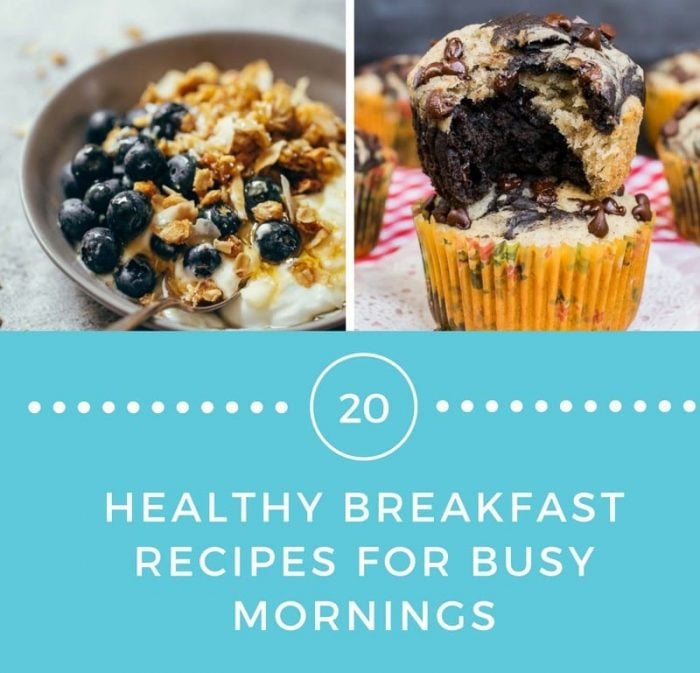
Here are 20 hearty healthy breakfast recipes ideal for families on the go:
We all know that a checklist can make it easier to get stuff done. If you have children, you may not think a lot about the chores they can do. However, children are able to do so much more than you realize. Obviously, the age of the child will determine what they can do. I’ve compiled a Spring Cleaning checklist to make it easier for you to assign chores to your children. But, first, let’s take a closer look at what you should know about kids and spring cleaning.
Kids cleaning floors
Why Kids Should Clean
Cleaning will actually let your children feel more grown up. For example, little kids love to help with anything because they want to mimic their parents. Cleaning also gives your children a sense of responsibility. For example, it might be their responsibility to keep the living room clean. Teach them to be proud of their clean space and they will be more apt to keep it clean. More importantly though, teaching your kids to clean will help them keep their own homes spic and span in the future.
When Kids Can Start Cleaning
Even toddlers can help with cleaning. It might be something simple like folding washcloths, but they’ll love being involved. The exact age of your children will determine what they can do. For example, you shouldn’t let your kids clean with cleaning products until they’re old enough to know that they’re dangerous and should be used with caution.
Chores Kids Can Do
There are so many chores your kids can do. In the Spring Cleaning Checklist for Kids I’ve provided, you’ll get a better idea of what your kids can do. The first time your kids go through the checklist, make it feel like a game. For example, cut the checklist into sections and give each child a room to work on. The first child to do all their chores, and do them well, will win a small prize. You could also go through the list when your children and everyone work together to get the job done. Your younger kids can do anything that involves taking things from one room to the other. For example, on the list is mentions taking dirty bedding to the laundry. This is a great chore for your little kids. You can start teaching kids to mop when they are around 8 or 9, but you need to keep in mind that you may have to go behind them because they are new to it.
Don’t make the mistake of doing all the cleaning around your home. You want your children to learn how to clean so that they can keep their own homes clean as adults. Cleaning teaches children to be responsible, allows them to feel included, and gives them a sense of accomplishment when they’re done. Remember that toddlers can even help with small things like folding laundry or taking dirty bedding to the laundry room. Be sure to print out the Spring Cleaning Checklist for Kids so that you can assign tasks to your children based on their ages.
There was a time when most Canadians who wanted to pick up some fresh steaks or chicken breasts would simply head down to the nearest supermarket and see what was available. But in recent years to major trends have been completely reshaping the retail market for meat in the country’s largest province: Ontario. In greater and greater numbers, shoppers are choosing to have groceries delivered directly to their homes. If you want to get groceries delivered to your door there are more possibilities than ever before, which is opening a market for more bespoke types of delivery. For example, it is now possible to set recurring orders that will be delivered regularly and charged automatically, and delivery is no longer limited to a shopper’s house — some services now deliver to offices, cottages, and gyms as well.
Chicken Breasts
At the same time, trends in consumption are intersecting with trends in conscience, and many Canadians now want to make sure that the food they eat is sustainable, and where possible, locally-sourced. According to a recent article in the Toronto Star, half of the beef consumed in Ontario is raised in-province, which reflects a growing desire on the part of consumers for local meat produced in healthy and sustainable ways, without the use of antibiotics or added hormones.
This has opened up an expanding new market for Ontarians who want fresh meat delivery that brings together the most efficient service with the best quality local food. Companies like truLOCAL, which delivers locally-raised beef and pork, free-run chicken, and even wild-caught fish anywhere in Ontario, have carved out a niche for themselves by allowing shoppers to build meal boxes filled with a range of products, from steaks to sausages to pork chops and more. These boxes are delivered frozen every month, and shoppers can change their orders month each month, or choose to skip a month if they so desire. Because the boxes are specially designed to keep the contents refrigerated, shoppers don’t need to worry about being home when the boxes arrive.
Services like this have become especially popular among younger customers who may be extremely passionate about sustainable meat, but not necessarily have the time to visit speciality butchers or local food stores. Likewise, they appeal to shoppers who are committed to cooking at home with the best ingredients, but find it difficult to make time for regular shopping trips.
Home Delivery Is Changing How Ontarians Buy Meat
They are also tapping into a growing market for local meat outside of the province’s largest urban centres. While cities like Toronto, Ottawa, and Kingston have populations sufficiently large enough to attract custom butchers dedicated to providing high quality local meats, shoppers in smaller towns and villages may be limited to what the local supermarket provides. Because meat delivery services are increasingly able to bring local meat to every postal code in the province, artisanal quality meat isn’t just for urbanites anymore.
As more and more Ontarians become aware of the importance of eating sustainably raised meat, services that are able to capitalize on people’s desire for convenient, affordable fresh meat delivery are only likely to become more popular.
Many know the man, Walter Elias Disney, as the epitome of the American Dream and the man behind one of the world’s most beloved theme parks and entertainment empires. There is no denying Mr. Disney’s influence on the world through his creativity and business drive. The Walt Disney Company is the one of the top largest media giant in the world with assets including movies, television studios, music and radio shows and resorts. Disney’s theme parks in the United States, Paris, Hong Kong, Tokyo and Beijing continue to be popular destinations for memorable family vacations.
6 Surprising Facts About the Man Behind Disney
Walt Disney and Mickey
The world of Walt Disney is filled with magic and mystery — and for a good reason. The man himself was an enigma to many, and his life’s work was filled with wonders and curiosities. Like many extremely creative individuals, he was both accomplished and eccentric, often in compelling ways. Here are six surprising facts that highlight the man behind the magic of Disney.
1. The Media Mogul Never Graduated
From high school, that is, Walter Disney stands as an example of outrageous success despite not having received a high school diploma. He dropped out of high school at the age of 16 and pursued his creative endeavours wholeheartedly. His work paid off in the form of his future media empire, and his achievements garnered him honorary degrees from Ivy League universities.
2. What’s in a Name?
6 Surprising Facts About the Man Behind Disney
Walt Disney’s name was not originally Disney at all. The family’s original French-heritage name was “d’Isigny.” The name came from a small village in France and was pronounced “Deez-nay.” The name evolved over time, and it’s probably a good thing it did — for business purposes — since “Disney” is much easier to spell and pronounce. Interestingly, Walt Disney occasionally used alias names including “Retlaw Yesnid,” his full name spelled backwards, or “Yen Sid,” the letters of “Disney” in reverse.
3. You’ll Recognize His Voice
Yes, Walter Disney himself was the original voice of Disney’s most famous character, Mickey Mouse. For 20 years, Disney was the exclusive voice of Mickey in all of the animated movies featuring the beloved cartoon rodent.
4. He Had an Odd First Job
In France at the age of 16, Walt Disney had a rather unusual first occupation. Having dropped out of school, he became an ambulance driver after being turned down by the military. He covered his ambulance in cartoon drawings — foreshadowing his future as a pioneer in the world of animation. His career followed an interesting trajectory, complete with dabbling in several vocations. Once, in his early twenties, Walt Disney was fired from a clerical office job due to “lack of creativity.” He certainly proved that former employer wrong as he pursued his deep passion and talent for creating legendary characters.
5. Contrary to Popular Belief. . .
Disney’s body was not cryogenically frozen in a mysterious laboratory. When he passed away, an urban legend quickly surfaced that he had chosen this unusual option. In fact, he is interred at Forest Lawn Memorial Park in Glendale, California. Such bizarre urban legends might have their roots in the fact that Walt Disney was a most unusual character himself — but this particular myth has been perpetuated even in the face of proof to its contrary.
Walt Disney Hollywood Star of Fame
6. He Broke Records
Walt Disney went down in history for winning more Oscars than anyone else, ever. Over his 43-year career, Disney won 32 Oscars. He was nominated 64 times for the prestigious awards. In addition, he won seven Emmy Awards and several honorary awards for his creative work in film and television. Disney won his very first Academy Award in 1932 for the creation of Mickey Mouse.
After creating Mickey Mouse, Disney would go on to create the repertoire of beloved characters now known as Donald Duck, Goofy and Pluto — and of course, Mickey Mouse’s adored companion, Minnie Mouse.
Want a power-packed protein that is bound to please at any occasion? Try serving this Super Easy Roast Turkey Dinner Recipe with help from Canadian Turkey!
Spring has sprung! Have you begun to think about some of things you want to do now that warmer weather is on its way? There are many special days that are great opportunities for families to get together and enjoy special moments with one another. One way to help make a celebration special is with food.
Photo credit: https://www.canadianturkey.ca; Super easy roast turkey dinner.
Family Meals
No matter the size of your gathering, a whole turkey is a fabulous to prepare and serve! Turkey is a much healthier choice to serve while being able to serve a show-stopping meal to help you celebrate your fun event. Both white and dark meat are lean, allowing for a lean and delicious turkey meal to be served. A whole turkey also helps your budgeting goals. With the various cuts of meat a turkey can provide, it helps to satisfy your gang’s individual preferences. When broken down on a person-by-person basis, you will find how inexpensive this bird can be! Turkey would make a great meal idea for festive family gatherings such as Mother’s Day. Father’s Day, Victoria Day, graduations, and more!
There are usually A LOT of leftovers after cooking a turkey. What can be done with them?
Yes, there can be lots of leftovers from a roast turkey. This is what is also so amazing about cooking this awesome protein. Canadian Turkey sees leftovers as lifesavers! Did you know you can make a delightful dinner with only two pounds of extra turkey meat? Planning for extra turkey means planning for extra meals, prepared all at once, and keep in the freezer until it is needed. This makes weeknight dinners easy to put together when your family is busy. Canadian Turkey has a handy turkey calculator that help you figure out the exact size of turkey you need for any occasion.
What else can be done with leftover turkey meat?
With three or four cups of leftover turkey meat stored in the freezer in individual freezer bags, they can be used as a base for marvelous meals. All you have to do is to defrost it in the fridge the night before. These freezer meal starters can be used as the base for turkey soups, salads, grain bowls, chilies, casseroles and pastas. Turkey also works well with different flavours and spices. This helps to modify any basic recipe into many different meals. Love eating pasta? Take a look at the feature pasta recipe on Canadian Turkey to see a variety of variations to make it simple to change things up. Make planning for extra turkey leftovers a must to give yourself a head start on weeknight dinners and lunches. It will pay off in the long run.
But turkeys are so big! Aren’t they difficult to prepare?
No! Canadian turkeys are actually easy to cook. There are only a few basic steps to follow to get a turkey from the store to your plate. Adding stuffing, rubs, and marinades can help to take a classic turkey dish to the next level. Do you find you are often pressed for time or are a novice in the kitchen? A basic roast turkey recipe and olive oil can be a delicious recipe to try. All that needs to be done is to prep and season your bird, then let the oven take over! Add some rice or potatoes and a few vegetables side dishes to put together a meal that will wow your guests.
Super Easy Roast Turkey Dinner Recipe
Super Easy Roast Turkey Dinner Recipe
Roasting a whole bird also allows you to enjoy more time with guests so you can celebrate, too! See below how easy it is to prepare this Super Easy roast Turkey Dinner recipe!
SUPER EASY ROAST TURKEY DINNER
Looking for a power-packed protein meal to prepare? Try serving this Super Easy Roast Turkey Dinner Recipe with help from Canadian Turkey!
Place the turkey into your roasting pan. Add the wine or turkey broth.
Cut the heads of garlic in half. Add to the pan. Add rosemary sprigs.
Roast for 45 – 60 minutes until the juices run clear and an instant thermometer reads 165°F (74°C) in the thickest part of the breast. Drumsticks will be cooked up to 15-20 minutes sooner, remove when ready and an instant thermometer reads 165°F (74°C).
Remove the turkey from the oven and let the breast rest for 20 minutes before carving.
Squeeze cooked garlic cloves out of casing. Mash into pan juices. Heat gently and add flour, if necessary, to thicken to create a gravy.
Notes
TIP: You can easily customize this recipe to your guests’ likes and preferences. Increase the breast meat if guests prefer white meat or increase drumsticks or add thighs if more desire dark meat instead. White or dark meat, turkey is still super lean.
Canadian turkey can be used in so many different dishes. You can visit Canadian Turkey for additional tips, recipes and HOW TOs to create dishes of all sizes, from snacks and appetizers to full meals and family favourites. Their recipe section is a treasure trove of make-ahead dishes and leftovers. It is always nice to know that you have some delectable dishes for the rest of the week, or pop into the freezer to warm up some pre-made meals for your family’s hectic weeknights.
Disclaimer: This post was generously sponsored by Canadian Turkey.
Your kids, and your inner child, are going to LOVE these peanut butter and jelly recipes. Did you know that April 2nd is National Peanut Butter and Jelly Day?
Is there any food more iconic to your childhood than the peanut butter and jelly sandwich? It’s something that children have enjoyed for decades. It’s not only quick and easy for parents and children to throw together for a quick lunch or snack, but it tastes amazing. In fact, it tastes so good that there are recipes that combine these flavours in brand new ways.
Indulge from peanut butter and jelly cupcakes to peanut butter and jelly ice cream sandwiches recipes!
Imagine indulging in everything from peanut butter and jelly cupcakes to peanut butter and jelly ice cream sandwiches. It’s enough to make anyone drool. The best part about these Peanut Butter and Jelly Recipes is that you can be so creative. While grape and strawberry are the most popular options for peanut butter and jelly, don’t be afraid to try other flavours. Imagine peanut butter and jelly cupcakes that use blackberry jelly.
If your kids love peanut butter and jelly sandwiches, they are going to flip for these snacks and desserts. They can even start their day with bread that features these yummy flavours. Many of these recipes would make great additions to lunch boxes as well.
Peanut butter and jelly served warm
There are so many great ways you can take this flavour combo and turn it into something new. There’s even a pizza out there that is made using peanut butter and jelly and it’s served warm. Is there anything better than warm peanut butter? The point is to think outside the box.
With just a few simple tweaks, you can make these recipes truly gourmet. And, if your child happens to be allergic to peanuts, try cashew or almond butter instead.
Peanut Butter and Jelly Recipes
If you’re looking for more great ideas, check out the recipes below. Chances are you’ll find something you’ll absolutely love.
Let’s face it. Drive-thru may make our lives easier, but they can certainly make our wallets thinner. Think about how much you spend at your favourite fast food place each evening and multiple that by the number of times you eat out each week and then by 52 weeks. The numbers can be staggering. But how else can you get a meal on the table when you’re swamped? Simple. You make freezer meals.
Make ahead freezer meals have been a secret weapon for moms for decades. All you need is a bit of time on the weekend to make meals to feed your family throughout the week. Some people even double or triple the recipes to have make ahead freezer meals for the entire month. This can take an entire afternoon, but is well worth it.
Another great suggestion to get together with other moms and swap your make ahead freezer meals. Each week, everyone in the group makes a large batch of one recipe, divides it up into disposable containers, and then swaps it with other members of the group. That way, each person only needs to cook one meal, but ends up with enough meals for the entire week. This is a great way to find new favourites for your family.
Whether your family loves Mexican food or homestyle dishes, make ahead freezer meals can be a lifesaver. There’s nothing like being able to open the freezer and find something to throw in the oven. Best of all, if you have to be out of town for a while, your husband will be able to keep the family fed without feeding them pizza or burgers every night. And, did I mention cleanup? Cleanup is a breeze. Just place your casserole dish in the dishwasher and you’re done.
Here are 20 make ahead freezer meals for busy moms!
Having a freezer full of meals and dinner on the table each night might be easier than you think! These make-ahead freezer meals are perfect for busy moms who don’t have time to spend in the kitchen each night. You can spend the whole day cooking, or just double these recipes whenever you make them add to your freezer!
Before doing this review, I was not “with it” when it came to app blockers and parental control app. My son, who is 6, is generally pretty limited on what he does on his tablet – by his own choosing. He can’t spell on his own yet and he hasn’t fully grasped the idea of the world-wide web. But as he’s getting older, I am starting to think it might be good for me to become familiar with these parental control apps in case I need to find one in a hurry.
Kidslox : Photo Credit: Kidslox
Kidslox Review
So, before I sat down to look through Kidslox, I went on the internet and looked up what a typical parental control app does and what they offer. Many of the apps were very similar, each one having their own unique quality that set them apart. I then sat down and wrote out a list of the items I felt were a must for my family, and this is where I base my rating. Here is my list:
Easy set up
Individual app blocking
Total Daily Limits
Content blockers
Timers
Social media/calling/text monitoring
Main “control center”
Multiple devices
Location monitoring
Lockdown mode
Photo Credit: Kidslox
In terms of my own list of parental control needs, Kidslox fairs at 8/10, but I’m going to add an extra point for it’s ease of use, for a score of a solid 9. I’ll break down this score below:
Easy Set Up
Like I said, I have never used a parental control app that wasn’t included with a device. I was a little concerned about the initial set up and how it worked, but it was actually super easy. Granted, to have it fully set up the way you want it to be, with all the options available, it’s a little tedious but once it’s set up, it’s done. All I had to do was go to the website to register, and then go on each device and download. Once the app was downloaded, I had to do the initial set up from the specific device and everything I did came up with a little pop-up that explained the function of the item, as well as how to use it.
Additionally, in order to allow Kidslox to “take over” your device, you have to access a lot of the background stuff like notifications, camera and so on. But instead of having to go through your phone looking for all these locations you’ve probably never used before, you just press a button and Kidslox brings you right there, you move a little slider, and it brings you right back.
Photo Credit: Samantha McKeag via Kidslox
I’ll show you what I mean: In this image, you can see all the areas that need to be modified in order for the parental control to function properly. I had already done all of them before I took this screenshot, but you can see here, when I got to content blocking, Kidslox was asking for my permission to access my phone (I set the Parent “Hub” on my personal phone) functions and storage functions. Like – I don’t know how to do that! But all I had to press was “continue,” it brought me to the appropriate spot on my phone, and I just had to move the icon from grey to blue.
Different modes to choose from Kidslox app
After that, it was just going through the page legend at the top of the page. I went through each page, one at a time and every time I went into a new page, it explained to me what that page was for and how to use it.
Individual app blocking
This was one of the things I liked the most about this because it wasn’t your device or the app deciding what was and wasn’t appropriate for your child, it’s the parents who decided. You can literally go through every single one of your apps and either “lock” or “unlock” to set restrictions on them.
One thing I was a little disappointed about initially was that I couldn’t differentiate “Kids Netflix” from regular Netflix. My son has a little obsession with That 70’s Show, as well as his cartoons, so I wanted him to be able to access Kids Mode, on which That 70’s show is (thank God), but it’s not difficult to change from kids’ mode to adult mode – in fact, he’s done it by accident a few times. One morning, I woke up to him watching his tablet in his room. I thought he was watching That 70’’s Show, only I suddenly realized that I didn’t recognize the voices. I looked down into his tablet and found he was watching….Weeds! I mean…..! Thankfully, he had no idea what they were talking about, and it could have been so much worse, but I didn’t want to find myself in that situation again.
Blurb on image requirement for Netflix in Kids’ Mode
If you look along the side of each app in your phone, it has a minimum age requirement. And if you hover over the age requirement, it will tell you what, for example, a child over under 12 can and can’t access on Netflix. So in other words, if the device is in Kid’s mode, they will be able to access Netflix but won’t be able to access anything that isn’t considered age appropriate.
Additionally, you can block in-app purchases so although your child will still be able to play those free games you downloaded, they won’t be able to “accidentally” select the in-app purchase options and buy 250 diamonds for $62. This is especially nice for someone like my son who can’t yet read and just touches the screen until he gets back to his game. There was a time where he purchased $4 worth of gold for his game – thankfully, it was only $4!
Daily Limits/Timers
The next thing you have to set, which takes like 5 seconds, are the daily limits. With each device, you’re able to set a total daily limit, as well as daily limits for each individual app.
For example: The parental control app comes with a default daily limit of 3 hours – which means no matter what your child does, they can only access their device for 3 hours total, after which time it goes into Lockdown mode and they can’t access it until 7 am the following day.
But to take it one step further, you can even go into each app and set a limit for that. So, if I only want my son on Netflix for 30 minutes, rather than 3 hours, I can set Netflix for 30 minutes and the tablet won’t go into Lockdown, but he will get kicked out of Netflix.
I like this because I don’t have to argue with him to turn it off even if he hasn’t reached his daily max, and it teaches hi” m how to “regulate” himself. Rather than using all his time up in one sitting, he can learn to save some of his minutes for later on in the day.
The timer function has a few different functions, which I like as well. So let’s say we go to the clinic and my son forgets his tablet at home, but we know it’s going to be a LONG wait. I can take my phone and turn it to child mode. As I switch from parent to child mode, the app will ask me for how long I want it in child mode (which could be separate from a set “schedule” – more on that later) to be on for – anywhere from 5 minutes to 3 hours.
Social Media/Calling/Texting Monitoring
This was the one thing I feel the app is missing. Although I can block access to these modes, and these apps do have age restrictions on them while in child mode, there is no monitoring. For example, if I had a 13-year-old who was just starting to use social media or texting his/her friends, I would like to be able to check, from my “hub” how many texts she’s sent, who she’s sent them to, most of her public activities on social media and so on. Although I can limit the daily use of social media, and I can disable her use of her phone and text messages, there is no real way to “spy.” I have never been a fan of “spying” on teenagers, but I’m not a mother of a teenager yet, so I will get back to you on that one.
Main Control Center
Screenshot of the “Dashboard” where you access all the devices you’re controlling
When you initially set up your account, generally, you would set this up from your phone. You can either choose to “share” your phone with your child and set “schedules” on when your phone will be in Child Mode, Parent Mode and Lockdown (I mean – let’s face it, parents, Lockdown mode wouldn’t be so bad for us either!), or you can keep on your phone and just control everything from there. From there, you can monitor, make decisions, change schedules, timers, modes and so on right from your phone.
So all I would have to do here is click the device I want to control, and my usual menu will pop up with modes, restrictions, daily limits, and schedules. I wouldn’t ever have to pry my kid’s device form his hand to change some of the settings, and he doesn’t even have to know he can access the app at all if I keep it in the background apps rather than his immediate screen (we have Samsungs).
Multiple devices
As I mentioned above, this app has the ability to “control” multiple devices. In fact, you can control a total of 10 devices from one main hub, which I think it pretty awesome. For people who have more than one child, who each have their own tablets, as well as their own phones, this is a nice feature to have. Even if you have three children, that’s only 6 decives, so there is ample opportunity to control as many devices from one platform as would be necessary.
Location monitoring
In doing my research of other devices, one thing I found on many of them was “location monitoring.” Since my son is only 6 and doesn’t take his tablet with him anywhere he goes, this isn’t something I would use often; however, if this was a feature on the app, I may consider putting it in his backpack. This is something I would have liked to see, but isn’t a deal-breaker.
Shutdown mode
Photo Credit: Kidslox
This was one of my favourite features on Kidslox. Once you’ve set the daily limit and that limit is reached, everything shuts down. No matter what you try to do, none of the apps will work and every time your child tries to open something, it will send a special message to your child informing them that it is currently in “Lockdown” mode. While in this mode, no notifications will be sent out informing your child that their Tom Cat now needs to be fed, so there won’t be any anxiety over being able to see notifications but not being able to access anything.
Bonuses
There were some bonuses on this app that I didn’t include in my list since I didn’t even know they were an option. One of them was “scheduling.” You can set up multiple schedules that can put the device into “Lockdown” mode at specific parts of the day. So although the device has a daily limit, if you want the device shit down for 45 minutes for supper, or for two hours to do homework, you can set these times up in the device. For example, if you want Homework to be done between 4:00 and 6:00 every day, you set the schedule times and name it “Homework.” At 4:00, the device will get a notification that it is in Lockdown mode until 6:00. You will then receive a notification that Lockdown mode has now been disabled. Likewise, you can set a “bedtime” schedule which will Lockdown at night. The device has a default bedtime set for 8 pm until 7 am. You can even set the days, so from Monday to Friday, homework time is from 6 to 8, but on Saturdays and Sundays, it doesn’t exist. The only thing I would have liked with this was a little pop-up or something that showed up on the screen saying something like: “Homework time! Kidslox is now going into shutdown mode!”
The content blocker is a dual controlled section. Kidslox is always uploading new URLs they feel are unsafe or inappropriate for children and these are automatically blocked, so Mom and Dad don’t need to go through the World-Wide Web copying and pasting porn sites (cause that would be super…uncomfortable). Automatically, website containing adult content, chat rooms, gambling, cults, drugs, violence and so much more is already blocked and it’s continuously updating. On top of that, parents can go into the content blocker and enter their own URLs they feel are not conducive to their family’s lifestyle.
My Review
PROS:
All in all, I really liked Kidslox. I liked how easy it was to set up and that the app basically sits behind the scenes and acts as a “parent” when it comes to which apps work and when. When in Lockdown mode, the only way to get back into the device or to switch modes is to have a password. So as long as Mom or Dad pick a password the kids could never figure out, then there is no way they would be able to get into it and override the system. I love the scheduling more, because although the daily limit thing is awesome, if I want my son doing homework between 4 and 6 but his tablet is available, it becomes a distraction. But if he knows there is no possibility of him using the tablet during that time, then he won’t be fixated on it.
And lastly, I really liked that even though it would be in Lockdown mode, if something happened, I could still get into it by just putting in my password. In fact, when I initially installed it on my phone, I woke up one morning to a notification alarm but I didn’t check it. While I was on the bus, I wanted to check something on the internet and I couldn’t get into my phone – it was frustrating me so much. And then I realized it was because I was in Kid’s mode. Once I figured that out (I hadn’t yet had coffee), I was easily able to switch to parent mode. So although it was initially frustrating, it was proof that the app works!
Kidslox blocked page
COULD BE BETTER
I do think that this app is better for younger children; kids who don’t quite have the hang of technology and don’t yet use social media. There is no way to add exceptions or specifications for social media apps with Kidslox, it’s either they can or can’t use it.
And the only other drawback I found was that I wasn’t able to differentiate Netflix Kids from regular Netflix, and the age requirement seemed a little high for me, since my child is only six. In this case, if you feel your child is able to access shows on Netflix you would rather he or she didn’t, you could simply copy the URL and paste into the content blocker. Also, there is a special YouTube function so it blocks everything on YouTube except the kids version.
Conclusion
All in all, I very much liked it and I would definitely recommend it to parents who are looking for a more thorough parental control app for their kids. Not to mention, at $79.00 for a lifetime membership, or $39 for a year, the price isn’t so bad either! You can also get a limited version of the app for FREE, if you’re looking to test it out!
For more info on this amazing app, you can check out their website or follow them on their Twitter or Facebook pages! They also have excellent email and phone customer service if ever you need someone!
Disney lovers rejoice! The following Disney movies are scheduled to hit the big screen, April through December 2018. There’s no better time to mark your calendar…
2018 Disney Movies – April Through December
A Wrinkle in Time ( March 9)
After the disappearance of her scientist father, three peculiar beings send Meg, her brother, and her friend to space in order to find him. Prominent cast members of A Wrinkle in Time include Storm Reid, Oprah Winfrey, Reese Witherspoon, and Mindy Kaling.
Avengers: Infinity War (April 27)
This Avengers movie, the third in the franchise, unites many well-loved superheros as they battle Gamora’s father. Word has it; he’s up to his old tricks… this time gathering Infinity Stones and planning the demise of the universe. If you can’t get enough of Marvel characters, this movie is totally for you!
Solo: A Star Wars Story (May 25)
Always wanted to know more about YOUNG Han Solo? Good news… now you have the chance. Follow him on his journey with new friends Lando Calrissian and Chewie by his side. Prominent cast members include Woody Harrelson, Emilia Clark, Donald Glover and Alen Ehrenreich as Han Solo.
The Incredibles 2 (June 15)
Fans of the Pixar hit The Incredibles will be happy to learn that this sequel picks up right where the first movie left off. The new film focuses on Elastigirl, who embarks on an adventure of her own, while the rest of the crime-fighting family remains at home. Most of the principal cast from the first movie will reprise their roles in the much-anticipated film.
Ant-Man and the Wasp (July 6)
Ant-Man and the Wasp is said to answer lingering questions movie-goers may have after watching Avengers: Infinity War. Starring Paul Rudd and Evangeline Lilly, the film centres around Scott Lang as he tries to balance his responsibilities… that of being a dad AND a superhero. How well will he handle the task?
Christopher Robin (August 3)
Many families are familiar with the popular character Winnie the Pooh and all of his friends from Hundred Acre Wood. The (currently untitled) live-action film now in production revisits the character Christopher Robin after he’s all grown up.
Ewan McGregor stars as Christopher Robin, with Hayley Atwell playing alongside him. You can also expect to see favorites such as Eeyore, Piglet and most of all Winnie the Pooh.
The Nutcracker and the Four Realms (November 2)
If you enjoy films like Narnia and Alice in Wonderland, chances are you’ll like The Nutcracker and the Four Realms. In this “slightly dark” version of the classic Nutcracker, Clara enters a magical world to find the key needed to unlock the box her mother gave her. The movie stars Mackenzie Foy and Morgan Freeman and Keira Knightley as the Sugar Plum Fairy.
Ralph Breaks the Internet: Wreck-It Ralph 2 (November 21)
When a Wi-Fi router gets plugged into the arcade where they live, video game characters of Wreck-It Ralph (John C Reilly) and Vanellope von Schweetz (Sarah Silverman) get access to the Internet.
Join them as they explore a familiar world, presented in an entirely new and exciting way. Other actors to reprise their roles include Alan Tudyk, Jack McBrayer, and Jane Lynch.
Mary Poppins Returns (December 25)
This much anticipated sequel to the 1964 Disney classic introduces a new generation of fans to a new generation of Banks kids. Emily Blunt stars as the magical nanny Mary Poppins, joined by an accomplished cast.
While not much has been revealed yet about this modern musical, it’s sure to put a smile on your face and a skip in your step. Mary Poppins Returns is currently scheduled to be released on Christmas Day.
Magic Camp (December 31)
Magic Camp is another live-action family film. It follows a man who returns to the magic camp he attended as a kid, to work as a counselor at the request of his former mentor. The movie was originally set to release in April, but has been pushed back and is now slated to come out sometime in late December. It features Adam Devine of Modern Family fame, as well as Gillian Jacobs from Community.
For all the latest updates on the 2018 Disney Movies, please view their website!
Which Disney movies are you looking forward to seeing and why?
Spring is almost here and with spring comes cute little bunnies. Is there anything cuter than a bunny? What about a cute bunny butt? Rabbits have the cutest little tushies. You can’t help but smile when you see a cute bunny hopping through your yard. If you want to capture that cuteness into a delicious treat, there are so many cute treats made to look like bunny butts.
Whether you love cookies or cupcakes, you can make those treats look like bunny butts. All it takes is a bit of icing or melted chocolate to create something super adorable. You can even make bunny butts and then use them to decorate other desserts. Imagine a cute white chocolate bunny butt on top of a cake that has Oreo cookie crumbs on top. It will look like the bunny is burrowing into the cake.
You could even start your morning with some Bunny Butt Pancakes. Truthfully, the sky’s the limit. The roundup below will give you some amazing ideas and help encourage you to think of new ones. The recipes below are incredibly delicious and easy to alter to make them your own. Don’t be afraid to play around with recipes to create something different.
These recipes would be perfect for a spring bake sale. No one will be able to resist such cute treats. And, let’s not forget Easter. These treats would be so cute on an Easter buffet table. You could also make the bunny butt suckers and wrap them in sucker bags to use as your place cards or a treat for your guests to take home.
If you have a child born during the spring, so many of these treats would be perfect for a birthday party. You could even have bunny butts as your theme. It’s something fun that kids are sure to love.
Whatever the occasion, these bunny butt treats are sure to be a big hit.
As a mother, I am completely obsessed with pictures. I love capturing that perfect moment to remember forever. Unfortunately, though, these days it’s easier to take pictures than it is to print pictures. The thing is, these days, you can even get your photos printed on canvas and get this done at websites like Canvas Factory.
Photo Caption: Canvas Factory
I mean, 15 years ago, printing wasn’t easy, but at least you only had the ability to print 8 to 16 pictures on a roll; now you can take up to 100 pictures in one day and then you’re suddenly stuck, 6 years later, with over 20,000 pictures! I print what I can when I can, but these moments are so special to me I don’t want to just print them and then hide them away in some box or dusty photo album somewhere – I want to be able to display them and be able to see these special moments every time I walk into a room.
Photo Credit: Canvas Factory
Well, enter Canvas Factory!
Canvas Factory is a Canadian company that produces prints on canvas and they take pride in their high-quality materials at an affordable price.
“Canvas Factory provides high quality canvas prints at an affordable price. We believe in providing the best canvas printing services to ensure that your photos are preserved on canvas exactly as you want them, easily and conveniently.”
Easy Peasy Lemon Squeezy To Order With Canvas Factory
Recently, I decided I wanted to get one of my most favourite moments printed – but not just printed – displayed beautifully as a gift for my dad. I visited the Canvas Factoryand although I was a little nervous, it didn’t take long for me to notice that everything from their website setup to their product selection to their customer service was great!
Initially, I had a question about shipping, so instead of looking around aimlessly (although it literally took me 15 seconds to find it when I did look – and might I add is pretty awesome – $12.84 for shipping anything under $120, and over $130 shipping is FREE! ), I started a live chat. Not only was the person I spoke to real, but I asked all kinds of random questions and not once did she refer me to call the customer service number (nothing irks me more than being told the people on the chat can’t help me).
Then I proceeded to peruse their product selection as well as their sizes. I’d already decided that I wanted a canvas picture, but I was interested to see what sizes were available and what the new technology these days (I’m not very hip and with it) may have developed since the last time I ordered something like this online.
Photo Credit: Canvas Factory
In addition to the canvas photos (which come rectangular, square, and panoramic and range in sizes from 12 in x 18 in to 40 in x 32 in – you can even create your own custom sizing), you can also order acrylic glass prints (which come in the same shapes and the same sizes), and HD Metal Prints made using high-quality aluminum (same shapes and roughly the same sizes), you can get any one of these as a single photo, a split image photo, a wall display, and even a collage.
The process itself – uploading and editing my image was easier than anything I’ve ever done with any other online company (not naming names but it might sound like smuddersmy). I was able to upload my image from either my desktop, Facebook, Instagram, Dropbox, of flickr. That being said, I know that once a photo is uploaded to Facebook, the image quality immediately decreases so I wasn’t surprised when the first image I chose wouldn’t upload because the pixels weren’t high enough.
But I eventually found the original photo on my computer and uploaded it. It’s a picture I took on a whim with my iPhone 6 years ago. It’s never been very good quality but I love the picture so much. I uploaded it anyways with the plan to change the filter.
When I got to the next page, I was able to choose from all sorts of filters – B&W, invert, sepia, red, blur, edge, and more, and I could change the brightness, the contrast and the sharpness.
And just as I thought I was ready to order, I get to the next page and they start asking me about my wrapping style – whether I wanted mirrored (where the picture would look like it goes from front to back so the sides of the canvas wouldn’t be bare), continuous (like it was actually being wrapped around the canvas) and I could choose specific colours to make it resemble an actual frame.
Done and sent!
I woke up, though, the next morning to an email from Canvas Factory – and it wasn’t some automated generic email, it was an actual employee telling me that the quality wasn’t super great and asked if I wanted to continue or choose another picture. They’d even attached a picture of what it would look like on the canvas. I was pretty married to this picture though, so even if it was a little grainy, I would have tried to pass it off as “artsy.” I told them to go ahead. I was emailed later that day informing me my canvas had been shipped and they provided me with a tracking number.
Memories To Last A LifetimeWith Canvas Factory
A little while later, I got my box in on my door step – and I will say – I am not AT ALL disappointed! In fact, it’s really not as grainy as I thought it would be – it barely looks grainy at all! It was packaged beautifully, the wood it’s made with is real road, not flilmsy poster board, the canvas is wrapped professionally and it’s just beautiful! On top of that, it was saran wrapped as well as being wrapped in a large box, so there was no chance this was getting damaged.
I am 100% completely in love with the canvas photo and although I can’t wait to give it my dad, I also kind of…just a little bit…sort of…wanna keep it for myself!
I definitely recommend Canvas Factory. I didn’t have to re-do anything 10 times while trying to upload, I didn’t have to ask about shipping times or shipping costs (cause it’s all right there in front of you!) and I didn’t even have to check up on it while it was shipping – it came quickly and safely. This is the perfect company to use if you’re looking to capture that perfect moment that’s just sitting on your computer and display it for years and years to come!
Note: The picture of the picture does not do it justice.
Disclaimer: I received a canvas image print from Canvas Factory in order to write this review. The views I shared are my own.
Did you know that there are so many little things you can do for your kids this Easter that cost next to nothing? It might be cutting their sandwiches into the shape of an Easter egg, printing Easter lunchbox jokes or including some cute Easter bunny cookies in their lunchbox. You could also give them some stickers or an inexpensive game you picked up at your local discount store. In other words, you don’t have to spend a lot of money to make the holiday special.
Easter Lunchbox Jokes For Kids
Lunchbox Jokes Are So Much Fun
There are literally thousands of printables out there that allow you to do something fun with your kids. All it takes is a bit of ink and paper. It might be colouring pages, activity pages, or even cute jokes. These funny jokes for easter were created by The Inspiration Edit. Not only are they super cute, but they allow you to bring a smile to your child’s face throughout the week of Easter. Just print the Easter jokes out, cut, and pop one in each day of the week leading up to the holiday.
Easter Lunchbox Jokes
Kids’ Jokes
Use this to inspire you to create even more fun things for your child’s lunchbox. It doesn’t have to be anything expensive or even difficult. You can find a number of kids’ jokes online. You can also get as creative as you want. Print them out as is or create your own fun photos for each joke. You can even find jokes for every holiday of the year. Have fun with it!
Little kids are going to love this fun little surprise. It’s something that will make her and her friends laugh. Your child’s friends will think she has the coolest mom because you included a cute little Easter joke. And, if your child prefers to stick to herself, it’s something to bring a smile to her face during lunch period.
Easter Lunchbox Jokes
Click HERE to download the Easter lunchbox jokes printable or click on a photo above!
You won’t believe all the ideas to decorate Easter eggs that are available! Whether it’s stickers, markers, or dye, there are so many options for you and your kids to have fun decorating Easter eggs.
Easter is such a magical holiday for little ones. There’s the Easter bunny, Easter treats,cookies and chocolate, Easter crafts, Easter baskets, and of course the egg hunt. Remember growing up and decorating eggs with your parents? Chances are you simply dipped the eggs in some dye and that was it. While that’s fun, there are so many other ways to decorate Easter eggs.
HISTORY OF THE EASTER EGG
Every child looks forward to dying Easter eggs for the big Easter egg hunt. Many Easter decorations involve seeing a colourful Easter egg. Of course, what’s the Easter bunny without his basket of chocolate Easter eggs? However, many children and adults don’t realize the history of the Easter egg and how it became such an icon to the holiday.
The egg has been considered a symbol of birth and renewal for hundreds of years. It began back in what Christians refer to as pagan times, although there are many pagans who celebrate the same traditions today. They believe the egg is a symbol of the renewal of spring as spring emerges through a harsh winter much in the way a chick hatches from an egg.
A GODDESS
Easter is actually named after the Anglo-Saxon goddess Eostre (also known as Eastre or Ostara). One year Eostre was late and winter continued to pound the region. Once she did arrive she found a small bird almost frozen to death. Out of guilt, she cared for this bird as her pet. The bird recovered but would never be able to fly again. She decided to turn him into a snow hare and give him the name Lepus. So that he would always remember he was once a bird, she also gave him the ability to lay brightly coloured eggs in which he gives to the children during the festival of Ostara.
CHRISTIANITY
With the coming of Christianity having to compete with Pagan beliefs, the Christians decided to take on many of the pagan celebrations and turn them into Christian holidays. This was in hope of converting pagans to Christianity with more ease. So to put a Christian spin on the Easter egg, they say that the egg represents rebirth into the Christian faith and dedication to the teachings of Jesus. The hatching chick from the Easter egg is to represent Jesus’ resurrection as he emerged from the tomb.Report ad
MIDDLE AGES
Around the Middle Ages in England, it became a tradition to decorate eggs for Easter. The wealthy flaunted their wealth by using gold. The peasants tend to use dyes from flowers and other plants that gave a nice hue. Shortly after the Middle Ages, people in the 1600s started exchanging egg shaped gifts. By the 1800s, chocolate Easter eggs made their emergence and have been popular since then.
1800S
In the late 1800s, Peter Carl Fabarge was commission to create a beautiful Easter egg design to be given as a gift to the Czar’s wife. The egg was designed with beautiful jewels which opened up to reveal a smaller just as beautiful egg. Each year he created a new, beautifully designed egg as an Easter gift. He created fifty-seven eggs in all. They are now known as Imperial Easter Eggs and many people continue to create them even after Carl Fabarge’s death.
As you can see the Easter egg went from a simple meaning of rebirth and renewal to more extensive meanings. Regardless, the Easter egg continues to be a major symbol of Easter today whether it is for the great Easter egg hunt, to place in Easter baskets, or to decorate a home.
How To Cook The Eggs
If you plan to eat the eggs after the Easter festivities are over, make sure to properly cook them. The best way to hard boil an egg, and avoid that icky green colour on the yolk, is to boil the eggs for 5 minutes, remove from heat, and cover the pot. Let the eggs sit for 30 minutes and you’ll have perfectly cooked hard-boiled eggs.
Decorating Easter Eggs
Now, when it comes to creative ways to decorate Easter eggs, there are so many options. It all depends on the age of your children. Some techniques can be extremely advanced, while others are so simple that a toddler can do it. Decorating eggs is a great way to spend the day before Easter doing something fun with your kids.
Ideas to Decorate Eggs for Easter
Let these fun ways to decorate easter eggs be an inspiration. You can always use these as a jumping off point for creating your own Easter egg designs. Just remember, dip-dying eggs will always be fun, but you can do so much more. Even placing stickers on the eggs before dying them and then peeling the stickers off to reveal a design can be a lot of fun.
Crayons and Dye
Before you dye the egg, color designs on it with a white crayon. You can write your name, draw squiggly lines, or any other design you think of. When you dip the egg in the dye, the areas that are colored will remain white.
Stickers
After you dye the eggs and they have dried, decorate them with Easter Stickers. If you have more than one child coloring eggs, they may want to keep up with the eggs that they created. You can use one type of sticker for each child and place it on the bottom of the egg. This way they will not be confused.
Egg Animals
These eggs can be dyed or you can just leave them white. It all depends on the type of animal you want to create. For this you will need googly craft eyes, pom-poms, feathers, glitter, sequins, beads, markers, yarn, ribbon, fabric scraps, construction paper, and an imagination. Try creating an Easter bunny or baby chick!
Masking Tape and Dye
Take the masking tape and cut it into small shapes such as circles, stars, or squares. Stick the masking tape shapes on the egg and dip it into the dye. Once the dye has completely dried, remove the tape. You will be left with white places where the tape was. Try creating a polka-dotted Easter egg!
Rubber Bands and Dye
This is idea comes from making home-made tied died shirts. Take the rubber bands and wrap them around you eggs. Use as many or as few as you would like. Dip the egg in dye and wait for it to dry before removing the elastic bands.
Decoupage
For this type of egg you will need colored tissue paper and glue. Tear the tissue into small pieces and dilute the glue with a small amount of water. Cover the egg with the white glue and randomly place your small pieces of tissue paper on the egg.
Spray Paint
For many Easter egg hunts there is one special egg hidden somewhere in the grass. The person who finds this egg usually wins a prize of some sort. Spray painting that egg gold makes it really special. Spray paint can be used on any of the eggs though. It comes in many different colors and textures. Be creative.
Shaving Cream
For this method, you will need a paper plate, food colouring, and shaving cream. The shaving cream needs to be foam and not the gel type. Fill the paper plate with a layer of shaving cream and add a few drops of different colours of food colouring. Use a toothpick or fork to move the colours around so that they are spread out through the shaving cream. Do not spread them so much that all of the colours blend and turn into only one ugly shade of brown. Take the egg and dip it into the mixture, making sure to get all sides of the egg. Use a paper towel to wipe away the shaving cream from the egg. You should be left with a tie-dyed effect.
Paint
Acrylic paint is great for the artists in your family. With the paints they can create anything they want on the Easter egg. Turn it into a football or paint it to look like a baby chick has cracked the top open. This work can be a little more tedious, but it also allows the child to be creative and use their imagination.
All of these different ways to decorate Easter eggs can be used on their own, or you can combine these ideas and come up with Easter eggs that are even more creative. Adding a little fun to your Easter eggs will make your Easter egg hunt and Easter basket even more exciting.
Creative easter egg decorating ideas
These tutorials show you how to make a huge variety of different decorated Easter Eggs. We have covered everything from natural dyes to, painting eggs and of course, let’s not forget the good ole sharpie pen. All of these Easter Eggs are easy to make and come with full tutorials.
When I was a child I believed there was only one way to decorate an Easter egg. We would dip them in the bright dyes and then place them in the empty egg carton to dry. As I have gotten older, I have found ways to make decorating Easter eggs more creative and a lot more fun.
What’s your favourite way to decorate Easter eggs? Share your comments below so that everyone can learn all the creative ways to decorate Easter eggs.
This list offers some of the most delicious recipes you can make with Cadbury crème eggs or Cadbury Mini eggs. Warning: these recipes are not for the faint of heart or those that are watching their calories. These Easter recipes are for those looking for pure decadence.
Cadbury Crème Eggs
Is there anything better than a Cadbury Crème Egg? When it comes to Easter candy, the answer is a definite yes. From the thick chocolate shell to the creamy interior, these eggs have been a favourite for decades. The crème filled variety originally hit store shelves in 1963 though Cadbury had been making filled eggs since 1923. People love the candy so much that the company has to make 500 million each year to keep up with demand. That’s a LOT of crème eggs.
Imagine taking those delicious eggs and turning them into desserts. It’s enough to make the strongest health-food junkie weak in the knees. From cheesecake to chocolate mousse, there’s a dessert for everyone on this list of recipes using Cadbury Eggs. There are even a few recipes that incorporate some of the other Cadbury Eggs, such as the Cadbury Mini Eggs.
In all honesty, this is a roundup that you don’t want to miss. There are so many decadent and delicious Easter recipes that would be perfect for your Easter get together. Imagine your guests’ faces lighting up in joy when they see what you’ve done with the Cadbury Crème Egg. People will be begging for seconds and the recipes.
Easter Recipes with Cadbury Eggs
Easter Recipes with Cadbury Eggs
You can substitute the original Cadbury Crème Eggs in some of these recipes with any other flavours such as the Cadbury Caramel Crème Eggs, the REESE’S Milk Chocolate Peanut Butter Crème Eggs, or the Cadbury chocolate Crème chocolate crème eggs.
If you’re looking for something new and delicious to serve this Easter for dessert, you’re going to love these recipes using Cadbury Eggs. They are sinfully sweet and oh so decadent. Be sure to stock up on Cadbury Eggs so you can keep making some of these delicious treats after Easter is over.
I hope you enjoyed these Easter Recipes with Cadbury Eggs as much as my family and myself did! If you make it, please share your photos with us on Facebook or Twitter! Also, check out all of our other Easter recipes!
In an age where everything is digitized, it might surprise you to hear that print paper books gaining popularity. People are now trying to limit their screen time and this trend is reflected in book sales. E-book sales in the UK has seen nearly a 20 per cent plunge in 2016 alone. During that same year in the USA, paperback sales rose 7.5 per cent and children’s book sales were up over 15 per cent. This tells us that digital technology has not had the same effect on publishing that it has in other industries like music and media.
Are Paper Books Making a Comeback?
The rise of print book sales
There are so many reasons why people prefer physical books over their digital counterparts, including the tactile experience that comes with turning each page.As well, independent and discount bookstores as well as online retailers are making buying books convenient, particularly when customers already know what they want. They don’t have to browse through the rest of the collection in order to find the one they want. This streamlines the process and can be done from the comfort of their own home.
Independently owned bookstores, on the other hand, have become community cornerstones. Since they exist within a neighbourhood, they are able to curate their collections to better suit the environment in which they are in. This makes the content more engaging and interesting to potential customers. People also tend to find that the stores themselves are more inviting and feel free to just browse more than they do in larger chain bookstores.
Finally, many people are looking to spend less time in front of their screens. We’re all aware that many of us now look at screens at work, for entertainment, and to communicate. This along with new methods of purchasing print books, has led to their increase in sales.
Is this just a trend?
Many people are happy to hear about the resurgence of print books. It appeals to our nostalgia and reminds us of an era that existed before the pervasiveness of digital technology. However, some people speculate that the spike in print sales we’re experiencing is just a trend that won’t last.
For instance, Jane Friedman cites Amazon as the main reason we’re seeing a rise in print books. Due to print books’ declining sales throughout the past decade, often the physical version of the book is offered at a discounted rate which undercuts the ebook price. If Amazon adjusts its prices to reflect the surge in print purchases and removes the discount, Friedman argues that print sales will once again plummet.
Friedman also cites traditional book retailers as an indication that this is just a trend. The well-known book retailer Barnes and Noble are famously experiencing hard times and closing locations everywhere. During the surge in print book sales, Barnes and Nobles’ sales declined by 6 percent (as did the book sales of other department stores like Walmart). She also argues that while independent bookstores are in fact surviving, they’re not excelling. This could mean big trouble for the independent movement if attitudes change even slightly.
Are Paper Books Making a Comeback?
Print books in the future
While it might be true that time is the only way to know what will become of print books, and despite words of caution from critics, the future of print paper books is bright. According to a 2016 New York Times article, Amazon is so confident in its book sales that the online retailer is even planning on opening more physical bookstores. The Amazon bookstore will operate in conjunction with the online store; customers will be able to look at books all they want at the physical location and can purchase it later at the online bookstore. They will also be able to easily order any book on the website that is not in stock.
The extent of the success of independent and discount bookstores might be up for debate, but there is no denying that print books are seeing a resurgence. While it was once a dying industry, these bookstores are experiencing growth while established large book retailers are on the decline. The power of these independent shops lie in the connection they have with their communities.
Given that independent bookstores are on the rise, perhaps the reason for the decline of large chain bookstores is their business model is outdated. People want more options when it comes to purchasing books. And Amazon and independent bookstores are providing these options, allowing people to purchase from the comfort of their home or visit a local bookstore where they can see and feel the books before buying.
Books are forever
The popularity of print books are an anomaly in this digital age. However, for many bookworms, this is no surprise. Many would that it is more satisfying having the physical paper books to read rather than an ebook. For anyone who feels this way, the best thing they can do is support a local independent bookstore.
Are you looking for fun ways to keep the little ones busy? As the weather begins to warm, and the flowers begin to bloom, you may be thinking about Easter activities such as this Some Bunny Loves You Alphabet Game are so many things you can do with your kids that cost hardly anything at all. You can dye eggs, print out colouring pages featuring an Easter theme, or even play a game.
Some Bunny Loves You Alphabet Game
This game created by The Inspiration Edit, is the perfect thing for you and your kids. Not only is it free to print but is so much fun to play. Best of all, it’s even educational. Is there anything more a mom could ask for? Everything you need is included for you to download and print.
Some Bunny Loves You Alphabet game
You could play this game with your kids in the week leading up to Easter or on Easter. It’s a great activity to keep kids entertained while all the preparation is going on. Your little ones could even play the game with their older siblings or cousins – if you’ll need to be busy with the preparation.
Alphabet Egg Game
Remember, Easter doesn’t have to be expensive. There are so many things you can print out for your kids to do. You could even print out pages to create a personalized colouring/activity book. This would make a great addition to their Easter baskets, but wouldn’t cost much at all.
Some Bunny Loves You Alphabet Game Instructions
Also, this would be a great printable for teachers. If you’re looking for something fun to do in the classroom, this is a fun game. You will need to print several pages, but you could also laminate the pieces so that you can use them over and over each year.
Some Bunny Loves You Alphabet Game
To download the printable click HERE or click on each photo above!
What do you like to with your kids for Easter?
Are there any free activities you would like to share with other moms?
Buying a house can be terrifying. Buying a house in Ottawa is even more terrifying, for many reasons. There are so many questions to answer: should you save up every single penny you have to get a 20% down payment? If you don’t want to wait until you’re 55 to buy a house, what are the options for buying a house without a 20% down payment.
When you have finally figured that part out, there are even more questions: Where do you buy – Kanata, Barrhaven, Orleans? What do you buy – a townhouse, a bungalow, a single family home, a duplex? Why is a house in Kanata $600,000 for the same kind of house you would buy in Convent Glen, Orleans, for $320,000? And one of the biggest questions facing many new buyers these days: Should You Buy a New Home or an Existing Property?
When my husband and I first decided to buy a home, we had a few “necessities” (besides the actual real ones – like needing toilets and bathtubs and so forth), so we had a very precise wish list in mind. The thing that was frustrating for us was that 1/2 our wish list we could get in a new build, and half our wish list we could only get in a “used” house.
As we do for just about any large purchase in our lives, we did a lot of research, which consisted of Googling “buying a new house vs. existing house”. We found a lot of information, of course. But, it was funny, we couldn’t’ find a lot of drawbacks for buying a new house, besides the fact that we would have to wait longer than if we bought an existing property.
When It’s Time To Buy a House: Do You Buy New Or Old?
Better To Be Safe Than Sorry
We are both “better to be safe than sorry” people and so the idea of moving into a house where we wouldn’t have to worry about the roof, the furnace, the water heater, foundation issues…(you get the gist), we decided that buying a new built home would be the smartest bet for us. Considering our area of choice was Orleans and the fact that we wanted to live in a neighbourhood, we were OK with the fact that we would be living in a “cookie-cutter” house, so that wasn’t even a factor in our decision making (statistically, this is the biggest reason people don’t like buying new build home). And the idea of being able to pick out some of the designs and finishes was really exciting for us, considering we had been waiting almost 10 years to be able to buy a home.
Now, we are 6 months into living in our home and we love it. I wouldn’t have done it any other way; we were able to completely customize our home and were able to meet 8 out of 10 from our list without having to look at 200 houses or do any renovations. That being said, there were things I wasn’t expecting, things we had never encountered throughout our research, and that’s why I’m writing this article: for those who are considering either/or like we were, I want you to be 100% prepared for what buying a new build home consists of.
This is mud/rock that I took out of ONE of my dog’s paws.
7 Unexpected Things We Didn’t Know Would Happen When Buying A New Build Home
1. The mud
One of the first things we experienced when we moved into out home near the middle of August was the mud. Because we didn’t have any grass (and wouldn’t until the following spring because a lot of the houses around us were still being built), every time it rained, there was a ridiculousamount of mud. I don’t know if it’s because of where they chose to build our home, but the mud wasn’t mud, it was clay.
I have two dogs – one is a white shih tzu, the other one is a 50 pound hound. Clay is thick, sticky, and chunky – cleaning off clay isn’t as easy as just wiping off mud. We had to keep a bowl of water and a towel at our front door so that every time (whether it’s 1 in the afternoon or 3 in the morning), we had to wash their feet and wipe them dry or they would track “mud” through the house – including the brand new beige carpet leading to the upstairs. Not to mention, our own feet. I didn’t buy a rug for the front hall until almost December because it wasn’t worth it, we were constantly bringing mud in; I was washing my floors every. single. day.
But the worst part? Clay is clumpy – my 50 pound dog has webbed feet, so the clay would accumulate right down deep into her pads and it wasn’t until she started walking around sounding like her nails were too long that I realized that the clay, along with the rocks that filled the driveway, were lodged up into her paws. The poor girl! Once that happened, the paw cleaning before coming in had to be even more thorough.
Living in a construction zone
2. The construction
I know, I know, I should have thought of it, but I was so excited to have finally bought my own home, that I hadn’t considered the fact that I would be moving into a construction zone. Every company does it differently, some companies build up one entire block and then let everyone move in at the same time (ish) and others build a few rows at a time and let the owners move in as soon as the house is done. We were the latter and were the second row to be completed. Since we have lived here, 12 houses have been finished in our row, and 6 more rows with 10-12 houses each have gone in. There’s still 2 more rows left to go in. Luckily, once the houses directly across from us were done, the construction moved away from the house, so it wasn’t so bad.
But it’s not just the noise, it’s the dust, the soot, the nails, and the STREET SWEEPER. So, remember when I was talking about the mud, you were probably thinking – how often did it rain there!? Well!! Due to the nails and all the construction going on, a street sweeper came every single night to brush the nails and whatever else off the roads so our cars wouldn’t suffer – so that meant the street was always wet. Plus, because of the dust in addition to our air conditioner, our noses were so raw on the inside, we were having nose bleeds and even had to get prescription nose cream to stop the irritation.
Dirt piles and construction debris on a street
3. No playing outside
One of the things I was most excited for was having the ability to just let my dogs out into the backyard, let them roam around and come back in. I was also looking forward to having a dead end street where my son could ride his bike without a worry. Yeah, well, not quite. First of all, obviously (again, didn’t think about this) you don’t immediately have a fence when you first move in – we didn’t even have steps going into the backyard, so there wasn’t much playing in the backyard going on. And because there was always construction trucks around, there was no way I was letting my kid ride his bike anywhere unless I was immediately beside him. In fact, my outdoor-loving 6 year old could barely play outside at all. There was one day when he realized he could bring his Tonka trucks in the backyard and play construction – that is until the wheels got full of clay and he couldn’t move the truck anymore.
Crack on a stairs
4. House Settling
When you first move into your new home, it’s pretty perfect; the painting has just been done, everything is gleaming white, everything is clean and lovely. But then, within the first few months, as the house starts to settle into its foundation, the house shifts. You don’t notice it much at all, but what you do notice are nasty little cracks pretty much everywhere – along the drywall seams, along the baseboards, along the counter tops in the bathrooms that attach to the walls. Even door shifts so suddenly doors that closed perfectly are now a little stiff, or your shower door now creaks a bit when you open it cause the bottom half is now rubbing against the tile when you open it. There isn’t all that much you can do about that. But when we spoke to one of our reps, he said his team would fix the really bad ones now, but that for the rest, we should wait at least 4 seasons to ensure it’s settled, and then fix everything in one shot.
Condensation in a window
5. The Condensation
Apparently, lumber has water. Apparently, in the first 12-18 months, this lumber starts to secrete water. Couple that with regular condensation from the cold outside and the warm inside, we literally had puddles on our window sills. The problem was, we didn’t notice it immediately. We have a lot of windows, but the ones in the living room have the couch in front, and the blinds are always closed in the bedrooms.
Front door lock that is rusted
I went around the house one day to wipe them up with a paper towel and I used almost a whole roll. We have made it a habit to go through the house wiping down the window sills every day and we ensure to always have the blinds up at least 2-3 inches above the sill so that the condensation doesn’t become trapped and create mold. I feel as though the condensation in our home was a little severe; for example, on some of the coldest days, the lock and doorknob on the inside of the front door would get frost on them and the screws actually developed rust. But if that’s the least of my worries, I am OK with that.
No curbs on the street
6. No Curbs
Now, this is not at all something I had even considered, thought of, who prepared for. When you first move into these homes (depending on how developed the neighbourhood is when you move in), there are no curbs, and obviously no sidewalks. But at some point, they do have to make curbs. And when they do, they need to build a trench. I don’t know what most construction companies do, but this one chose to build the trenches all around the neighbourhood before putting in the curbs which meant that we had to wait a few days between digging trenches and putting in the curbs. I walked out one morning for work and realized there was no way I was leaving my driveway. It wasn’t exactly small enough for me to jump over and it was about 4 feet deep so if I missed, I would be pretty hurt. Luckily, one of the crew men saw me standing there looking lost and ran over with a board and made me a little bridge. It was inconvenient, but luckily it didn’t last long.
Man applying kitchen tiles
7. You’re not moving into a perfect home
I was under the impression that on move-in day, we would be coming in to a perfectly finished house. Everything would be done and all that would be left was to move our stuff in and settle down. Well, that’s not the case – and it rarely is for anyone who moves into a new build. When we moved in, there were a few things still not completed: the caulking around the steps at the front door, a screen was missing from the dining room window, there were some inconsistencies in the wall edges, one of our tubs was scratched, and a few other mostly superficial issues.
Luckily, the majority of the issues were fixed within the first few weeks and for some other things that we are still working on getting fixed, it can get frustrating, but I know that we’re protected. We’re protected because we didn’t just hire some random contractor to do the work, this is a reputable company who is constantly doing work in our area so we know that they will get things done, even if it does take time. We may have to bug them, and at the end of the day, we may have to deal with Tarion, but it will get done. So don’t expect to move into something pristine – unless you get lucky, it may feel like you’re moving into a rental again, especially when you have to go around and do the move-in inspection and name things that need to be fixed – but once those things are fixed (and you NEED to make sure they are because it is NOT a rental), at the end of the day, it is your house, and that feels amazing!
Another thing as well is when you’re picking everything out to include in your home. Unless you have an unlimited spending cap, you won’t be able to afford to get all the upgrades you want since they are rather expensive and anything that is considered a non-necessity, isn’t included. And although I have come to consider a kitchen back splash as a necessity, that’s not the case, so we had to do our own. However, we were lucky in that we got the keys to our home 3 weeks before we needed to be out of our old house so we took the time to put it in before we physically moved in there.
Still Wouldn’t Do It Any Other Way
Besides these five things, honestly, I still think we made the right decision. No, our house didn’t come with a deck or a fence, that is something we will have to put in ourselves, but we got to choose a specific colour scheme for our home, we got to choose which hardwood floors we wanted, we got to choose whether we wanted a regular sized kitchen or an extended kitchen, our tiles in the bathrooms, the shower heads, the taps, and doorknobs and so forth. And, the biggest selling feature for me that all the “old” houses we looked at didn’t have – a laundry room on the 3rd floor!
If you’re thinking about buying a new build, here are my suggestions to you:
Thoroughly research the company you’re purchasing from. Ask all the questions you can think of and don’t be afraid of bothering them – you’re buying this house, you need to know. Having trusted real estate agents is a big help whether you’re buying a condo unit or a huge home in a well-known neighbourhood. Agents often know which companies have good reputation among their past clients. You could even go as far as knocking on some doors and asking people who have recently bought with the company you’re thinking of.
Don’t be afraid to “fight” for your needs. We had an issue with the shower we bought – we were told one thing and got another. A lot of people would chalk it up to a misunderstanding, but I couldn’t do it. I fought for what we thought we were buying when we bought it, and maybe the people who dealt with me didn’t like me afterwards, but this is my house, and I’m paying for it. If you come in and one of your sinks is scratched, even if it’s 3 mm, tell them to replace it. You’re not moving into a rental that comes “As-is”, you’re moving into a brand new home that you paid for and it should be pristine.
Bring in your own inspector. All housing companies have an “inspection” at the end of the building period. They say that the inspection is from a 3rd party, but there was some pretty large things the inspector we got missed – like enormous cold spots in one of our bedrooms that then created mold. The siding on the front of the house had to be completely removed to blow more insulation, and then replaced. It was inconvenient, but not terrible since we caught it early. Also, they just happened to miss that the phlange on the roof water pipes were not caulked which resulted in a little bit of a leak (luckily, all of these ended up being superficial because we had caught them early enough). But had the inspector done his job properly, he would have caught that. So bring in your own inspector (your building company won’t like that but they can just suck it up, buttercup), tell them to use their little machine to look for cold spots and/or moisture behind walls, check the roof for any possible leaks, and anything else that could be a potential problem in the winter (especially if you’re buying in the summer and won’t know of these problems for a few months)
Small Price To Pay
Although we did have some issues, again, I wouldn’t trade it. Here’s why: We have a brand new furnace, we have a brand new roof, we have a brand new water heater, we have all brand new appliances, and so on. So even though we did have these problems we may or may not have had if we’d moved into a “used” home, everything we struggled with was covered by our warranty company, including the appliances. And if the warranty company didn’t want to help, then we always have Tarion to back us up, whereas if we had found any of these issues in an older home, it would be coming out of our pocket
Every house purchase comes with a lot of uncertainty, and a lot of anxiety, but just try to take it all in stride and try to stay positive. Everything always works out in the end.
When It’s Time To Buy A House, Would you Buy New Or an Existing Property? Comment Below!
Easter is right around the corner and if you’re looking for a fun and inexpensive craft for your kids to do, this is it. Not only is it something they can make, but they’ll be able to wear it. Kids are going to love making this Bunny Headband and, if you have little boys, you can always leave off the flower. The craft is so easy that kids of all ages will be able to make it.
If you have really small kids, you can make these for them. These would be the perfect prop for Easter photos. If you need smaller headbands, check the baby section of your favourite store. Imagine these cute little bunny ears in a baby’s first Easter photo.
Pink and White Bunny Headband
While this craft recommended using white and pink foam, you could use whatever colours you want. Bunnies come in a variety of colours. You could do black, brown, gray, or tan ears. Just have fun with it. If your kids want purple or even green bunny ears, go with it.
If you’re making this bunny headband for little boys, you could also use foam to create a small top hat. How cute would that be? Let your kids get as creative as they want. They may want a top hat with a band around the middle or one with polka dots. The more creative they are the better.
Pink and White Bunny Headband
You could also make this bunny headband as part of your children’s Easter baskets. Just slip these in the basket along with the candy and other goodies. You could even add a fluffy bunny tail to complete the costume.
Easter activities don’t have to be expensive. There are so many things you can do with your kids that cost very little. Whether it’s making headbands or playing games, you can have lots of fun this Easter.
Super Easy DIY Bunny Headband For Kids
Bunny Headband Materials
Materials:
Pink and white craft foam
Scissors
Pencil
White headband
Flower decoration
Hot glue gun
Instructions:
Draw and cut out two rabbit ear shapes from a piece of white craft foam
Draw and cut out two rabbit ear shapes from a piece of white craft foam. Use your headband as a size reference, and create a shape you are happy with. Make the shape sort of an elongated football shape.
Draw and cut out two smaller rabbit ear shapes from a piece of pink craft foam.
Draw and cut out two smaller rabbit ear shapes from a piece of pink craft foam. These will be the inside of the ears, and must be small enough to fit inside of the white craft foam ear shapes.
Glue the pink rabbit ear foam shapes on top of the white craft foam ear shapes, with the bottom edges lining up.
Glue the pink rabbit ear foam shapes on top of the white craft foam ear shapes, with the bottom edges lining up.
Use a hot glue gun to attach the two bunny ears to the top of the white headband.
Use a hot glue gun to attach the two bunny ears to the top of the white headband. Hold them in place until the glue dries so that they do not fall over.
Glue on a floral accent off to the side at the bottom of one ear on your bunny headband.
Glue on a floral accent off to the side at the bottom of one ear on your bunny headband.
Bunny Headband For Kids
You are done!
Do you make Easter Crafts with your kids? What do you create? Comment below!
If you’re looking for something that will really make your kids smile this Easter, you can’t go wrong with these Bunny Butt Sugar Cookies.
Who doesn’t love cut-out sugar cookies? They’re sweet, delicious, and even better when you add icing. They’re also the perfect cookie for decorating. While you may make decorated cookies for Halloween and Christmas, what about Easter? There are so many ways to decorate sugar cookies for Easter as well. You can make eggs, crosses, and, of course, bunnies.
Bunny Butt Sugar Cookies
Easy Easter Cookie Recipe To Make
These Bunny Butt Sugar Cookies are so adorable. And, they’re easier to make than you might think. You start with a delicious sugar cookie recipe and then use royal icing to decorate. While it may look complicated, you’ll see in the instructions below that these are a piece of cake – or should I say cookie – to make.
Flavoured Icing
And, if you want to change up the recipe a bit, have fun with it. You could use chocolate icing and jelly beans to decorate instead of the royal icing. You could also add different extracts to the royal icing to change up the flavour. Don’t be afraid to get creative with a recipe. That’s what makes cooking and baking fun.
How To Show The Finished Cookies
Once your cookies are decorated, consider placing them on a bed of edible Easter basket grass or a plate of crushed chocolate cookies. This will make it appear as if the bunnies are escaping into their burrows. You could also add some candy carrots around the plate because bunnies love carrots.
Fun Easter Cookies For Kids
If you’re looking for something fun for Easter treats, these cookies are perfect. It’s something that will make people smile and they taste amazing. Plus, they are so fun to use when decorating other desserts, such as cakes. Just be creative and have fun with it. That’s what makes spending time in the kitchen worthwhile.
Easter Bunny Butt Sugar Cookies
Makes 14 circle cookies and 28 mini eggs for the feet
Cookie Ingredients
1 cup unsalted sweet cream butter
1 1/2 cup powder sugar
2 tsp vanilla extract
1 large egg
2 1/2 cup flour
1 tsp cream of tartar
1 tsp baking soda
1 circle cookie cutter
1 mini egg cookie cutter
1 cookie sheet fitted with parchment paper
Royal Icing Ingredients
3 egg whites
1 tsp cream of tartar
1 tsp vanilla
4 cup powder sugar
2 disposable piping bag fitted with a number 2 tip
1 squeeze bottle
pink food colouring
How To Make the Bunny Butt Sugar Cookies
Preheat oven to 350 degrees
Using a standing mixer, cream together the butter, powder sugar, vanilla and egg together until creamy and combined.
In a large bowl, mix together the flour, cream of tartar and baking soda
Gradually mix in the flour mixture into the wet ingredients until combined and a dough forms
Once the dough is formed, sprinkle about 3 tablespoons of flour onto a cutting board and place the dough onto the cutting board.
Sprinkle some flour onto the cookie dough and roll out the dough to about 2 inches thick
Cut out your cookies and place onto the cookie sheet
Bake your cookies for about 8-10 minutes
Let them cool completely
Royal icing directions
Using a standing mixer, mix together the egg whites, powder sugar, vanilla and cream of tartar until combined
If your royal icing mixture looks like a yellow soup, add in another cup of powder sugar (max 2 cups) until your icing starts to thicken
Continue to mix until white and stiff with peaks. About 5-7 minutes
Scoop some icing into a bowl and add in your pink food colouring and mix until combined
Scoop the pink icing into a piping bag and place into the fridge to use later
Scoop some white icing into the piping bag
Using the remaining white icing, add in 2-4 TBSP water into the white icing and mix until combined
Pour into a squeeze bottle
Using the white icing in the piping bag, pipe a line around the edging off all your cookies. Place white icing in the piping bag into the fridge to use later
Using the squeeze bottle, fill in your cookies
Let completely dry overnight
Once dry, using the white piping bag, add a small dollop of icing onto the back of the egg cookies to act as a glue. These are going to be your bunny feet.
Place two bunny feet on each circle cookie.
Using the pink icing, add the details to the feet and pipe on a pink dot for the bunny tail.
Let completely dry for an hour to two hours before enjoying!
I hope you enjoyed this EasterBunny Butt Sugar CookiesRecipe. If you make it, make sure to share with us on Facebook or Twitter! Also, check out all of our other Recipes.
Easter Bunny Butt Sugar Cookies
Lyne Proulx
If you’re looking for something that will really make your kids smile at Easter, you can’t go wrong with these Bunny Butt Sugar Cookies.
Icing (and let set overnight) and decoration 1 dayd1 hourhr
Total Time 1 dayd1 hourhr40 minutesmins
Course Dessert, Snack
Cuisine American, Canadian
Servings 14cookies
Calories 392kcal
Equipment
circle cookie cutter
mini egg cookie cutter
cookie sheet fitted with parchment paper
disposable piping bag fitted with a number 2 tip
squeeze bottle
Ingredients
Ingredients
1cupunsalted sweet cream butter
1 1/2cuppowder sugar
2tspvanilla extract
1large egg
2 1/2cupflour
1tspcream of tartar
1tspbaking soda
Royal icing
3egg whites
1tspcream of tartar
1tspvanilla
4cuppowder sugar
pink food colouring
Instructions
Preheat oven to 350 degrees
Using a standing mixer, cream together the butter, powder sugar, vanilla and egg together until creamy and combined.
In a large bowl, mix together the flour, cream of tartar and baking soda
Gradually mix in the flour mixture into the wet ingredients until combined and a dough forms
Once the dough is formed, sprinkle about 3 tablespoons of flour onto a cutting board and place the dough onto the cutting board.
Sprinkle some flour onto the cookie dough and roll out the dough to about 2 inches thick
Cut out your cookies and place onto the cookie sheet
Bake your cookies for about 8-10 minutes
Let them cool completely.
Royal icing directions
Using a standing mixer, mix together the egg whites, powder sugar, vanilla and cream of tartar until combined
If your royal icing mixture looks like a yellow soup, add in another cup of powder sugar (max 2 cups) until your icing starts to thicken
Continue to mix until white and stiff with peaks. About 5-7 minutes
Scoop some icing into a bowl and add in your pink food colouring and mix until combined
Scoop the pink icing into a piping bag and place into the fridge to use later
Scoop some white icing into the piping bag
Using the remaining white icing, add in 2-4 TBSP water into the white icing and mix until combined
Pour into a squeeze bottle
Using the white icing in the piping bag, pipe a line around the edging off all your cookies. Place white icing in the piping bag into the fridge to use later
Using the squeeze bottle, fill in your cookies
Let completely dry overnight
Putting The Cookie Together
Once dry, using the white piping bag, add a small dollop of icing onto the back of the egg cookies to act as a glue. These are going to be your bunny feet.
Place two bunny feet on each circle cookie.
Using the pink icing, add the details to the feet and pipe on a pink dot for the bunny tail.
Let completely dry for an hour to two hours before enjoying!
We use cookies to ensure that we give you the best experience on our website. If you continue to use this site we will assume that you are happy with it.