What follows is a list of 13 energy bite recipes for you to consider. I’ve tried to include something for every taste. Let’s touch on a few popular choices.
13 Energy Bites Recipes
Energy Bites
Kids of all ages will no doubt love the No-Bake Peanut Butter and Jelly Energy Bites. Packed with protein, these little balls of yumminess contain dried fruit, coconut, flaxseed and (of course) PB&J.
The No-Bake Almond Joy Energy Bites featured here are both gluten-free and vegan, when you use the suggested brands. If you’re a fan of the candy bar, this treat is right up your alley. Here’s a quick tip. If your almond butter is too stiff to work with, simply pop it in the microwave for a few seconds for it to soften up.
13 Energy Bites Recipes
Who doesn’t love blueberry muffins? This energy bites recipe tastes very similar and takes about 10 minutes to whip up, from start to finish. Yummy ingredients include dried blueberries, maple syrup, almond butter and hemp seeds… just to name a few.
Pumpkin isn’t just for fall. It’s delicious the rest of the year too! These energy bites, packed with dates, pecans, coconut, chocolate chips and optional protein powder will have everyone coming back for more. I can almost guarantee it!
13 Energy Bite Recipes
13 Energy Bites Recipes
You’ll probably find that the majority of energy bite recipes you run across are the “no-bake” variety. The great thing about this is even the littlest chefs-in-training can help prepare these healthy treats without fear of getting burned. Better yet, they’ll feel a big sense of accomplishment because they were able to help!
You have to admit; whoever came up with the idea of energy bites is pretty genius. There are literally thousands of recipe variations to choose from, not to mention the fact that you can take them with you wherever you go and lots are no-bake energy bites. How many times during the day do you feel like you could use a boost of energy? Probably more than you care to admit, right?
There are so many great attractions to visit with kids in the Ottawa/Gatineau area. On the top of our list is the Canadian Museum of History, in particular the Children’s Museum. It’s great on those yucky winter days when it’s too cold to play in the snow and you want to get out of the house. Or anytime really. Read more on our family day at the Children’s Museum!
Children’s Museum at the Canadian Museum of History
Stunning tree on the Main floor.
On our last visit, we decided to check out some of the regular adult exhibits first which we knew our boys would enjoy since they could run around through the open spaces and see some cool displays to keep them entertained. When we first arrived, they were in awe of the most spectacular Christmas tree they have on the main floor by the gift shop. What a magical sight!
Huge gift shop! Lots of cool stuff!
Of course they got distracted by the gift shop as well, and we poked around before hitting up the main attractions. They have so many cool gifts and tons of Christmas ornaments and décor items. I found some amazing Canadian made sheepskin slippers for myself that I’m adding to my Christmas list!
Amazing interactive screen show in the special exhibition.
Next up: special exhibitions section. They typically have two running at one time. Currently, the first one is called Medieval Europe– Power and Splendour, and it will run until January 20th, 2019. They display over 200 treasures from a world renowned British museum, apparently a first for them with an international partnership. We loved it. The second special exhibition was on William Notman (1826 – 1891) who was the first Canadian photographer to gain an international reputation. We wanted to see this and although it looked super interesting, we knew it wouldn’t be overly interesting for the kids! The good news is, it’s on until April 14thso we plan to go back without the kids soon.
A Day at the Museum of History/Children’s Museum
Next up, the Canadian History Hall, an elaborate exhibition where you can discover Canada and all the events that have shaped are country up to today. Again, we didn’t spend too much time there because the main goal of the visit was to visit the Children’s Museum, so we hit that up next!
One of the many elves hiding throughout the Children’s Museum.
When we arrived, we received our passport – each child receives a stamp for each country you visit. Such a cute concept! We also received a checklist for the elf challenge. You have to find all the elves which are little “Elves on the Shelves” throughout the museum. Then you hand in your checklist on the way out for a special surprise. We didn’t find them all and were far too busy with two toddlers to try, but they still were overjoyed when they spotted one.
Hamming it up on the actor’s stage.
Jax loved acting on the stage at the first set up. There is just so much to see that we didn’t even get into all of it but there are literally 30 stations that represent different parts of the world with different props and activities. They both had tons of fun on the ship where Jax especially loved the fact that he could use the interactive tool to move the pretend cargo. Then Hudson ran into the Captain’s Quarters to steer the ship.
Cutest little captain.
There are so many toys, dress-up stations and play opportunities – you could literally stay all day! We are so excited because we just got wind that they are planning a renewal of the Children’s Museum to make it even better!
Me and my son
When we decided we had enough, we went to the gift store to pick up some goodies for the kids and called it a day. After all that fun, they both passed out 5 minutes into the drive home! Just what we all needed. Be sure to check out this awesome museum and learn more about what they have to offer! To find out more a day visit at the Children’s Museum, please visit the Museum of History!
Disclaimer: I received a family admission to the Museum of History in order to review their venue. The views I shared are my own.
A New Year has come, and like many, you have made a resolution. The resolutions that people make can differ greatly, yet some seem to appear year after year, often for the same person.
The following are the top 10 New Year’s resolutions:
Happy New Year
1. Lose Weight
This is one of the most common resolutions. Many people want to lose weight. They may decide to go on a diet for the New Year or exercise instead.
2. Stop smoking
Many who smoke make quitting a priority as their New Year’s resolution. Many do not like to smoke and have been trying to quit for years. New Year’s can be a wonderful time to move ahead on this. You can also have a goal of stopping another addition such as drinking, drugs, gambling, etc.
3. Spend more time with the children
Many people wish that they did more with their kids. They might make a resolution of doing so, which can be beneficial to both them and their children.
Top 10 New Year’s Resolutions
4. Get a better job
A lot of people are not very happy with their jobs. They might just be staying stagnant in it, afraid to switch. A resolution might be to search for another job and to hopefully get one. You could also have as a resolution to do better in your current job or get a promotion.
5. Get out of debt
For those in debt (sadly a high number) you might want to make getting out of debt your resolution. Even if you are not in debt or you are so much so that you will not be able to get out of it this year, then your goal might be to do better with money and to not spend as much.
6. See or call your relatives more
A lot of us have relatives that we do not see or call enough. It might be your mother, your grandparents or someone else. You might make a resolution to keep in better contact with them.
Two red heart balloons
7. Find that special someone
Many people who are single might make a resolution to do what is necessary to find someone. They may feel that they have not been successful but now is the time to try.
8. Do an accomplishment you have been putting off
Many of us have things we have been meaning to do. It might be learning another language, going on a special trip, learning to play an instrument, becoming a vegetarian or so forth. Whatever accomplishment you have been thinking about but just haven’t done can work as your resolution.
9. Help others
Some of us may list altruism as our resolution. It could be about giving to charity or volunteering. This is a great goal.
Top 10 New Year’s Resolutions
10. Be happy
For some, the resolution is both simple and complicated. They want to be happier and have less stress. This can be a fantastic resolution.
Do you have any New Year’s resolutions? Please share below.
This Turkey Ranch Mac-n-Cheese is sure to be a hit in your household. Who doesn’t love mac-n-cheese? This recipe completely transforms those holiday leftovers into something new. With three types of cheese, ranch dressing, and bacon added to the mix, who could resist?
Turkey Ranch Mac-n-Cheese in a white bowl.
Holiday Turkey Recipe
Let’s face it. When the holidays roll around it’s so hard not to over do it. There are so many great recipes that your family requests year after year. And, of course, you have those new recipes you just have to try this year. The only problem is that you’re usually left with a lot of turkey leftovers and there are only so many turkey sandwiches a person can eat before they snap. This year, why not try something different like the turkey ranch mac and cheese?
Whether you’re having turkey for Christmas, Thanksgiving, Easter, or any family meals, chances are you’re going to have leftovers. Leftover turkey is great for sandwiches and soups, but wouldn’t it be nice to try something different? More importantly, wouldn’t it be great to make something that tastes completely different? After all, you can only enjoy those flavours so many times before you need a break.
In all honesty, this recipe is one that your family will ask for again and again. You can also freeze some of your leftover turkey to ensure you have enough to make this recipe again.
Turkey Ranch Mac-n-Cheese in a white bowl.
Turkey Ranch Mac-n-Cheese Recipe
If you’re looking for a great way to reuse that leftover turkey, you’re going to love this recipe. It’s perfect during the cold weather seasons. If you like spice, you could also add a touch of cayenne to this recipe to spice things up a bit.
Ingredients:
3 cups of uncooked elbow macaroni pasta
5 Tbsp of butter (divided into 3 Tbsp and 2 Tbsp)
2 Tbsp of all-purpose flour
½ tsp of salt
¼ tsp of pepper
3 cups of milk (divided into 2 cups and 1 cup)
1 ½ cups of cheddar cheese (shredded)
½ cup of Parmesan cheese (grated)
½ cup of Swiss cheese (shredded)
2 cups of cooked turkey (shredded or diced)
¾ cups of ranch salad dressing
1/3 cup of bread crumbs
8 slices of bacon (cooked and crumbled)
Directions:
Preheat the oven to 350 degrees.
In a large pot, boil the elbow macaroni pasta for 5 minutes. Then drain and return the pasta to the pot. Set aside.
In a large saucepan, melt 3 Tbsp of butter over medium heat. Whisk in the flour, salt, pepper, and slowly add 2 cups of milk. Once combined, stir in all the cheeses – cheddar, Parmesan, Swiss.
Add the turkey, ranch dressing, cheese mixture, and remaining cup of milk to the pot of macaroni pasta. Mix well and transfer to a large greased baking dish.
Melt the remaining 2 Tbsp of butter. In a medium bowl, mix the bread crumbs and melted butter. Sprinkle it over the macaroni and top with the crumbled bacon.
Bake uncovered for 30 minutes.
Let cool and enjoy!
How do you like to use leftover turkey? Do you do sandwiches, casseroles, soups? Share your favourites below.
In a large pot, boil the elbow macaroni pasta for 5 minutes. Then drain and return the pasta to the pot. Set aside.
In a large saucepan, melt 3 Tbsp of butter over medium heat. Whisk in the flour, salt, pepper, and slowly add 2 cups of milk. Once combined, stir in all the cheeses – cheddar, Parmesan, Swiss.
Add the turkey, ranch dressing, cheese mixture, and remaining cup of milk to the pot of macaroni pasta. Mix well and transfer to a large greased baking dish.
Melt the remaining 2 Tbsp of butter. In a medium bowl, mix the bread crumbs and melted butter. Sprinkle it over the macaroni and top with the crumbled bacon.
I hope you enjoyed the Turkey Ranch Mac-n-Cheese Recipe! If you make it, make sure to share with us on Facebook or Twitter! Also, check out all of our other Recipes.
When it comes to choosing your honeymoon destination several ideas may come to your mind: mesmerizing sunsets at the Bahamas, the intriguing Orient, the imponent Pyramids of Giza… Yet, there are several other travel destinations that are much more in reach and perhaps even easier on your wallet. Disney honeymooms can be fun, romantic or mystical! If you are one of those people that still believe in Never-land, then a Disney honeymoon may be the choice for you.
If you want a memory that will last for a lifetime you should bring your loved one to Disney World. That’s the perfect place for romance and you will see your dreams come true there. Follow the example of Cinderella and her beloved Prince and spend your honeymoon in the magic World of Disney.
Spending a honeymoon in Disney is like getting two layers of chocolate on your favourite sundae. You are getting married which is very likely one of the most important events in your life, and you are adding the possibility of spending time with your loved one in of the most magical places on earth. However, in order to make things work out great you need some time to organize your trip and ensure everything goes smoothly.
Disney fairytale honeymoons
The newlyweds will have plenty of time to enjoy the best dining possibilities, wonderful accommodations, great chances for a party night and most of all the sparkling romance in this magic Disney World. You will get a honeymoon that you’ll never forget. You probably will like it so much that you will return over and over again in the future. Most couples do. By reading this text you might understand what makes Disney World so special and romantic and why you should choose to spend your honeymoon there.
Visit Disney – a world of romance
You don’t have to be a family with kids to enjoy the magic world of Disney. This place has been popular among couples spending their honeymoon, for a long time now and it’s a fantastic place filled with romance. This magic world is so much more than just a park filled with amenities for children, it also offers amazing Disney beaches, excellent places to have a nice dinner and relaxing spa treatments. What more could you ask for on your honeymoon?
There are great dining possibilities with an atmosphere filled with romance and candle lights and you can experience a show performed by talented artists and actors at Cirque du Soleil. Of course you might experience the park on your own by riding along the monorail on a romantic trip as well.
Accommodations for couples on honeymoon
It’s no problem to get a vacation without disturbance if that’s what you want. Just tell the people working with the reservations and it will be arranged. The staff will do their best to help you get a room as far away from noisy areas as possible. If you would like to experience even more of the Disney atmosphere, together with your loved one, you can stay at one of the accommodations inside the park. You can have a Disney romantic vacation for two while enjoying characters and fireworks in the park. Could it get any better?
Guide to Disney Honeymoons
Disney Honeymoon Registry
Disney now offers a honeymoon registry where your guests may be able to contribute in order to help you out with the costs of your Disney World honeymoon. Here all the contributions will be credited onto your personal Disney Honeymoon gift card. Once the card is charged, then you may be able to use it for every eligible vacation expense you wish.
Disney Cruise Ship
Disney Romantic Honeymoon Options
There are a variety of romantic choices for you in Disney. Following are some great ideas:
You won’t be disappointed if you choose to spend your honeymoon in the fantastic world of Disney. There are so much romance and so many wonderful amenities to experience. We are sure you will be delighted and you probably would like to return again to Disney World.
As a couple, you have to option to dine like a royal family in Cinderella’s Castle. This area has grown very popular for even marriage proposals, where the engagement ring is offered on top of rose petals in a glass slipper! For those willing to spend a night at the castle now there is the option of sleeping inside of Cinderella’s Royal Castle. The suite of one million dreams indeed may come alive but expect it to be also the most costly night of your life. For more reasonable options, you can choose from many Disney World honeymoon resorts, each unique and beautiful in its own way. Favourite Disney resorts include the Grand Floridian Resort and Spa, Disney’s BoardWalk, Disney’s Yacht Club Resort, Disney’s Contemporary Resort, and Disney’s Polynesian Village Resort.
Start your honeymoonwith Firework Displays
You can start your honeymoon by enjoying the Magic Kingdom’s fireworks from a romantic boat ride. You may choose between a 45 foot yacht able to accommodate up to 13 people that includes dinner or a canopied pontoon boat that will offer snacks and hold up to 10 people.
Preparing for Your Disney Honeymoon? Don’t Forget Your Honeymoon Packing List!
Before heading to your magical Disney honeymoon, make sure you have everything you need packed and ready to go. Honeymoon packing lists can help ensure you don’t leave anything important behind. From romantic outfits to sunscreen for sunny days at Disney beaches, having your list organized will help you focus on enjoying the magic with your loved one. Trust me, a well-packed bag ensures you can focus on making memories, not worrying about what you’ve forgotten!
As seen, Disney may really make your wishes come true. You may really feel like princess Cinderella for once, in your Disney fairy tale honeymoon. Don’t forget to order champagne, a bouquet of roses, and wish upon a star!
Mouth wash is meant to further reduce microbes and bacteria in the mouth after a proper flossing and brushing routine. It does not replace these important parts of dental care; it’s used to complement them and provide extra benefits. So should I use mouth wash or not?
What is a Mouth Wash
Mouth wash is an oral rinse with antiseptic properties that when swished around and gargled in the mouth provides extra cleaning action. Whether it contains alcohol or not, it should not be swallowed – only moved around for several seconds and then spit back out again.
You should regularly visit your local dental clinic for all your dental needs and to make regular appointments every 6-9 months. Mouth rinses are usually flavoured and provide a minty, fruity, or spicy taste to freshen breath while removing odours.
Should I Use Mouth Wash or Not?
Mouthwashes might be recommended for other medical purposes, like as an anti-inflammatory, anti-fungal, or analgesic. These are specially-formulated mouth washes that differ from the standard breath-fresheners commonly found at the grocery and drugstore.
Is Mouth Wash Beneficial?
There is some debate as to whether cosmetic, every day mouth wash is beneficial for a dental care routine. Using an oral rinse after brushing with a toothpaste containing fluoride might lower its effects, like protection against cavities and remineralization of teeth. But mouth washes that contain fluoride fix this issue. Other studies have suggested there may be a link between using mouth wash that contains alcohol and oral cancer. However, these studies were unreliable and focused on excessive mouth wash use.
Use Alcohol Free Mouth Wash
Mouth washes containing alcohol should be avoided anyway, because they can cause dry mouth and potentially lead to other dental issues. Dry mouth will make bad breath worse because there is less saliva to clean away odour-causing agents. Mouth washes may also cause side effects like affecting one’s ability to taste, and staining of the teeth. In rare instances, redness, ulceration, and soreness can occur, and the use of an oral rinse should be discontinued if this is the case.
Should I Use Mouth Wash or Not?
Other individuals may have sensitivities to ingredients in mouth wash like fragrances or preservatives. Switching to another brand without these qualities, like an all-natural mouth wash, might solve the problem. Mouth wash can also be diluted if it’s too strong.
Medical rinses that have been recommended or prescribed by a doctor or dentist may be needed to kill harmful bacteria, or to help treat periodontal disease, in which case the benefits and downsides need to be appropriately weighed.
No Negative Side Effects
For those in good health using popular brand name and alcohol-free mouth washes, there are rarely any negative side effects experienced. Dentists like to reinforce that mouth wash is never a replacement for proper brushing and flossing. Everyone should brush and floss twice daily and follow the check-up schedule recommended by their dental professionals.
It’s also important to make an appointment if you’re experiencing pain or sensitivity in the teeth or gums because this might be an indicator of a larger problem like a cavity, gum disease, or another more serious condition. These require professional treatment and procedures to rectify – mouth wash, brushing, and flossing alone won’t fix these.
New Year’s Eve is a time for having fun with the whole family. If you have kids, part of the fun can definitely be craft-related. What follows is a short list of projects, suitable for kids of all ages. Chances are, your kids will have a hard time deciding on which one to do first. You will find below 17 New Year’s Eve Crafts For Kids!
17 New Years Eve Crafts For Kids
17 New Year’s Eve Crafts For Kids
Paper Plate Noise Maker
What’s a New Year’s Eve celebration without noise makers? These party favours are really festive and quite easy to make. Necessary supplies include paper plates, several colours of curled ribbon, crayons or markers, tape, a stapler and something like small beads or pasta that makes noise when you shake it.
Balloon Countdown
This is a fun way to reminisce about what’s happened during the past year. Using a small funnel, fill clear balloons with a bit of gold glitter. Next, fill the balloons with helium (Many party supply stores have portable helium tanks for rent.)
Print out the provided tags and attach one to each balloon. Add adhesive numbers (7 through 12) for the countdown. At the top of each hour, pop the corresponding balloon and have your kids answer the question on the tag.
17 New Years Eve Crafts For Kids
Toilet Paper Party Poppers
There’s no reason to spend the money on expensive party poppers when you can make your own. What’s so cool about this particular craft is that it gives kids a chance to get really creative.
All that’s required to make the poppers is recycled toilet paper rolls, confetti, tissue paper in a variety of colours, small trinkets or little pieces of candy, washi tape, ribbon and scissors.
Fill the to the paper rolls with the confetti and candy or trinkets. Wrap each roll in tissue paper, twisting the ends. Decorate as desired. To “pop” the poppers, simply pull hard on each end and watch the confetti fly.
I hope you take the time to explore all of the fun New Year’s Eve crafts on this list. It’s not too early to think about things for kids to do or eat as they bring in the new year!
It’s the most wonderful time of the year…until your nose becomes congested, your lips are chapping, and your skin is unbearably dry. With the beauty that comes with the holiday season, winter woes may ensue; however, fear not, as these helpful tips will ensure you get the most out of the holidays without a box of tissues at your side! Taking care of yourself this winter will keep you on the very top of Santa’s Nice list!
1. Don’t forget to moisturize
From skating to snow shoeing and snowy walks, winter is full of fun activities. However, we all know the cold can take a toll on our skin. In the harsh winter months, you should be paying more attention to your skincare routine.
Try exfoliating more, limiting hot water and using a moisturizer. Dermal therapy® body lotion is one option to help relieve dry, cracked, and itchy skin. With alpha hydroxy acids, it helps to replace old dry skin to reveal new skin and will help keep your skin smooth during the winter.
2. Stay on top of dry lips
Exfoliate your lips twice a week to help prevent chapping. Before you go to bed, make sure you apply a thick lip balm to bring back some of the moisture you may have lost during the day.
3. Fight congestion
A stuffy nose and cold weather go hand-in-hand, and this can dampen your day. Sleeping with an extra pillow to elevate your head, using a humidifier and taking hot steamy showers can help clear your congestion. You can also try a nasal spray like hydraSense®Medium Stream. hydraSense is made from 100 per cent naturally- sourced seawater and helps to flush out excess mucus to relieve nasal congestion. Free your nose this winter!
4. Combat dry eyes
Cold winds and dry indoor heating are a recipe for eye discomfort. Make sure to give your eyes breaks during the day by looking away from your electronics or wearing glasses instead of contacts. hydraSense®Advanced for Dry Eyes is one option for effective, long-lasting relief for your irritated eyes. It is preservative free and contains a clinically proven naturally sourced lubricant.
5. Stay hydrated
You may be great at staying on top of your water intake during the summer because of the heat, but it is just as important to stay hydrated during the winter. Don’t forget to carry around a water bottle and drink regularly throughout the day.
6. Get your rest
Less sunlight and the chaos of the holidays can often make you feel tired, so getting a good night’s sleep to restore your energy is especially important during this time of year. Try your best to stick to a consistent sleep schedule. If you have a hard time getting to sleep, try a relaxing night time routine, such as reading a book or gentle stretches.
With fun outdoor activities, and the holidays, the winter is an exciting time of year! Don’t let the harsh weather hold you back from doing what you love!
Winter Care Bayer
What are some of your best winter care tips? Share below!
This post is sponsored by Bayer. To make sure these products are right for you, always read and follow the label.
7 Smart Tricks To Save Your Bright Rug From Stains
If there is one thing that all homeowners dread ubiquitously, it’s this: maintaining bright coloured rugs! Yes, they are absolutely gorgeous, come in so many unique designs, and can match a variety of interior design styles, but once their surface is hit with those inevitable spills or spots, you’ll have a whole new dilemma on your hands altogether. But don’t worry, with proper care and precaution, you can easily take care of this problem. So, without further ado, let’s take a look at some smart tricks to save your bright rug from stains.
Regular Vacuuming With A Twist
Pink rose in a pink vase on a white rug
Rugs with bright colours tend to collect a lot of noticeable grime, which can then coagulate into its very fibers and take the form of stubborn stains. Sounds messy, right? But this dilemma can be easily avoided if you vacuum your rugs regularly. Three times a week should become your life-mantra if you want to maintain the beauty of their bright colours. It not only stops the dirt from coagulating but also swoops it up and fluffs up the trodden parts. You can even add a sprinkle of baking soda over the rug before vacuuming. This will help it smell fresher as well.
Make Yourself An Emergency Kit
Living Room Furniture
More often than not, stains happen to appear on rugs due to an unforeseen accident – maybe your kid tripped and spilled something or maybe a family member had a slip of the hand. This can be especially harrowing if your rug has a bright colour that highlights the stain. In such cases, it’s best to have an emergency spot-checking maintenance kit on hand. You can make one of your own. You can stock it with commercial carpet stain remover for the stubborn stains, club soda for wine spills, hydrogen peroxide for blood stains, and dishwasher detergent for mild stains. Remember to dab, and not rub while cleaning – otherwise you’ll just end up making it more permanent. If none of these homebased remedies work, it’s time to call for professional rug repairmen and cleaners.
Stain Removal Know-How
Bedroom with a rug on the floor
It’s important to know the fabric of your bright coloured area rugs and carpets to prevent them from staining permanently. When you know the properties of the fibers, you’ll be better equipped to deal with the stain-removal first-aid. When you dab/blot, you’ll need a stain removing agent, and the best way to determine which one to use depends totally on what your rugs are made of. For example, water is enough to blot away at nylon and polypropylene rugs. Wool rug stains can be removed with club soda, and so on.
Chewing Gum Stains
Child bedroom
Gum and the sticky mess it leaves in its wake has become a ubiquitous contemporary conundrum. There are two things from which gum can be quite challenging to extract: hair and area rugs. Once it sticks to either of these things, it can be next to impossible to take out. Imagine the horror of having a gum stain on your gorgeously bright rugs! Sounds like a nightmare, right? But here’s a little trick that can help you take out the sticky wad out of the rug fibers easily: simply rub the affected part with ice-cubes. It will freeze the gum, which you can then take out with minimal to no damage at all.
When Precaution Is Better Than Care
Fireplace in a living room
Now that winter is in full swing, your bright area rugs are more susceptible to stains than ever before. Add messy outdoor activities to cold and insane moisture content, and you’ll have a mess on your hands if somebody even accidentally steps a dirty step on your precious rug. There are a number of ways you can keep your homes cleaner this winter, but the most effective ones by far include implementing the no-shoe rule and doubling up on the doormats!
Using Rug Protectants
Living Room Furniture
One of the simplest and best ways that you can save your bright rugs from stains is by investing a good protectant. These are developed especially for area rugs and seals them up against any and all spills by bonding with the fibers. However, applying the sealant yourself can be very tricky as rugs come in all sorts of fibers and therefore, have unique characteristics. Amateurs might end up ruining the rug surface, so it’s better to contact professionals if you want to apply a protectant.
The Water-Vinegar Remedy
7 Smart Tricks To Save Your Bright Rug From Stains
There are many types of stain cleaning solutions, but the one that is the most versatile and universally beloved is the water-vinegar remedy. It consists of three-parts warm water and one-part vinegar. It works incredibly well on a number of stain types. It can remove coffee, beer, milk, soda, and other liquid stains. It’s also extremely effective against food-related stains like curry, gravy, ketchup, and even eggs.
So, these are 7 smart ways that you can protect your bright rugs against stains of all types. As you can see, a good knowledge of solvents, rug fibers, and quick wit are all you need to beat those pesky stains once and for all!
Are you looking to create Christmas memories and traditions with your children? There are a number of fun Christmas activities you can take part in as a family to make a great holiday experience! Whether you’re looking to pass the time while you wait for dinner, or trying to give the rest of the family something to do when you have family in town visiting, here are 5 fun Christmas activities for the family!
1. Do an outdoor activity together
Whether you go to a farm to pick out a Christmas tree, hit the local ice skating rink, or go snow tubing together, the holiday season is a great time to take part in outdoor winter activities as a family.
2. Bake Christmas cookies together
Not only is baking a great way to teach your kids about measurements, but you’ll have so much fun baking and decorating together. Whether you’re baking cookies for Santa or your family, your kids are bound to have fun!
This is one of many things to do with your family for Christmas! Your kids will love to drive or walk around the neighbourhood to see whose houses are lit up with colourful lights!
You might have your child pick out a toy to donate to Toys for Tots or donate to a local food bank. No matter the cause, your child will always remember their good deed.
These are just things to do with family during Christmas break, but don’t let the fun stop there. You can think of more ideas and other fun things that your children will enjoy doing and even consider making some of your own traditions.
What is a more iconic flavour combination at the holidays than chocolate and peppermint? It’s something that we all look forward to every year. It’s great in hot chocolates, candies, and even cookies. These Holiday Double Chocolate Cookies are not only great for get togethers, but you’ll find that they are great throughout the holiday season.
This recipe for chocolate peppermint cookies has a wonderful holiday flavour. Remember that splurging on pure peppermint extract is going to give you the best flavour. Whenever you bake, always use the best ingredients and you’ll be happy with the results. That’s where many people go wrong. Skimping on real butter, extracts, etc. can really hurt the overall flavour of your baked goods.
Holiday Double Chocolate Cookies
These are the best Christmas cookies to bake for family and friends! These chocolate peppermint cookies would be great for bake sales, gifts, holiday parties, etc. Imagine putting these in a cute holiday container with colourful tissue paper as a gift for your child’s teachers. You could also pack these in cut treat bags for bake sales or gifts for your neighbours and coworkers. The flavour of these chocolate cookies is amazing, but presentation is always important. If you’re taking these to a party, place them on a cute platter and with a paper doily under them. And, let’s not forget how amazing this recipe for holiday cookies would be for a cookie swap. Everyone will be wanting more and begging for the recipe.
If you want something that satisfies that craving for rich chocolate and peppermint, these holiday cookies are excellent. You will love sitting down and enjoying these with coffee, hot chocolate, or even a cold glass of milk. This is the perfect way to unwind after being stuck in your local mall for hours with angry and impatient shoppers. Just pop these in the oven or microwave to warm them up whenever you need a treat to help you make it through the holidays with your sanity intact.
Preheat oven to 350 degrees. Line large cookie sheet with parchment paper.
Combine flour, baking powder, baking soda, cinnamon and salt in a bowl. Whisk ingredients together. Set aside. Using an electric mixer, beat the butter and both sugars until creamy. Slowly add one egg at a time to the butter and sugar mixture, beating after each addition. Add vanilla beating to incorporate with the butter, sugar, and egg mixture. Slowly add the flour mixture, one cup at a time, stirring to combine after each addition.
Using a ¼ cup, scoop out the cookie dough and place on the lined cookie sheet allowing space for baking between each cookie. Bake the cookies for 15 minutes.
Using a double boiler, melt the milk chocolate melting wafers. You can also melt them in a microwaveable bowl for 30 seconds at a time, stir, and repeat until wafers are melted. Once melted, pour chocolate into a disposable piping. Cut a small tip off the piping bag and drizzle all over the cookies. Repeat the steps with the white chocolate. Once both chocolate have been drizzled, sprinkle crushed candy canes. Let chocolate completely dry before enjoying!
Holiday Double Chocolate Cookies
I hope you enjoyed the Holiday Double Chocolate Cookies Recipe! If you make it, make sure to share with us on Facebook or Twitter! Also, check out all of our other Recipes.
Holiday Double Chocolate Cookies Recipe
Lyne Proulx
These Holiday Double Chocolate Cookies have a wonderful chocolate and peppermint flavour. These are the best Christmas cookies!
Preheat oven to 350 degrees. Line large cookie sheet with parchment paper.
Combine flour, baking powder, baking soda, cinnamon and salt in a bowl. Whisk ingredients together. Set aside.
Using an electric mixer, beat the butter and both sugars until creamy.
Slowly add one egg at a time to the butter and sugar mixture, beating after each addition.
Add vanilla beating to incorporate with the butter, sugar, and egg mixture.
Slowly add the flour mixture, one cup at a time, stirring to combine after each addition.
Using a ¼ cup, scoop out the cookie dough and place on the lined cookie sheet allowing space for baking between each cookie.
Bake the cookies for 15 minutes.
Using a double boiler melt the milk chocolate melting wafers. You can also melt them in a microwaveable bowl for 30 seconds at a time, stir, and repeat until wafers are melted.
Once melted, pour chocolate into a disposable piping.
Cut a small tip off the piping bag and drizzle all over the cookies.
Repeat the steps with the white chocolate.
Once both chocolate have been drizzled, sprinkle crushed candy canes.
Walt Disney World is more than kiddie rides in the Magic Kingdom and meet-and-greets with Mickey and friends. This Florida hot spot can offer the ultimate vacation destination perfect for adults looking to escape the stress of daily life. That’s why Disney World is good for Adults too!
Disney World has four Disney theme parks and two water parks and occupies about 40 square miles of land. It offers a variety of resorts to fit any adult’s budget, style and personality. From the sleek Contemporary Resort to the southern charm of Port Orleans to the elegance of the Grand Floridian, the Disney resorts are some of the finest accommodations to be found in the Florida.
Wine Bar George at Disney Springs ~ Photo credit: Disney:(Preston Mack, photographer)
1. Escape from reality
The daily humdrums can be well, humdrum. Often adults become so busy rushing from task to task, they forget to take a step back to enjoy the little pleasures in life. A Disney vacation can be a great for adults too! You can escape from work woes, pressure and general tension. A leisurely stroll through the Gorilla Falls Exploration Trail in the Animal Kingdom is a great way to reconnect with nature. For an adrenaline jolt, a ride on the intense Mission: SPACE in EPCOT can be the perfect choice for thrill-ride lovers.
2. Romantic getaway
From moonlit walks along the white sand beaches of the Caribbean Resort to fine dining and the nightlife of Disney Springs, Walt Disney World can be the height of romance. Couples can take advantage of the many Disney date-like activities. They include sailing, exploring the pavilions at EPCOT’s World Showcase or indulging in a romantic dinner for two. Now those are very valid reasons why Disney World is so good for adults to visit!
A great restaurant choice is The California Grill on the top floor of the Contemporary Resort where you can also watch the evening fireworks from the Magic Kingdom as you linger over dessert. Evening nightlife for couples may include Fireworks at EPCOT or enjoy late-night fun at Disney Springs.
3. Many Disney activities for active adults
Disney World truly has something for everybody. For adults, there are many activities to choose from including golf, sailing, fishing, and surfing lessons. Each of the parks offers behind-the-scene tours. Some tours are about an hour, while others span a half day. Park tours as well as many of the other activities may not be included in your vacation package, so be sure to check when making your reservations. Some tours fill up quickly during peak seasons, so reserve your space as early as possible.
4. Foodie’s paradise
With more than over 100 dining options throughout the Disney properties, Walt Disney World is truly a foodie’s paradise for Adults too. From sushi to giant turkey legs to exquisite steaks grilled to perfection, the fine dining choices are seemingly endless. EPCOT’s World Showcase has international cuisine from 11 different countries including Morocco, Japan, France, Germany and the United Kingdom.
The Animal Kingdom has the amazing Tusker House with its mouthwatering African dishes and all-you-can-enjoy meats, salads and desserts. Not to be overlooked are the many fine dining options in the resorts, most notably the elegant dining available at Victoria’s & Albert’s in the Grand Floridian.
5. Reconnect with your playful side
I find this is the main reason why Disney World is good for adults. It is almost impossible to not to feel like a bit of a kid when vacationing at Disney. Standing on Main Street U.S.A. in the Magic Kingdom while enjoying a Mickey Premium Ice Cream bar can make anyone feel young at heart. To awaken your inner-child, give Mickey a hug and pose for a picture. Ride the teacups at the Mad Tea Party, laugh with Flik and the bugs in Animal Kingdom’s. It’s Tough to be a Bug or soar over the natural wonders of California in EPCOT’s thrilling ride, Soarin’.
Why Disney World Is Good For Adults Too
If you are an adult traveling with children at Disney, your vacation can be even more amazing. Adults visiting Disney with kids get to see the most magical place on Earth through the eyes of innocent children. Share their wonder and the memories of your Disney vacation may last a lifetime.
When most mothers think of challenging events in the first two years of an average child’s life, they might think of vaccinations, fevers, tantrums, and night-waking. What about weighings? Believe it or not, for some mothers, having their babies weighed is a tremendous cause for anxiety. Often, these are mothers whose babies suffer from Failure to Thrive (FTT). Unfortunately, many of these mothers are made to feel as though their infant’s FTT is their fault. I’m here to tell you it’s not. Your failure to thrive baby doesn’t make you a failure as a mother.
What is FTT?
The term FTT is frightening. It is an umbrella term for what could be hundreds of conditions, ranging from disease to organic. The diagnosis can terrify even the most experienced mothers. When a doctor tells a mother that her baby has FTT, only one thing is certain: this is the first moment of a difficult road.
But life can and often does return to normal for mothers of FTT babies. Such women need to know that they are not alone and there is hope.
Newborn’s fee
My Story
My third child was failure to thrive and I was completely unprepared. I had never heard of it and that’s after two other pregnancies. After the diagnosis, there didn’t seem to be anyone who understood what I was going through.
I did receive tremendous support from my pediatrician, but I was hurt by the number of well-meaning neighbors and even medical professionals who made me feel as though my baby’s weight deficiency was a result of my unskilled mothering.
Many acquaintances told me things like, “In my house, your daughter would get fat.” My baby was born 6.6 pounds at full term. She nursed beautifully. Her initial check-ups were okay, but by six months it was obvious that she was small, and at a year she was only 6 kilos.
No Escape
I was utterly preoccupied by my daughter’s FTT. There was not one day of respite from the time my baby turned six months until she was fifteen months old. I felt as though she was in my arms 24/7 and I had a two-year-old and a four-year-old at home, too.
I remember calling my husband in tears, telling him that I couldn’t put her down because I couldn’t take her non-stop crying, and that I couldn’t get anything done.
The Rules
I weighed my daughter weekly. I was told to write down every bite my daughter swallowed. The list was short: nearly all offers of food were refused.
It’s very difficult for someone who has not had an FTT baby to understand. I was supposed to feed a baby who didn’t want to eat. At the end of each day my floor held the contents of my refrigerator: yogurts, chocolate, pasta, chicken, soup, fruits, you name it. She threw it all over the floor. I tried feeding her sitting, standing, even putting food around her toys — nothing worked.
The Search for Help
I tried every route I could think of beyond my regular pediatrician. I visited a nutritionist who told me to put oil on noodles, buy full-fat milk, and give her baby crackers, never rice cakes. Then I tried another and another.
The nutritionists couldn’t seem to get it into their heads that my daughter didn’t eat. If only she ate noodles, I tried telling them, then I could start worrying about the oil. The only thing she wanted to do was nurse, and after hours of trying to get her to eat, I’d nurse her.
Then there was the board of ten gastroenterologists I had to sit before —like I was on trial. They looked at my baby with incredulity and added an “S” (severe) before the FTT on her medical charts.
The Natural Route
At nine months, I tried natural medicine. It was expensive. I was told to take my daughter off of everything: wheat, peppers, dairy — which was contrary to the expensive dairy PediaSure she was supposed to be drinking — and a whole list of other foods. I couldn’t handle it after a while, and I stopped.
Your Failure to Thrive Baby Doesn’t make you a Failure as a Mother
Celiac Wasn’t the Culprit
I tested her for low iron, worms, and celiac disease. Finally, when she was a year old, my doctor said that she should have a stomach biopsy. He told me it was the only way to completely rule out celiac. Thank heaven, that came out normal, too.
Surprisingly, my FTT baby was my earliest walker — she started at eleven and a half months — and all of her fine and gross motor skills developed normally. There was just the major issue of her FTT.
First Birthday
My doctor kept telling me that after a year, a child’s whole immune system changes, and this can cause other changes in her physiology, too — such as an increased appetite. I’m so grateful this was the case. At around fourteen months, my daughter did begin to eat small amounts of solid food.
Finally, She Made the Weight Chart
Today, she is nine and petite. She only made it onto the weight chart —the fourth percentile — in kindergarten. I always have this disquiet: should I recheck her? I found that as soon as I decided in my heart that she was developing normally, and told myself to just forget about it, much of the stress disappeared. But that took a while.
FTT Round II
Six years later, my fifth child was born, another daughter at a lovely 7.7 pounds. By the time she was three months, I knew she was FTT, too.
Physically, it was no easier, but emotionally it was. I got a lot of strength from a story about a wise man who spent a night at someone’s house and in the morning asked the mother if he could feed the baby. He explained that feeding another human being is one of the holiest pursuits; life is all about giving.
From then on, I found that the hour and a half it took me to feed my baby one small yogurt was manageable: I was giving to another human being; that had to be the best way to spend my time. I also liked to think of what my mother says: Good things come in small packages.
Don’t Go it Alone
My message to other mothers is that you must not try to cope with this alone. Even if you have to go through three pediatricians or a variety of nutritionists, find someone who doesn’t blame you and who will help you. Remember, to take care of yourself, too.
Canadian Gila Green is an Israel-based writer and editor from Ottawa. She is the author of Passport Control (S&H Publishing) and King of the Class. Her novel in stories White Zionis forthcoming from Cervena Barva Press and her young adult novel No Entry will be coming out in September 2019 with Stormbird Press, Australia. She lives with her husband, her five children and their dog, Bella. Gila welcomes visitors.
This DIY Rudolph tealight ornament is so cute, don’t you think? With the exception of the battery-operated tealights themselves, you may already have all the other necessary supplies on hand.
This is a fun holiday craft project that even younger kids can help you with, as long as supervision is provided. Paint the base of each candle brown and the actual light red. Allow them to dry completely.
Glue on appropriately-sized wiggly eyes and “antler-shaped” gold pipe cleaners… the more sparkle the better! A hot glue gun is best. In the event you don’t have access to one, any good- quality craft glue is sufficient.
Your antlers don’t have to be perfect, by any means. Just give each pipe cleaner a few half-loop bends. It’s as easy as that.
DIY Rudolph Tealight Ornament
DYI Rudolph Tealight Ornament in process
Use matching ribbon or fabric to make Rudolph’s bowtie and the ornament hanger. I personally love the plaid fabric used in this example. But, any Christmasy ribbon will get the job done.
I think these are perfect little gifts for teachers, classmates or even neighbours. The ornaments are easy to make and pretty affordable to boot. If you know someone who collects Rudolph décor (and tons of people do) you could easily gift them with 10 or 12 little Rudolph’s to hang on their holiday tree.
Another notable thing about the ornaments is that they’re safe use because the tealights never get hot enough to start a fire. Safety is always an issue. But, it’s important to practice Christmas tree safety, during the holidays. There’s no such thing as being TOO careful!
Rudolph the Red-Nose Reindeer has been a holiday tradition for generations. What would Santa and the other reindeer do without him, on Christmas Eve? It’s easy to make the holidays more merry and bright, with the help of these adorable ornaments. You still have time to make this craft and there’s no better time to start!
DYI Rudolph Tealight Ornament
Rudolph Tealight Ornament
Materials
Small battery operated tealight
Brown and red paint
Paintbrushes
Ribbon
Scissors
Hot glue gun
Wiggly eyes
Sparkly gold pipe cleaners
Rudolph Tealight Ornament material needed
Instructions
Begin by painting the flame of your battery operated tealight with red paint. We used chalk paint because it is fast drying.
Rudolph Tealight Ornament in process
Once the flame of the tealight has dried, use brown paint to cover the rest of the front and sides of the tealight. You will not need to paint the back of the tealight.
When the paint has dried completely, glue two wiggly eyes to the front of your painted tealight above the flame.
Rudolph Tealight Ornament in process
Cut a gold sparkly pipe cleaner in half and form each half into a zigzag type of reindeer antler shape. You can see the photos for reference.
DYI Rudolph Tealight Ornament in process
Hot glue the two pipe cleaner antlers to the back of the tealight, one behind each eye of the reindeer.
DYI Rudolph Tealight Ornament in process
Cut a small piece of holiday ribbon and tie it into a small bow.
DYI Rudolph Tealight Ornament in process
Glue the small bow to the bottom front of the tealight reindeer.
DYI Rudolph Tealight Ornament in process
Cut another small loop of ribbon and hot glue it to the top of the back of the tealight in the middle. This will be the hanger for your ornament.
With the change of temperature, it is time to be extra careful to prevent viruses that can cause us to be sick. There are times that becoming sick is inevitable. Want to make sure you are ready to fight off these symptoms? Keep on hand these items to have a well-packed sick day kit to help you start to feel better.
Build Your Sick Day Kit
For Tummy Troubles:
Chamomile tea: Chamomile tea can help ease the pain of an upset stomach. Keep a couple of packets in your kit to help reduce unpleasant cramping.
A cup of tea and a flower on a book on a bed.
Heating pad:Heating pads are an inexpensive and cheerful way to sooth and calm your stomach. They also give you that warm comfy feeling that will make curling up on the couch much more pleasant.
For Cold and Flu:
Tissues: This one is a no-brainer. There’s nothing worse than running out of tissues when your nose is leaking like a faucet. Keep your nose happy with a pack of your favourite soft tissues and keep your family happy by leaving the toilet rolls where they belong – in the bathroom.
hydraSense: Clear your nose fast with a hydraSense saline nasal spray for your nasal cold symptoms. Just spray, blow and you’re clear. Another great thing about hyrdasense Daily Nasal Care is that it is 100% naturally-sourced seawater that is clinically proven to reduce and relieve nasal congestion and nasal symptoms. hydraSense is medicine-free, so you can use alongside your other cough and cold medication. See here to learn more about hydraSense Nasal Care.
hydraSense bottle and product box on a table with a piece of facial tissue.
Soup packets: No one wants to cook when they are sick and drinking soup is a great way to make sure you’re getting the liquids you need to stay hydrated.
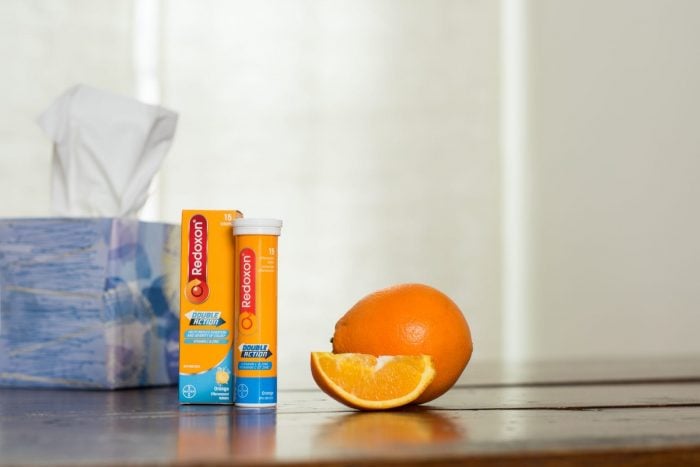
Redoxon: Redoxon is a great way to get your vitamin C dose year-round whether you are sick or not, but it is especially helpful when a cold throws off your usual diet. Just one tablet gives you 10 oranges worth of vitamin C**! Redoxon also gives your water a fun fizz and flavour in case you’re getting tired of gulping down plain water all day. It is available in great-tasting orange flavours. Please note – Redoxon is not a meal replacement.
Redoxon Double and box beside a box of facial tissue on a table.
For Headaches:
Pain Relief: Keep an over-the-counter pain reliever to help take the sting off of your headache.
Essential oils: While essential oils may not have any scientific claim to healing, a nice peppermint, lavender or rosemary oil can help you.
Ice pack: An ice pack can help temporarily take the sting off a headache. Wrap the ice pack in a towel or cloth before applying for more comfort.
Whew! Now that the components of a sick day kit in tow, do we ever think about planning about getting back on track once the symptoms start to go away? Have these handy tips on hand to help you get back to your regular routine.
Getting Back on Track:
Aromatherapy diffuser: Nothing can truly rejuvenate your system like a fullnight’s rest. This may sound simple, but sleep plays such an important role in your overall health. Sleep can help to reduce stress, improving mood and increasing energy. You can try setting a diffuser 30 minutes before you go to bed. This can help you feel relaxed for a long, peaceful sleep.
One A Day multivitamins: When you are sick you may feel like you’ve been unable to eat much of anything. This can prevent you from getting the important nutrients your body needs. One A Day Gummies Plus Immunity Support contain zinc and vitamin C. This combo helps to maintain immune health in a great-tasting gummy. This multivitamin comes in great tasting fruit flavours (green apples, blue raspberry and orange), and are a fabulous way to get your essential vitamins and minerals. Visit One A Day® Gummies Plus Immunity Support for more details!
One A Day Multivitamin bottle beside a box of facial tissue and oranges.
Motivational playlist: A great playlist will lift our spirits and get you motivated to start moving again. Try popping your headphones in and boost your energy levels with a solid workout. Whether it be yoga, hitting the gym or going for a jog, a good tune will put you in the proper mindset for a great sweat, so you feel as good as new!
Smartphone and earbuds on a table.
With this sick day kit and helpful tips to get back on track, you should have just about everything you need to be ready to make a icky sick day more bearable. Remember, if your symptoms are severe or you find they are getting worse, speak to your doctor about what you should do for treatment.
How to Build Your Sick Day Kit
Do you have a sick day kit ready at home? Let us know what your must-have items are!
This post is sponsored by Bayer. To make sure these products are right for you, always read and follow the label.
There’s just something about the season and pumpkin desserts that go hand-in-hand, and I couldn’t imagine not whipping up a pie each year to gather the family around the table at Thanksgiving and on Halloween. You will love our super easy pumpkin pie recipe!
When I think of Fall, I always imagine that perfect slice of homemade pumpkin pie waiting to be eaten, with a dollop of whipped cream to top it off… My mouth is already watering just thinking about it!
This year, if you’re looking to invest the time to prepare a good old Homemade Pumpkin Pie, look no further: this recipe is bound to be an instant hit! It was with my family! You’ll never want to eat another store-bought pumpkin pie again after having a slice of this!
This is a classic, unfussy pumpkin pie. We take it plain or, when feeling feisty, with a dollop of softly whipped cream. The spices are not overpowering, here. If you like your pie spicy, increase the cinnamon and ginger a little. (We’d stay away from increasing the cloves, a 1/4-teaspoon should suffice).
1 3/4 cups fresh pumpkin puree, see our recipe, or 1 can of pumpkin puree
3/4 cup heavy whipping cream
1 teaspoon vanilla extract
1 1/2 teaspoons ground cinnamon
1/2 teaspoon ground ginger
1/2 teaspoon nutmeg
1/4 teaspoon ground cloves
1/2 teaspoon salt
Super Easy Pumpkin Pie Recipe
HOW TO MAKE THE Pie CRUST
Prepare crust according to our recipe. If you use a store-bought crust, follow the instructions on the package for blind baking.
Preheat the oven to 400°F.
Remove the pie crust from the refrigerator and place on a baking sheet (this makes it easy to move in and out of the oven). Bake for 15 minutes or 10 minutes without the baking sheet. Take the crust out of the oven. Don’t worry if the bottom puffs up; just press it down gently with a flat spatula, taking care not to puncture it.
Refrigerate while you make the pie filling.
Pumpkin Puree
PUMPKIN PIE FILLING
Whisk eggs and both sugars together until smooth.
Add pumpkin puree, cream, vanilla, cinnamon, ginger, nutmeg, cloves, and the salt.
Stir until well blended.
BAKE THE PUMPKIN PIE (Makes 1 (9-inch) pie)
Heat oven to 375 degrees F.
Transfer pie shell to a baking sheet.
Pour pumpkin filling into the pie shell.
Bake 45 to 60 minutes or until a toothpick plunged into the centre of the pie, comes out clean.
Rotate once or twice during baking.
If the top of the crust becomes too dark, cover with a thin strip of aluminum foil.
Cool on a wire rack for 10 minutes and serve warm or cool for 2 hours until room temperature.
I hope you enjoyed this Easy Pumpkin Pie Recipe! If you make it, make sure to share with us on Facebook or Twitter! Also, check out all of our other Recipes.
Super Easy Pumpkin Pie Recipe
Lyne Proulx
When I think of Fall, I always imagine that perfect slice of homemade pumpkin pie waiting to be eaten, with a dollop of whipped cream to top it off… My mouth is already watering just thinking about it!
Chilled pie dough for one single-crust 8 or 9-inch piesee our pie crust recipe, or store brought
3large eggs
1/2cupgranulated sugar
1/3cuplight brown sugar
1 3/4cupsfresh pumpkin pureesee our recipe, or 1 can of pumpkin puree
3/4cupheavy whipping cream
1teaspoonvanilla extract
1 1/2teaspoonsground cinnamon
1/2teaspoonground ginger
1/4teaspoonground cloves
1/2teaspoonnutmeg
1/2teaspoonsalt
Instructions
CRUST
Prepare crust according to our recipe. If you use a store-bought crust, follow the instructions on the package for blind baking.
Preheat the oven to 400°F.
Remove the pie crust from the refrigerator and place on a baking sheet (this makes it easy to move in and out of the oven). Bake for 15 minutes. Take the crust out of the oven. Don’t worry if the bottom puffs up; just press it down gently with a flat spatula, taking care not to puncture it.
Refrigerate while you make the pie filling.
PIE FILLING
Whisk eggs and both sugars together until smooth.
Add pumpkin puree, cream, vanilla, cinnamon, ginger, cloves, and the salt.
Stir until well blended.
BAKE THE PIE
Heat oven to 375 degrees F.
Transfer pie shell to a baking sheet.
Pour pumpkin filling into the pie shell.
Bake 45 to 60 minutes or until a toothpick plunged into the centre of the pie, comes out clean.
Rotate once or twice during baking.
If the top of the crust becomes too dark, cover with a thin strip of aluminum foil.
Cool on a wire rack for 10 minutes and serve warm or cool for 2 hours until room temperature.
Cut into 6 wedges and add homemade whipped cream or ice cream.
Food. For many Canadian families, it is as the heart of their holiday celebrations. A lot of planning goes into treats and meals that their loved ones will devour and reminisce about for many things to come. Canadian Turkey wants to give you a hand with your entertaining plans this holiday season with some show-stopping dish ideas and tips and tricks to help get you through this time of the year! You have to make this Turkey, Cranberry and Goat Cheese Party Bites Recipe for your guests!
Photo Credit: https://www.canadianturkey.ca; Turkey, Cranberry and Goat Cheese Party Bites.
Recipes for any type of festive crowd
Do you struggle finding meals to serve at a festive occasion? Planning ahead and using various cuts of meat will give you a (turkey) leg-up on your entertaining plans. Canadian Turkey has a variety of recipes on hand to help you serve some amazing meals for your guests. Be sure to visit canadiantukey.ca to find and save recipes that can do the following:
please your loved ones
can be prepared in advance
go from freezer to oven in a flash, or
can be dished as a festive starter or appetizer.
Canadian Turkey has all sorts of delicious dishes to help prepare you for any kind of gathering!
Saving your favourite recipes makes it easier for you to access, regardless of the size of your festivities. Some really great recipe to keep handy is their Turkey, Cranberry and Goat Cheese Party Bites for your next cocktail party or pot-luck. This dish is great because the ingredients can to prepped ahead of time and can be whipped up on the day of your event.
Turkey, Cranberry and Goat Cheese Party Bites Recipe
Turkey, Cranberry and Goat Cheese Party Bites
Want to make your holidays merry? See how Canadian Turkey can help with this Turkey, Cranberry and Goat Cheese Party Bites Recipe!
In a non-stick pan or skillet, season ground turkey meat with salt, pepper and garlic powder. Sauté until lightly browned and cooked through, 6-8 minutes. Set aside to cool.
Roll out puff pastry and cut into 2-inch by 2-inch squares. Press into the bottom of a mini muffin tray. Use a fork to prick holes into the bottom part of the pastry to make your ‘cup’. Cook according to package instructions until barely browned. Set aside to cool. Exact number of bites may vary according to how thin pastry is rolled.
Fill each pastry cup with ground turkey. Top with a dollop of cranberry sauce and goats cheese.
Broil on high for 1-2 minutes until cheese is softened.
Top with mint.
Serve immediately.
Notes
TIP:These bites make a perfect starter for your parties or family get-togethers. Get a head start by making the first two steps ahead of time and store the pastry cups and cooked turkey for up to 2 days before you need them. You can easily whip up a double batch of cups and mix up your toppings to create different flavours. Try:Sweet and Spicy:Ground turkey + red pepper jelly + brie + jalapenoIsland:Ground turkey + jerk sauce + cubed pineapple + cilantroItalian:Ground turkey + pesto + sundried tomato + mozzarellaCheesy Mushroom:Ground turkey + mushrooms + onions + cheddar
If you are looking for other ways to get your holiday party started with Canadian turkey, print off this pintable showing 5 ways you can make holiday appetizers with ground turkey meat!
Find it hard to feed a throng of holiday revelers? Canadian turkey makes a fabulous feature item on all of your entertaining menus. Cooking a classic roast turkey dinner with all of the fixings is worth the time needed to put together to create a holiday celebration for those you are celebrating with. You can usually count on leftovers from this bird to help create quick and healthy meals on hectic days when you have a lot to juggle. It is always great to have scrumptious dishes on hand for the rest of the week or squirrelling away pre-made meals in the freezer to cook for a busy weeknight during the holiday season.
Making Canadian turkey the star of your holiday season
Canadian turkey is such a versatile protein to use in meals. With all of these options, it is easy to have this bird as the star of your holiday season. You should give some of these recipes a try to be creative or keep your traditional go-to’s intact. No matter which way you choose to prep your turkey this year, it will be delicious! Since turkey can be used in so many different dishes, try using as a main ingredient in any of your star appetizers and main meals for tickle the taste buds of your guests. Take a look below to find more amazing ways to add Canadian turkey when throwing your next holiday get-together.
Roast Turkey on a festive holiday table ~ Photo credit: Canadian Turkey
8 Great Tips to Help You Entertain-at-Home Like A Pro
Serve dishes that can be made in advance. Favourites like casseroles, pastas and stews featuring turkey can be made ahead of time and just re-heated gently to serve.
Help your guests avoid the dreaded ‘crash’ that follows a heavy meal and think about serving lighter fare. Turkey makes a great feature meal, feeding a crowd with big flavour, while being a leaner, lighter choice.
Build your party around a series of appetizers. A great one to try is our Turkey, Cranberry and Goat Cheese Party Bites. Finger foods also mean using less dishes and cutlery, saving time when it comes to clean up.
Plan something other than a formal sit down. A relaxed buffet style meal encourages grazing throughout the night, mingling while guests eat and chat. Choose foods that taste great at room temperature, like a stuffed turkey breast or turkey casserole.
Think about hosting a potluck. You provide the crowd-pleasing main dish, like a whole roasted turkey, and then have your guests bring a selection of appetizers, salads and desserts. Guests love to contribute, and this will help take the heat off of you.
Substitute turkey into any of your favourite party dishes. Think about ground turkey, turkey breast or turkey sausage in any of your go-to appetizers and mains.
Use your handy crock-pot to help you make a crowd-pleasing dish ahead of time. Canadianturkey.ca has manycrock-pot and make-ahead inspirations. A bonus you’ll love with the crock pot? You can heat and serve all in the same container!
Save on the big meal by skipping the beef tenderloin or prime rib and opting for a less expensive cut of meat. A whole turkey will feed a large crowd for just a few dollars per person, making it a budget-friendly choice!
Turkey, Cranberry and Goat Cheese Party Bites Recipe ~ Photo credit: Canadian Turkey
More ways to put Canadian turkey at the heart of your holiday festivities!
Do you love these amazing tips and tricks dished out for you to use for your holiday celebrations? Is there something you still have questions about? Will this be your first time creating a holiday feast for your loved ones or hosting a festive bash? Head over to canadianturkey.ca additional tips, recipes, Turkey Basics videos and HOW TOs to make this festive season the best one yet. Their Year-Round Whole Turkey HOW TOs section will help you through the whole process of roasting a whole Canadian turkey for your loved ones ay time of the year. The Recipe section is packed with yummy recipes when cooking a whole turkey and other cuts of this fabulous bird. They help you to have nutritious and delicious turkey on your table to as the heart of your holiday season or to #Entertain WithTurkey at any time of the year!
Disclaimer: This post is generously sponsored by Canadian Turkey.
There are so many great reasons to go camping in the fall, if it’s your first time, you’ll wonder why you hadn’t tried it before. The cooler temperatures can put people off fall camping, but if you love the colours of fall foliage, hot beverages, camping food, the smell of wet leaves after the rain and burning campfires, fall camping is for you.
What To Bring On A Cold Fall Camping Trip
Those who truly love camping will camp during any time of the year, even when the weather turns bitter cold like in the fall. Although camping when it is cold does not seem like it would be any fun, you can make it bearable by bringing the right gear to protect you from the harsh weather.
Think Blankets
Bring as many thick blankets as you possibly can. Try to keep the number as low as you can, but make sure that the blankets are going to keep you warm. Cotton and rayon linen will be cool when the air temperature is cool, so try bringing a few fleece throws or even a large down-filled blanket. Feathers will keep you warm, and you can see this fact in action whenever you see ducks or any feathered friend swimming in an ice cold lake or river.
What Type of Jackets Should You Wear At A Fall Camping
Wear thick jackets that are insulated to keep you warm at even below zero temperatures. Most of these jackets will be filled with down feathers, but some will be filled with other insulating materials that will probably keep you just as warm.
Make sure that the exterior fabric of the jacket will not absorb water. This is important because if it starts to rain or snow, you don’t want your jacket to absorb any of the water or snow that falls on you. The jacket should also have hood to keep your head warm (which is just as important as any part of your body).
Wear more than one layer underneath your jacket. Two or three layers is enough. You do not want to wear too many layers because you still want your sweat to be removed effectively. Make sure that your layers are also warm. Fleece and pure cotton sweaters are just fine.
Why Is Fall Camping Better?
The following tips will show you the reasons why fall camping is so much better!
1. Fewer Campers
There are fewer crowds at popular campgrounds in the fall. After Labor Day, school is back in and the kids are busy with homework and weekend activities, so fewer families will be out on campgrounds. You have more sites to choose from and more space to relax and explore.
2. More Wildlife
Another advantage to going during the fall when there are fewer campers is more wildlife. If you’re keen on wildlife watching, bring a camera with you to make the most of your trip. In the fall, many different animals are migrating, looking for a place to hibernate, and scavenging the last of the food for a long winter. As the leaves thin out, they’ll be easier to spot. Don’t forget to look to the skies for migrating birds as they head for the south.
Earlier in the fall you’re likely to see songbirds like warblers, thrushes, and shorebirds. Come October, sparrows, kinglets, wrens, and hermit thrushes are to be seen. By November, it’s mostly waterfowl you’ll see in the skies, as well as blackbirds.
3. No Bugs
Bugs can drive you up the wall in the summer. Early in the summer, black flies and mosquitoes can eat you alive. Deer and horse flies come out in July and August, while come September, the bugs start to die down. By October and November, you can enjoy completely bug-free camping, and that’s a rare treat.
5 Reasons Fall Camping Is Better
4. It’s a Great Time to Bring a Spooky Book
With night coming earlier and rain likely to be in the forecast for at least part of the day, it pays to bring a book. When the leaves are turning colour or falling off the trees, get in the spirit of the season with a spooky book, preferably one that ventures deep into the woods.
5. It’s Easy to Stay Warm
If you’ve always wanted to go camping in the fall but you’re worried about the temperature, you just need to prepare. One way to keep your feet warm this fall on a camping trip is with thermal socks. Thermal socks trap in heat and wick away moisture, keeping your feet dry and warm, even on damp, cold days. With a TOG rating 7 times warmer than basic cotton socks, Heat Holders thermal socks are worth considering for your fall trip.
Don’t just stop at thermal socks, either. Bring a thermal blanket and even thermal underwear to make sure you stay warm and cozy through your trip. One place you can get all your thermal wear needs covered is Heat Holders.
Keep a fire going at all times. Not only will this help you keep warm, but you can also easily cook your food. A fire may be difficult to build when the weather is cold, especially if you want to use local brush/twigs as tinder. So, make sure to bring your own dry twigs or tinder to help you make a fire.
With all these reasons to go camping in the fall, what are you waiting for?
Rudolph the Red-Nosed Reindeer had a very shiny nose… and it’s no surprise that reindeers hold a special place in the heart of the holiday season. These charming creatures have become symbols of Christmas magic, joy, and togetherness. So, when your kids find themselves looking for something fun to do on a chilly winter afternoon, why not suggest one of these adorable reindeer crafts?
Whether you’re a parent, teacher, or caregiver, these 17 reindeer craft ideas will keep little hands busy and imaginations soaring. From simple paper projects to popsicle stick creations, there’s something for every age and skill level. Let’s explore these festive activities that bring the spirit of the holidays right into your home or classroom.
Here’s a short description of some of them:
Chocolate Scented Play Dough Reindeer
Homemade play dough is really easy to make. It requires just a few simple pantry ingredients. Sir together a batch to make the reindeer’s body and head.
Use small sticks for the legs and tail. Attach googly eyes, a small red pom-pom for the nose and little pieces of sparkly tinsel for the antlers and your reindeer is good to go!
Yogurt Cup Rudolph Reindeer Craft
Do you or your kids love yogurt? If the answer is yes you probably dispose of lots of empty yogurt cups. This project, similar to the one above, is a great way to recycle some of them. In this case, just use a yogurt cup in place of the play dough.
Reindeer Paper Plate Craft
This is a fun kids craft for the littlest artists in your life. Necessary supplies include paper plates, construction paper of various colours, brown craft paint, glitter glue, paint brushes and a glue stick. The neatest aspect of this project is that the reindeer’s antlers are made from a cut out of your child’s handprints.
Reindeer Droppings Treat Bags
If you’re looking for a cute treat to send for your child’s Christmas party, consider these reindeer droppings treat bags. They don’t take long to put together, especially when you print out the free poem tag provided. Choose a candy like Whoppers or Milk Duds for the “droppings.”
Reindeer Crafts Collage
Reindeer Craft Ideas
If you’re a fan of Rudolph the Red-Nose Reindeer you might find it interesting to note that he came to be in 1939 because of a story originally written to hand out to kids (during the Christmas season) at a department store. Rudolph’s been guiding Santa and enchanting children ever since!
Reindeer crafts offer more than just entertainment. They’re a wonderful way for kids to develop fine motor skills, express creativity, and engage in meaningful holiday traditions. Creating these crafts together also provides an opportunity for family bonding, storytelling, and making memories that will last long after the decorations come down.
Plus, many of these projects use everyday materials you likely already have at home—making them easy to set up without a trip to the store.
With these 17 reindeer craft ideas at your fingertips, you’re ready to keep the holiday spirit alive through creativity and play. Whether making popsicle stick reindeer or sock puppets, your children will enjoy hours of festive fun—and you’ll love watching their imaginations come to life.
If you have a favourite reindeer craft, be sure to share that with us in the comment below!
For many families, a Disney cruise is a magical trip of a lifetime. There’s SO much to see and do, it’s hard to squeeze everything into one trip. You will find below tips on things to know before going on a Disney cruise.
What You Need To Know BeforeGoing on a Disney Cruise
Keep reading, to learn more about some of the things experienced cruisers wished they knew before setting sail on a Disney Cruise. It may make the experience all the more enjoyable for your travel group.
1. Plan Before You Go
Just like any other vacation, it’s important to be well-prepared for your Disney cruise. Take time to consider what to pack and stick the list somewhere in your luggage. This way, you won’t forget anything when it’s time for your return. In addition, book your princess meet & greet, character breakfast, dinner at Palo and/or Remy (adult only, additional fee), and excursions before the trip so you don’t need to worry about it once you’re onboard the ship.
2. Use Your Time Wisely
Between the massive luxury cruise liner and the shore time at ports, there’s a lot to do on a Disney cruise. Use your time effectively so you’re able to take advantage of as much as possible. For a first time sailer, a 3-night cruise may seem like a long time. Unfortunately, your dream vacation will be over before you know it. Even a 7-night cruise can feel like it’s not long enough to do everything.
3. Go See the Shows
All aspects of a Disney cruise are top-notch and high-quality. This includes the live entertainment aboard the ship. Plan to see each evening show. For those with the early dinner seating the show is at 8:30, the second seating show is at 6:15. If you don’t, you’re TOTALLY missing out!
4. Budget Money for Souvenirs
Who doesn’t love souvenirs? You probably want to bring home a few to remember your trip, right? While there are a number of gift shops on the ship and on Disney’s private island, Castaway Cay, merchandise tends to be a bit pricey. Always set aside a portion of your budget to buy souvenirs. Alternatively, if you love saving money (and who doesn’t) order official Disney merchandise online and hand it out to friends and family members on the ship or when you get home. The gifts will still be special and you cut the cost by ordering them from another retailer.
5. Give Adults Some Alone Time
Taking care of the kids during a Disney cruise can be exhausting. Everyone is SO excited and eager to explore the activities aboard the ship. Make sure that you get some adult time to unwind. It goes without saying; the Senses Spa and the designated “adult-only” areas are perfect for this. But what about the children? Bring them to the youth club for their age group. The daily Navigator will show you what planned activities the club’s have throughout the day. Even if your child isn’t into the upcoming activity there are plenty of other sections of the club they can visit. There are tons of things to see and do for kids of all ages!
6. Cruise During Certain Holidays
Disney goes all out for Halloween and Christmas cruises. While the sailings around Christmas are more expensive, they start celebrating as early as November 8. Halloween festivities start as early as September 7. Whether you prefer to have an excuse to wear your favourite ugly Christmas sweater or come up with an amazing themed family costumes. You won’t regret it. These are several things to keep in mind, as you put together your Disney cruise.
7. Use an Authorized Disney Vacation Planner
Taking advice from others who vacationed before you is one of the best ways to make your magical dreams come true! You can have someone take care of all this for you. Let an Authorized Disney Vacation Planner, like OMC Blogger, Jeremie from Pure Magic Vacations. They will work with you and offer port excursion suggestions for your family and even book them for you, if you want. It’s all free!
These tips on things to know before going on a Disney cruise will definitely be helpful on planning your next vacation!
My son. His smile can light up a room in an instant. I have been racking my brain to figure out a special gift to give him this holiday season. I found a fun photo of my little guy that brought back one of my favourite memories of him of this year. This inspired me to want to bring this memory to life, but I wasn’t sure how to do it. Canvas Factory makes special gift memories to life by putting special photos onto canvas. They asked me to see how easy it was to create a special canvas print with a special photo. I could not wait to see how it would turn out.
Boy sledding on a hill.
Gift Memories with Canvas Factory – Review
From memory to checkout
Here are the simple steps I went through to place an order with Canvas Factory:
Size – I chose the size of print I wanted. I selected a 50 cm x 40 cm (20″ x 16″) print.
Select Photo – I uploaded the photo I wanted to use to their site. Remember to not choose a blurry photo. I was able to adjust the photo to have the image where I wanted it on the canvas.
Wrap Style – You can choose how your edge of your canvas border will look. You can have the image wrap around the edge of the border (Gallery Wrap) , mirror the image (Mirror Wrap), or choose a colour that complements the image on the edges (Colour Wrap). I chose to have the Mirror Wrap feature.
Effect – You are able to change the look of the image for your print. You also have the option to add text to make your print extra special. I chose to use the Bright Effect to add some life to my image.
Checkout – I made arrangements to have my canvas print shipped to my door. I also received my invoice via email to have a copy of my order.
Unwrapping a memory
It took about two weeks for my Canvas Factory to arrive on my doorstep. I was so curious to see how the image on my canvas print turned out.
I was pleased to see how well packaged it was. After I opened the box, my print was shrink wrapped in plastic. The edges were protected with covers to prevent crumpling during shipping.
Canvas Factory print on a stool with shipping box.
Once the plastic was off of my print, I saw the image of the photo I wanted to gift to my family. I liked having this image enlarged. It was warm and bright. I felt that I may not have wanted to have used the Bright Effect.
Canvas Factory print on a wall.
Up close, the image on the canvas print was much brighter than I remembered seeing it on the computer. It looked a bit darker on my laptop screen than on the canvas, but again, it could be because I used the Bright Effect and the image is smaller on my screen than it is when put onto canvas. Even though I wish I did not use this feature, I still love the overall look of my canvas print.
I was happy to see how well the frame of the print was put together. Real wood is used to construct the frame. Utility staples are used to secure the canvas print to the frame. Each one was placed well so it did not cause the canvas to pinch or wrinkle.
Collage of back of Canvas Factory frame.
A sneak peek at sharing a memory
I could not wait for Christmas Day to see my son unwrap this gift. Luckily, I was flying solo at home when the canvas print arrived. This gave me the perfect opportunity to find the perfect place to hang this memory. There is an empty wall in my living room that would be perfect for this print to hang.
I was right. This canvas print works so well in this space. It brought this corner of my room to life and a smile to my face. I am really excited for my son to see it and to relive this memory over and over again every time we see it.
Canvas Factory print on a wall in a living room.
Gifting a memory, simply and easily
I really loved how simple it was to order a canvas print from Canvas Factory. I chose the image I wanted to enlarge on a canvas. It was easy go through the steps to take my photo to put it on a canvas print. Once it arrived, I was happy to have this memory to gift so simply this year. Gifting a memory from Canvas Factory is a fabulous idea this holiday season as it is easy to put together!
Are you curious as to what else you can do to gift memories with Canvas Factory? We revisited their website and followed them on their Facebook, Twitter, Instagram, and Pinterest pages!
Disclaimer: I received a free canvas print form Canvas Factory in order to write this review. The views I shared are my own.
Are you in search of fun Mickey Mouse projects the whole family can join in on? If the answer is yes, this post was written especially for you. Mickey Mouse made his screen debut on November 18th, 1928. This day was proclaimed Mickey’s birthday by the well renown Walt Disney. In celebration of Mickey’s 90th birthday, I’ve come up with a list of 13 Must Make Mickey Mouse Projects for you to consider.
Let’s talk about a few of them!
13 Must Make Mickey Mouse Projects
Fun Mickey Mouse Projects
This Mickey Mouse purse would be great to take with you when you visit one of Walt Disney’s theme parks. It’s so inexpensive to make, you can even make one for everyone in your travel group. The material for this bag is actually a fleece scarf that you can typically pick up at the dollar store of a couple of bucks. How inventive can you get?
If you’re hosting a Mickey Mouse birthday party for a young Disney lover, this easy-to-make Mickey Mouse piñata will fit right in. This is actually a papier-mâché craft, using a punch balloon for the base. Making fringe is easy with fringe scissors designed for just this purpose. Look for them at your local big box craft supply store.
These Mickey Mouse Christmas ornaments are totally adorable, don’t you think? You could just as easily make mini versions for a small tree. The required supplies are pretty basic. You need clear glass ornaments, paint in several colours, paint brushes, red glitter, clear school glue, water and you’re good to go!
Encourage your kids to drink more water, by making these personalized Mickey water bottles. This craft is especially easy if you have a craft cutter machine like a Cricut. (If you don’t, the alternative is to buy commercially-available vinyl Disney wall decals.) Either way, you’ll end up with water bottles that Mickey would be proud to drink out of.
I hope you take the time to check out the rest of these fun Mickey Mouse craft projects. They’re great for passing the time on a lazy Saturday afternoon or a warm summer day.
Parents regularly worry about their children’s future. Those concerns naturally include their children’s education and, more specifically, how to best save for their post-secondary education. The consistently rising cost of education across universities in Canada sometimes makes saving for education seems like an uphill battle. However, there are tools that can help Canadian parents save for their child’s education, one of the most common being a Registered Education Savings Plan or RESP.
What is an RESP?
An RESP is a tax-sheltered education savings plan created and registered by the Canadian government that assists families in saving for their child’s post-secondary education. While it is usually parents who start an RESP for their child, anyone can act as a subscriber, which is the term for the person or party who enters into the RESP contract. That means grandparents, aunts, uncles or others can open an account for a child. There is a maximum RESP contribution limit of $50,000 per child.
When the child, or beneficiary, is ready to attend university, they are able to access the funds that have been saved in their RESP. This includes contributions made by parents or other individuals, as well as any provincial or government grant money that was added to the account since the time it was created.
One of the most attractive features offered by an RESP is what the government matches to subscribers. To provide some specific numbers, the Canadian government matches 20% of the first $2,500 contributed to an RESP, up to $500 a year. This is maxed out at a lifetime limit of $7,200 per beneficiary. Although there is a maximum limit of matching government contributions, these additional funds are extremely attractive for families looking for effective savings tools.
The RESP Family Plan or the Group Plan
There are two plans to choose upon deciding for an RESP: the family plan and the group plan.
With the family plan, you can name one or more children to receive the savings when they need to pay for their post secondary studies. The earnings can be shared among the children, and the Canada Education Savings Grant can be used by any beneficiary named in the RESP. Your financial institution or a certified financial planner can help you answer questions related to this plan.
The group plan is for one child only. You have to make regular payments for the duration of the RESP term. Your savings are combined with other people that are contributing. The payout at the end will depend on how much money is in the group account and on the number of children that are the same age as your child (same school year).
Important Questions To Ask A RESP Financial Advisor
Anyone can pretty much open an RESP for a child. It can be the parents, grandparents, other family members, and friends of the child. We opened an RESP for our daughter, and her paternal grandparents also contributed once with a lump payment. RESP’s can be opened by one individual, or opened jointly by spouses or common-law partners. To get started on opening an RESP, you will need to get a Social Insurance Number (SIN) for your child. There is no fee, but you will need to show certain documents such as a birth certificate to be able to acquire one.
To get you started, make sure you ask these questions about the Registered Education Savings Plan:
Do I have to put a minimum amount of money into an RESP?
Are there any fees to pay once I open an RESP? If yes, how much will I have to pay and what are they for?
Do I have to make regular payments?
Can I change my contribution amounts?
Can I withdraw any money if I need to?
Are there any fees or penalties for withdrawing money early?
What happens if my child decides to only study part-time at a post secondary education?
What happens to my savings in the RESP if my child does not continue his education after high school?
Do you limit the types of educational programs my child can attend?
What are my investment choices?
Can I lose money on my investment?
Can I transfer the RESP to another person? If yes, is there a cost?
What happens if I close my RESP early?
How to maximize your RESP
When it comes to saving for your child’s post-secondary education through an RESP, there are a number of ways you can maximize your account.
A RESP provider offers these helpful guidance points:
Invest additional funds. Subscribers of RESPs are not required to commit to a regular contribution schedule, but it helps if they can. Additionally, putting a little extra into your RESP can pay off. For example, if you earn a raise at work, consider increasing your contributions to your child’s RESP – it can make a significant difference in the long-term value of your account.
Stay up-to-date on your account. It’s a smart idea to regularly review your RESP account and stay informed of any changes to provincial or federal grant money that may be available to you. CST Consultants now has a feature that allows account holders to check their status online. Not only does this mean you are on top of what is happening with your investment, but it can also help you find extra funds to direct towards your child’s future!
Consider RESP gifts. Almost anyone can invest in an RESP for a child. When it comes time for birthdays, holidays or other gift-giving occasions, you can ask family and friends to contribute to the savings. These types of additions can pay off in two ways: one, the account benefits from additional funds; second, your RESP may be eligible for more in government grants.
Regardless of whether higher education costs continue to increase or not, it’s smart for families to do things: one, save effectively through vehicles like RESPs that are specifically designed for education savings, and, two, begin to save as early as possible for higher education. Starting to save earlier means families can benefit from the tremendous power of compounding.
Adventure. Playtime is made fun when there is adventure to be had. Toys that lend themselves to allow kids to jump into fun situations are always great to play with. Playmobil Canada loves to make the imagination of children soar with their playsets that span various categories. They asked my family if we would like to play with a few of their Dragons playsets to see if my kids would be able to blaze into adventure with them. We were really excited to see how much fun we could have with these Playmobil playsets.
Dragons boxed playlets.
Dragons from Playmobil Canada – Reviews
My family received the following Dragons playsets from Playmobil Canada:
Snoutlout and Hookfang
Astrid and Stormfly
Dragons playlets assembled.
Target practice, anyone?
Huge wings. A comfy seat. Sheep with targets on them? These are some of the items my son encountered when he played with the Snoutlout and Hookfang playset. Snoutlout is one of Hiccups’ friends that joins Hiccup on his adventures throughout the film and television series. Hookfang is the dragon he befriended.
Dragons Snoutlout and Hookfang playset boxed.
This playset comes with Shoutlout and Hookfang characters, a pond with a harpoon and lit arrows, and a cool as a cucumber sheep marked with a target on its coat.
Dragons Snoutlout and Hookfang playset assembled.
This set was really simple to assemble as there are only 33 pieces to put together. Once all of the work was done, my son could not wait to take to the skies with this fun-loving duo around our home.
My little guy loved that the wings can twist 360º. This helps Hookfang “fly” in any direction. He also loved that Hookfang’s mouth opens and closes.
Boy playing with Dragons Snoutlout and Hookfang characters.
Boy playing with Dragons Snoutlout and Hookfang characters close-up.
My son liked trying to put objects and the sheep in Hookfang’s mouth and then laughed at how silly it looked. Hookfang’s posable legs also brought this dragon to life.
Snoutlout was also fun to play with. My son is able to remove his helmet, swing his hammer around with fury, and hop aboard Hookfang is easy with his snug saddle.
Dragons Snoutlout character.
Both of my kids had fun practicing their aim with the harpoon and flaming torches on the unknowing sheep target. They loved loading the harpoon, aiming their arrows at their four-legged friend and trying to hit the red spot on the sheep’s side. I also liked the detail put into the weeds and the slight waves on the surface of the pond. It really helped to breathe life into this set.
Boy playing with harpoon of Snoutlout and Hookfang playset.
Two peas in a pod
A smart and strong girl needs a dragon that matches her personality. Astrid and Stormfly are a perfect pair because they are both clever and fierce characters. This set includes a both characters and a removable saddle to soar into adventures.
Dragons Astrid and Stormfly playset boxed.
My daughter was gravitated towards this set. She is a huge fan of Astrid and could not wait to start playing with these two peas in a pod.
Dragons Astrid and Stormfly playset assembled.
My child loved testing out Stormfly’s wings and legs to see what this dragon can do. She also loved checking out Stormfly’s fangs to see how ferocious her new friend is.
Dragons Stormfly removable saddle.
The saddle is a great addition to Stormfly. This allows for Astrid to stand or sit while she helps defend Berg, her village, with her friends and their dragons. My daughter preferred to have Astrid sit while she swung her axe in flight.
Dragons Astrid character.
Girl putting toy fish into Stormfly’s mouth.
Blazing into adventure in a fun way
Overall, my kids have so much fun blazing into adventure with these Dragons playsets from Playmobil Canada. The Snoutloud and Hookfang set makes my son smile. Giggles and streaks of orange are all we see when he plays with this set. Both kids also love fine tuning their aim on the sheep with the harpoon and torches. My daughter connected with the Astrid and Storfly set. She loved tinkering and then running around our home with this dynamic duo. She loved how well you could move both characters. This is one of the few collections that both of my kids could both use and enjoy together! They would be amazing gift ideas for those kids who are hard to shop for on your list this year.
Blaze into Adventure with Dragons from Playmobil Canada
Are you curious about other toys your child can blaze into adventure with from Playmobil Canada? We found other great items on their website! We also enjoyed connecting with them on their Facebook, Twitter, Instagram and YouTube channels!
Disclaimer: I received products from Playmobil Canada in order to write this review. The views I shared are my own.
We use cookies to ensure that we give you the best experience on our website. If you continue to use this site we will assume that you are happy with it.


")