Home Blog Page 60

Chicken Riggies Recipe – Spicy Pasta Dish

27

After googling a few chicken recipes, I came across a Chicken Riggies Recipe that really intrigued me. This is a dish that is popular in central New York, USA, and many popular pizzerias. It is very popular and there are many different variations that can be found on all the popular food blogs. I could not wait to give this a try. 

Chicken Riggies Recipe

When I make out my grocery list for the week, I try to make things that are one pot. Either that or a few dishes that use the same ingredients, such as chicken or ground beef, so I can buy in bulk and save as much as I can. Honestly, who doesn’t love to save a few dollars on their grocery bills?!

Italian Spicy Pasta Dish

This Italian spicy pasta dish is made with rigatoni pasta, fresh veggies, chicken, pasta sauce and a few other ingredients. Most of these are staples in my household, so for this dish, I only had to pick up the chicken and rigatoni pasta! How easy of a meal is that?! Not only is this dish perfect for weeknights because the cleanup is easy, but it is also packed full of flavour. Everyone in your family, even your little picky eater, will love my super easy to make Chicken Riggies Recipe

Let’s start making this dish. You will need the following ingredients:  

Ingredients

  • 1 pound of boneless skinless chicken
  • 3 Peppers: 1 yellow, 1 red, 1 orange
  • Salt and pepper to taste
  • 1 8oz package of mushrooms 
  • 2 cups of Alfredo sauce
  • 1 1/2 cups of marinara sauce
  • Red Pepper flakes or fresh chili peppers
  • Rigatoni pasta

It is super easy to make, let’s get started!

How To Make The Chicken Riggies

1. Cook pasta according to package.

2. Cook cubed chicken over medium heat just until they begin to turn white.

3. Add mushrooms to chicken and cook for 5 minutes.

4. Add peppers and cook 5-7 minutes (I usually season the veggies and chicken with salt and pepper at this point).

peppers

5. Add 1 1/2 cups of marinara sauce and 2 cups of alfredo sauce over a medium heat. If you like spicy foods you can add in Red Hot peppers or pepper flakes.

6. Stir mixture, your sauce should look orange.

7. Continue cooking on a medium heat about 10 minutes or until all veggies are tender. 

sauce2

8. Pour sauce over your rigatoni pasta and sprinkle with grated parmesan cheese and red pepper flakes optional.

Chicken Riggies Recipe
Chicken Riggies

I hope you enjoyed my Chicken Riggies Recipe as much as my family and I did. If you make it, make sure to share with us on Facebook or Twitter! Also, check out all of our other Recipes.

Chicken Riggies Recipe

This Chicken Riggies Recipe is super easy to make. Not only is this spicy pasta dish perfect for weeknights, it is also full of flavour.
5 from 1 vote
Prep Time 15 minutes
Cook Time 50 minutes
Total Time 1 hour 15 minutes
Course Main Course
Cuisine American, Italian
Servings 4 serving
Calories 824 kcal

Ingredients
  

  • 1 pound of boneless skinless chicken
  • 3 Peppers 1 yellow, 1 red, 1 orange
  • 1 8 oz package of mushrooms
  • 2 cups alfredo sauce
  • 1 1/2 cups marinara sauce
  • 1/2 teaspoon Red Pepper flakes or fresh chili peppers Add to your liking
  • 1 box Rigatoni pasta

Instructions
 

  • Cook pasta according to package.
  • Cook cubed chicken over medium heat just until they begin to turn white.
  • Add mushrooms to chicken and cook for 5 minutes.
  • Add peppers and cook 5-7 minutes (I usually season the veggies and chicken with salt and pepper at this point).
  • Add 1 1/2 cups of marinara sauce and 2 cups of alfredo sauce over a medium heat. If you like spicy foods you can add in Red Hot peppers or pepper flakes.
  • Stir mixture, your sauce should look orange.
  • Continue cooking on a medium heat about 10 minutes or until all veggies are tender.
  • Pour sauce over your rigatoni pasta and sprinkle with grated parmesan cheese and red pepper flakes optional.
  • Enjoy!

Nutrition

Serving: 4peopleCalories: 824kcalCarbohydrates: 99gProtein: 47gFat: 26gSaturated Fat: 11gTrans Fat: 1gCholesterol: 154mgSodium: 1463mgPotassium: 1338mgFiber: 7gSugar: 12gVitamin A: 836IUVitamin C: 81mgCalcium: 53mgIron: 3mg
Keyword chicken riggies, easy dinner, spicy pasta recipe
Tried this recipe?Let us know how it was!

Be Earth Day Ready with DK Canada Books ~ Reviews

32

Earth Day is all but here! April 22nd is the day marked on our calendars to recognize our planet and to appreciate it. There are so many ways people can learn more about the earth and to celebrate the day. DK Canada wants to help families get Earth Day ready by sharing their selection of books that are all about our planet and what makes it so fantastic. They asked me to review three books from their Earth Day Boutique to see if my family could benefit from the information they would share with us.

DK Canada Embrace the Earth logo

Be Earth Day Ready

Below are the titles I chose from DK Canada to get my family ready for Earth Day:

DK Canada Earth Day Review Book Covers

Want to create a with your family this Earth Day? The Bee Book is a great way to get them in the spirit of the occasion by teaching them just about everything they wanted to know about these insightful insects. It shares details about different types of bees, ideas on attracting bees to your garden, tips to follow on becoming a beekeeper and lays out recipes to create numerous items to use for personal and home use.

DK Canada The Bee Book Book Cover

The section I was most interested in was “Attracting Bees.” My other half and I are getting our younger kids into wanting to improve the plight of the dropping bee population. We have started to grow flowers that will help to enhance their foraging opportunities. This title teaches readers what type of plants they should have in their yard, why growing flowers that are breed to look fabulous may not be the best for bees to visit and why flowers with a simple structure are best for attracting bees to your garden. We will put these tips into play when we start putting our garden together this year.

“Creating a Garden for Bees” pages from The Bee Book

Earth: The Definitive Visual Guide takes readers by the hand on a bright and educational adventure around our planet. This reference book touches on various topics about our planet, from land, weather, water, and the atmosphere. Earth also talks about some our world’s most important, unique and most dangerous features.

DK Canada Earth: The Definitive Visual Guide Book Cover

There was so much to take in and learn in Earth! The pictures and photos mixed with the details this book shared were fabulous. I spent many minutes admiring the details on each page. One area I absolutely loved was “Shelves and Plains” in the Oceans and Seas section of this book. I learned what makes up the continental margins off the coastlines of the land, why the abyssal plains are fascinating and how thick ocean sediments can be in certain parts of the ocean floor. This is a book I would not have trouble picking up to read over and over again.

“Shelves and Plains” pages from Earth: The Definitive Visual Guide book

Want your kids to learn more about the earth in a more interactive way? Utterly Amazing Earth is a fun book to introduce younger readers to what makes the world tick. Kids can crack open the cover to learn about water cycles, earthquakes, seasons and volcanoes. The best part about this book is that learning is helped along with the use of pop-ups, flaps and spinning diagrams that bring learning to life.

DK Canada Utterly Amazing Earth Book Cover

Though my younger daughter really enjoyed finding out what certain precious gems look like before they are polished, she got the best kick out of making a volcano erupt. She was so excited, she kept shouting “Kaboom!” while she pulled the tab to make the explosion happen. She then called her brother over to watch her make this event happen for about twenty minutes. The diagram for the water cycle also fascinated her and she learned more about this important this cycle is to our planet. Both of my little ones are now huge fans of this title and have fun reading it.

L: Utterly Amazing Earth “Volcano” page; R: Children reading a book on a couch

These are only a few of the awesome titles families can find to get ready for Earth Day. Want to find more titles from DK Canada? Visit them on their website, and connect with them on their Facebook, Twitter, Instagram and Pinterest pages for more ideas!

To read more DK Canada book reviews, click HERE!

Disclaimer: I received products from DK Canada in order to write this review. The views I share are my own.

Save

Save

WillLand Outdoors Hand Pouch Review

73

The warm weather is here! I am so excited I no longer have to wear bulky layers to stay warm. Since I do not have to wear all of these pieces of clothing, I do not always feel like carrying a large bag with me to run my errands or going out with friends. WillLand Outdoors wanted to see if they could help me strip down to carrying the essentials by asking me to review their WillLand Selection Hand Pouch.

Two hand pouches with tags

WillLand Outdoors Hand Pouch Review

The WillLand Selection Hand Pouch is great for taking just what you need with you for a day or night on the town. Below is a list of features this bag boasts:

  • Heavy duty cotton canvas bag
  • Durable genuine leather accessories
  • Genuine leather carry straps
  • Premium silver metal zippers.

For me, the cotton canvas mixed with the leather gave it an all-around look. I felt I could use it with a lot of the items I have in my wardrobe and could use it for various occasions. The texture of the bag felt softer to the touch than I thought it would be. I believed that it was going to feel a bit scratchy against my skin, but it was really comfortable. It was also easy to grip in my hand when I wanted to hold it in my hand.

Hand opening to show the lining of purse

Getting in and out of this bag was really easy. The zipper glides across its run quickly with the flick of a wrist. The genuine leather accessories made this job even easier to do. Not a fan of carrying straps? The clasps opened and closed easily so you can do strapless in a flash!

Detachable card carrier with photo window

Need to carry essential cards and photos with you? A detachable card carrier with photo window lays inside this hand pouch to make this task possible. Each card fits snug within the slots of the card holder so they did not slide around or fall out while on the move.

Top: Bag with photo pocket showing; Bottom: Bag with card wallet showing

The cotton lining on the inside of the bag felt soft and tough. I felt secure putting a lot of items in my bag without worrying about making holes through this layer. How many items was I able to fit into this pouch?

I was able to place these essentials into this Pouch bag:

  1. A key chain
  2. A small bottle of lotion
  3. A tube of lip moisturizer
  4. A pair of sunglasses
  5. A large screen smartphone in a wallet case
  6. A pair of ear buds.

I was happily surprised I was able to carry so many items in this pouch. I thought I would have to carry a small backpack with me to carry the rest of the items I like to have handy while on the move around town.

Though I do not usually carry hand pouches when I go out, the carrying strap was comfortable to use. With the weight of the items in my bag, I thought the strap would have snapped or the metal clasp would have broken within a few minutes of use. I put this bag to the test on an errand run for a few hours and found that the clasp and strap held strong. I also found it comfortable to carry this bag in my hand and my arm when I no longer wished to carry it on my wrist.

I was really impressed with the look and the strength of the WillLand Selection Hand Pouch. It can be paired with so many different outfits in my wardrobe, it is soft yet strong, it can carry many of the things I need when running around on errands without worrying about the strap breaking. I am so happy to now have a slim bag to carry my essentials with me on-the-go!

Want to know more about WillLand Outdoors? Connect with them on their Facebook, Twitter, and Instagram pages!

Disclaimer: I received products from WillLand Canada in order to write this review. The views I shared are my own.

Save

Save

Save

Save

Some Handy Life Insurance Terms You Should Know

13

Life Insurance Terms you need to know
open book with pages rapidly turning on a man’s face


Life insurance can be an overwhelming shopping experience for most people. So many different terms and jargon its easy to get confused and it’s hard to admit you don’t understand something. Here is a list of some basic terms you should know to help you have a better understanding of what your dealing with.

When You’re Shopping for Life Insurance

Term Insurance

Term life insurance refers to insurance that is purchased for a period of years (the term) which are typically 5, 10, 20, and 30 years. Since the premium remains the same throughout the policy term, the rates for a longer term are higher than rates for a shorter term because of the higher risk

Before term policies expire, most companies will offer a renewal however be sitting down because the pricing is steep and will be based on your new age. Many insurers will also have a conversion option that allows the policyholder to convert the term policy to a permanent policy such as Universal Life or Whole Life without you having to prove you are still healthy. You will, however, pay the rate based on the new type of policy based on your new age.

Term insurance quotes can easily be done online as most independent agents have a “quote engine” on their website. It’s important to note that an online quote must be confirmed with an agent because there are underwriting questions that must be asked and answered before the application can be submitted.

Whole Life Insurance

Whole life is permanent insurance that provides coverage throughout your lifetime. These policies accumulate cash value because the premium you pay is actually more than the cost of insurance during the early years and less than the cost of insurance in the latter years. The insurance company also pays a small amount of interest on the cash value account each month.

Whole life insurance is most attractive because the death benefit is guaranteed for your lifetime as long as you pay your premium, the premium does not change, and you can borrow the cash that accumulates in the policy.

Universal Life Insurance (UL)

Universal life is a type of flexible permanent life insurance that offers lower cost insurance protection (like term) combined with a savings element (like whole life). The money in the savings account is invested by the insurer and credited to the account to allow for building the cash value of the policy.

The main difference between UL and term or whole life insurance is its flexibility. With a UL policy, the premiums and face amount can be changed to accommodate life changes of the policyholder. Also with a UL policy, there is a minimum interest rate established by the insurer, but if the insurance company’s portfolio outperforms the minimum interest rate for the policy, the insurer will apply the excess earnings to the cash value of the policy. UL also allows access to the cash value through loans and partial surrender.

Death Benefit

The death benefit is the amount the insurer agrees to pay your beneficiary in the event of your death tax-free.


Some Handy Life Insurance Terms You Should Know
man, woman, and child sitting on a trunk


When You Apply for an Insurance Policy

Premium

This is the amount you pay in return for the insurance policy. Typical premium periods are monthly, quarterly, semi-annually, or annually. Your premium will be based on many factors such as your age, your health, the amount of coverage, and your weight and height.

Underwriting

This is a process your insurer will require to determine the rate class you will be assigned. The process typically includes an application containing questions about your health, a medical exam, a blood and urine analysis, and reports from your doctors and any medical facilities you listed on the application.

MIB (Medical Information Bureau)

Most insurers check the MIB database while going through the underwriting process. This database does not contain your medical records, it does, however, provide member insurance companies with information regarding health conditions and lifestyle information.

When You’ve Been Approved for Coverage

Beneficiary

Your beneficiary is the person(s) or organization(s) that you assign to receive the death benefit in your policy when you die.

Contingent Beneficiary

Your contingent beneficiary (alternate) receives the death benefit when your beneficiary does not survive your death. For example, you might name your spouse as beneficiary and then your children as contingent beneficiaries.

Cash Value

A savings account found in Whole Life and Universal Life policies that earn interest and is available to the policyholder through policy loans or surrender.

Riders

Riders are options that are available to purchase and add to your life insurance. Since they are an extension of coverage, most all riders require additional premium.

Policy Loan

A policy loan is when a policyholder borrows from their insurer and uses the cash value in their policy as collateral. Policy loans may or may not have to be repaid, but in all cases, the unpaid balance of the loan will be deducted from the death benefit if you die with an unpaid balance.

Surrender Value

When a policyholder surrenders a life insurance policy, they are exchanging all their rights under the policy for the accumulated cash value, minus any surrender charges. Only a whole life or universal life policy can be surrendered.

Find A Life Insurance Broker & Get Started!

It is really important for you to understand what kind of policy you are getting and that it fits your needs. Starting with these definitions you can ask the right questions to figure out what you need. Find a life insurance broker that will ask about your needs first before making a recommendation. Don’t take anything if you are unsure if its right for you or seems overly complicated.  A good life insurance broker will explain everything clearly to help you make the right decision.


Photo Credit: http://romainlaurent.tumblr.com/

BBQ Ranch Chicken Salad Recipe

19

Are you looking for the ultimate summer meal? This BBQ Ranch Chicken Salad is not only packed with protein, but it is also loaded with good for you ingredients that create a must have summer salad. On those days when it is too hot to fire up the oven, this dish will save the day while keeping the house cool. Talk about a winner winner chicken with dinner recipe!

BBQ Ranch Chicken Salad Recipe

Easy Chicken Salad To Prepare

As the temperatures start to warm up, I try to keep my kitchen efforts at a minimum, but with growing kids in the house, I can’t skip cooking every night. So, I like to keep a few precooked chicken breasts or a rotisserie chicken from the deli in the fridge, to make delicious dinners like this one even easier. No matter how hot it gets, or how busy the day might be, a great meal is only a few steps away. 

Salad Recipe With Wholesome Ingredients

This recipe is fantastic because it is packed with good for you ingredients like avocado, cucumber, onion, black beans, lettuce and chicken. But, it is versatile; you can mix up the ingredients to make this salad work for your taste preferences. Also, use whatever flavor and style of BBQ sauce your family prefers.

BBQ Ranch Chicken Salad Perfect For Picnic or Potluck

Make this for dinner with the family on the deck or double the ingredients for a potluck or picnic. Everyone is sure to love this salad. If you are prepping this in advance to serve later, I recommend adding the dressing right before serving to keep things fresh.

What to Serve The Salad With

You could pair this meal with a crusty bread, cheesy garlic loaf bread, or a nice red wine that is low in tannins like a Zinfandel or Primitivo.

One Dish Meal Ideas

If you are looking for more one dish meal inspirations you will like these recipes. Reader favourites include:

  1. Old Fashioned Macaroni Salad
  2. Chicken Riggies Recipe
  3. Savoury Italian Pasta Salad Recipe
  4. Super Easy Chicken Alfredo Bacon Penne Pasta Recipe
  5. Turkey Ranch Mac-n-Cheese Recipe

BBQ Ranch Chicken Salad Recipe

For this recipe, you will need the following ingredients:

Salad Ingredients

  • 2 hearts of Romaine lettuce, chopped
  • 1 rotisserie chicken, skinned and cubed
  • 1 cucumber cut in quarters
  • 1 basket of baby tomatoes cut in half
  • 1 can of corn, drained
  • 1 can of black beans, drained and rinsed
  • 1 bunch of green onions, chopped
  • 1 avocado, peeled and sliced

Dressing Ingredients

  • 1 bottle of Ranch dressing
  • 1 Kraft Original BBQ sauce (use 1+ TBSP for the dressing)
BBQ Ranch Chicken Salad

The BBQ Ranch Chicken Salad is so easy to make! This is how you do it:

Directions

Toss the chopped romaine in a large bowl. Add the chicken cubes.(Set aside some of the chicken to put on top of the lettuce/chicken combination. Position the lettuce/ chicken in the middle of the serving plate.

On of the four corners of the plate put the corn, black beans, cut baby tomatoes, and quartered cucumber. Add the remaining chicken on the top of the lettuce, and top with the chopped green onions.

Pour the bottle of ranch dressing into a bowl.Begin by adding 1 TBSP of the BBQ sauce and stir until well blended. Taste to ensure flavour. If necessary add more BBQ sauce to the dressing and stir well.

Position the sliced avocado on top of the salad. Pour the salad dressing on top of the entire salad. Drizzle with the remaining BBQ sauce.

I hope you enjoyed my BBQ Ranch Chicken Salad recipe as much as my family and I did. If you make it, make sure to share with us on Facebook or Twitter! Also, check out all of our other Recipes.

BBQ Ranch Chicken Salad Recipe

BBQ Ranch Chicken Salad

Lyne Proulx
This BBQ Ranch Chicken Salad is easy to make and very high in protein. It's a perfect meal to bring to a picnic or a family gathering.
No ratings yet
Prep Time 20 minutes
Total Time 20 minutes
Course Salad
Cuisine American, Canadian
Servings 6 people
Calories 873 kcal

Equipment

  • Bowl

Ingredients
  

Salad

  • 2 hearts of Romaine lettuce chopped
  • 1 rotisserie chicken skinned and cubed- about 4 cups
  • 1 cucumber cut in quarters
  • 16 baby tomatoes cut in half basket full
  • 1 can can of corn drained
  • 1 can can of black beans drained and rinsed
  • 10 green onions chopped
  • 1 avocado peeled and sliced

Dressing

  • 1 bottle Ranch dressing
  • 1 tbsp Kraft Original BBQ sauce use 1+ TBSP for the dressing

Instructions
 

  • Toss the chopped romaine in a large bowl. Add the chicken cubes.(Set aside some of the chicken to put on top of the lettuce/chicken combination.
  • Position the lettuce/ chicken in the middle of the serving plate.
  • On of the four corners of the plate put the corn, black beans, cut baby tomatoes, and quartered cucumber.
  • Add the remaining chicken on the top of the lettuce, and top with the chopped green onions.
  • Pour the bottle of ranch dressing into a bowl. Begin by adding 1 TBSP of the BBQ sauce and stir until well blended. Taste to ensure flavor. If necessary add more BBQ sauce to the dressing and stir well.
  • Position the sliced avocado on top of the salad.
  • Pour the salad dressing on top of the entire salad.
  • Drizzle with the remaining BBQ sauce

Nutrition

Calories: 873kcalCarbohydrates: 38gProtein: 52gFat: 60gSaturated Fat: 11gCholesterol: 177mgSodium: 1453mgPotassium: 760mgFiber: 9gSugar: 9gVitamin A: 1538IUVitamin C: 26mgCalcium: 72mgIron: 3mg
Keyword BBQ chicken, BBQ Ranch Chicken Salad, chicken salad, high protein salad, ranch salad, salad
Tried this recipe?Let us know how it was!

10 Easter Traditions Around the World

7

Easter is celebrated all around the world but every country has its own unique way of celebrating. For example, in Canada and the United States, the Easter bunny and egg hunts are popular. You will find below 10 Easter Traditions Around The Word to share with your family!

Families gather together and enjoy decorating the boiled eggs all different colours before hiding them for the kids to search for with their baskets in hand. Chocolate bunnies are also a big part of celebrating Easter in the Canada and the U.S. but in other parts of the world, things are very different.

Easter Traditions Around the World

Here are 10 of the most well-known Easter traditions around the world!

  1. In Sweden, kids dress up as Easter witches and visit their neighbours where they trade their drawings and paintings for sweet treats the days leading up to Easter Sunday.
  2. In Germany, they decorate Easter eggs and hang them on the trees throughout the towns.
  3. In Bermuda, people celebrate by eating codfish cakes and hot cross buns and on Good Friday, they fly homemade kites.
  4. In Haux, France, the people gather together and make a giant omelet that is large enough to feed a thousand people. On Easter Monday, they serve it in the main town square for all the townspeople to eat.
  5. In Norway, the people gather together to read crime novels known as Paaskekrimmen and some watch crime shows on TV.
  6. In Europe, they have Easter Fires, which are big bonfires they light on Easter Sunday and Monday.
  7. In Poland, they practice the tradition of Smingus-Dyngus in which the boys go around on Easter Monday and try to pour buckets of water on other people.
  8. In Israel, many people walk the path Jesus walked on the day he was crucified on Good Friday and on Easter Sunday they go to the Garden Tomb for a church service.
  9. In the Czech Republic, the men use whips they make themselves out of willow branches and decorate with ribbon to spank the women in an effort the transfer the vitality and fertility of the tree to the women.
  10. In Hungary, the boys go around and sprinkle water, cologne or perfume over the heads of the young women and then ask them for a kiss.
10 Easter Traditions Around the World

As you can see, the world is full of unique Easter traditions. If you’re traveling to a difficult country during this holiday, you may want to do a little research first. This way, you’ll know to expect while you’re there so you’re not caught off guard.

Crispy Roast Turkey Recipe

105

Are you looking for some new options to add to your spring meals? Why not add turkey into the mix? Not sure how? Canadian Turkey has plenty of options to add some new flavours to your meals including this Crispy Roast Turkey Recipe!

Crispy Roast Turkey Recipe
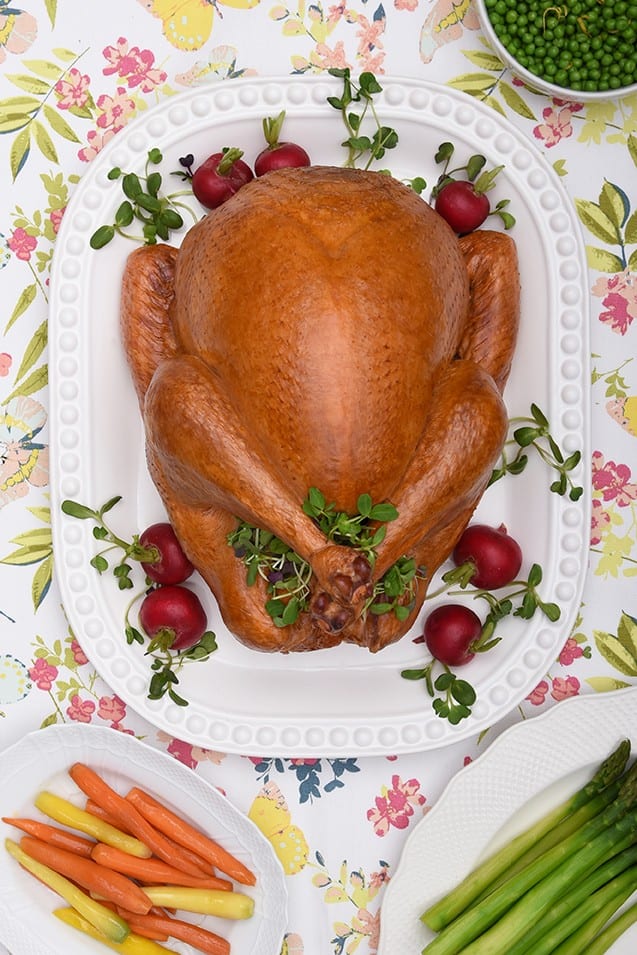
Photo courtesy of Canadian Turkey.ca; Crispy Roast Turkey on a platter with vegetables on an Easter-themed table

The temperature is rising. The flowers are budding. The snow is all but gone on the ground. These are three great signs that spring has arrived! With the change in season come a switch in the types we want to serve. Warm and comfort foods are going to make way for lighter, fresher options.

Most people think that turkey is only to be enjoyed during the cooler months of the year. Did you know that there are different ways to serve this versatile bird to create light and fresh dishes? Turkey is considered to be a protein that is packed with power. It contains about 30 grams of protein per every 100-gram serving. It is also lean and full of nutrients, so it is also a healthier option to choose!

Having the gang over for Easter?

Thinking about what to serve for Easter dinner? Turkey would be a great option to make. Planning to have a large group over to celebrate the holiday? Cooking a whole turkey would be a great way to serve a gaggle of people without much effort. All that has to be is to prep your bird, season it, then let your oven work it’s magic to complete the job. Enjoying leftover turkey for the next few days is always idea! It freezes easily and can be used in a variety of your favourite recipes. It is a fabulous choice to add to your make-ahead meals to make weekday meal planning for your family a breeze.

If you do decide to make a whole turkey for your Eater celebrations, Canadian Turkey has an eye-catching Crispy Roast Turkey recipe for you to try!

Crispy Roast Turkey recipe

Crispy Roast Turkey Recipe
Photo courtesy of Canadian Turkey.ca; Crispy Roast Turkey on a platter with vegetables on an Easter-themed table.

Extra Crispy Roast Turkey

No ratings yet
Prep Time 1 day
Servings 8

Ingredients
  

  • 12 – 14 lbs. turkey
  • Salt and pepper to taste
  • 1 tbsp olive oil
  • 1 ½ tsp dry ground sage
  • 1 ½ tsp dry ground thyme
  • 2 tbsp butter softened to room temperature
  • 1/3 cup roughly chopped carrots
  • 1/3 cup roughly chopped celery
  • 1/3 cup roughly chopped onions
  • 1 cup turkey broth

Instructions
 

  • Defrost the turkey according to package instructions or visit canadianturkey.ca/ for proper thawing instructions and tips.
  • Make sure the giblets have been removed.
  • At least 12, and up to 24 hours before cooking, air-chill your turkey in the refrigerator. Air chilling will dry out the skin of the bird, making the skin extra crispy when cooked. To air chill your turkey, place the bird on a baking sheet or baking pan large enough to hold the bird. Make sure the pan is deep enough to catch any drips or liquid. Place the turkey on a baking rack in the pan, so that air can circulate completely around the bird.
  • Preheat your oven to 350ºF (175ºC).
  • Once the turkey is ready to roast, spread the butter evenly over the breast.
  • Season the bird, inside and out, with the salt, pepper, olive oil and the herbs.
  • Stuff the cavity with the celery, carrots and onions.
  • Place the turkey in a large roasting pan. Roast for 3 ½ – 4 ½ hours or until the juices run clear and an instant thermometer reads 170°F (77°C) in the breast and 180°F (82°C) in the thigh when inserted into the thickest part of the meat. For more information on cooking times, visit canadianturley.ca.
  • Remove the turkey from the oven and let it rest for 30 minutes.
  • Discard vegetables from the cavity and carve the turkey.

Notes

Cooking times are for planning purposes only – always use a digital meat thermometer to determine doneness.
TIP: To create an extra juicy turkey breast, take an additional 2 tbsp of softened butter and spread generously under the skin and all over the breast before cooking.
Tried this recipe?Let us know how it was!

What about a meal for a smaller or more intimate group?

Not having a Want to cut your cooking time in half? You are able to buy an array of turkey parts such as thighs, breast, and drumsticks that take less time to prepare than a whole bird. This idea will also dazzle your family and friends you will be able to beautifully present the cuts of turkey you want without having to carve it. This option also works if you are planning a smaller, more intimate affair. You can buy just enough for your small group so nothing goes to waste.

Turkey is great for holidays, but what about an everyday meal?

Ok, Easter is over. How can turkey be used to lighten up everyday meals? Canadian Turkey has so many options to make a ho-hum meal into a fresh and delicious one.  There are recipes for soups, salads and main entrees that are sure to please those tucking into your table!

Extra Crispy Roast Turkey Recipe
Roast Turkey

Excited to see other terrific turkey dishes you can prepare using Canadian Turkey? Take a look the Canadian Turkey website, or connect with them on their Facebook, Twitter, Instagram, YouTube and Pinterest pages!

Disclosure: I was generously compensated to share these fabulous ideas in this post by Canadian Turkey.

SaveSave

Save

35 Easter Craft Ideas

9

One of the best parts of Easter for many families is allowing the kids to play and enjoy themselves. One great option for them to have fun is by making Easter crafts. See below our list of 35 Easter crafts ideas!

Spring has sprung and it’s time to start thinking about how to celebrate Easter with the kids. Of course, you’ll want to do an Easter egg hunt and make Easter baskets. But what about the days leading up to Easter? What will your kids do to stay busy? They can make Easter Crafts. There are so many fun Easter crafts to choose from.

Easter Craft Ideas

If you’re having children over to your house, or hosting an event where children will be present, you want to do something to keep them happy and occupied so they don’t get bored. Not only can you find a number of craft kits in your local craft stores, but you can find some amazing Easter crafts for kids in the roundup below.

Keeping The Kids Busy With Easter Crafts

You want to keep the kids occupied while adults are talking or practicing Easter traditions and customs, preparing meals, or just visiting. So, what can you do?

Well, we have a list of ideas to spark your interest. They’re easy to do and most of them don’t cost a lot of money or anything to get started. These are Easter craft ideas for children of all ages so there’s something to keep everyone busy. You can also have older kids help younger kids with these, so it makes a great way for them to spend time together.

SCRAP SUPPLIES

With many of these Easter crafts, you can use scraps you have leftover from other projects. For other projects, consider looking at your local discount stores or using coupons at your favourite craft store. In other words, you don’t have to spend a lot of money. If you do need to buy some supplies, consider buying a few extra so that you can start building a craft supply stash for your kids.

Easter Craft Ideas

Easter crafts for preschoolers

These crafts are intended for preschoolers and kids of all ages! Make sure not to miss out on all the fun! Doing crafts with your kids is a great way to build memories. Your kids will look back and enjoy the time you spent with them. You may even want to consider setting aside time each week for you and your children to do crafts together. You could try something new each week. If you’re not into baking, why not make memories by crafting together?

35 Ideas for Easter Crafts

If you’re looking for some more fun things to do with the kids this Easter, check out this great list. With these ideas for Easter crafts, you’re sure to find something that will work for the children in your life. These are also great ideas for church gatherings, schools, and other places where you will have children gathered for the holiday.

  1. Easter Carrot Homemade Playdough
  2. Homemade Easter Egg Dye
  3. Encanto Disney Easter Eggs: Cricut Craft
  4. Easter Slime
  5. Kool Aid Easter Egg Dye
  6. Ninja Turtle Slime Eggs
  7. Easter Bunny Craft For Kids With Printable Papercraft Template
  8. Easter Bunny Craft Scene
  9. Carrot Paper Craft
  10. Fuzzy Chicks Easter Eggs
  11. Make an Easter Egg Craft
  12. Easter Corner Bookmarks
  13. Easter Colouring Pages
  14. Paper Roll Chick
  15. Easter Treat Pails
  16. Marbled Easter Egg Art
  17. Easter Bunny Napkin Rings
  18. Crystal Easter Eggs
  19. Easy Paper Chick Craft
  20. Easter Craft Stick Puppets
  21. Craft Stick Bunnies 
  22. DIY Easter Carrot Treat Box Paper Craft 
  23. Mini Upcycled Plastic Cup Easter Baskets 
  24. How Many Bunnies in a Jar? Easter Craft 
  25. Rocking Paper Plate Sheet 
  26. DIY Gingham Scrapbook Paper and Toilet Paper Roll Easter Rabbits 
  27. Super Easy DIY Bunny Headband For Kids 
  28. Foam Cup Bunnies 
  29. Fuzzy Yarn Sheep 
  30. Glitter Egg Diorama 
  31. Easy DIY Easter Egg Crayons 
  32. Easy Easter Garland 
  33. Easter Egg Clothespin Craft 
  34. Plastic Easter Egg Chicks in a Shredded Paper Nest Craft 
  35. Hen and Chick Nest 

These Easter crafts will definitely inspire creativity in your kids. Whether you’re making Peeps magnets or Easter garland, these crafts will keep your kids busy and entertained. These would also make great crafts for the classroom. If you’re a teacher, there are so many of these crafts that are super affordable to make.

18 Awesome Easter Treats For The Family

10

These are 18 awesome Easter treats for you to try with your family. Whether you’re looking for something you can enjoy at home with the family, or something to take to an Easter get-together, you’re going to find something on this list that suits your needs. Just be careful, some of these Easter treats are so cute, you might not want to eat them at all!

18 Awesome Easter Treats
Easter treats collage

Baking Fun Easter Recipes

There are many reasons to celebrate Easter, but of them, one favourite for many is the great Easter treats. While kids love the goodies, they’re not the only ones who can appreciate delicious treats this time of year, either. Making treats yourself and eating handmade treats are part of the fun of the holiday. We have a list here of great Easter treats that is sure to make everyone you know happy. You can find sweet treats for everyone here.

Some people love to make an Easter tradition out of making their own goodies and sharing with people they know and care about. You might take them to a church event, or to school, or you might share them at an Easter picnic. Even if you’ve never done this before, this year could be a good time to start. From Easter chocolates to marshmallows, eggs and duckies, jelly beans, and so much more, you’re going to find loads of delicious Easter snack and dessert recipes to suit your fancy here.

Enjoy and Happy Easter!

18 Awesome Easter Treats

18 Awesome Easter Treats

1. Easter Puppy Chow
2. Easter Muddy Buddy aka Bunny Bait
3. Jelly Bean Bark
4. Easter Bunny Oreo Ice Cream Cake
5. Chocolate Bird Nests
6. Banana Oatmeal Nests
7. Easter Egg Pie
8. Easter Truffles
9. Butterfly Cupcakes
10. Nut Free Easter Bites
11. Easter Peeps Cupcakes
12. Easter Chick Cupcakes
13. Easter Rice Krispies Treat Pops
14. Bunny Butt Cupcakes
15. Peeps Easter Sugar Cookies
16. Easter Peeps Cake
17. Brownie Peanut Butter Birds Nest
18. Easter Basket Cupcakes

I hope you enjoyed these 18 Awesome Easter Treats round up as much as I did! Also, check out all of our recipes!

How To Celebrate Easter With Older Children

4

Many of us remember the fun of decorating eggs on Easter and participating in Easter egg hunts. They were a part of many happy childhoods. As children get older, they may not be as interested in these types of things. If they’ve outgrown Easter baskets and egg hunts, here are some other ideas for you.

How To Celebrate Easter With Older Children

Here are 3 ideas on how to celebrate Easter with older children!

1. Cook an Easter/Passover dinner together

This is a great time to spend some time together in the kitchen. You could teach your children to prepare the traditional items you make every year like a turkey meal, or you could make up an entirely new dinner for yourself this year. It’s as much about the time together as it is about the food itself.

2. Attend a church service together

Older children will typically get more out of a church service than younger children who get restless and bored. Your older child might really appreciate the message that is shared at an Easter service and it’s also a chance for you to bond. You can spend some time together afterwards and discuss the service and how you feel about it.

3. Hide eggs for younger kids

This is a great one, whether you’re doing your own Easter egg hunt at home or helping with a hosted one at a church or a park. If your older children are too old to participate in the hunt themselves, they might still enjoy making the fun for the little ones. If you do it together, it’s also a good chance to talk and bond.

How To Celebrate Easter With Older Children

These are just a few ideas on how to celebrate Easter with older children. Don’t limit yourself to this list. You can use these ideas to help you think of some ideas of your own.

Parenting Strategies for Common Family Challenges

6

Parenting Strategies for Common Family Challenges


Your kid gets sick and suddenly your plans to clean the house, get to work on time, or follow through with some other commitment get derailed. Sound familiar? As parents, we face challenges like this daily. Having children is a blessing. But some days it can have us wondering where we left our car keys, not to mention our sanity. We often look to experienced parents, those with years under their belt, and wonder how they do it. Here’s the advice we rounded up from parenting veterans on how to face common family challenges without losing your cool.


Parenting Strategies for Common Family Challenges
fruits and vegetables with walnuts


Nutrition and health

Do you have picky eaters that snack all the time? And it’s a struggle to get your kids’ daily nutrition requirements into evening meals? You know they should be eating more leafy greens and nutrient-dense foots… But they tell you they don’t want to. What are you to do?
Here’s a simple solution for you… Stop buying overly processed and sugary snacks. If they aren’t on hand in the snack cupboard, you and they will not be tempted. Have healthy replacements immediately available. Buy fruit. Have veggie sticks in the fridge with tubs of salsa and hummus. A nutritious and popular kid pleaser is the humble peanut butter ball. Add chia seeds, flax seeds, almonds, raisins, and whatever else, and your kid will have a power-packed snack. If they do not care for the healthy snacks you prepare, at least they will work up an appetite for that healthy dinner.

Emergencies and accidents

Common child injuries occur daily. Do you know who to call if the injury was a result of someone else’s negligence or medical malpractice? Is your family doctor on speed dial? What about your child’s school? Your spouse’s workplace? Having an emergency list of phone numbers next to your house phone is the first step in being prepared for emergencies as a parent. Many families today use a Smartphone instead of having a house phone. So place these emergency phone numbers in your smartphone’s contact list, and some of these numbers should be in your kids’ phones, too. But also keep this list on the fridge in case an accident should happen while your kids are with a babysitter.

This list should include…

  • Poison control
  • Animal control
  • Doctor / ER
  • Local pharmacy
  • Your kid’s school
  • Your lawyer
  • Neighbor or a friend with a key to your house
  • Your bank
  • Your credit card company
  • Local locksmith
  • Local towing service

Another essential for being emergency-ready? Be sure to have a first aid kit in the house.

Work emergencies

We all want to prioritize our families, but sometimes a work emergency will come up and destroy our best-laid plans. When that happens, play dates, after school classes, and more are left hanging. Then we feel guilty for trying to balance a career and our family lives.

Working parents should create for themselves a support system of people they can call in a pinch. Babysitters, close friends, grandparents, family, kids’ classmates that they can have a playdate with. Daycare centres should not be off the list. Neither should a good neighbour friend. Curate this list frequently and make sure to always follow-up a baby-sitting stint with a heartfelt thank-you accompanied by a gift. Your support system needs nurturing to stay strong. Remember that.

Aside from having a net of people who can help stand in for you, you need to assess the expectations you have of yourself as a working parent. And the expectations your boss has of you. They may not know you are struggling unless you speak up. When you do bring up a possible work/family life conflict, make sure you mention alternatives that work for you. For example, you can’t stay for meetings past 4pm, but you are open to a phone call at 5pm. Ask for flexibility, but also provide workable options.


5 Ways Families Can Renovate Their Home Without Breaking The Piggy Bank

5 Ways Families Can Renovate Their Home Without Breaking The Piggy Bank


Your home is the most special place in the world. It’s where you listened to your child mumble their first words and watched them take their first steps. That is why renovating your home is so much fun. You get to take your favourite place and make it much better.

You’ll already know raising children isn’t cheap, so even though you want your home to be lovely it can’t break the piggy bank. You have to improve its beauty without spending too much. We’re going to discuss some of the easiest ways you’ll be able to do it when the time comes.


5 Ways Families Can Renovate Their Home Without Breaking The Piggy Bank
Our kitchen renovations replacing cabinet doors and handles before and after look


1 – Swap Over Cabinet Doors

There is a good chance your cabinets are fine even though they look a little beaten up. This is usually because the doors or handles are too old. It doesn’t make sense to fix something that isn’t broken.

Focus your efforts on the specific problems by swapping cabinet doors for new ones. It’s possible you will only need to replace the handles. In lots of cases a new coat of paint will be more than enough too.

2 – Luxury Isn’t Always Expensive

We all think certain things are luxurious because of the information we’ve been fed, but it isn’t always true. The chandelier is a good example, because even though we think they cost a lot most of them don’t.

Then you’ve got luxury items that come with cheaper alternatives available. A good example of this would be marble statues. Instead of buying marble you could buy metal statues and they would still look luxurious.

3 – Replacing Your Windows

Hopefully you only need to reseal your windows as opposed to replacing them, but you’re sometimes left with no choice. It’s a pity because it involves a lot of work, which is why you should always choose vinyl windows.

They are so much cheaper than any other kind, plus they come with extra benefits too. You’ll be able to pick any style and colour you want. They’re also simple to clean making housework a breeze.

4 – Only Go For Quality

When it’s time to renovate a room you might decide to throw lots of old things out. Don’t rush to the store and replace them without thinking about it first. Ask yourself if you would be able to live without them.

It’s often advantageous to spend more money on a few items rather than the same amount of a collection of them. You’ll also be left with a lot more space, which has its own advantages when it comes to beauty.


5 – The Bathroom Hotel Look

If you walk into a fancy hotel you’ll always notice they look different compared to normal bathrooms. The biggest difference isn’t necessarily related to money. It’s got a lot more to do with how things in the bathroom are presented. A change of paint colour with a few new accessories can give a facelift to your bathroom without spending lots of money.

How much do you think a standalone bathtub is compared to a regular one? There is no way deeper sinks will be a lot more than one in the average bathroom. These two changes will make your bathroom look gorgeous.

Don’t Break The Piggy Bank

It’s easy to waste lots of money when trying to build your dream home. Emotions can get the better of you, so hopefully these tips will save you money. They’ll also make your home a lot more attractive than it is at the moment and you should look forward to your next renovation project.

What are your tips to renovate your home without breaking the bank?


How to Organize a Backyard Easter Egg Hunt

12

If you’re not able to go out for an Easter egg hunt this year, you can do one yourself at home. In fact, a lot of families do this in addition to a formal Easter Egg Hunt because they have more control over it, it allows smaller children to get a fair shot, and it can be great fun for all of the family. Here’s how to organize a backyard Easter egg hunt!

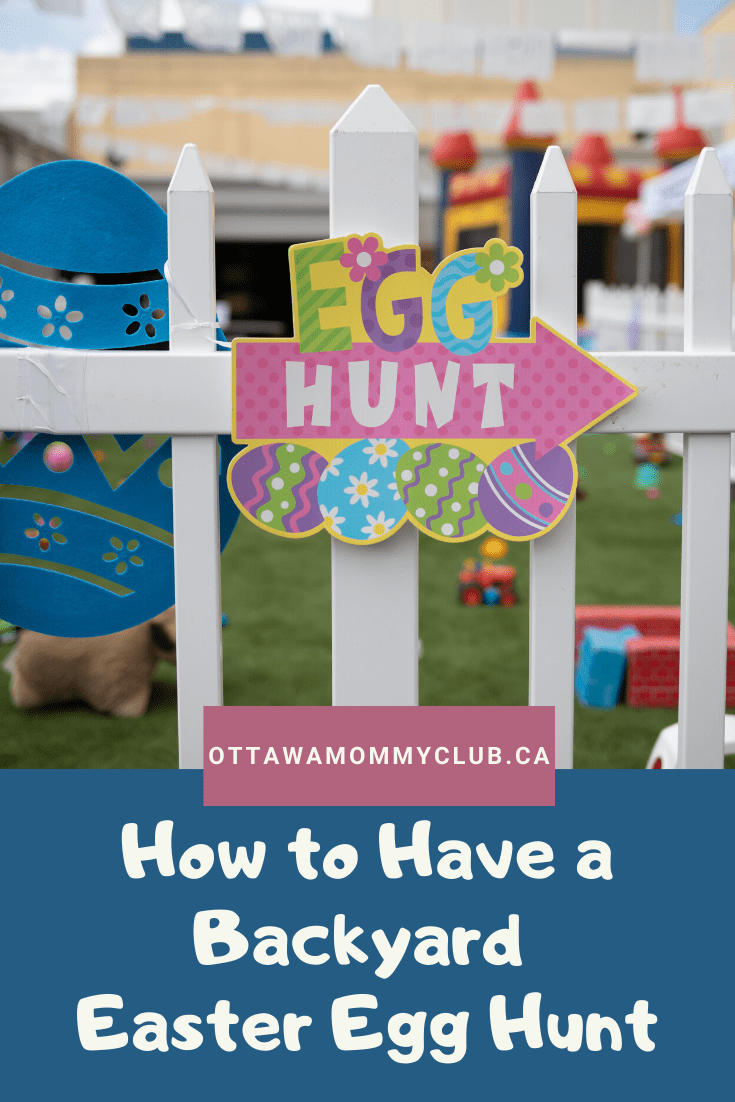
How to Have a Backyard Easter Egg Hunt
Easter eggs in a basket

Backyard Easter Egg Hunt

Before long the Easter Bunny will be hopping down the bunny trail, hiding eggs for excited boys and girls to find. Avoid Easter egg hunt pitfalls like hunting chaos, melting chocolate, unsportsmanlike conduct and disappointed kiddos, by planning ahead and incorporating a few of these simple ideas and tips into your backyard Easter egg hunt festivities.

Know how many children with be participating.

Before you can properly prepare for your Easter egg hunt, you need to know how many children are going to be there so you can make it fun for everyone. Once you know the number of kids coming, you can pick a number of eggs each child will be ‘allowed’ to find. If you have 10 kids coming, you might want to let them each find 15 or 20 eggs, but if you have a larger crowd — 20 or more kids — you might want to stick with 10 eggs apiece. Giving kids a limit on the number they can find helps keep it ‘fair’ for smaller kids. Older kids should be encouraged to let younger kids find ‘easier’ eggs. Another idea if you’re super organized and have a lot of kids is to colour-code eggs- certain age group kids can find certain colours. (Little kids only get the yellow eggs! etc)

Buy or make your Easter eggs

Buying plastic eggs is a great option because you can fill them with candy or treats, you save the time of cooking and decorating and there is no mess to clean up. You can also make your own Breakable Chocolate Egg to hide Easter treats and chocolates.

Stuffing the Easter Eggs

Bored with the traditional jelly beans and chocolate eggs that seem to melt as the eggs lay in wait in the warm sun? These days supermarkets stock a huge variety of Easter candy individually wrapped for convenience and cleanliness. Consumers can purchase everything from gummy bunnies and egg-shaped gumballs to mini egg-shaped Reese’s Peanut Butter Cups and M&Ms and more. Opt for the non-chocolate varieties of candy, if your Easter egg hunt will take place outdoors in a warm climate.

Better yet, parents interested in cutting back on their child’s sugar intake can find a variety of Easter-themed trinkets like stickers, tattoos, bouncy balls, etc. designed specifically in size for the popular plastic eggs at party stores and discount retailers like Wal-Mart and Target to fill their eggs with instead.

If you’d like to “fill” your eggs with larger items like stuffed animals or sand toys, assign the prizes a number and then fill the plastic eggs with a slip of paper with a number on it. At the end of the hunt, children can take their numbers and redeem them for the corresponding prize. This is a great way to cut back on the waste of useless trinkets that will probably just end up in the trash in a day or two.

Hide your Easter eggs

Once you have your eggs, you need to prepare them for hiding, then work out a plan to where you will hide the eggs. You want good hiding spots but you also want it to be safe so avoid any dangerous areas or objects.

If you’re going to have both young and old children participating, consider making zones so you can hide the eggs based on the age groups. You want the younger children to have a chance to get eggs and you want it to feel like more of a challenge for the older ones as well.

Evening the Easter Egg Hunt Playing Field

At every Easter egg hunt, there always seems to be one, two or five kids that are bit more competitive than the others, resulting in a few kids going home with most or all of the coveted Easter eggs. Hunt organizers can avoid this pitfall in a few ways.

1. If your Easter egg hunt caters to a large group of children, divide the “hunting grounds” up into age groups so that children only hunt for eggs with other children around their same age. It’s much easier for a two-year-old to enjoy the Easter egg hunt and take home a nice haul of eggs if they don’t have to compete with an 8-year-old.

2. Another way to instil fairness into your Easter egg hunt is to assign the children an egg cap. In other words, allow each child to collect ten eggs. Once they have found ten eggs, the hunt ceases for them. That way each child goes home with the same amount of eggs. Another twist on this is to number the eggs and have each child search for the eggs with the number (or colour if you choose) they are assigned.

Backyard Easter Egg Hunt Ideas

  • Hide a couple of golden eggs and fill these extra special eggs with an extra special prize such as a gift card or dollar bill.
  • Planning an Easter egg hunt for older children or teens? Make the Easter egg hunt more challenging by holding it at night. Once darkness sets, arm kids with a flashlight and begin the hunt.
  • Fill eggs with coins, and then let kids go to a “store” you’ve set up where they can buy items of their choosing with the money they’ve found.
How to Have a Backyard Easter Egg Hunt

Organizing a thrilling and successful backyard egg hunt, doesn’t take a lot of time or money, just a little know-how and imagination. With these simple steps, you can have your own Easter egg hunt in your backyard. It’s fun, it’s easy, and everyone will make memories to last a long time.

How do you organize a backyard Easter egg hunt? Do you have an Easter egg hunt inside instead?

5 Easy Ways to Sleep Peacefully During Late Pregnancy

5

It is the last leg of your pregnancy, you are in your third trimester and coming in fast for the final stretch (pardon the pun). Pretty soon, you will be experiencing the happiness of being a parent first hand. You are so close that you think about it all the time, even dream about holding your bundle of joy, that is, IF you could get some quality sleep. Here are 5 easy ways to sleep peacefully during late pregnancy!

5 Easy Ways to Sleep Peacefully During Late Pregnancy

Things are getting tougher with each passing day. Your belly feels like it weighs a million tons and any sudden movements make will make you just burst! You badly need regular sleep, but just cannot seem to get comfortable enough to fall asleep, or do anything about it for that matter. Your lower back hurts, your legs cramp, you feel dizzy and barfing all the time. The uncontrollable bladder is just the cherry on top, isn’t it?

Easy Ways to Sleep Peacefully during Late Pregnancy

What you are going through is not uncommon. A study published in the Journal of Clinical Nursing in 2013, analyzed the most common symptoms experienced by pregnant women and concluded that about 79.9 % of the women experienced Polyuria, 75.6 % experienced Fatigue and 71.3 % experienced heart burn during the second and third pregnancy trimester.  All three of these conditions contribute a great deal to sleep disturbances during the latter part of pregnancy. These sleep disturbances, if left unaddressed are going to cause a lose out on precious sleeping time, not to mention increasing the risk of postpartum depression later on as well. 

How to get Some Snuggly Snoozes during Pregnancy?

You are not going to have to go it alone. We know it can get pretty exhausting dealing with the miracle of birth 24/7. That is why we will be giving you some sleep awesome tips to help you cope through the last few months of your pregnancy. We want you to sleep well, for your wellbeing and of course, for everyone around you. We know WE would not want to cross someone dealing with pregnancy hormones AND sleep deprivation.

A Naturopathic Approach to Fertility and Pregnancy
Pregnant woman sitting on a dock

Tip # 1- Pillow Talk

And by pillow talk, we do not mean actually talking to your pillow. Well, you can do that too if you are into it and it helps. However, what we really mean to say is that you invest in a good pregnancy pillow for yourself. A pregnancy pillow is curved at all the right places and provides back, as well as tummy support.

There are a wide range of pregnancy pillows available in the market. Be sure to choose one that best suits your figure and provides support for your back. A memory foam mattress would not be a bad idea either. Remember, that in order to get a good night’s sleep during pregnancy, you will need to gear up!

Tip # 2- Sleep on your left Side

Doctors recommend sleeping on your left side during the latter part of pregnancy as it allows for optimal circulation of blood through your body. It also makes it easier for your baby to receive nutrients and oxygen through the placenta. A study published in 2011 suggested that pregnant women who sleep on their left side during the last months of pregnancy had a lesser risk of late stillbirth than those who slept either on their backs or on their right side. Sleeping on the left side during late pregnancy ensures better cardiac output and allows for better oxygen saturation for the baby.

Tip # 3- Don’t Force It!

Try not to force sleep. If you cannot get some shuteye while in bed, get up, walk around a bit, read a book, take a warm bath with your favourite essential oil or just write in your diary. Anything that helps you relax. For many women in their third trimester, sleeping on the bed can get pretty uncomfortable. Allow yourself to doze off even if you are on the couch, as long as you are comfortable.

Tip # 4 – Spousal Support

Ask your partner for help in getting some sleep, you are in together after all. Perhaps. you can request your significant other for a massage to help you relax and get some sleep. If you cannot sleep, or if there is something on your mind, talk to your partner. Let them know your thoughts and worries. This can work wonders in sorting through the thoughts that start crossing your mind once you get in bed. Once the thoughts are out on the table, you will feel much better.

Tip # 5 – Get Comfortable

Optimize yourself and your surroundings for your comfort. Wear your comfortable Pj’s and make sure that your environment induces sleep. Keep a relaxing ambiance in your bedroom. If you keep getting distracted by noise, play white noise sounds to help you relax and cancel out any commotion in your surroundings. Be prepared and keep all your essentials at the bedside table so that you do not have to get up in the middle of the night to get them or nag your partner, who would be fast asleep way before you. Invest in a humidifier to keep the snoring and nasal discomfort away during the last months.

Author Bio:

Eugene Gabriel has his BSc (Hons.) Degree in Psychology. He has always been fascinated by the effects of good quality sleep, or the lack of it on human productivity and overall well-being. He has helped thousands of individuals suffering from sleeping problems by teaching them about the healthy changes they need to make in their lifestyle in order to sleep peacefully. You can also follow him on his blog or on twitter @eugenegabrielj

Tomato Basil Soup in a Bread Bowl

34

Comfy food is acceptable any time of year! At our house, we eat a soup and a sandwich year round even when it’s very hot outside. It’s a great way to have your kids eat their vegetables. This delicious Tomato Basil Soup recipe and very creamy and tasty. Your guests will love the soup presentation in a bread bowl. Enjoy!

Tomato Basil Soup in a Bread Bowl

Tomato Basil Soup in a Bread Bowl

For this recipe, you will need the following ingredients:

Tomato Basil Soup Ingredients

  • 1 tbsp olive oil
  • 1 large red onion, chopped
  • 1 ½ tsp minced garlic
  • 1 – 28 oz can of crushed tomatoes
  • 2 -15 oz cans of chicken broth
  • Salt and pepper to taste
  • 1 cup heavy cream
  • 1 fresh bunch basil, washed and torn into small pieces
  • 4 bread bowls

The Tomato Basis Soup is so easy to make! This is how you do it:

Tomato Basil Soup in a Bread Bowl

SOUP DIRECTIONS

Pour olive oil into a large pot heating until hot on medium heat. Add your onions and cook until soft about 5 minutes. Toss in the minced garlic and continue to cook while seasoning with salt and pepper stirring occasionally. Add can of crushed tomatoes and chicken broth. Bring it to a boil then allow to simmer for 15-20 minutes.

Next, transfer your soup into a food processor blending until smooth. Return pureed soup back to pot, again on medium heat. Lower the heat and allow to simmer while adding the heavy cream stirring to incorporate the two together. Add about ½ of the chopped basil. Let this sit and simmer for another 15 minutes or longer if you prefer a thicker soup.

BREAD BOWLS:

Using a sharp knife, cut a circle into the top of each loaf, leaving a 1-inch border all around. Remove the bread top, then hollow out the middle with a fork or your fingers, leaving a thick bread shell.

Scoop the soup into each bread bowl and garnish each with remaining basil.

Tomato Basil Soup in a Bread Bowl
Tomato Basil Soup in a bread bowl

I hope you enjoyed my Tomato Basil Soup recipe as much as my family and I did. If you make it, make sure to share with us on Facebook or Twitter! Also, check out all of our other Recipes.

Tomato Basil Soup in a Bread Bowl

Delicious Tomato Basil Soup Recipe In A Bread Bowl

Lyne Proulx
This Tomato Basil Soup recipe and very creamy and tasty. Your guests will love the soup presentation in a bread bowl.
4.17 from 6 votes
Prep Time 5 minutes
Cook Time 35 minutes
Total Time 40 minutes
Course Soup
Cuisine American, Canadian, Italian
Servings 4
Calories 496 kcal

Ingredients
  

  • 1 tbsp olive oil
  • 1 large red onion chopped
  • 1 ½ tsp minced garlic
  • 1 28 oz can of crushed tomatoes
  • 2 15 oz cans of chicken broth
  • Salt and pepper to taste
  • 1 cup heavy cream
  • 1 bunch fresh basil washed and torn into small pieces
  • 4 bread bowls

Instructions
 

Tomato Basil Soup

  • Pour olive oil into a large pot heating until hot on medium heat. Add your onions and cook until soft about 5 minutes. Toss in the minced garlic and continue to cook while seasoning with salt and pepper stirring occasionally.
  • Add can of crushed tomatoes and chicken broth. Bring it to a boil then allow to simmer for 15-20 minutes.
  • Next transfer your soup into a food processor blending until smooth.
  • Return pureed soup back to pot, again on medium heat. Lower the heat and allow to simmer while adding the heavy cream stirring to incorporate the two together.
  • Add about ½ of the chopped basil. Let this sit and simmer for another 15 minutes or longer if you prefer a thicker soup

Bread bowls

  • Using a sharp knife, cut a circle into the top of each loaf, leaving a 1-inch border all around.
  • Remove the bread top, then hollow out the middle with a fork or your fingers, leaving a thick bread shell.
  • Scoop the soup into each bread bowl and garnish each with remaining basil.

Nutrition

Calories: 496kcalCarbohydrates: 53gProtein: 12gFat: 28gSaturated Fat: 14gPolyunsaturated Fat: 2gMonounsaturated Fat: 8gCholesterol: 71mgSodium: 1361mgPotassium: 727mgFiber: 5gSugar: 17gVitamin A: 1412IUVitamin C: 21mgCalcium: 134mgIron: 14mg
Keyword soup in a bolw, soup recipe, tomato basil soup, tomato basil soup in a bowl, tomato soup
Tried this recipe?Let us know how it was!

4 Tricks to Get Your Children Eating Healthier

13


 4 Tricks to Get Your Children Eating Healthier

Some kids will eat almost anything you put on their plate and others, not so much. These picky eaters are hard to please and usually want to eat the same thing over and over. It’s especially common in younger children. Unfortunately, that’s not very healthy. Therefore, parents with picky eaters have to find ways to get their kids to at least try different foods. To get children eating healthier can definitely be difficult at times.

Introducing them to a variety of fruits and vegetables isn’t always enough. That’s when you need to use your imagination and find ways to get them to eat healthy without them knowing it.

Here are four tricks to get your children eating healthier:

  1. Make food fun. Make the food colorful, turn pancakes or pizzas into smiley faces or cut the food into various shapes to make them more fun to eat.
  2. Replace cookies, candy and chips with bananas, watermelon, apples and other healthy foods you can eat for a snack. Your kids will eat what’s available.
  3. Make tasty milk shakes out of real fruit. Children love them and you’ll love the fact they are actually eating/drinking something healthy.
  4. Sneak veggies into foods your children already eat. For example, chop up tomatoes, peppers, onions, mushrooms, and other vegetables and use them as the topping for your homemade pizzas or add them to some of your child’s other favorite dishes.

You can’t force your children to eat healthy but you can encourage them to do so. When you make mealtime fun and interesting, kids are more likely to try new things. Use these tips to make mealtime a positive experience for your children and you’ll get better results. Best of luck!

Do you have any tips or tricks to get children eating healthier that you would like to share with our readers? Please leave them in the comment below.

3 Simple Ways to Prepare Your Family for Easter

9

3 Simple Ways to Prepare Your Family for Easter
Crucifix on top of bible


3 Simple Ways to Prepare Your Family for Easter

There is more to Easter than egg hunts and chocolate bunnies. If you are of the Christian faith, this holiday is even more sacred to you. Easter is the Christian celebration of the resurrection of Jesus Christ on the third day after his crucifixion. For many Christians, the celebration of Easter is preceded by a 40-day period of penance that begins on Ash Wednesday and ends on Holy Saturday called Lent.

Whatever you believe, it’s also a time of year that most families come together to spend time with one another.

Here are three simple ways to prepare your family for Easter:

  1. Enjoy the outdoors/nature – Easter makes us think of Spring. If you want to prepare for Easter, try spending some time outdoors. Go to the park, have a picnic, or just go for a walk. See if things are blooming in your area yet.
  2. Spend time with friends and family – Easter is also a great time to come together with the ones you care about. Invite friends and extended family for dinner or game night. Go visit friends you’ve been putting off for a while. Make the time for others.
  3. Talk about the meaning of Easter – This is also a great time to discuss the true meaning of Easter and reflect on your beliefs. Share this with your children. Talk openly. Remember what it’s really all about and be grateful.

Every family celebrates Easter in their own way. We hope that these ideas will help you plan for your own Easter celebration. If something on our list doesn’t sit with how you celebrate and believe, use them as a launch pad to create your own ideas. Do what works for your family. Make your own traditions if you want.

Easter Egg Nest Cookies Recipe

16

Take sugar cookies to the next level, just in time for Easter with these adorable Easter Egg Nest Cookies. These are perfect for making with the kids. They look so fancy but are so easy to bake and decorate! 

If I have a food weakness, it is definitely homemade cookies. There is something about the texture and the burst of butter in a sugar cookie that makes my heart happy! This recipe captures the essence of all of my favourite things about cookies, and packages them into a really appealing package that is perfect for Easter, but also works all spring long!

Icing With Green Dyed Coconut

One of the things I like most about this recipe is the icing. It is so easy to make. It only takes a few ingredients and comes together in just about as many minutes. I love to add green dyed coconut to this cookie because it looks so adorable. You can use malted milk ball eggs, jelly beans, or even chocolate eggs to complete the eggs in the grass. All are delicious options. 

Easter Egg Nest Sugar Cookies

My recipe starts with a basic sugar cookie recipe. This one is versatile and holds up to decorating really well, while providing a buttery flavor with just the right bite to the cookie. The recipe is easy enough to involve the kids from mixing the dough to decorating! When dying the coconut to use as grass, remember a little goes a long way with the food coloring and try not to go over 5 drops. 

If you are looking for more Easter cookies recipe ideas, you might like these:

If you are looking for more homemade Easter ideas check out these reader favourite posts.

Everyone loves this breakable chocolate egg with hidden surprises inside! Make this Easter bunny kids craft with a free template to display as a part of your Easter decor.

Easter Egg Nest Cookies Recipe
Easter cookies with a green nest and chocolate mini eggs

This Easter Egg Nest Cookies recipe will become a family favourite! Not only is it tasty, it’s also adorable to prepare and they make a great centrepiece to decorate your Easter table for snacks or desserts.

Easter Egg Nest Cookies Recipe

You will need the following ingredients:

(makes 2 1/2 dozen)

  • 3 cup flour
  • 1 tsp baking soda
  • 1/2 tsp salt
  • 1 cup soft unsalted butter
  • 1 cup granulated sugar
  • 1 egg

Equipment Needed

  • Cookie Cutter: Circle
  • Parchment paper
  • Cookie sheet
  • Rolling pin
  • Wire rack
  • Mixer
  • Mixing bowl
  • Ziplock bag
  • Plate
  • Metal spatula

Let’s get these made and enjoy a delicious treat:

Cream the soft butter with the sugar until the combination is smooth and not grainy to the touch in a mixing bowl. Add eggs and continue to mix. Add the vanilla and continue mixing.

Sift the four, baking soda, and salt together. Add the dry mixture to the wet mixture. Continue mixing to make sure all ingredients are thoroughly blended.

Make the dough into a ball, wrap it in cling wrap completely covering the entire dough ball. Put in the refrigerator for about 6 hours or overnight. Check to see if the dough is firm.

Preheat oven to 325 degrees.

Pull the cookie dough out of the refrigerator and sit it out to soften up a bit. Put flour out on the cutting board, rub flour on the rolling pin, and work some flour into the batter. (if needed). Roll the dough out on the cutting board and using the cookie cutter begin to make your cookies.

Line the cookie sheet with parchment paper. Using a metal spatula move the cut cookies to the parchment lined cookie sheet.

Bake at 325 degrees for 8 minutes. Check to see if the cookies are thoroughly baked. Take the cookies off of the cookie sheet and put on a wire rack to cool completely. (About 10 minutes).

Easter Egg Nest Cookies Recipe
Easter Egg Nest Cookies

Icing Ingredients:

  • 2 egg whites
  • 1 cup powder sugar
  • 1/2 tsp cream of tartar
  • 1 tsp vanilla
  • tooth picks

Icing Directions:

Combine all ingredients except the colours into a standing mixing bowl. Mix on medium speed onto stiff peaks form. Scoop icing into a bowl or onto a plate that has a dip and rim to it so that the icing doesn’t spill out. 

Grass Ingredients

  • 1 1/2 cup shredded sweetened coconut
  • 5 drops of green food colouring
  • 1 large ziplock bag
  • 1 bag of chocolate mini eggs

Directions

Combine the coconut and food colouring in the ziplock bag and shake until coconut is dyed green. Add more food colouring to get the colour you want. Pour out the dyed coconut onto a plate.

Decorating directions

Take cooled cookie and dip the top part face down in the icing. Pull the cookie up so that access icing can drip off and then dip the cookie into the coconut . Tilt the cookie back over and place the cookie, bottom down, onto a cookie sheet. Take a tooth pick and dip it into the icing and then scrap off the icing onto the cookie and then place the chocolate eggs onto the icing dot.

Repeat process with all cookies until all done. Let sit for 30 minutes before enjoying! 

I hope you enjoyed my Easter Egg Nest Cookies Recipe!  If you make it, make sure to share with us on Facebook or Twitter! Also, check out all of our other Recipes.

Easter Egg Nest Cookies Recipe
Easter cookies with a green nest and chocolate mini eggs

Easter Egg Nest Cookies

Not only are these Easter Egg Nest Cookies tasty, they also make a great centrepiece to decorate your Easter table for snacks or desserts!
No ratings yet
Prep Time 40 minutes
Cook Time 8 minutes
Keep in refrigerator 6 hours
Course Dessert, Snack
Cuisine American, Canadian
Servings 30 cookies
Calories 175 kcal

Equipment

  • Cookie Cutter: Circle
  • Parchment paper
  • Cookie sheet
  • Rolling Pin
  • Wire rack
  • Mixer
  • Mixing bowl
  • Ziplock bag
  • Plate
  • Metal spatula
  • Toothpicks

Ingredients
  

Cookie Ingredients

  • 3 cup flour
  • 1 tsp baking soda
  • 1/2 tsp salt
  • 1 cup soft unsalted butter
  • 1 cup granulated sugar
  • 1 egg

Icing Ingredients

  • 2 egg whites
  • 1 cup powder sugar
  • 1/2 tsp cream of tartar
  • 1 tsp vanilla

Grass Ingredients

  • 1 1/2 cup shredded sweetened coconut
  • 5 drops of green food colouring
  • 1 bag of chocolate mini eggs

Instructions
 

Cookie Directions

  • Cream the soft butter with the sugar until the combination is smooth and not grainy to the touch in a mixing bowl.
  • Add eggs and continue to mix.
  • Add the vanilla and continue mixing.
  • Sift the four, baking soda, and salt together.
  • Add the dry mixture to the wet mixture.
  • Continue mixing to make sure all ingredients are thoroughly blended.
  • Make the dough into a ball, wrap it in cling wrap completely covering the entire dough ball.
  • Put in the refrigerator for about 6 hours or overnight. Check to see if the dough is firm.
  • Preheat oven to 325 degrees.
  • Pull the cookie dough out of the refrigerator and sit it out to soften up a bit.
  • Put flour out on the cutting board, rub flour on the rolling pin, and work some flour into
  • the batter. (if needed).
  • Roll the dough out on the cutting board and using the cookie cutter begin to make your cookies.
  • Line the cookie sheet with parchment paper.
  • Using a metal spatula move the cut cookies to the parchment lined cookie sheet.
  • Bake at 325 degrees for 8 minutes. Check to see if the cookies are thoroughly baked.
  • Take the cookies off of the cookie sheet and put on a wire rack to cool completely.
  • (About 10 minutes).

Icing Directions

  • Combine all ingredients except the colours into a standing mixing bowl.
  • Mix on medium speed onto stiff peaks form.
  • Scoop icing into a bowl or onto a plate that has a dip and rim to it so that the icing doesn’t spill out.

Grass Directions

  • combine the coconut and food colouring in the ziplock bag and shake until coconut is dyed green
  • Add more food colouring to get the colour you want
  • Pour out the dyed coconut onto a plate

Decorating directions

  • Take cooled cookie and dip the top part face down in the icing
  • Pull the cookie up so that access icing can drip off and then dip the cookie into the coconut
  • Tilt the cookie back over and place the cookie, bottom down, onto a cookie sheet
  • Take a tooth pick and dip it into the icing and then scrap off the icing onto the cookie and then place the chocolate eggs onto the icing dot
  • Repeat process with all cookies until all done
  • Let sit for 30 minutes before enjoying!

Nutrition

Serving: 30cookiesCalories: 175kcalCarbohydrates: 21gProtein: 2gFat: 9gSaturated Fat: 7gTrans Fat: 1gCholesterol: 22mgSodium: 84mgPotassium: 54mgFiber: 1gSugar: 11gVitamin A: 197IUVitamin C: 1mgCalcium: 6mgIron: 1mg
Keyword Easter cookies, Easter Egg Nest cookies, sugar cookies
Tried this recipe?Let us know how it was!

How Stress Can Show Up In Your Life  

24

Let’s face it, our mommy lives can get pretty darn hectic, which can make us quite stressed out. Some amounts of stress can be healthy, but when we are stressed out for long periods of time, our body will start showing signs that we need to slow down, take a deep breath (or two) and center ourselves. 

We live in a world where pushing ourselves beyond our capabilities is seen as admirable success. Our bodies pay the price of our negligence while we push ourselves in order to appear brave, strong and invincible.  

I was that person; trying to be superwoman. I pushed myself to be the “perfect mom” and it took its toll on my health. One of the things that I remember the most is how I used to dread looking at myself in the mirror each morning. Why? Because I knew I had another “breakout” to cover up with makeup.  I never thought that at the age of 40, I would be dealing with wrinkles AND acne!

These breakouts were a sign that my body was lacking balance. At the time, I was dealing with a newborn who wasn’t sleeping well and wasn’t feeding properly, as well as a 5 year old who felt neglected because mommy was often too tired and overwhelmed to play with him.  As you can imagine, the guilt and the exhaustion eventually affected me on a physical level.

When we are under constant stress, our body’s response is to increase the production of the stress hormone called cortisol.  Hormonal imbalances wreak havoc with the rest of our system, with acne as one of the primary secondary symptoms.


Excess cortisol also increases cravings for fatty comfort foods and can lead to an intake of high-fat and high-sugared foods.  Guess who had her hand in the cookie jar every day?

We are all different and my stress showed up through my skin, but there are other signs that show us when we’ve pushed our body’s limitations. 

Here is a quick list of what stress can look like:

Headaches, frequent colds and infections, heartburn, weight gain/loss without dietary changes, skin problems such as rashes and acne, hormonal imbalances, blood sugar dysregulation, sleeping problems and so much more!

So how did I get rid of my acne?

First, let’s see what causes acne.

We are talking about a stress and gut related issue here. Clogged pores can lead to bacteria and yeast overgrowth on the skin causing acne. Too much sugar, antibiotics and birth control pills can be the culprit for this.  Inflammation, hormone fluctuations, and increased cortisol can also exacerbate acne. Like I have mentioned earlier, cortisol is directly linked to the Adrenal Glands which produce the main hormones of stress. I talk more about the adrenals in other articles.

Here’s what I did

I included these foods to my diet

  1. Probiotic rich foods like kefir and cultured vegetables
  2. Zinc rich foods like pumpkin seeds and flaxseeds
  3. Vitamin A rich foods like spinach and carrots
  4. Foods high in fiber (vegetables, seeds, nuts)
  5. Good protein sources (organic eggs, poultry, grass-fed beef)
  6. Healthy fats (coconut oil is best)

I avoided these foods

  1. Sugar and carbohydrate rich foods (reduce fruit intake and use raw honey or Stevia instead)
  2. Gluten and wheat containing foods
  3. Fried food and hydrogenated oils (use coconut oil instead)

I included these 6 natural remedies

  1. Probiotics. Typically 2-3 capsules twice a day. Probiotics boost immunity and kill off yeast and bad bacteria.
  2. Zinc. Promotes immune function and reduces buildup of DHT to improve skin healing.
  3. Omega-3 Fatty Acids.  Fish oil / cod liver oil daily or flax or chia seed oil. Helps reduce inflammation and support hormone balance.
  4. Tea Tree Oil. Apply tea tree oil to blemishes morning and night. Tea tree oil has anti-microbial and anti-fungal properties.
  5. Vitex. Balances hormones that can reduce acne formation. You can alsotake Evening Primrose and Borage oil for hormone balance
  6. Antioxidants. Elderberry syrup

I adopted a simple yet effective mindfulness routine

    1. Simple daily breath work will do wonders for stress
    2. Gardening lowers rates of depression and anxiety, raises energy levels, improves mood, and also helps to reduce stress  and tension. Tend indoor plants, if you don’t have a garden
    3. Epsom salt baths ease stress and promote relaxation.Stress drains the body of magnesium, and given that most of us are under chronic stress, our bodies are magnesium deficient. When Epsom salt is dissolved in warm water, the magnesium is absorbed through the skin to help replenish magnesium levels in the body. Magnesium helps promote a feeling of calm and relaxation. It also increases energy and reduces irritability. Epsom salt baths can help improve your sleep and concentration. 

Our bodies speak to us every single day and are a chronological photographic series of our choices. Our choices do matter. What you eat and how you manage stress really does matter.  What you drink does matter. How you speak to yourself and others matters. The health of your relationships matter.  


As parents, we have an extremely important role to play and the best way to show up for our children is the take care of ourselves.  I am happy to report that I have learned how to listen to my body and not feel guilty for taking care of myself.  I invite you to do the same 🙂  

Much Love,

Julie

Follow me!

@JulieCloutier6 & Facebook

3 Tips to Teach Children to Respect Discipline

12

One of the toughest parts of being a parent is discipline. While some parents handle discipline better than others, and some children take to it better than others, we all face challenges. If you want your children to respond well to discipline, you need to teach them to respect it.

3 Tips to Teach Children to Respect Discipline

The first thing a parent should remember is that all children are different, even if they may look alike physically. One may be an introvert who shuns crowds and parties; the other turns out to be the life and magnet of any reunion. We often make the mistake as parents to believe that since we are fair we must treat all of them the same way. Serious mistake!

Observing babies only a day old will reveal completely different behaviours at that tender age; that means that some traits in our temperament are innate, while others become acquired. The old discussion regarding the importance of nature vs. nurture is simply a waste of time. Let’s accept them the way they are and design a specific approach for each child even as they cling voraciously to the life giving nipple.

Operant conditioning

In this context of early childhood, I am convinced from experience that most grandmothers are a hindrance to the children’s proper training. They rush to the baby’s side as soon as they hear a whimper, let alone a full-blown cry. If we know for a fact that there is no immediate danger, let them use their lungs for few minutes; they need to do it periodically.

By attending to their needs without delay since early childhood, we are telling the child that they control our lives, that they have the power to summon our presence whenever they feel like it. When they become older, the feeling of control persists and converts many mothers in “slaves” to their children’s every request. It should be the other way around; obedience is a trait that is taught and learned from an early age. How many times have you observed a child’s tantrum followed by the mother giving in? Too many times to count probably.

But if we “teach” the child that he/she can use these tactics to obtain what they want, we are creating a “monster” who will make our life miserable. We must reward good behaviour, not the other way around. That is called operant conditioning and you certainly have seen it on television; experts use it on dogs because it works. And it works fine on children. They do what you ask and expect, and they get a reward. They misbehave and they lose the prize. But please don’t use money as a reward; you’ll convert them into materialistic “fiends”.

Parents: the prize need not be material

Children respond very well to hugs, words of congratulations, and, best of all, the satisfaction of knowing that they did well. It’s called self-satisfaction and it is closely linked to self-esteem. A child who has been spoiled will never experience self-satisfaction. He/she must be rewarded by external factors to be content. As parents we must educate our children to seek internal rewards such as pride in doing your best, even if you fail to reach your objectives.

In every case, we have the obligation to recognize their different needs and act accordingly. In this light parents and teachers have the same mission: to educate future winners!

Here are 3 tips to teach children to respect discipline:

1. How to explain discipline to a child

Rather than taking a “do as I say” approach, take the time to explain and show why discipline is important to a healthy life. This includes the importance of self-discipline. Your children need to learn how to do the right thing even when you’re not around to tell them what to do.

2. Teach how discipline gives control

Often children don’t respect discipline because they feel like it strips them of their power. If you take the time to show how discipline actually gives way to control and eases the chaos of life, your child will have a different perspective. You can teach them to respect discipline by understanding how it clears the chaos of the world.

3. Show how it keeps them healthy

A disciplined person will do things that keep them healthy in life such as exercising, eating better, going to bed on time, and avoiding bad habits. When your children understand that discipline helps create a happier and healthier life, they will have more respect for it in their own lives.

3 Tips to Teach Children to Respect Discipline

Now that you have these tips to teach children to respect discipline, remember that every child is different and every situation is different. You know your child better than anyone else and you are the best judge of their capabilities and maturity. Use this as your guide to help teach them respect for discipline in life. 

Do you have other tips to teach children to respect discipline that you would like to share? Please write them in the comment below!

5 Ways to Celebrate Easter as a Family

4

Many people want to spend holidays with their families and Easter is no exception. For many, this is a religious holiday but even if you don’t celebrate it that way, you will find that people still like to enjoy time with their families. Here are five ways to celebrate Easter as a family!

5 Ways to Celebrate Easter as a Family
Easter meal

Ideas to Celebrate Easter

These are special ideas for celebrating easter with the family!

1. Have a nice dinner

Holidays bring people together and dinners are a great way to celebrate. Easter Dinner is also a traditional way that many people celebrate Easter and Passover.

2. Read or tell Easter stories

This is great for children but even adults can enjoy it. Gather round and read or tell stories about Easter.

5 Ways to Celebrate Easter as a Family

3. Understand all the history and background of Easter

What happened at the first Easter? What are the religious backgrounds of Easter? And, what is the Pagan history of Easter? A great way to celebrate the holiday is to understand its origins and the true meaning of Easter.

4. Participate in traditional customs

Decorating Easter eggs, attending a religious service, or having a traditional dinner with family are all some ways to honour traditional Easter customs.

5. Plant seeds

Growing plant or flower seeds will not only teach children how nature works, but also the power of a new life which will result in having pride in themselves for creating such a life. Make it simply by filling eggshell halves with soil in an egg carton. Plant 2 or 3 flower/plant seeds or even just grass in each one and cover with soil. Water the potting mixture lightly with a spray bottle and place in front of a sunny window. Water them lightly with a spray bottle or tap water when the soil feels dry.

5 Ways to Celebrate Easter as a Family
Planting seeds in egg carton: Photo credit: lovelihood via Foter.com / CC BY-SA

With these different ways to celebrate Easter, you can begin planning the best Easter celebration for your family.

Do you want to add to our list? What do you do to celebrate Easter as a family? Comment your ideas for celebrating Easter!

How to Read and Understand a Coupon Matchup

16

Coupon Matchup


How to Read and Understand a Coupon Matchup

If you’re new to using coupons, you may be confused about some of the terms and things that you see on your favorite coupon blogs. Coupon matchups are one of those things that may confuse you. They can be really confusing to a new couponer if you’re not used to reading them.  Learning how to read and understand a coupon matchup is one way that you can save more money using coupons than you previously might have been.

So what is a coupon matchup? They are blog posts, usually put out once a week for each store, are meant to help you do exactly what they say; match coupons to store sales to help you maximize your savings.  The majority of matchups include every deal that is in the sale ad for that particular store each week.

To start, you’ll need to understand that coupon matchups are usually full of info. Each one might include things like the product you’ll be buying, the number of items you’ll need to buy, coupons used, where to get those coupons, apps or online rebates used, store rewards that you’ll get back and of course, your final price after all of those items are combined. Coupon matchups can use different terms depending on who wrote them, but the basics stay the same. If you’re new to couponing as a whole, it can be extremely helpful to learn the basic terms used in couponing first and then work on becoming a coupon matchup pro.

A coupon matchup might look something like this:

Buy (2) Always Infinity @ 2/$5.00
Use (1) .50/1 Always Infinity Coupon 
Pay $4.50 oop
Get back $0.50 RR
Submit for $1.00 cash back at Caddle
Final price: $3.00 wyb 2

Confused? Let’s look at what it actually says. First, you’re going to buy 2 packages of Always Infinity at a price of 2 packs for $5.00. Next, you’ll use one $0.50 off coupon. You can find that coupon in the P&G coupon insert that would come in your newspaper or at sites such as Save.ca. For this deal, you would pay $4.50 out of pocket (oop).

Once you paid your out of pocket cost, you would get back $0.50 in Register Rewards (or store reward, but for the sake of this example) and submit for a $1.00 cash rebate at Caddle. Your final cost would be $3.00 when you bought 2 packages (wyb) or just $1.50 each. Now obviously, I pulled that specific deal out of my head, but you get the idea.

You might be wondering why you should go through all of the trouble to learn how to read a coupon matchup. When you add coupon matchups to your shopping trip planning, you can easily double the amount of money that you’re saving. They work so well for you since sites like flipp.ca include flyers with every deal that the store is advertising each week. This means that you won’t miss a single deal and are saving every penny that you possibly can!

Happy Coupon Matchup!


Photo credit: ccPixs.com via Foter.com / CC BY

Golden Oreo Cupcakes

34

One of my favourite cookies is the famous Oreo! I remember as a child loving to slam dunk my Oreo in a glass of milk or to twist it to lick the icing. So yummy! There are definitely more varieties of Oreo’s now including the Golden Oreo. These Golden Oreo Cupcakes are for all Oreo lovers!

Golden Oreo Cupcakes

Golden Oreo Cupcakes

These vanilla cupcakes with crumbled Golden Oreo cookies topped with a vanilla cream cheese frosting are easy to make and so deliciously good!

Golden Oreo Cupcake Ingredients

  • 1/2 cup unsalted butter softened
  • 2 eggs
  • 2 1/2 cups flour
  • 2 1/2 tsp baking powder
  • 1/2 tsp salt
  • 3/4 cup milk
  • 1 3/4 cups sugar
  • 1 tsp vanilla
  • 1/4 cup of crumbled Golden Oreo cookies

How to make the Golden Oreo Cupcakes

Preheat oven to 350 degrees and set up your cupcake pan with liners.

Using a medium bowl, whisk flour, baking powder, and salt.

In a separate large mixing bowl, beat butter with an electric mixer on medium to high for 30 seconds. Using a sealable bag place your cookies in it and smash with a rolling pin or your hands. Now add sugar, and vanilla to the butter and beat until combined. Add eggs one at a time, beating well after each addition.

Alternate, the flour mixture and milk to butter mixture, beating on low speed until everything is well mixed together. Add in your Golden Oreo crumbled cookies and fold in. Fill the cupcake pan liners 2/3 with cake batter.

Bake for 18-20 minutes. Remove cupcakes from pan and allow to cool on a wire rack for 30 minutes before frosting.

Golden Oreo Cupcake Recipe
Golden Oreo Cupcake

Vanilla Cream Cheese Frosting Ingredients

  • 1 cup unsalted sweet cream butter
  • 3 cups powder sugar
  • 1 tsp vanilla
  • 3 tbsp heavy whipping cream
  • 1 half cup of Oreo’s

Frosting Directions

In large mixing bowl, beat butter, vanilla and cream cheese on high speed until fluffy. Add 3 cups of sugar, one at a time. Add in heavy cream if frosting is looking like sugar pebbles.nScrape the sides to get all of the sugar. Mix until your frosting is stiff and won’t fall off the whisk.Take a butter knife and carve out a small portion of the cupcake. Fill in with frosting. Using a star tip, pipe on the frosting onto the top of the cupcake and place a Oreo on top.

I hope you enjoyed my Golden Oreo Cupcakes!  If you make it, make sure to share with us on Facebook or Twitter! Also, check out all of our other Recipes.

golden Oreo cupcakes

Golden Oreo Cupcake

Lyne Proulx
These vanilla cupcakes with crumbled Golden Oreo cookies topped with a vanilla cream cheese frosting are easy to make and so deliciously good!
5 from 1 vote
Prep Time 10 minutes
Cook Time 20 minutes
icing 10 minutes
Total Time 40 minutes
Course Dessert
Cuisine American, Canadian
Servings 12 cupcakes
Calories 609 kcal

Ingredients
  

Cupcake Ingredients

  • 1/2 cup unsalted butter softened
  • 2 eggs
  • 2 1/2 cups flour
  • 2 1/2 tsp baking powder
  • 1/2 tsp salt
  • 3/4 cup milk
  • 1 3/4 cups sugar
  • 1 tsp vanilla
  • 1/4 cup Golden Oreo cookies Crumbled

Vanilla Cream Cheese Frosting Ingredients

  • 1 c unsalted butter
  • 3 c powder sugar
  • 1 tsp vanilla
  • 3 tbsp heavy whipping cream
  • 1/2 cup Golden Oreo cookies

Instructions
 

Cupcake Directions

  • Preheat oven to 350 degrees.
  • Set up your cupcake pan with liners
  • Using a medium bowl, whisk flour, baking powder, and salt.
  • In a separate large mixing bowl, beat butter with an electric mixer on medium to high for 30 seconds.
  • Using a sealable bag place your cookies in it and smash with a rolling pin or your hands
  • Now add sugar, and vanilla to the butter and beat until combined.
  • Add eggs one at a time, beating well after each addition.
  • Alternate, the flour mixture and milk to butter mixture, beating on low speed until everything is well mixed together
  • Add in your Golden Oreo crumbled cookies and fold in
  • Fill the cupcake pan liners 2/3 with cake batter
  • Bake for 18-20 minutes.
  • Remove cupcakes from pan and allow to cool on a wire rack for 30 minutes before frosting.

Frosting Directions

  • In large mixing bowl, beat butter, vanilla and cream cheese on high speed until fluffy.
  • Add 3 cups of sugar, one at a time.
  • Add in heavy cream if frosting is looking like sugar pebbles.
  • Scrape the sides to get all of the sugar.
  • Mix until your frosting is stiff and won't fall off the whisk.
  • Take a butter knife and carve out a small portion of the cupcake.
  • Fill in with frosting.
  • Using a star tip, pipe on the frosting onto the top of the cupcake and place a Oreo on top.

Nutrition

Calories: 609kcalCarbohydrates: 86gProtein: 5gFat: 28gSaturated Fat: 16gPolyunsaturated Fat: 2gMonounsaturated Fat: 8gTrans Fat: 1gCholesterol: 94mgSodium: 246mgPotassium: 81mgFiber: 1gSugar: 63gVitamin A: 829IUVitamin C: 0.02mgCalcium: 88mgIron: 1mg
Keyword cupcakes recipe, Golden Oreo cupcakes, Oreo cupcakes
Tried this recipe?Let us know how it was!

5 Fun Ways for Kids to Hop into Spring with Funrise Toys – Review

86

March is here! That means that spring is just around the corner. With warmer weather on its way, kids can’t wait to see more sun and to watch the world come back to life. Funrise Toys wants kids to hop into spring this year in a fun way by asking us to test a bevy of their toys. Here are the fun toys Funrise Toys sent us to play with to welcome spring:

Funrise Toys Review!

  • Gazillion Bubbles Giant Bubble Power Wand
  • Gazillion Bubbles Giant Bubble Mill
  • Gazillion Bubbles Giant Bubble 2L Solution
  • Tonka Tinys Car Crush Escape Playset
  • Tonka Tinys Car Dash & Blast Quarry
5 Fun Ways for Kids to Hop into Spring with Funrise Toys
Funrise Toys: L- Giant Gazillion Bubbles products; R-Tonka Tinys products

Kids young and old love playing with bubbles! Gazillion Bubbles Giant Bubble products are a fabulous way to usher in the warm weather and for whimsical play.

5 Fun Ways for Kids to Hop into Spring with Funrise Toys
Funrise Giant Gazillion Bubbles products

Easy playtime fun is at hand with the Gazillion Bubbles Giant Bubble Power Wand. With the push of a button and specially formulated bubble solution, this special wand creates large bubbles to catch or watch as it floats away.

5 Fun Ways for Kids to Hop into Spring with Funrise Toys
Giant Gazillion Giant Bubble Mill toy and 8 ml refill

My son did not want to put this wand down! He was fascinated with how the bubbles were blown by the fan in the wand. He also could not stop smiling at the size of the bubbles he was producing. He wished is was warmer outside so he could play all day with this toy.

5 Fun Ways for Kids to Hop into Spring with Funrise Toys
Top Left – Boy playing with Giant Gazillion Giant Bubble Wand into bubble solution; Top Right – Boy walking with Giant Gazillion Giant Bubble Wand; Bottom – Boy and girl playing wth Giant Gazillion Giant Bubble Wand

Want to create a myriad of bubbles?  Gazillion Bubbles Giant Bubble Mill is perfect to create a magical scene.  Once the solution is added to this machine’s reservoir, push the button to produce giant bubbles to fill the air with magical fun!

5 Fun Ways for Kids to Hop into Spring with Funrise Toys
Giant Gazillion Bubble Mill product

Both of my kids were filled with laughter and delight after watching the bubbles float away from this bubble mill. Since it was cold outside, the bubble seemed a bit thicker so it was fun to watch them form for a bit longer on the mill then float away. It was also cool to see gigantic bubbles coming out of the mill.

5 Fun Ways for Kids to Hop into Spring with Funrise Toys
Right – Giant Gazillion Giant Bubble Mill toy; Top Right-Boy pointing to bubbles in the sky; Bottom Right-Giel sitting with Giant Gazillion Giant Bubble Mill

Have you run out of solution to keep the bubbles blowing? The Gazillion Bubbles Giant Bubble 2L Solution will help to ensure there will be bubble fun for many play times to come! This unique solution was formulated in a lab to produce bigger, more elastic bubbles. It also comes with a specially designed wand for more bubble blowing fun. What is great about this solution is that it is eco-friendly, safe, non-toxic and will not stain clothing or furniture.

5 Fun Ways for Kids to Hop into Spring with Funrise Toys
Gazillion Bubbles Super-Sized Bubble Solution

Blowing her own bubbles was a fun pastime for my daughter with the manual wand. Though the bubbles were not as big as with the other bubble makers, she was able to create a bubble wonderland in our living room after a few blows. I also loved that the formula for these bubbles allowed for them to be sturdy and stay around longer than other bubble solutions we have used in the past.  

5 Fun Ways for Kids to Hop into Spring with Funrise Toys
Right – Girl blowing bubbles; Left – Bubbles on wood floor

Smashing. Crashing. Flipping and sliding. Tonka allows for kids to be able to do all four of these things with their Tinys playsets. Each playset takes kids to a place where they can drive in and have mini adventures with all of the equipment on site. Both of these sets also help to bring the fun of outdoor play indoors. What is great about both sets is that each playset took a few minutes to assemble and are easy to move around when the weather warms up.

5 Fun Ways for Kids to Hop into Spring with Funrise Toys
Tonka Tinys playsets displayed

My kids were intrigued with the Tonka Tinys Car Crush Escape Playset. They learned how and why cars are crushed, and how much fun it can be to do it!

5 Fun Ways for Kids to Hop into Spring with Funrise Toys
Tonka Tinys Tonka Tinys Car Crush Escape and Dash Playset

They enjoyed putting the car into the crane, bringing it over to the car crusher and pulling the lever to “crush” the truck. My daughter also loved being able to flip some of the recycled items into the bins with the flipper. I have to admit I had a lot fun flicking the items into the bins, too!

5 Fun Ways for Kids to Hop into Spring with Funrise Toys
Top – Child flipping “recycled material” into bins; Bottom Left – Child opening crane clamp; Bottom Right – Child using lever to “crush” a truck.

Exploring the different levels of the Tonka Tinys Car Dash & Blast Quarry had my kids giggling and having fun. The gate allows young builders to travel up elevators, slide down a steep road slide and have the potential to be blown sky high with the push of the detonator.

5 Fun Ways for Kids to Hop into Spring with Funrise Toys
Tonka Tinys Blast Quarry Playset

Each of my kids had fun bringing the truck up the elevator. The truck really zoomed down the road slide to the bottom of the playset. When the truck had to pass over the bridge to the road slide, they could not contain their laughter as they hit the detonator to see the boulder blast through the roadway, sending the truck flying. It was a delight to do even without the truck in this area.

5 Fun Ways for Kids to Hop into Spring with Funrise Toys
Top Left – Child putting truck at the top of a road slide; Top Right – Child pushing truck across ramp; Bottom Left – Child pushing truck up a road ramp; Bottom Left – Child lifting truck in an elevator

My kids are now ready to hop into spring with the help from Funrise Toys! They brought a sense of whimsy and imagination to playtime. I really liked how easy they were to move around and put away once playtime was over. My kids enjoyed discovering what they could do with these toys. The simplicity of putting these toys together or setting up these items is an added bonus when the kids want to get down to having fun. These toys are great ways to welcome spring this year!

Want to see more ways for kids to hop into spring with Funrise Toys? You can visit them on their website, and connect with them on their Facebook, Twitter, Instagram and YouTube pages!

Disclaimer: My family received products from Funrise Toys in order to conduct and write a review. The views I shared are my own.

Save