This colourful DNA Book will give your kids a perfect introduction into the world of DNA. Where is DNA in my body? What does DNA do? Can I see DNA? The section about ‘Passing on your genes’ peaked my children’s interest learning how parents pass on their genes, with examples of adorable puppies, no less.
Inside DK Canada book
DK Canada 1000 Inventions and Discoveries Book
Cover of “1000 Inventions and Discoveries”
This interesting 1000 Inventions and Discoveries book goes over inventions year by year beginning from stone tools in c.3,000,000 BCE to a human-carrying drone in 2016 and more leading all the way into 2020. Although, this one was for the kids interests, and Jax chose this book, it certainly kept my husband and I engaged. I personally learned that the first skyscraper was built in Chicago in 1885, amongst many other fascinating things I discovered! I think this will be a great learning tool for my kids, especially when they are a bit older!
Inside DK Canada Book
DK CanadaHuman Body Book– Your amazing body as you’ve never seen it before
Cover of DK Canada Book “Human Body”
This amazing Human Body encyclopedia teaches your little ones all about the human body from head to toe an inside and out with vivid colourful 3D artwork. I see some major science projects ahead in school using these books! Jax wanted to learn all about eyeballs and was so fascinated about eye muscles and how vision works.
This Shrimp Cobb Salad is a healthy and flavourful dish that is loaded with shrimp, veggies, and topped with a delicious, lemon-based dressing. It is a must-try summer salad that will be loved by everyone!
Shrimp Cobb Salad Recipe
The beauty of this recipe is that it is very versatile and adjustable. You can play with the ingredients to fit for any taste and occasion. Also, if you are looking for more delicious summer dishes, try this amazing classic potato salad, or arugula salad.
Cobb salads are quite popular and festive looking meals that are full of proteins and vitamins. This version of it is personally my favourite one. The combination of shrimp and veggies, along with bacon and dressing, is just to die for. A true Cobb salad isn’t complete without bacon! I am a huge bacon-lover, and added extra bacon to it!
Also, this shrimp Cobb salad recipe is full of protein and very easy to prepare. The shrimp takes only 5 minutes to cook, which makes this a truly unforgettable salad. You can assemble it any way you desire. Not only does this Cobb salad with shrimp scream summer, but it is also super colourful and delicious!
What do you need to make the Shrimp Cobb Salad?
You will need the following ingredients:
Shrimp
1 lb of cooked and peeled shrimp (you can also use raw shrimp, but you will have to add a few extra minutes to cook it)
1 tablespoon olive oil
2 tablespoons lemon juice
1 teaspoon garlic powder
Salt and pepper to taste
Salad
3 slices of cooked bacon (crumbled)
2-3 eggs (hard-boiled)
5 cups Romaine lettuce leaves (washed and dried)
1 cup cherry tomatoes (halved)
1 cup sweet corn
6 oz. blue cheese (crumbled)
1 avocado (sliced)
1 cup croutons
Recipe for cobb salad dressing
1/2 cup mayonnaise or sour cream
1/4 cup shredded Parmesan
2 tablespoons olive oil
1 clove garlic (minced)
2 tablespoons lemon juice
Salt and pepper (to taste)
How to make a cobb salad
Start by cooking the shrimp. I like to use a non-stick grill pan for this. However, you can easily fry it as well. Just mix the shrimp with olive oil, lemon juice, garlic, salt, and pepper.
Then, cook it quickly on the grill or skillet for about 4-5 minutes.
Make the Cobb salad dressing by adding all the ingredients together. You can use a blender or a fork to combine them, until the desired consistency.
Lastly, assemble the shrimp Cobb salad. In a large bowl. Add lettuce, tomatoes, cheese, and half of the croutons. Then, toss to combine. Top with shrimp, bacon, avocado, corn, and eggs. Garnish with the freshly made dressing on top. Add the remaining croutons.
Serve fresh.
Cobb Salad Recipe tips:
You can make this salad with other proteins. For example, feel free to swap the shrimp with chicken or turkey breast.
For a vegetarian version, skip the shrimp all together.
Also, you can use other vegetables on hand. You can add beans, bell peppers, shallots, mixed greens, cucumber, etc.
Storage
To store it, use an airtight container, and refrigerate for up to 2 days.
I hope you enjoyed my Shrimp Cobb Salad Recipe as much as I did! If you make it, please share your photos with us on Facebook or Twitter! Also, check out all of our other recipes!
Shrimp Cobb Salad
This Shrimp Cobb Salad is a healthy and flavourful dish that is loaded with shrimp, veggies, and topped with a delicious, lemon-based dressing. It is a must-try summer salad, that will be loved by everyone!
1lbof cooked and peeled shrimpyou can also use raw shrimp, but you will have to add a few extra minutes to cook it
1tablespoonolive oil
2tablespoonslemon juice
1teaspoongarlic powder
Salt and pepper to taste
Salad
3slicesof cooked baconcrumbled
2eggshard-boiled
5cupsRomaine lettuce leaveswashed and dried
1cupcherry tomatoeshalved
1cupsweet corn
1avocadosliced
6oz.blue cheesecrumbled
1cupcroutons
Dressing
1/2cupmayonnaise or sour cream
1/4cupshredded Parmesan
2tablespoonsolive oil
1clovegarlicminced
2tablespoonslemon juice
Salt and pepperto taste
Instructions
Start by cooking the shrimp. I like to use a non-stick grill pan for this. However, you can easily fry it as well. Just mix the shrimp with olive oil, lemon juice, garlic, salt, and pepper.
Then, cook it quickly on the grill or skillet for about 4-5 minutes.
Make the dressing by adding all the dressing ingredients together. You can use a blender or a fork to combine them, until the desired consistency.
Lastly, assemble the salad. In a large bowl. Add lettuce, tomatoes, cheese, and half of the croutons. Then, toss to combine. Top with shrimp, bacon, avocado, corn, and eggs. Garnish with the freshly made dressing on top. Add the remaining croutons.
Serve fresh.
Notes
RECIPE TIPS: You can make this salad with other proteins. For example, feel free to swap the shrimp with chicken breast or turkey. For a vegetarian version, skip the shrimp all together. Also, you can use other vegetables on hand. You can add beans, bell peppers, shallots, mixed greens, cucumber, etc.STORAGE: To store it, use an airtight container, and refrigerate for up to 2 days.
When people have a new baby, there is a lot of focus placed on the event and the new child that has arrived. People stop by, send flowers, drop off gifts, and generally get excited to see and hold the new bundle of joy. Of course, when this is not the first child in the house, there may be one or more siblings that can feel a bit left out and jealous. The older siblings aren’t necessarily receiving any gifts, though there are times when visitors are sensitive to older siblings and try to make them feel special by bringing them a little trinket as well. With that in mind, here are a few thoughts on how to help your child overcome jealousy of a new baby.
Getting them involved
One way to help children overcome jealousy of a new baby is to get them involved in the process. Sometimes older siblings can also experience some excitement about having a new baby in the house. The older children may not have the maturity or responsibility to handle particular aspects of caring for a baby, but they can certainly help with small tasks. Or, the parents can at least do their best to make the sibling feel like they are involved, even if the parent is keeping a close eye on what is going on. The goal is not to make the sibling upset by putting them to work, but rather to make them feel like the whole family is involved in the process.
Focused time
Another way to make a child feel a bit less jealous is to spend some focused time with them. Despite the busyness of raising a new baby, parents may need to take the older child on a few outings so that they receive some real attention as well. These outings do not have to be long or complex, but they can give the child something to look forward to on a regular basis. Some parents institute a weekly “date” with their child so there is always time that is scheduled.
Unhappy jealous little girl crying with her family in background.
Working through phases
Overall, some aspects of family life just have to be survived. Parents can work to minimize jealousy, but they still have to meet the needs of all children. A new baby needs constant attention, and parents cannot neglect that infant just to make an older child feel a little bit better about the process. Parents can do their best to spread the love, but being a family is about understanding that everybody needs to be a bit flexible sometimes. A sibling may be a bit jealous of a new baby, but this will also teach them something about living with other people and thinking about others.
How to help a child overcome the jealousy of a new baby is not an easy task. There are family situations that simply have to be endured, but there are times when people should be intentional about helping certain kids work through things and this is one of them.
As August winds down, back to school season starts to take on more and more of its annual dress. Staples commercials abound and the stores at the malls are getting flooded with back to school and autumn fashions. So you just got your kids their allotment of clothes and even got a head start on buying their back to school books and supplies. The question is now: how do you get your children’s minds ready for back to school?
Smart kid in class. Happy child against blackboard. Drawing light bulb. Idea concept
Back to School
Back to school is a big time event in the life of any children. Not only are kids generally excited to see their friends again on a regular basis, but also they can look forward to getting back into a regular routine, which all children, especially teens, so desperately need. Granted, the late nights and easy frivolities of the hot summer will be given up, but the daily structure that elementary and high school classes and activities bring should be welcome solace to both parents and student alike.
Now is a good time for your children to start getting not just their back to school wardrobe and backpacks ready, but their minds too. Too often during the summer grade slide, kids fall into bad habits: too much internet and cell phone, not enough intellectual stimulation. As such, the brains go a bit soft, and the adjustment to school is difficult. Just like any other muscle in the body, the brain needs to be worked out regularly. Playing only video games and talking and chatting via text and Skype do not qualify as sufficient mental exercise.
Good Mind Exercise
There are many ways that your kids can get their minds ready for school, and fun ways at that. Have them do things like the puzzles, board games, or crossword puzzles. Why not buy a brainteaser book and challenge your son or daughter to solve some of the problems? Give them some incentives. For example, give them some kind of reward for each brainteaser they solve. These incentives could be of monetary or other remunerative value. Perhaps you can offer incentives in some other way, perhaps by extending certain privileges.
Some other interesting approaches include joining your teens to Lumosity, which is a website full of brain training exercises. These are both fun and extremely entertaining; moreover, these exercises are scientifically designed to improve both cognitive and mental function. This program will provide your teens with an edge to starting school and even keep them sharp all the year through. Stanford and Harvard researchers collaborated with the founders of this website to create games that stimulate and activate brain cells toward higher mental achievement.
Reading Never Fails
Of course, reading can never fail your child. There are many books that could be recommended for back to school reads and reading does more than just build solid vocabularies. According to Ken Pugh, PhD, a director of a research institute dedicated to the science of language, reading keeps your mind both sharp and nimble. So take that drive down to the local bookstore, or better, plan a day at the library to pick up some really good reads for your children. Insisting that 20 to 30 minutes per day be spent reading is a solid way to develop beneficial habits in your children. Be clear in explaining that the time invested in such an activity will pay dividends over a lifetime. For one, your children will never be subject to being bored as they will always be able to use down time to pick up that latest read.
Following some of the suggestions to get your children’s minds ready for back to school is more than just important in creating wholesome and productive future members of society. Too many kids today get lost in the shuffle of peer pressure and other negative influences. Seeing that your children get good guidance and good preparation for back to school will only insure their eventual success. And part of this is good mind stimulation. Toward this end, the time you invest now as parents will certainly be well worth it, as later on you will less likely have to deal with young adults who find themselves lost in a difficult world because of prior lack of preparation.
Disney fans are going to love this Paper Princess Ariel Paper Doll Craft! It is perfect for an afternoon craft session to pair with the Disney The Little Mermaid movie!
When you need a way to keep the kids busy, and you want to encourage creativity, paper crafts are the way to go. I love them because they require simple supplies that you likely have on hand. They also are usually easy for younger kids, and can be made more challenging for older kids who will enjoy embellishing their creations.
This Princess Ariel paper doll craft is super easy thanks to the included template. With only a few supplies like paper, glue, and markers, this little doll comes together easily. Make a few to share a smile with a friend, or to have a good old fashioned paper doll dramatic play session.
This is a great way to add a little Disney Princess magic to the day and your space. These are so cute, your little crafters will be proud to display them around the house for all to admire! Print a few extra templates off for later, because this will be a craft your kids want to revisit!
I recommend using mint green, purple, and orange paper to make the doll. Chose a colour of paper that you prefer for the skin tone. If your kids are older, they might enjoy adding to the costume you dress Ariel in, so stickers, sequins, and beads can be added, or you can make the doll as I did! If you liked this easy craft, you might want to check out some of my favourite paper crafts here. You can make a friend for Ariel with this Paper Princess Belle doll craft.
Select a paper for the skin tone and also select mint, green, orange and purple coloured craft papers for this craft. Trace the hair pattern on the orange paper, the body base on the paper selected for the skin tone; trace the fin and tale on mint and green coloured paper and the top on purple paper. Cut out the traced patterns nicely.
Step 2
Cut a slit along the traced line inside the hair template.
Step 3
Take the body base cutout and slide the head part through the slit from the bottom side of the hair. Use glue to fix the position of the hair and head once they are placed nicely.
Step 4
Attach the fin pattern on the fin part of the tale pattern.
Step 5
Attach the top pattern on the top side of the body base and the tale pattern below the top, on the body base.
Step 6
Use a green marker pen to trace scalloped patterns on the tale pattern. Use a black maker to draw the eyes, nose, and mouth of the paper Ariel doll.
I hope you enjoyed my Princess Ariel Paper Doll Craftwith Printable Template! If you make it, please share your photos with us on Facebook or Twitter! You can check out all our other crafts!
Princess Ariel Paper Doll Craft
Yield: 1 Ariel Paper Doll
Prep Time: 5 minutes
Active Time: 20 minutes
Total Time: 25 minutes
Difficulty: Easy
This Princess Ariel paper doll craft is super easy thanks to the included template. With only a few supplies like paper, glue, and markers, this little doll comes together easily.
Select a paper for the skin tone and also select mint, green, orange and purple coloured craft papers for this craft. Trace the hair pattern on the orange paper, the body base on the paper selected for the skin tone; trace the fin and tale on mint and green coloured paper and the top on purple paper. Cut out the traced patterns nicely.
Step 2
Cut a slit along the traced line inside the hair template.
Step 3
Take the body base cutout and slide the head part through the slit from the bottom side of the hair. Use glue to fix the position of the hair and head once they are placed nicely.
Step 4
Attach the fin pattern on the fin part of the tale pattern.
Step 5
Attach the top pattern on the top side of the body base and the tale pattern below the top, on the body base.
Step 6
Use a green marker pen to trace scalloped patterns on the tale pattern. Use a black maker to draw the eyes, nose, and mouth of the paper Ariel doll.
Strawberries are such an amazingly wonderful summer treat. While they taste amazing on their own, you can use them in so many different recipes. Everything from smoothies to pie taste great when made with strawberries. It’s a fruit that you can literally use in every meal throughout the day. If you’re a bit tired of strawberry smoothies for breakfast, why not bake these Strawberry White Chocolate Scones?
Of course, these scones aren’t just good for breakfast or brunch. These would be wonderful served in the afternoon tea party or with a glass of iced tea. You could even serve flavoured teas that would compliment the flavours inside the scones. For example, an orange tea would be fabulous. If you’re having the girls over, why not make these strawberry chocolate scones and a pitcher of iced tea to help you beat the heat?
Strawberry scones with frozen strawberries
If you’re making these strawberry white chocolate chip scones in the fall or during the winter months and don’t have fresh strawberries on hand, frozen strawberries will work. The key to working with frozen berries in desserts like scones is to thaw them and then get off as much of the liquid as you can. Fold the berries in last and you won’t have colour bleed that turns the scones pink.
Scones Flavours
Also, if you don’t like scones with strawberries, use whatever berries you prefer. Blueberries, blackberries, and raspberries would all work wonderfully in this scones recipe. You could even try making more than one batch with different berries in each. You could also do a mixed berry flavour scones.
Can you freeze scones
Yes, you can freeze scones. If you make too many, pop the white chocolate strawberry scones in the freezer before topping them with the glaze. Reheat in the oven and then drizzle on the glaze. You’ll have a quick and tasty dessert in a matter of minutes.
Strawberry White Chocolate Scones Recipe
This simple recipe for scones is easy to make and can be enjoyed throughout the day. Whether you’re looking for a yummy breakfast or a late-night snack, you’ll truly enjoy the flavour of these strawberry scones.
Ingredients
3 ½ cups all purpose flour
¾ cup granulated sugar
2 tbsp baking powder
½ tsp salt
1 cup all-vegetable shortening, cold, cut into small pieces
2 eggs
1 cup fat free, 2% or regular evaporated milk
1 ½ cups white chocolate chips
2 cups chopped fresh strawberries
Glaze
2 cups icing sugar
5 tbsp fat free, 2% or regular evaporated milk
½ tsp vanilla extract
How to make strawberry scones
Preheat oven to 425°F. Line 2 baking sheets with parchment papers.
1. In a large bowl add flour, sugar, baking powder, and salt and mix. Cut in vegetable shortening with fingers or pastry blender until mixture resembles coarse crumbs.
2. In a medium bowl add milk and eggs and whip. Add to flour mixture and combine, after, add white chocolate chips and combine. Add fresh strawberries and combine. Be careful not to over mix the strawberries.
3. Place the scone dough on a lightly floured surface. Shape the dough into a square that is 1” inch thick and cut into 16 pieces.
4. Place the strawberry scones on prepared baking sheets. Bake for 18 to 22 minutes until lightly golden.
Glaze for the scones
Add icing sugar, milk and vanilla in a bowl and stir.
Drizzle glaze over strawberry scones when they come out of the oven. If you would like more glaze, drizzle again 10-15 minutes later.
I hope you enjoyed my Strawberry White Chocolate Scones as much as I did! If you make it, please share your photos with us on Facebook or Twitter! Also, check out all of our other recipes!
STRAWBERRY WHITE CHOCOLATE SCONES RECIPE
Lyne Proulx
These Strawberry White Chocolate Scones are easy to make and can be eaten during a yummy breakfast, afternoon tea, or as a late-night snack!
1cupall-vegetable shorteningcold, cut into small pieces
2eggs
1cupfat free2% or regular evaporated milk
1 ½cupswhite chocolate chips
2cupschopped fresh strawberries
Glaze
2cupsicing sugar
5tbspfat free2% or regular evaporated milk
½tspvanilla extract
Instructions
Preheat oven to 425°F. Line 2 baking sheets with parchment papers.
Scones
In a large bowl add flour, sugar, baking powder, and salt and mix. Cut in vegetable shortening with fingers or pastry blender until mixture resembles coarse crumbs.
In a medium bowl add milk and eggs and whip. Add to flour mixture and combine, after, add white chocolate chips and combine. Add fresh strawberries and combine. Be careful not to over mix the strawberries.
Place the scone dough on a lightly floured surface. Shape the dough into a square that is 1” inch thick and cut into 16 pieces.
Place scones on prepared baking sheets. Bake for 18 to 22 minutes until lightly golden.
Glaze
Add icing sugar, milk and vanilla in a bowl and stir.
Drizzle glaze over scones when they come out of the oven. If you would like more glaze, drizzle again 10-15 minutes later
It’s no secret that kids love playing with their food. Why not host a fun and messy family dinner? The giggles won’t stop when mom or dad prepares a meal that kids and parents eat straight off the table with their hands. No plates or silverware are allowed! Show kids that mom and dad can let their hair down and relax the rules of the house once in a while, all in the name of fun by throwing a messy family dinner party.
This dinner is guaranteed to be the talk of the town! Kids won’t soon forget this silly dinner and will treasure this wacky evening with mom and dad and brothers and sisters! Having fun and messy family dinner is a great way to bond with the kids and teach youngsters that there is always room for fun in life.
Planning the Menu
A no silverware, no plates dinner isn’t the time to play it “safe.” Finger foods are an absolute no, no! Eating foods that the family would normally eat with silverware is what makes this dinner fun.
Main dish: Spaghetti with meatballs or ribs with mashed potatoes
Dessert ideas: Ice cream in a bowl, powdered donuts, or chocolate cake (not cut into slices – dig in)
Other great foods for a fun and messy family dinner include casseroles, rice, stuffing, spinach, pudding, and pie.
The messier the cuisine, the better!
Preparing the Dinner Table
To minimize the mess and prevent damage to furniture or flooring, line the family dinner table with a thick paper or plastic tablecloth. If younger children are present, it may be wise to cover the chairs and floor underneath the table with plastic or just simply host this silly dinner outside using the patio furniture. To make dinner time even more fun, provide crayons and markers, and let family members doodle on the tablecloth while they wait for the food to be served.
Serving the Messy Meal
Serve the food in courses: appetizers, salad, main dish and sides, and dessert. All of the food should be placed directly on the table in front of each person. It is consumed using only the hands, not utensils, of course. Clean up is a mother’s dream. Just wrap all the mess up in the paper tablecloth and throw it out.
Of course, cleaning up the kids may take a bit more effort. It might be best to draw an after-dinner bath or, if it’s a hot day, hose the family down!
Capture Fun Moments During The Messy Family Dinner
Taking some pictures or video of this fun and messy family dinner is a must. Family members will get a kick out of reliving the memories. In fact, this family activity will probably be so popular that it might be fun to host a messy family dinner once a month or on special occasions like birthdays. Why not make the next family dinner even more of a treat by including extended family members and friends?
Poor little blueberries, sitting on that super market shelf longing to be picked up and put into your shopping cart. I think that saying; “Dynamite comes in small packages” was written with blueberries in mind. There have been numerous studies based on the health benefits of eating blueberries. The findings are astounding; just imagine how much good you could do for your body by just eating a handful of blueberries everyday!
Instead of grabbing for that desert packed with sugar and other processed goodies, try eating some blueberries and other fresh fruits. Natural sugar is always the best way to go.
The benefits of blueberries have been an important topic to researchers for years. In the June 2004 issue of the Journal of Agriculture and food Chemistry, researchers used a technique called oxygen radical absorbance capacity (ORAC) to test the antioxidant power of more that 100 fruits, vegetables, and spices. Blueberries were proved to be the fruit with the highest antioxidant power. Scientist give all the credit to the anthocyanin the blueberry contains, this phytonutrient is responsible for the colour of the blueberry. That is why it is always such a great idea to eat fruits and vegetables rich in colour, these hold the most nutrients.
The healthful possibilities are endless when it comes to blueberries and other fruits and vegetables. They have a tremendous impact on encouraging and maintaining your nutritional health.
Blueberries, especially organic ones, help the body in ways such as:
Guarding against Alzheimer’s and other neurological diseases
Combating aging and reversing short term memory loss
Relieving arthritis inflammation
Fighting infection and bolstering the immune system
Promoting urinary tract health
Optimizing vision health and reversing the causes of macular degeneration and blindness
Improving motor skills
A fun way to spice up a turkey burger is to add some blueberries in the mix. The fruit makes the burgers more nutritious by adding antioxidants and decreasing the fat content, not to mention blueberries make for a juicer burger. According to the Washington post researchers are planning on taste testing these fruit burgers in hopes of this being an option for school lunch programs.
If you are not use to a healthy lifestyle, things must be done in small steps. Placing a bowl of fresh blueberries on a coffee table for you and your children to eat as a snack is such a wonderful start. When you begin to make healthy choices you are preventing aliments in the body and teaching children by example. You can also make delicious recipes with blueberries! These studies based on the health benefits of eating of blueberries certainly prove that blueberries should be party of your weekly meal planning. So, eat those blueberries!
Without the ability to read, how would you know to stop at a danger sign? How would you know what to order from a restaurant menu, or be able to understand the work contract you have to sign? The truth is, people are using literacy skills all the time. But what if your son or daughter refuses to read? They could be missing out on developing key skills, opening up their imagination, learning about the world, and being inspired to explore. Here are some tips to help your children to read!
Family reading a story on a sofa in the living room
1. Why Don’t Your Children Read?
Ask them why they don’t want to read. Is it because they find it boring, or is there a deeper issue? Is it because they can’t read very well, and don’t understand or feel confident? Do their friends think reading is un-cool, and think they will get teased?
Finding out the reasons will help you to find ways of making their reading more enjoyable. If they are struggling, you can help them improve. If they simply haven’t found a story they like yet, you can help them explore different genres – there are many wonderful books for children to choose from, such as comedy or action.
2. Find Books Recommended by Children and Parents
If your children are trend-conscious, make books cool! Find out what their sport, music, and celebrity heroes read. Look for books that have a novelty factor, such as those with furry covers, sparkles, accessories, or pop-up functions. Find quality books about their favourite footballer, film character, or TV show. Be aware of current popular titles, and find out what other children and parents recommend.
3. Make Reading Fun!
Turn reading into an adventure. Create a reward-based “quest” where your children have to read a certain number of books. They could win a treat each time they complete one. Create a fun quiz to test whether they have understood the story. Or, if you are a keen reader yourself, make up a treasure trail, where your children find clues from the books they read, in order to lead them to their prize!
If all this is a bit too much work, there are plenty of schemes you can join in with, for example most libraries run reading schemes during the summer holidays where children can win goodies for reading a certain number of books.
4. Help Kids Relate to Books
Do your children love certain movies or television shows? There are plenty of books and publications out there to prompt their interest, from tie-in novels, to new stories, companion guides, or behind-the-scenes.
5. Help Children with their Hobbies
What hobbies do they have? What captures their imagination? Many children, particularly boys, can be hard to motivate when it comes to reading fiction, but they might read book after book on football or space. Go with the flow. It doesn’t have to be a work of exceptional literature just so long as they are reading! Take them to places relating to their interests too, and encourage them even further.
Finally, the important thing to inspire your children to read is to be enthusiastic about reading. If you are seen to enjoy it, whether that means reading a novel or looking through a reference book that interests you, the feeling might just rub off onto your offspring!
There are a multitude of things to do in Montreal that are absolutely free. Check out these 5 free things to do in Montreal with the family!
Free Things To Do In Montreal
Are you travelling to Montreal on a budget? Pay for the hotel and restaurants in Montreal, but experience many of the best attractions of this great city for free. Montreal is a beautiful Canadian city with European flair, but that doesn’t mean visiting has to be hard on one’s wallet.
1.Jean Talon Market
The largest of four Montreal Markets, Jean Talon has a local feel to it. The market is a feast for the senses with it’s many booths of produce, cheeses, oils, meats, and specialty items. The best Gelato can be found at Havre-Aux-Glaces. Pick up lunch at the market for picnicking later in the day on the Mountain or at the Old Port.
2.Old Port of Montreal
Historic Old Port of Montreal is a place for photos and wandering. Enjoy a self guided walking tour. The cobble stoned St Paul Street is home to many great restaurants and art galleries showcasing Canadian art. St. Pal takes you to Place Jacques Cartier, an area often filled with Buskers and artisans selling their wares. Green space along the water has benches for enjoying a picnic and people watching.
3. Parc Du Mont Royal
The gem of many great parks in Montreal, Parc Mont Du Royal is 101 hectares of wilderness that sits on Mont Royal. The park offers great views of the city and a place to relax, picnic or read. There are many cleared trails for hiking, biking, or cross country skiing. Enjoy watching the ducks or the sunset near Beaver Lake. On Sundays (except winter), pull up a piece of grass and enjoy an impromptu free spirited drumming jam session. The free music of Tam Tam is found at the base of the mountain near Parc Ave.
4. Angrignon Park
Angrignon Park sits on a 97-hectare of land in the west end of Montreal. You can access the Angrignon park via the Subway (Metro) or by car. It is known for its tranquil green space with a long pond in the middle. The park has six miles of walking trails and seven miles of cross-country skiing trails. It also has large community gardens with more than a hundred plots. Don’t forget to bring your picnic and eat on tables along des Trinitaires street.
5. Explore The Underground City
Safe from the outdoor elements, the Montreal Underground City links thousands of boutiques, hotels, restaurants, universities, and franchise stores. It is a network of 30 km of underground tunnels that are accessible via Peel, McGill, and Bonaventure Metro stations.
Visiting the cosmopolitan city of Montreal doesn’t have to be expensive. No matter what the weather, there are lots of free attractions to enjoy in Quebec’s Montreal. Come see the history, parks, and markets of the city.
If you are looking for a way to add a touch of colour to your space this summer without spending any money, or needing any major supplies, you are going to love this Colourful Paper Flower Wreath Craft! It is adorable and works well on any interior door to add a floral element that everyone will love!
Basic Supplies Paper Crafts
Paper crafts are awesome because they require such basic supplies, that almost anyone will have them on hand. I love to offer a paper craft on rainy or incredibly hot days, or anytime the kids feel restless. Creative work is good for the spirit and the mind, and gives them something to be proud of when they have finished the project.
Paper Crafts For Kids Of All Ages
This Colourful Paper Flower Wreath craft is great for kids of all ages. Even teens will enjoy making this. While I used a variety of colours in my wreath, you can customize the colours of this project to suit your mood or home! Personalize it for someone special, like a mom or grandma, or make one for every room in the house to offer a summer garden vibe. No matter what colours are used, or where they are displayed, the kids will love showing them off!
This craft is great for making with a group of kids, or as a special afternoon project for one. With the included template, this wreath comes together with ease. Younger kids might need a little help to line everything up correctly.
Print a few templates to share with crafty friends, or pin this idea for later. The result of this colourful paper flower wreath is so pretty I am sure you will want to make this again in the future!
Select different coloured craft papers, would be great if you can gather 2 shades of each colour for the flower craft. Grab 2 shades of any coloured craft paper and trace the big flower pattern on one paper and the small flower pattern on the other paper. Trace the small circle on yellow paper and the leaf patterns on green paper. Cut out the traced patterns nicely.
Step 2:
Stick the small flower pattern in the centre of the big flower pattern. Stick the small circle in the centre of the small flower pattern.
Step 3:
Grab as many coloured craft papers as you wish and prepare enough paper flowers to fill the whole wreath base. You can use our wreath base template or you can prepare a customized base.
Step 4:
Determine a size for the wreath and cut out the base from cardstock paper.
Step 5:
Start to attach the paper flowers on the wreath base. Keeping the flowers close to each other but also keeping enough space to attach the paper leaves on the base.
Step 6:
Once you are done sticking the flowers and filling the wreath base, you can stick the leaves in between the flowers to give it a nicer look!
Select different coloured craft papers, would be great if you can gather 2 shades of each colour for the flower craft. Grab 2 shades of any coloured craft paper and trace the big flower pattern on one paper and the small flower pattern on the other paper. Trace the small circle on yellow paper and the leaf patterns on green paper. Cut out the traced patterns nicely.
STEP 2:
Stick the small flower pattern in the centre of the big flower pattern. Stick the small circle in the centre of the small flower pattern.
STEP 3:
Grab as many coloured craft papers as you wish and prepare enough paper flowers to fill the whole wreath base. You can use our wreath base template or you can prepare a customized base.
STEP 4:
Determine a size for the wreath and cut out the base from cardstock paper.
STEP 5:
Start to attach the paper flowers on the wreath base. Keeping the flowers close to each other but also keeping enough space to attach the paper leaves on the base.
STEP 6:
Once you are done sticking the flowers and filling the wreath base, you can stick the leaves in between the flowers to give it a nicer look!
Habits, whether good or bad, start early, and that’s exactly why it is extremely important to correct bad habits in children. The habits that children pick up at their tender age influence their personality and life in more ways than one. If you notice your little one engaging in a bad habit, don’t ignore it. Instead, check out these 5 ways to help correct those bad habits in children.
Woman holding a boy.
5 Ways to Help Correct Bad Habits in Children
1. Praise & Reward
Praising and rewarding your kid when he engages in a good habits and consciously avoids engaging in a bad habit can work wonders. It is more of a positive feedback mechanism that always does the trick, and can also strengthen the bond between you both. Letting your kid know that his good behaviour is appreciated will encourage him to be on his best behaviour at all times, and gradually, it will become a part of his personality.
2. Educate
Possibly the only way your kid can actually avoid engaging in bad habits and engage in more good habits on his own is when you educate him about the difference between them both. Make it a point to sit down with him and talk about how his behaviour influences those around him, and how he can too, come across as a beautiful person thanks to his good habits.
3.Take Things One at a Time
Don’t overwhelm your kid by pointing out several of his mistakes or bad habits together. Instead, take things one at a time and work your way up from there. Do not rush and do not lose your temper. One of the golden rules of effective parenting is to never lose your calm and be incredibly patient with your little one.
Girl screaming
4.Identify the Cause
Kids often practise unwanted behavioural patterns due to certain triggers. They may have picked up something from a particular friend or if they’re stressed about something. Talk to your kid and try to identify the root cause of his bad habit. Once you’ve identified the cause, you can try to find a way around it and help your kid engage himself in alternative, more positive outlets.
5 Ways to Correct Bad Habits in Children
5.Set the Rules
Setting the rules is an absolute must, but the key to doing it right is to do it in a firm yet gentle way. Let your kid know the consequences of his inappropriate behaviour and bad habit, and let him know the reason why. Encourage and motivate him to be at his best, and highlight his strong points often when you’re setting the rules to do the trick!
There is no need to panic about losing the youthful bloom if the skin is taken care of. Mature skin is something all have to face one day. Aging is a normal part of life, and with appropriate skin care, mature skin can still look wonderful and fantastic. You will find below tips on on how to use essential oils for dehydrated and aging skin.
Effective Anti Aging Skin Treatment
The skin changes according to age. Other factors that influence the skin are diet, exercise, lifestyle, and environment. One way to ward off aging and slow down the appearances of wrinkles is by doing facial exercises. Thus, adopting a holistic approach to skin care will yield admirable benefits and help maintain a youthful looking skin for longer.
How do Essential Oils Ward off Aging and Proffer a Younger Looking Skin?
With age, the functions of the body slow down. Cells are not replaced and regenerated as quickly, and a supple skin gives way to sagging and drooping. Mature skin is characterized by fine lines, wrinkles, crow’s feet, jowls, blemishes, and age spots.
Essential oils like lavender, rosemary, and batana oil have been used for beauty for centuries. They stimulate and encourage regeneration of healthy new cells. They reinstate vitality and control capillary activity. In modern skin care, essential oils for skin care highly valued for replenishing moisture, restoring vitality, and improving overall appearance.
Good and regular skin care using aromatherapy slows down the signs of aging appreciably. Essential oils tone sagging muscles and restore the tone of the skin. They hydrate the skin and regenerate cells rapidly.
Lavender Essential Oil Rejuvenates the Skin: A Remarkable Anti Aging Skin Product
Lavender is a wonderful skin care oil and ought to be a part of the daily skin cleansing and toning regimen. It aids in lymphatic drainage and balances sebum production effectively. It keeps the skin looking flawless, blemish free and absolutely radiant.
Frankincense is an invaluable oil for skin care. It
decelerates the process of aging and delays the onset of its undesirable signs.
It is particularly recommended for dry, sensitive and mature skins.
Frankincense should be included in one’s skin care program after one passes the
age of 25 years.
Essential Oil Recipe: An Effective Essential Oil Blend for Daily Use to Keep the Skin Looking Younger
This essential oil blend will help maintain healthy and young looking skin.
Ingredients
Frankincense 2 drops
Geranium 3 drops
Lavender 3 drops
Patchouli 2 drops
Jojoba oil 20 ml
Instructions
Mix all the drops to the jojoba oil in a glass bottle or a roller and massage into your skin.
Regular aromatherapy facial massages with selected essential oils help sustain normal, healthy, and young-looking skin. Also, hydrating face masks using aloe vera gel or seaweed extracts with specific essential oils produce remarkable benefits. As you can see essential oils can be very helpful and beneficial for dehydrated and aging skin.
Do you used essential oils for your skin care routine? Comment below.
This Dalgona Inspired Pina Colada Milk is the perfect treat for summer. Inspired by the Dalgona coffee craze, this version takes your taste buds on a tropical trip. It is the ultimate indulgence on a hot day!
While vacations may be on hold until the pandemic is over, that doesn’t mean you can’t experience a totally tropical vibe at home. These Dalgona Inspired Pina Colada Milks are my new summer obsession. I have a feeling you will love them as much as I do!
The drinks look super fancy and rival any mixed drink you might have at your favorite bar or coffee shop, but they are perfect for sharing with the whole family, as no alcohol is used in the recipe. Serve Dalgona Inspired Pina Colada Milk in place of dessert on a scorching day, or make a batch before guests arrive. They will be properly wowed! It is always a good time for a pina colada milk!
You can use fresh or canned pineapple, whatever you have on hand will work fine. Use whatever milk you prefer from whole to skim. There is no need to go buy something special for this recipe, unless you hope to make preparation easier. This recipe does take a few moments of time, I highly recommend using an electric mixer or frother to save a few minutes. If you are using a whisk, be prepared to whip the cream for at least 7 minutes, but don’t be surprised if it takes a few extra minutes to manually get hard peaks. It is a part of the process! It is well worth the effort in my opinion for such a tropical indulgence!
Dalgona Inspired Pina Colada Milk Recipe
This delicious drink is the perfect summer treat for kids and adults alike. The taste of pineapple and coconut will take your taste buds to the beach.
Equipment
Whisk, electric mixer, or frother.
Blender or food processor
Bowl
Cup
Ingredients
¼ cup of chopped pineapple
½ tablespoon of water
1 cup of whipping cream
2 teaspoons of sugar
1 cup of milk
Shredded coconut for garnish
Instructions
In a heavy saucepan place chopped pineapple and water and simmer until soft, about 10 minutes. Blend in a blender or food processor until smooth and set aside to let cool.
Whip whipping cream until soft peaks form, and the add the sugar. Continue to beat until hard peaks form, this takes approximately 7 minutes in total. If using a whisk by hand this may take longer..
Gently fold in the cooled pineapple mixture to the whipping cream. Do not over mix.
Fill a glass with milk to about 2/3 full. Gently spoon on the whipping cream mixture, sprinkle with some shredded coconut and enjoy.
I hope you enjoyed my Dalgona Inspired Pina Colada Milk as much as I did! If you make it, please share your photos with us on Facebook or Twitter! Also, check out all of our other recipes!
Dalgona Inspired Pina Colada Milk
This delicious drink is the perfect summertreat for kids and adults alike. The taste of pineapple and coconut will takeyour taste buds to the beach.
In a heavy saucepan place chopped pineapple and water and simmer until soft, about 10 minutes. Blend in a blender or food processor until smooth and set aside to let cool.
Whip whipping cream until soft peaks form, and the add the sugar. Continue to beat until hard peaks form, this takes approximately 7 minutes in total. If using a whisk by hand this may take longer..
Gently fold in the cooled pineapple mixture to the whipping cream. Do not over mix.
Fill a glass with milk to about 2/3 full. Gently spoon on the whipping cream mixture, sprinkle with some shredded coconut and enjoy.
My little boys LOVE trains and train sets! I mean, doesn’t every child? I don’t know what it is about them! Even when we visit the Canadian Museum of Science and Technology in Ottawa, every single time we end up spending so much time at the train table they have set up in the Train section. When we were asked to review some Thomas And Friends toys, we couldn’t say no!
Loving the new Thomas Track!
The three Thomas & Friends toys we were given to review are:
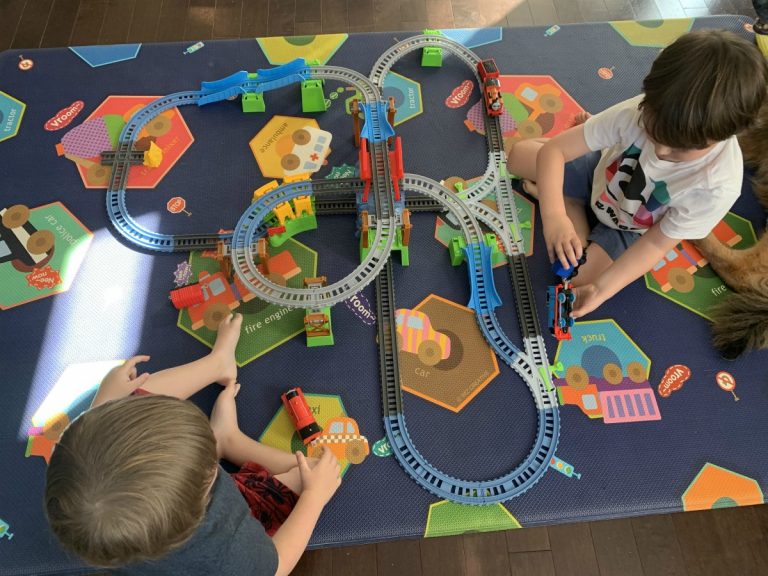
First, we cracked open the Thomas & Friends™ TrackMaster™ Percy 6-in-1 Set. As soon as my little ones saw the packaging there was no way we were going to put this task off. My husband cleared the play mat and made room for this awesome track set and the boys helped click all the pieces together and had a blast helping out. What’s great about this set is that you can create SIX different layouts to keep the kids interested and engaged. Anything that keeps them off the screens is a huge win for me and this has already provided hours of entertainment. What’s more is that it expands! You can buy other TrackMaster™ sets and interchange and expand them!
Fisher-Price® Thomas & Friends™ TrackMaster™ Motorized Engine Assortment
Thomas and his friends
The Thomas & Friends™ TrackMaster™ Percy 6-in-1 Set comes with one motorized Percy train, but we were also given 3 others to add to our set – making this even more entertaining for my boys. These additions to the set feature everyone’s favourite characters from the TV show and make great additions to your little one’s collection. My guys loved having all the trains “chasing each other” and racing! Just don’t forget to have your 2AAA batteries ready, which are needed per train! Good thing Shoppers Drug Mart is a close drive to us!
Thomas & Friends™ MINIS – Mystery Engines
Thomas Minis chugging along
We already had some of the Thomas & Friends™ MINIS, so we were super happy to acquire more to add to our collection. With over 80 to collect, we have a ways to go! Each single blind pack contains one MINIS engine whose identity is a mystery. Kids LOVE mystery surprise packs and they make a great affordable surprise treat when you’re at your local Walmart. My kids fell in love with these little trains that connect to each other when we were at a playdate, and our little friend had his own collection. Since they are so tiny they are easy to transport to take in the car, plane, or, of COURSE, train! And to bring on playdates or grandma’s house with little fuss.
Just counting the seconds until they can open it!
These products are recommended for ages 3 – 6 + and are available at Walmart.
Traveling should always be a fun experience. Your family should have as little worrying as possible, and just enjoy your family vacation to the fullest. Even though your best laid plans may not always materialize, here are some family travel tips for helping you to have a wonderful experience!
Mother with daughter packing suitcases while father with son exploring paper map all preparing for trip in living room
1. Identification Card
Have each child bring an identification card in his pocket at all times. You can also have him bring a card with the name, address and telephone number of the hotel where you are staying. In case you lose sight of him, any person of authority can easily identify him and hopefully call your hotel.
2. Over-the-counter medicine
Bring a fair amount of over-the-counter medicine for most ailments, not too much to arouse the suspicion of the immigration people of course, but enough for a quick fix for headaches, colds, diarrhea, muscle pain, and possibly band-aids. Six tablets of each would suffice; you can always get some more from the local pharmacy.
3. Change of clothes
Bring change of clothes for a maximum of seven days only, even if you’re going on vacation for two weeks. You can do your laundry or just arrange for laundry service before you run out of clean underwear or something to wear for dinner at that fancy restaurant in that exotic city you are exploring. This way, you won’t be bringing too much luggage, and at the same time have more room for your souvenirs.
4. Soiled clothes
You will like this travel tips! If you have to change hotels because you’re going to another city, how do you separate clean clothes from soiled ones if you brought only one suitcase per person (remember the mantra for travelers…travel light!)? The answer is: Ziplocs and garbage bags. That ubiquitous little plastic in the kitchen transforms into a lifesaver for your clean clothes. Bring lots of them in different sizes, big ones for pants and shirts; small ones for underwear, socks, etc.
You can also use one for your toiletries, for make-up; whatever you need to keep separate from the other things in your suitcase. It also keeps your things dry as an added bonus, just in case you get drenched in the rain for some reason.
5. Hydration
Any family vacation involves a lot of walking, and au naturelle, perspiring. Remember what your gym instructor keeps reminding you: hydrate, hydrate, hydrate. So what do you do if you’re stuck somewhere where you can’t get water or a drop to drink? Here’s what you should do: get some of those small sizes of bottled water and chuck them in the freezer in your hotel room the night before.
In the morning, wrap them with a small face towel, put a rubber band to hold it in place and bring it along in the backpack before you leave. It will still be cold when you eventually need it in the hot, humid afternoon. Take the towel, wipe it on your face..and voila! It will be cold too because of the frozen bottle. This is a wonderful way to refresh, especially when traveling in tropical countries.
6. Research your travel location
Know your enemy, and know yourself. If you go to war, you shall win a thousand battles. That is Sun Tzu speaking. Well, in this case, you’re going on vacation, so it will be to your advantage if you do some research of the place where you are going. Find out where the bus and train routes are, maps of the city that you’re planning to visit, interesting places to see and explore, before you leave your own country.
It would be worthwhile to make an itinerary for each day of your vacation, with flexibility for some surprise activities along the way. It is also good to memorize some phrases in the local dialect like, Where is the bus/train station?, How much is this?, and also very important, Where is the clinic/first aid? This last phrase is exceedingly vital. Can you imagine playing charades with a policeman in a strange country and making frantic gestures trying to communicate to him that your companion needs a doctor?
7. Don’t forget to bring a camera
Your vacation is something that you would want to treasure, and you need a good camera for that. Any small digital camera would suffice or your cell phone, but remember to bring two things with that: a good supply of batteries and lots of memory for your camera. Personally I allot 1 gig of memory for each day of my vacation and at least four extra batteries for the camera. If you suddenly find yourself in a downpour, you can keep your camera dry by keeping it in a; you guessed it, Ziploc. You can also purchase a waterproof camera pouch that you can use up to 10 feet underwater (10 dollars on most internet sellers). It’s like a Ziploc, but more sturdy.
8. Lifesaving gear
Remember Sun Tzu? In peace, prepare for war so don’t forget to pack your lifesaving gear; sunglasses, hats, sunscreen, comfortable shoes and clothes; anything that will make your trip more comfortable.
Every family vacation will spring surprises on you and you certainly cannot prepare for all eventualities. The trick is to have an open mind, an open heart, and to bring a good dose of your sense of humour. These family travel tips will certainly help to have an awesome vacation! Don’t forget to print our family travel planner with checklist to help manage all the details of your trip!
Summer is the perfect time to engage the kids with a great crafting session! These Paper Fruit Crafts For Kids with templates make for a fun way to get crafty while honouring some of the fresh foods you can find in season this time of year.
Paper crafts are one of my go to ways to entertain kids of all ages. I love paper craft options because they require only a few supplies, which you likely have on hand, and they are a ton of fun to make! These look like they might be tricky to create, but with the templates included below, these are super easy and add just the right touch of summer flair to the day!
If you are crafting with younger kids, this would be a great project to pair with a fruit salad snack. It might encourage them to try something new! If you are crafting paper fruits with older kids, challenge them to find a creative way to showcase their work. I have added these to handmade cards and gift tags. I would love to make them into a garland sometime too!
Paper Fruit Crafts For Kids
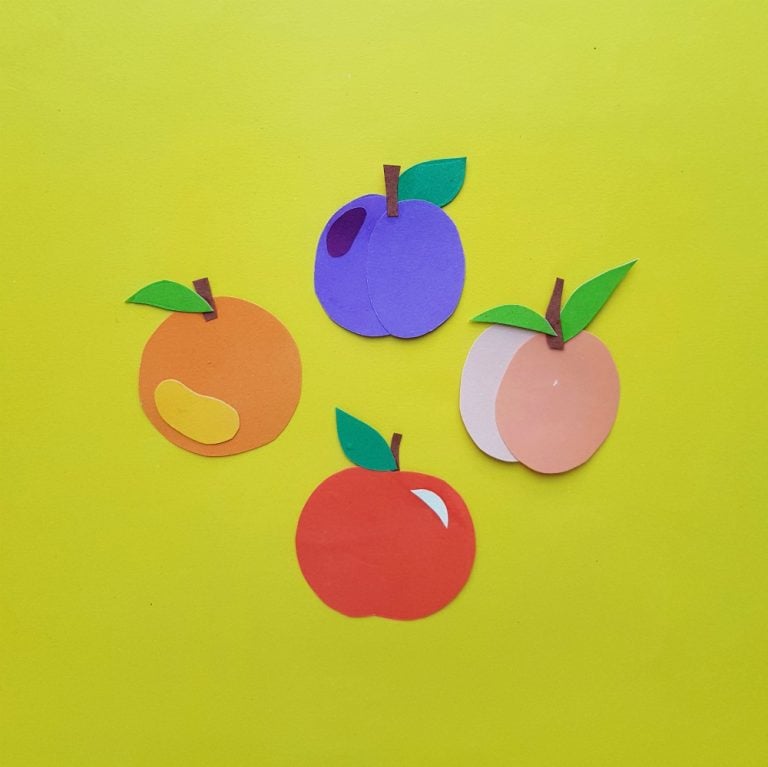
The included templates features oranges, apples, peaches and plums, for a variety of crafting options. The small details of the fruits really make them look realistic! The kids will be really impressed with their paper fruits upon completion!
Make sure you print a few templates to have on hand for when this paper craft is requested again, as it inevitably will be, by the kids. Or pin it for later, so you can reference it anytime you want a fun and easy paper craft option!
Print and cut out the patterns from the provided template. Select coloured craft papers for each of the fruits. Let’s start with the paper apple craft. Trace the apple pattern on a red (you can also use green) coloured craft paper. Trace the stem on brown, leaf on green and the other pattern on white coloured paper. Cut out the traced patterns nicely.
Step -2:
Glue the brown stem on the top middle part of the apple. Glue the white crescent pattern on any side of the apple pattern.
Step – 3:
Glue the leaf on either side of the stem part.
Step – 4:
Similarly, trace, cut and glue the patterns to complete each of the fruit crafts. Simply select colored craft papers as per the original fruit colour and trace the patterns on it. Cut out the patterns using scissors.
Step -5:
Use craft glue for attaching the cut out patterns to complete the fruit craft.
Take this opportunity, while making the fruit crafts with your kids, to talk about the importance of eating fruits daily!
Long drives on the road in a RV can get boring for kids. Bring along fun games and activities to make the time between stops even more fun. The following are 5 games that are ideal to bring on an RV vacation.
An RV vacation can be an experience people remember for a lifetime. The best aspect of a RV trip is not in reaching the intended destination, but in seeing the country on the way to the destination. While that should prove to be entertaining enough in itself, it is simply not the case. At some point, children will begin to whine, argue, and fight with one another, driving their parents to the brink of insanity. Even adults can begin to become snippy with each other.
5 Games To Bring On A RV Vacation
1. Sudoku
Sudoku puzzles are an excellent way for passengers to pass the time while traveling in an RV on the open road. And Sudoku is not only fun to complete, but also educational. For those unfamiliar with Sudoku, the concept is simple and based on logic. It is a 9 x 9 number grid where each vertical and horizontal row will never repeat a number and the numbers range from one to nine. The best aspect of Sudoku is that it requires no math skills. You can print free Sodoku cards too!
2. BingoGame
Bingo is a classic game that people of all ages enjoy. There is no need to spend money on a travel bingo set; bingo cards can be printed out online and taken to any copy store for lamination. Once they are laminated, passengers can use dry erase markers to mark their squares and wipe them off with a wet wipe in order to play again.
3. Go FishCard Game
Another fun game to bring on a RV Vacation is Go Fish. This game is a fun, family-friendly card game that is appropriate for children of any age. There are quite a few variations on this card game and special Go Fish decks can be purchased for a few dollars; however, standard 52-card decks work fine as well. This game can keep younger children occupied for up to an hour.
4. CheckersGame
Checkers is a board game both children and adults like to play. It is a two-player game where the object of winning is to “take” the opponents checker by jumping over it; the person who has collected all of their opponent’s checkers is declared the winner. While it may not seem reasonable to take along a game with 24 checker pieces, many board game manufacturers make magnetic checker boards, ensuring that pieces do not slide off the board when the RV hits a pothole or rounds a corner.
5. Arts and Crafts
Drawing, painting, and making fun crafts can be a great way to pass the time in an RV. Older children can learn to knit or crochet to pass the time. Younger children can colour and draw pictures, or even make a nature journal to record all of the plants and animals they have seen on the trip.
With a few carefully planned games and fun activities, kids can have fun even on the road in an RV. When taking kids along in an RV, it helps to be prepared for everything. Including boredom.
When you live in Canada, you REALLY appreciate when Spring finally arrives! Especially if you’re cooped up in the winter with a 3 and 5 year old. The first second we can get out and get some fresh air daily we are on it! My two boys love going for walks, bike rides, but mostly scootering. We were excited to get a chance to go scooting around town with the award winning Globber Scooter and review the Primo foldable model with lights!
First scooter ride out after the COVID 19 lockdown began.
We had bought my eldest son Jax, an awesome Primo lights scooter from Globber that we picked up at Mastermind Toys last year. Hudson couldn’t quite grasp the scooter just yet so he would walk instead. When this Spring came around he would try to steal Jax’s Globber Scooter and it looked like he was ready to join his big brother. Naturally we had to get the exact same model for Hudson right down to the colour. (story of our lives lol) We were able to find the exact same one in at Toys R Us.
We were so delighted when Globber reached out to us wanting us to review the high quality Primo foldable scooter with lights! I mean, we already LOVE their original so why not have a third that folds hanging around!?
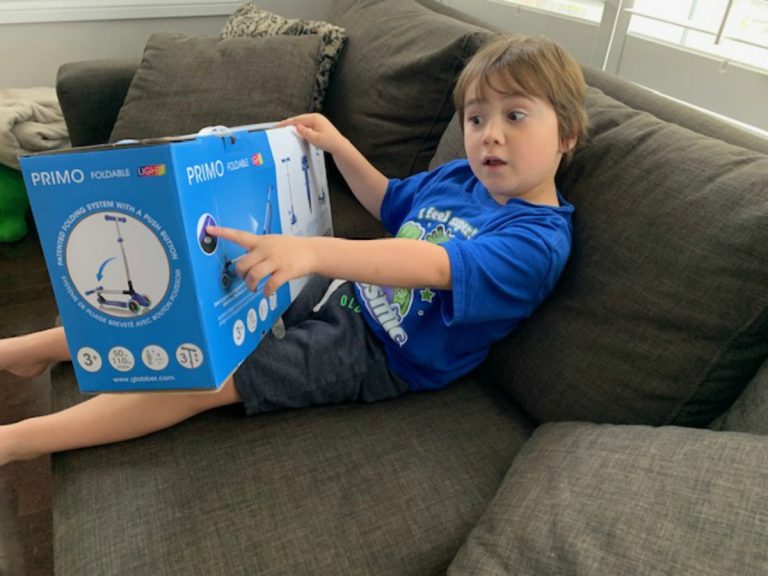
Jax super excited about all the Globber Primo Foldable scooter with lights and it’s features!
Globber Scooter: Primo Foldable with lights Review
We love everything about these wheel scooters and they have been pretty central to our lives since the world shut down in March due to COVID 19. Our lengthy scooter walks are one of the things that kept us sane and optimistic during the lockdown. And the boys got so good and fast at it over the weeks that we were running to keep up with them. It became such a daily routine that my husband and I both bought bikes to keep up! It sure is a lot easier to follow them around now on our bikes while they ride their Globber Scooters! And this was also the start of another hobby for us during the pandemic.
Scooting around the neighbourhood loving life!
I love that the Globber scooter will last a long time since it holds up to 110 lbs! Being an adjustable scooter with a 3-height T-bar, it’s recommended for kids aged 3 to 6+ making it a worthwhile investment!
The foldable scooter also offers a direction button lock which keeps the scooter moving straight if needed. Helps them scoot away independently until they are ready to transition from a three to two wheeler. What do my boys like the best? The lights of course!
Globber Primo Foldable Scooter
Globber Scooter Highlights:
Folding scooter with push button folding
system
Easy-to-use
Wide scooter deck with reinforced metal body
frame
Anti-slip deck design
Extra large wide integrated brake which
supports up to 110 lbs
Adjustable scooter with 3-height T-bar
Available in: Lime green, Navy, Blue, Pink
Suggested Age: 3-6
Scootering is hard work. Time for a break and some deep thoughts!
Globber ScooterAvailable at:
Toys “R” US, HBC, Indigo and Mastermind, your local toy stores
MSRP: $99.99
My boys truly love this scooter for kids and it looks like I might be buying a SECOND Globber foldable scooter! How did you stay active during the lockdown with high energy little ones?!
Summer is officially here, and things are certainly heating up! This Watermelon Strawberry Lemonade is the perfect way to cool off and quench your thirst. I know you are going to love this drink, and appreciate how easy it is to make something this delicious!
Some of my favorite fruits of summer come together to create what is possibly the best lemonade ever with this recipe. It is the perfect way to use fresh fruits without a whole lot of fuss. It is so easy to make that I am sure you will enjoy it all summer long!
There is nothing quite like cold, homemade lemonade in the summer. It is a time tested tradition to serve it to friends who drop by. After working in the garden or yard, nothing hits the spot like a glass served over ice. While I love traditional lemonade, this recipe really takes things to a new level of fantastic.
Watermelon Strawberry Lemonade
This recipe uses fresh watermelon and strawberries to create the perfect summer lemonade. But, if you like Arnold Palmers, this recipe can be made with tea as well for an unforgettable twist of tea and lemonade! Green and white teas blend beautifully with this lemonade, but you can use what you have on hand.
Unlike most lemonade recipes, you will use a blender to create a smooth, fruity base. I like to use the juice of fresh lemons, but in a pinch I have used bottled lemon juice. Either way is fine!
Ingredients
2 cups of Watermelon
1 cup of strawberries
2 tablespoons of Lemon juice
8 cups of water (you can substitute water for cold tea)
Instructions
In a blender, blend fruit with 4 cups of the water until smooth
Add remaining water and chill
This can be served with cold tea substituted in for the water. A green tea or white tea would taste delicious.
You can find all of my favorite drink recipes here!
I hope you enjoyed my Watermelon Strawberry Lemonade as much as I did! If you make it, please share your photos with us on Facebook or Twitter! Also, check out all of our other recipes!
Watermelon Strawberry Lemonade
This Watermelon Strawberry Lemonade is the perfect way to cool off and quench your thirst.
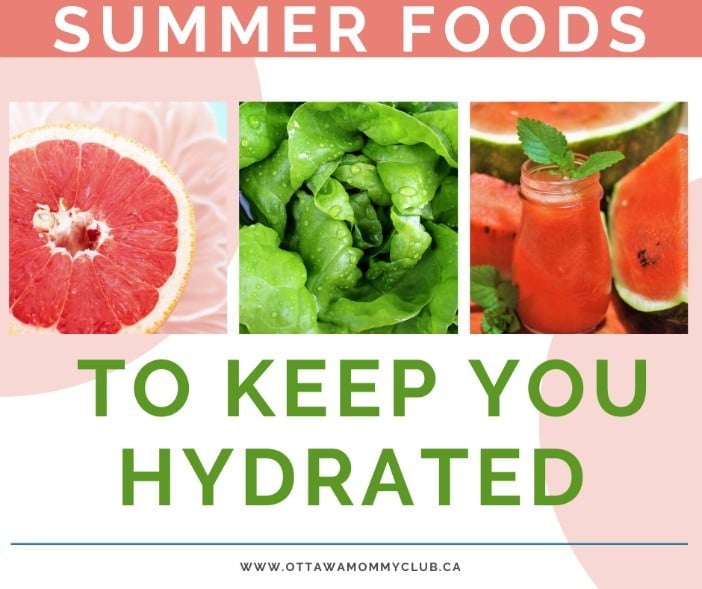
Summertime is a wonderful time of year when school is on break and people take vacations. It is also the time when temperatures soar and it can be easy to become dehydrated. Most people know it is very important to drink plenty of water all the time and especially in the summer. What some people may not be aware of is that there are also certain summer foods to keep you hydrated. There is one food in particular that may not really shock anyone, but the rest might be a pleasant surprise.
Summer Foods To Keep You Hydrated
Watermelon
Watermelon is a fabulous food to keep you hydrated that many people enjoy throughout the summer. What cookout or picnic would be complete without the juicy watermelon? Watermelon is surprisingly healthy because is high in fiber and vitamins and of course, water (91%). This fruit is aptly named since it contains so much water.
The greatest thing about watermelon is that most kids and adults enjoy eating it. There is a good chance you will not have to fight to find a good watermelon because most grocery stores and farmers’ markets carry them all summer long. This is good news because no matter where you and your family go during the summer, you will probably be able to find a watermelon or two.
Milk and yogurt
Milk supplies calcium and vitamin D and is good for healthy bones and teeth. Milk is also great for hydration because it is over 80% water. The best part about milk is that most kids like it. Milk can be enjoyed plain or with flavour additives like chocolate, banana, and strawberry. If additives are used, be aware that the carbohydrate count increases.
Yogurt is another pleasant surprise to the hydrating foods family. Yogurt contains almost as much water as certain fruits. A real upside to eating yogurt is that it is available in so many wonderful flavours. You can get it at any grocery store and even some convenience stores. Instead of packing sweet unhealthy snacks, pack yogurt (remember to pack in the cooler with ice).
Grapefruit
Grapefruit is another wonderfully juicy fruit to keep you hydrated during the summer months. Grapefruit is over 90% water and contains vitamins. Just like watermelon, grapefruit is easy to find and easy to pack for a trip or an event.
Some people may not care for the “zing” that grapefruit has, but that tartness can be tamed with a tiny sprinkling of sugar or low calorie sweetener.
Lettuce
This is good news for people who enjoy a good salad. Lettuce is made up of over 90% water and packed with goodness. People use lettuce as a garnish and as part of the main course in all types of salads. Lettuce is naturally low in calories and helps you feel full longer.
The variety that offers the most water content is iceberg lettuce. There are so many ways to enjoy iceberg lettuce other than salad: on burgers, as the foundation for chicken and taco salads and that is just the tip of the…iceberg.
When the temperatures start to climb, it is nice to know that there are options when it comes to staying hydrated. It is always a good idea to drink plenty of water, but sometimes water seems kind of plain. Some people just do not like the taste of water at all. If water is not your “go to” for hydration, then consider some of these wonderful and healthy food alternatives to keep you hydrated.
Fruits like watermelon and grapefruit are excellent sources of water and taste really good. Milk and yogurt lend a hand to healthy teeth and bones as well as helping keep you hydrated. Water is important, but it is nice that there are other choices when it comes to hydration. These are delicious summer foods to keep you hydrated while travelling or having fun outdoors with the family!
These are 6 best things to do in Old Québec City which showcase the city’s vibrant past and the colourful French culture.
Things To Do In Old Québec City
Travelers who love fine dining, eclectic shopping, and interesting historical attractions all wrapped up in a picturesque European setting must visit Old Québec City. Named a heritage district by UNESCO in 1985, it is the only city in North America still surrounded by protective walls. There are many things to see in Old Québec City!
1. Shop in the Quartier Petit Champlain
Named after Samuel de Champlain who founded Québec City in 1608, this bustling pedestrian-only neighborhood is the oldest shopping district in North America. Everything from designer clothing to kitchenware can be found in the little shops nestled behind stone facades. When it’s time for a break, stop at a sidewalk cafe for some local cheese and a glass of red.
Where is the Petit Champlain Shopping District in Old Québec city? In Lower Town on rue du Petit-Champlain (Petit Champlain Street) surrounded by boulevard Champlain and rue Sous-le-Fort.
2. Browse for Antiques
Known as the Antiques District, rues St-Paul and St-Pierre make up a fashionable area filled with antiques dealers and art galleries, and dotted with cafes and bistros. And to browse original art in a unique setting, explore the open-air gallery on the narrow rue du Trésor, with an array of creations by local artisans in a variety of mediums.
Where is the Antiques District? Where is Rue du Trésor? The antiques shops are located around rue St-Paul and rue St-Pierre in Lower Town, and the Rue du Trésor outside gallery can be found between rues Ste-Anne and Buade in Upper Town.
3. Place Royale
Place Royale is where Samuel de Champlain founded the City of Québec in 1608. This is the location he built the first permanent French settlement in North America. Erected in 1688, you can visit Notre-Dame-des-Victoires Church. You will have the chance to see the outline of Samuel de Champlain’s second house and have the opportunity to take pictures of the magnificent historic buildings.
Where is Place Royale? It’s located on Rue Notre-Dame.
4. Ride the Funicular or Climb the Escalier Casse-Cou (Breakneck Staircase)
Old Québec City is made up of two towns, Haute-Ville (Upper Town) and Basse-Ville (Lower Town). The Funicular, which is a cable-car, links the two. Enjoy panoramic views of the St. Lawrence River, and the Lower Town with the Petit Champlain shopping district and the historic Place Royale square. Or, climb the Breakneck Staircase for a taste of how it was done in the early 1800s.
Where is the Funicular? The Lower Town entrance is located in the House Louis Jolliet on 16 Petit-Champlain Street. The Upper Town stop is located off the Dufferin Terrace in front of the Chateau Frontenac.
5. The Plains of Abraham
The Plains of Abraham was a site of major battles. The Battlefields Park includes the Plains of Abraham and Des Braves Park in Old Québec. It is also Canada’s first national historic park! You can visit thePlains of Abraham Museum which offer a gateway to the Park, exhibitions, activities, services, and more information about your visit.
6. Take a Picture in Front of the Chateau Frontenac
Said to be the most photographed hotel in the world, the spectacular Chateau Frontenac resembles a castle from a fairy-tale with its stone towers, copper turrets, and majestic lobby. It has stood at the heart of Old Québec City since 1893 and hosted royalty, world leaders, and movie stars.
Where is the Chateau Frontenac? 1 rue des Carrières at Place d’Armes in the Upper Town.
With its cobblestone streets and beautiful 17th and 18th century architecture at every turn, Old Québec is a romantic destination filled with European charm. Exploring these attractions in Old Québec will provide a great sense of what makes this city so special and unique!
Disney fans are going to love this Princess Belle Paper Doll Craft. This adorable paper doll looks like it could be super complicated to make, but really, with the free template you can print, it is much easier than you might imagine!
You will only need a few supplies like paper, glue, a craft marker and scissors, and a little bit of time to craft up something awesome! Make one on a rainy afternoon while watching Beauty and the Beast, or invite a few friends over for the ultimate princess crafting session. You could also make these to add a special handmade touch to a birthday party! How fun would that be?
No matter the occasion, I am certain that this Princess Belle Paper Craft will be a success with your kids. These are a perfect boredom buster, and they give kids a chance to express their creativity with a little guidance.
Fun Paper Craft For Kids of All Ages
This project is great for kids of all ages. Older crafters might like to add additional details or embellishments to the finished project. Younger crafters will like making a few in different dress colours for an impromptu dramatic play session that they can pull out anytime, anywhere. These Princess Belle Paper dolls are perfect to take along on long car trips, or anytime kids are waiting and could use a little portable and quiet entertainment.
Parents and grandparents are likely to appreciate the nostalgia of paper dolls and might want to make one themselves, for old times sake! If not, I am sure they will enjoy the walk down memory lane!
If you are in the mood for more Disney inspired fun, check out all of my Disney posts for inspiration!
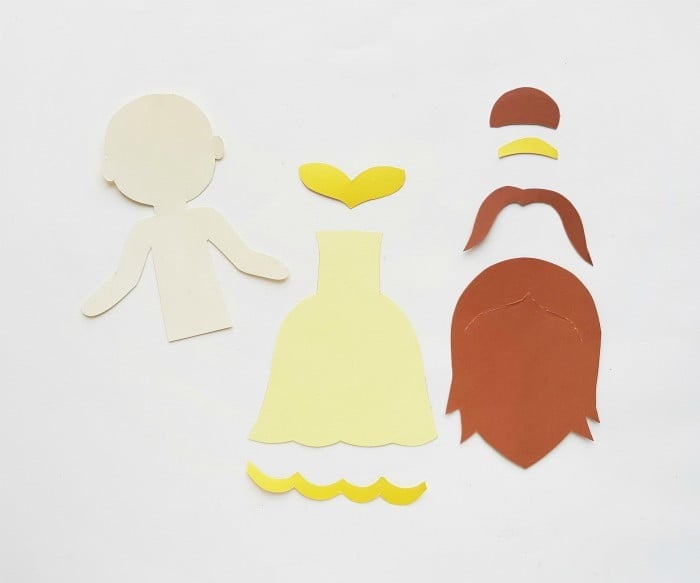
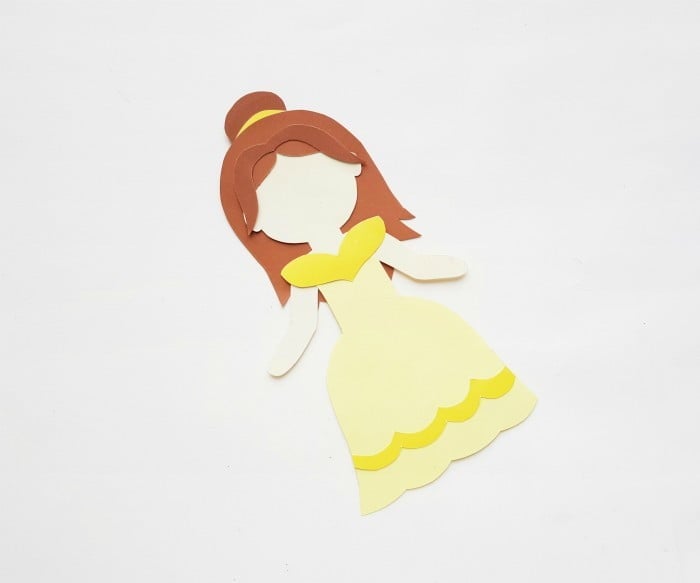
Select cream, brown, and 2 different shades of yellow coloured craft papers. Trace the dress and headband patterns on the yellow papers, trace the hair patterns on the brown paper, and trace the body base on cream paper. Cut out the traced patterns nicely.
Step 2
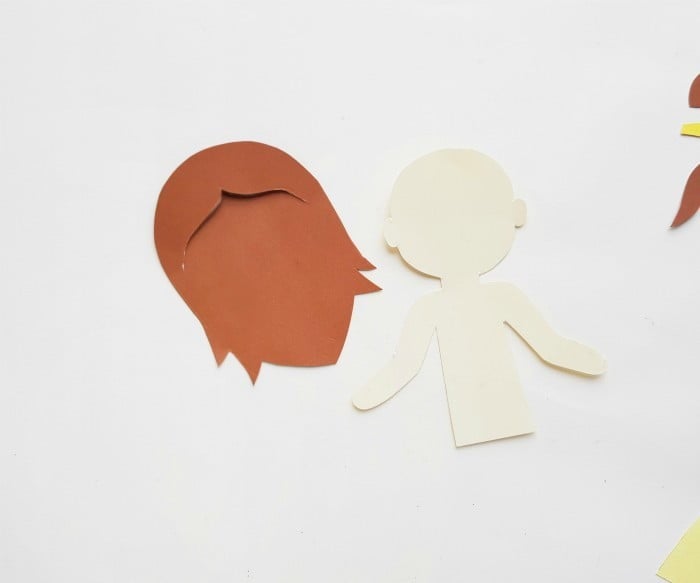
Cut a slit along the marked line inside the hair pattern.
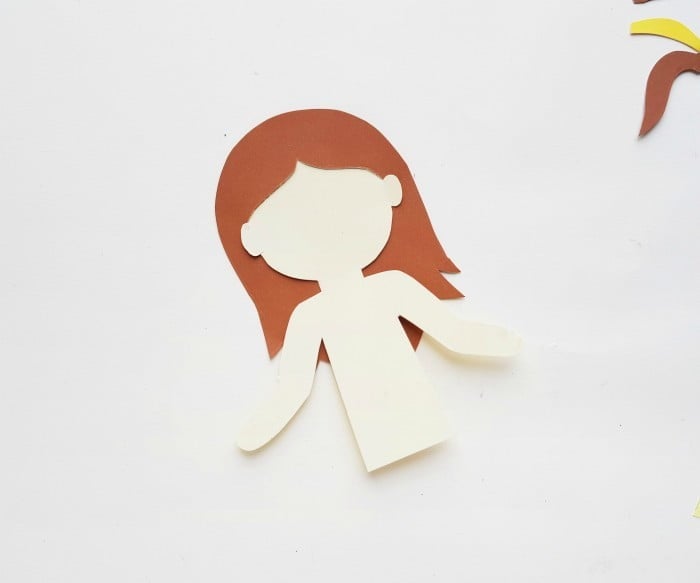
Step 3
Slide the top end of the head part through the slit from the bottom side of the hair pattern. Apply glue to attach the hair and the head together.
Step 4
Attach the yellow headband along the bottom side of the bun pattern. Attach the bun on the back side of the main hair pattern and attach the other hair pattern on the front side of the hair pattern.
Step 5
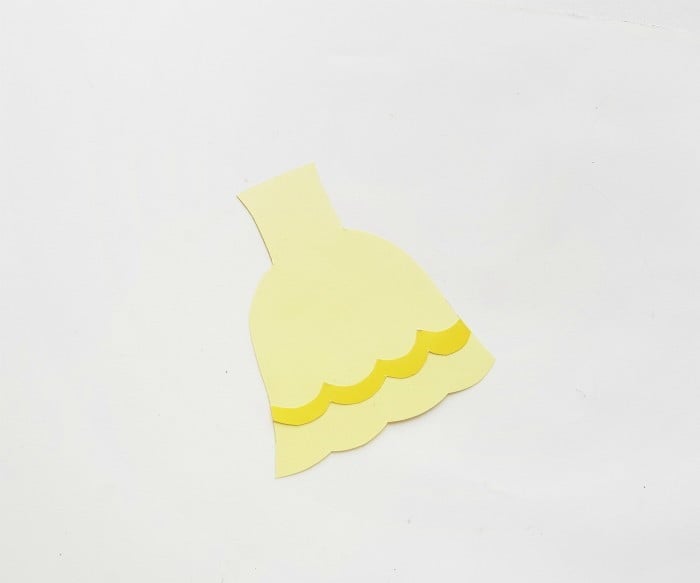
Grab the main dress pattern and attach the scalloped pattern near the bottom side of the dress pattern.
Step 6
Attach the dress on the body base nicely.
Step 7
Attach the V shaped part of the dress on the top side of the dress.
Step 8
Use marker pens to draw the eyes, nose, and mouth of paper.
Princess Belle Paper Doll Craft
Make Princess Belle Paper Doll Craft with a printable template
Select cream, brown and 2 different shades of yellow coloured craft papers. Trace the dress and headband patterns on the yellow papers, trace the hair patterns on the brown paper and trace the body base on cream paper. Cut out the traced patterns nicely.
Step -2:
Cut a slit along the marked line inside the hair pattern.
Step – 3:
Slide the top end of the head part through the slit from the bottom side of the hair pattern. Apply glue to attach the hair and the head together.
Step – 4:
Attach the yellow headband along the bottom side of the bun pattern. Attach the bun on the back side of the main hair pattern and attach the other hair pattern on the front side of the hair pattern.
Step – 5:
Grab the main dress pattern and attach the scalloped pattern near the bottom side of the dress pattern.
Step – 6:
Attach the dress on the body base nicely.
Step – 7:
Attach the V shaped part of the dress on the top side of the dress.
Step – 8:
Use marker pens to draw the eyes, nose and mouth of paper
DreamWorks Animation presents TROLLS WORLD TOUR, a music-filled, exciting adventure that’s sure to make the whole family sing, dance, and have fun again and again. Join Poppy, Branch, and the rest of the Trolls in the all-new DanceParty Edition available on 4K Ultra HD, Blu-Ray™, and DVD July7, 2020 from Universal Pictures Home Entertainment.
The Dance Party Edition includes an interactive dance party mode where viewers are introduced to dance moves to learn while they watch the film, lyrics to sing along, and surprises featuring their favourite characters! This special Dance Party Edition includes bonus content, such as an exclusive original short film starring the unforgettable Tiny Diamond, deleted scenes and behind-the-scenes exclusives with the power-house musical cast of Anna Kendrick, Justin Timberlake, Kelly Clarkson, Mary J. Blige, George Clinton and many more.
This fun and entertaining family film is the must-own movie of the summer. This upbeat journey that’s sure to get your feet tapping is brought to life through a star-studded cast including Anna Kendrick (Trolls, Pitch Perfect), Justin Timberlake(Trolls, Friends With Benefits), Kelly Clarkson(Ugly Dolls),Rachel Bloom(“Crazy Ex-Girlfriend,” The Angry Birds Movie 2) and Jamie Dornan(Fifty Shades Franchise) as well as Kenan Thompson (“Saturday Night Live,” Playmobil: The Movie),James Corden (Into The Woods, Peter Rabbit),Ozzy Osbourne, Anderson Paak, Sam Rockwell (G-Force,Jojo Rabit), J Balvin and Anthony Ramos (Original Hamilton Cast, A Star is Born).
Queen Poppy (Anna Kendrick), Branch (Justin Timberlake), and the rest of your favourite Trolls are back for another musical adventure that’s bigger—and louder—than ever before! In TROLLS WORLD TOUR, Poppy and Branch discover that their kingdom is only one of six musical realms—Funk, Country, Techno, Classical, Pop, and Rock—that were once united in perfect harmony. When the power-hungry ruler of the RockerTrolls threatens to silence all other music so her tribe can reign supreme, Poppy and Branch must embark on an epic quest to unite the realms of Trollskind, before the songs in their hearts are lost forever!The film is currently available for early viewing on a wide variety of popular on-demand services as a premium rental offering.
You can now purchase the TROLLS WORLD TOUR Dance Party Edition in 4K Ultra HD + Blu-Ray at your nearest retailer!
We use cookies to ensure that we give you the best experience on our website. If you continue to use this site we will assume that you are happy with it.