Home Blog Page 2

How to Maintain a Durable and Safe Home Foundation

0

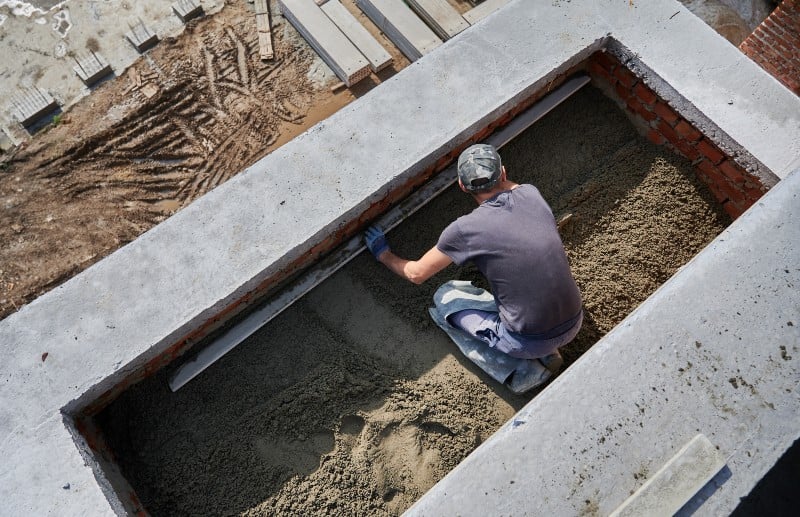
Your home foundation is literally what keeps your house standing strong. While it may not be something you think about every day, maintaining a durable and safe foundation is crucial for your family’s safety and the long-term value of your home. 

How to Maintain a Durable and Safe Home Foundation

Canada’s changing seasons, from freezing winters to rainy springs, can put a lot of stress on concrete foundations. For practical advice on spotting potential issues early and keeping your foundation in excellent condition, check out this homeowner’s guide to repairing cracks and maintaining your concrete foundation.

Understand Your Foundation Type

The first step in maintaining your foundation is understanding what type you have. Most homes in Canada have one of the following types

  • Concrete slab foundations which are poured directly on the ground and are common in newer homes
  • Basement foundations which provide extra living or storage space below the home
  • Crawl space foundations which elevate the home slightly off the ground

Each type has different maintenance needs. Knowing what you have will help you identify potential issues early and choose the best methods to protect it.

Inspect Your Foundation Regularly

Regular inspections are key to catching small problems before they become big ones. Walk around your home and look for signs such as

  • Cracks in walls or floors
  • Doors or windows that stick or do not close properly
  • Uneven floors or sloping areas in the yard
  • Water pooling near the foundation

Checking your foundation twice a year, ideally in spring and fall, helps you spot any early warning signs. You can also hire a professional inspector every few years for a more thorough assessment.

Keep Water Away from Your Foundation

Water is one of the biggest threats to any foundation. Standing water can seep into cracks and cause structural damage over time. To prevent water issues

  • Ensure gutters and downspouts direct water at least two meters away from your foundation
  • Grade your yard so it slopes away from the house
  • Avoid planting water-loving plants or trees too close to the foundation
  • Consider installing a French drain or other drainage solutions in areas prone to pooling

These steps can help prevent water from undermining the foundation and causing costly repairs.

Manage Soil and Landscaping Carefully

The soil around your home can expand and contract with changes in moisture, which can put stress on your foundation. Avoid heavy construction near your home that could disturb the soil and make sure to

  • Keep large trees with deep roots at a safe distance
  • Avoid overwatering flower beds near the foundation
  • Maintain consistent soil moisture to prevent uneven settling

Proper landscaping supports a healthy foundation and reduces the risk of cracks and shifting.

Maintain Your Home’s Exterior

Your foundation is closely connected to the overall health of your home. By maintaining the exterior, you reduce potential stress on the foundation

  • Seal cracks in exterior walls promptly
  • Repair any damaged siding or brickwork
  • Keep vents and air intakes clear of debris

A well-maintained exterior not only looks good but also protects the structural integrity of your home.

Address Cracks and Damage Promptly

Even small cracks can become serious if ignored. If you notice hairline cracks in concrete or masonry, fill them with an appropriate sealant. Larger cracks or signs of movement require professional assessment. Ignoring these problems can lead to more extensive damage and expensive repairs in the future.

Control Moisture Inside the Home

Excess moisture inside your home, especially in basements and crawl spaces, can contribute to a sinking foundation. Consider the following

  • Use a dehumidifier to reduce humidity levels in basements
  • Check for leaks from plumbing, appliances, or water heaters
  • Install sump pumps in areas prone to flooding

Controlling interior moisture helps prevent mold, mildew, and structural damage to the foundation.

Schedule Professional Maintenance

While there are many things homeowners can do themselves, having a professional inspect and maintain your foundation periodically is always a good idea. Professionals can

  • Detect problems not visible to the untrained eye
    Suggest waterproofing or reinforcement options
    Provide long-term maintenance plans tailored to your home and soil conditions
  • Investing in professional guidance can save money and headaches down the road.

Final Thoughts

A strong foundation is the backbone of a safe, comfortable, and long-lasting home. By understanding your foundation type, performing regular inspections, keeping water away, managing soil, maintaining your exterior, addressing cracks promptly, controlling interior moisture, and seeking professional advice, you can ensure that your home remains durable and secure.

Taking care of your foundation may not be the most exciting home project, but it is one of the most important. With consistent attention and simple preventive steps, your family can enjoy a safe home environment for many years.

Remember that maintaining a foundation is not just about protecting your house. It is about creating a secure space for your family to live, play, and grow without worrying about structural issues. Your foundation is an investment in the safety, comfort, and longevity of your home.

Choosing In-Home Care Without the Guilt Trip

0

You don’t plan for this part. The part where your parent starts slowing down. Where your mom forgets what day it is or your dad stops driving at night because “the glare’s too much.” The part where your roles quietly start to shift, and you become the one managing calendars, prescriptions, and conversations with doctors.

It sneaks up on you, this new version of caregiving. At first it’s an extra grocery run. Then it’s checking in more often. Then it’s wondering if they’re eating enough, sleeping enough, safe enough.

And somewhere between worrying and Googling, you start thinking about in-home care. Then immediately feel the guilt. Because shouldn’t family handle this? Shouldn’t you?

That’s the myth. And it’s time to let it go.

Why So Many Families Are Rethinking Care

Across Canada, more families are quietly rethinking what aging looks like. They’re trading institutions for independence, facilities for familiarity. According to Statistics Canada, the country’s population aged 65 and older is projected to double within the next 25 years, which means more families will face the same decision you’re facing now: how to care without losing yourself in the process.

In-home care isn’t just for those who need constant support. It’s for anyone who wants to age in their own space with dignity, comfort, and routine intact. It’s also for the adult children who are juggling careers, kids, and emotional fatigue, wondering how to do the right thing without burning out.

It’s not a failure to ask for help. It’s a strategy.

The Emotional Math Behind Every Decision

Every family weighs the same invisible equation: time, cost, guilt, love.

You tell yourself it’s temporary. Just until they get stronger. Just until work slows down. But the truth is, caregiving is rarely temporary; it’s a marathon disguised as a sprint. According to a 2018 Statistics Canada study, more than 7.8 million Canadians provide care to a family member or friend, often while managing full-time jobs.

That’s a lot of invisible labour, and even more invisible emotion.

Hiring in-home care doesn’t mean you’re handing off responsibility. It means you’re expanding your team.

What “Home” Really Means

When people talk about wanting to age at home, they’re not just talking about walls and furniture. They’re talking about the comfort of the familiar: the mug they’ve used for twenty years, the view from their kitchen window, the hum of their own appliances.

Home is sensory. It’s control. It’s identity.

That’s why so many Canadians are realizing that in-home care offers something no facility can replicate: the continuity of daily life. It allows parents to stay rooted in their routines while receiving professional, compassionate care on their terms.

More Canadian families are choosing in-home care as a way to support loved ones, allowing them to maintain independence, comfort, and a sense of community connection. All without leaving their homes.

The Quiet Strength of Caregivers

Let’s talk about the other side of this equation: the caregivers.

If you’ve ever tried to convince a proud parent to accept help, you know it’s not just logistics. It’s diplomacy. You’re managing emotions as much as tasks. You’re the bridge between generations, trying to balance their autonomy with your peace of mind.

According to the Canadian Institute for Health Information, 45% of family caregivers report feeling distressed, and that number spikes when they have limited professional support. The guilt, the pressure, the resentment — it builds quietly. And just like moms need alone time, caregivers also need space to recharge.

Professional home care doesn’t erase the emotional load, but it shares it. It brings expertise where love alone isn’t enough, creating space for family members to go back to being sons, daughters, and partners instead of full-time nurses.

What Good In-Home Care Looks Like

Good in-home care is not just someone showing up for a few hours a week. It’s a relationship. It’s consistency. It’s trust built over morning routines and small talk while folding laundry.

The best agencies take time to match caregivers with clients based on personality, needs, and cultural fit. They handle everything from medication management to meal prep to specialized dementia support. They communicate clearly, involve families in care planning, and provide updates that keep everyone in the loop.

You know you’ve found the right match when your parent stops calling their caregiver “the helper” and starts calling them by name.

The Money Conversation Everyone Avoids

Yes, cost matters. And it’s one of the biggest reasons families delay getting help.

But here’s the reality: institutional care isn’t cheap either. According to the Government of Canada, long-term care facilities can cost anywhere from $2,000 to $6,000 a month depending on the province and level of support. In-home care offers flexibility. You can scale hours up or down based on need, start small, and adjust as situations change.

For many families, that flexibility means they can sustain quality care longer without completely upending finances or routines.

How to Talk About It Without Breaking Down

The hardest part isn’t hiring help. It’s having the conversation.

Older parents often resist the idea of in-home care because they see it as a loss of independence. You might hear phrases like “I don’t need a babysitter” or “Save your money.” Underneath those reactions is fear. Fear of aging, of being forgotten, of becoming a burden.

The trick is not to convince but to collaborate. Frame it as adding support, not replacing family. Bring them into the process. Let them meet caregivers, voice preferences, and maintain control.

Language matters. Instead of saying, “You can’t do this alone,” try “You deserve more help so you can focus on what you enjoy.” It’s a small shift that protects dignity.

The Practical Checklist

When you start looking for in-home care, keep it grounded and methodical. Emotional decisions need logistical backbones.

Here’s where to start:

  1. Identify the actual needs. Medical? Mobility? Companionship? Be honest about what your parent requires and what you can realistically provide.
  2. Ask about credentials. Reputable agencies vet and train their staff, maintain insurance, and follow provincial home care regulations.
  3. Prioritize communication. You want transparency, consistency, and easy ways to reach the care team.
  4. Look for personalized care plans. Cookie-cutter approaches rarely work for real people.
  5. Start small. Try short shifts or trial weeks before committing to long-term schedules.

This process takes time, but doing it right means peace of mind later.

What You Gain Back

Once help arrives, you start noticing the space it creates.

You have time to call your friends again. To show up for your own kids. To remember you’re allowed to have your own life too. Your relationship with your parent shifts back toward something softer. Less about logistics, more about connection.

That’s what in-home care can do. Not just for them, but for you.

Because this isn’t about letting go. It’s about letting in.

The New Definition of Doing Your Best

If you’re wrestling with guilt, here’s a truth most people won’t say out loud: love doesn’t always look like self-sacrifice. Sometimes it looks like hiring help, setting boundaries, and trusting professionals to fill the gaps you can’t.

You don’t have to do it all. You just have to make sure it all gets done with compassion, quality, and intention.

That’s what good care really is.

Organizing Your Basement in Ottawa for Maximum Functionality and Safety

0

Basements often serve as multi-purpose spaces in Ottawa homes. They can be storage areas, playrooms, home gyms, or even extra living space. However, without proper organization, these spaces can become cluttered, unsafe, and underutilized. 

Organizing Your Basement in Ottawa for Maximum Functionality and Safety

A well-planned basement renovation can help transform your basement into a functional, safe, and inviting part of your home. This article offers practical ideas on how to make the most of your basement space.

Start with a Clear Plan

Before moving boxes and furniture around, take a moment to plan how you want to use your basement. Consider your family’s needs and lifestyle

  • Do you want a play area for kids, a cozy entertainment space, or a home office?
  • How much storage space is required for seasonal items, tools, or sports equipment?
  • Are there safety considerations such as stairs, low ceilings, or electrical panels?

Having a clear plan will make organizing easier and ensure that each area of your basement serves a purpose.

Declutter and Sort

The first step in organization is to declutter. Go through all items in your basement and decide what to keep, donate, recycle, or discard. Sorting items into categories can make this process more manageable

  • Seasonal items like holiday decorations or winter gear
  • Sports equipment and outdoor toys
  • Tools, DIY supplies, and hardware
  • Memorabilia and keepsakes

Decluttering not only creates space but also makes it easier to locate items when you need them.

Invest in Storage Solutions

Once you know what you want to keep, it’s time to choose storage solutions that maximize functionality

  • Shelving Units: Sturdy shelves can store boxes, bins, and bins for seasonal items. Metal or plastic shelving is ideal for Ottawa basements, which can be prone to moisture.
    Clear Bins: Transparent bins make it easy to see contents without opening each box. Label them clearly to save time.
    Hooks and Racks: Wall-mounted hooks are great for hanging bicycles, tools, or sports gear, freeing up floor space.
    Furniture with Storage: Consider benches or ottomans with hidden storage to combine function and comfort.

Choosing the right storage solutions keeps your basement organized while protecting items from moisture and damage.

Address Moisture and Safety

Basements in Ottawa can be susceptible to dampness, leaks, and flooding. Moisture can damage stored items and create health hazards like mold and mildew. To keep your basement safe and dry

  • Check for leaks around windows, walls, and floors, and repair them promptly
  • Use a dehumidifier to maintain low humidity levels
  • Elevate storage off the floor using pallets or shelving
  • Ensure electrical outlets and cords are safe from water exposure

In addition, make sure your basement has proper lighting, smoke detectors, and carbon monoxide alarms for family safety.

Create Zones for Different Activities

Dividing your basement into functional zones makes the space easier to use and keeps it organized

  • Storage Zone: Keep boxes, bins, and infrequently used items in a designated corner or along a wall.
  • Play Zone: If your basement doubles as a playroom, designate a safe, open area with rugs or foam mats. Store toys in bins or low shelves so kids can access them easily.
  • Work or Hobby Zone: Whether it’s a crafting area, home gym, or workshop, ensure this zone has adequate lighting and easy access to tools and supplies.
  • Relaxation Zone: A cozy seating area with couches or beanbags can make the basement inviting for family movie nights or reading.

Clearly defined zones make it easier to maintain order and ensure everyone knows where items belong.

Label Everything

Labeling is a simple but powerful way to keep your basement organized. Use clear labels on bins, shelves, and drawers so everyone in the family knows where things go. This is especially helpful for kids, encouraging them to put toys away and take responsibility for their space.

Keep Pathways Clear

Organization is not just about storage but also about safety. Ensure pathways are free from clutter to prevent trips and falls. Keep stairs and exits clear, and avoid stacking items in a way that could tip over. This is especially important if your basement serves as a play area or frequently accessed storage space.

Maintain Regularly

The key to a functional and safe basement is ongoing maintenance. Schedule regular checks to

  • Reassess storage needs and remove items no longer needed
  • Inspect for moisture, leaks, or pest activity
  • Rotate seasonal items to ensure accessibility
  • Clean floors, corners, and shelving units

Regular upkeep keeps your basement organized and prevents small issues from becoming big problems.

Final Thoughts

A well-organized basement can become one of the most useful spaces in your Ottawa home. By planning carefully, decluttering, investing in smart storage solutions, addressing moisture and safety concerns, creating zones, labeling items, and maintaining regularly, you can transform your basement into a functional, safe, and enjoyable space.

Whether your basement serves as a playroom, storage area, hobby space, or family hangout, these steps will help maximize its potential. A safe and organized basement not only protects your belongings but also provides peace of mind and a comfortable environment for your family to enjoy all year round.

Remember that organizing a basement is not just about tidiness. It is about creating a space that works for your family, supports daily life, and provides a safe and welcoming area where memories can be made.

Easy Landscaping Ideas for Busy Families in Ottawa

0

Creating a beautiful backyard can seem like a big task, especially for busy families in Ottawa who are balancing work, school, and extracurricular activities. The good news is that you do not need to spend all your weekends digging, planting, and watering to have a functional and attractive outdoor space. One way to enhance your backyard is by adding a pergola to your backyard, which can provide shade, define your outdoor living area, and create a cozy spot for relaxing or entertaining.

Easy Landscaping Ideas for Busy Families in Ottawa

With a few thoughtful landscaping ideas, you can create a backyard that is easy to maintain, enjoyable for the whole family, and designed to fit your lifestyle.

Plan with Purpose

Before adding plants, patios, or garden beds, take a moment to think about how your family uses your outdoor space. Ask yourself

  • Do your kids need a play area or open lawn for sports?
  • Would you like a small garden for vegetables or herbs?
  • Is outdoor entertaining a priority for BBQs and family gatherings?
  • How much maintenance are you realistically able to commit to?

Having a clear plan will help you choose landscaping elements that are both beautiful and practical for your family.

Choose Low-Maintenance Plants

One of the best ways to save time in the garden is to select plants that thrive in Ottawa’s climate without constant care. Consider the following options

  • Perennials: Plants like hostas, daylilies, and coneflowers come back year after year, reducing the need for replanting.
  • Native Plants: Native shrubs and flowers are naturally adapted to Ottawa weather, which means less watering and fewer pests.
  • Evergreens: Trees and shrubs like spruce or juniper provide year-round greenery and structure to your yard.

Grouping plants with similar water and sunlight needs also makes maintenance simpler and keeps your garden looking healthy.

Use Mulch and Ground Covers

Mulch and ground covers are lifesavers for busy families. They help retain soil moisture, reduce weeds, and give your garden a polished look. Popular options include

  • Wood chips or bark mulch around flower beds
  • Decorative gravel for pathways
  • Low-growing ground covers like creeping thyme or sedum

These materials save time on weeding and watering while keeping your landscape looking neat and tidy.

Create Functional Zones

A well-planned backyard can serve multiple purposes while remaining organized. Consider creating zones for different activities

  • Play Zone: A small lawn or soft area for kids to run, play, or set up a swing set.
  • Garden Zone: Raised garden beds or containers for easy planting and harvesting.
  • Relaxation Zone: A patio with seating for adults to unwind, read, or enjoy family meals outdoors.
  • Storage Zone: A small shed or storage bench for toys, sports gear, and gardening tools.

Clearly defined zones make it easier to maintain your yard and keep it functional for everyday life.

Add Simple Paths and Borders

Paths and borders make a yard easier to navigate and maintain. They also define spaces and add visual interest without adding extra work

  • Gravel or stepping stone paths are quick to install and low maintenance
  • Edging around garden beds keeps grass from creeping in and gives a clean look
  • Raised planters or containers can create natural boundaries between zones

Paths and borders make your backyard feel organized and can reduce the time spent trimming and mowing.

Incorporate Durable Surfaces

Busy families need spaces that can withstand wear and tear. Choose durable surfaces for patios, decks, and play areas.

  • Composite or PVC decking for low-maintenance outdoor living areas
  • Concrete or pavers for patios that can handle furniture and frequent use
  • Rubber or mulch play surfaces to keep kids safe while playing

Durable surfaces reduce upkeep and make your backyard practical for daily life.

Choose Multi-Purpose Furniture and Features

When space and time are limited, furniture and features that serve multiple purposes can be a game-changer

  • Storage benches double as seating and a place to keep toys
  • Picnic tables can serve as dining and craft areas
  • Shade sails or pergolas provide sun protection and define outdoor living spaces

These solutions help you maximize your backyard without adding extra work.

Maintain Smartly

Even with low-maintenance landscaping, a little attention goes a long way

  • Water deeply but less frequently to encourage strong root growth
  • Prune and deadhead plants at the right times of year
  • Mulch garden beds annually to conserve moisture and suppress weeds
  • Sweep or hose down patios and pathways to keep them clean

Setting a simple schedule for seasonal tasks makes upkeep manageable and keeps your yard looking its best.

Involve the Whole Family

Finally, make landscaping a family activity. Kids can help water plants, harvest vegetables, or assist with raking leaves. Turning chores into fun activities teaches responsibility and allows everyone to enjoy the backyard together.

Final Thoughts

Creating a beautiful and functional backyard does not need to be complicated, even for busy families in Ottawa. By planning with purpose, selecting low-maintenance plants, using mulch and ground covers, creating functional zones, adding simple paths and borders, incorporating durable surfaces, choosing multi-purpose furniture, maintaining smartly, and involving the family, you can enjoy an outdoor space that looks great and works for your lifestyle.

Your backyard should be a place where the whole family can relax, play, and connect with nature without feeling overwhelmed by constant upkeep. With a few thoughtful landscaping choices, even the busiest families can have a beautiful, manageable, and family-friendly outdoor space to enjoy all year long.

The Role of a Real Estate Lawyer and When You Should Get One

0


Buying or selling a home? It’s probably the biggest financial move you’ll make! A real estate lawyer is a specialized legal expert who concentrates on property transactions, working to make things go smoothly and protect your interests. Why is this so important? Well, buying property involves more than just the building; it’s about contracts, titles, and legal obligations. Think of them as your guide through the legal maze. This article will explain what a real estate lawyer does, point out when you might need one, and offer tips on choosing the right one.

The Role of a Real Estate Lawyer and When You Should Get One

What Is a Real Estate Lawyer?

A real estate lawyer is a legal professional who focuses on property matters, handling everything from houses to commercial buildings to plots of land. Their main job is to make sure transactions are legally sound and that their client’s rights are protected.

They handle different property deals, from first-time homebuyer purchases to big commercial investments. Unlike a real estate agent, who is all about the buying and selling, a real estate lawyer zeroes in on the legal details. They aren’t showing houses, but they make the deal solid.

Key Roles and Responsibilities

So, what does a real estate lawyer actually do? Here’s a peek at some common tasks:

  • Reviewing and Drafting Contracts: They go over purchase agreements, leases, and closing documents, which can get complicated.
  • Title Search and Verification: Imagine finding out someone else has a claim on your new house! Lawyers check the title to make sure there are no disputes, unpaid debts, or hidden issues.
  • Negotiating Terms: Need to haggle over repairs or closing dates? Your lawyer can stand up for you and fight for what’s best during negotiations.
  • Facilitating Closings: They take care of the legal side of the final sale, ensuring all paperwork is correctly filed and ownership properly transfers.
  • Handling Disputes: Disagreements with neighbours about property lines or broken contracts? A real estate lawyer steps in to sort it out.

When You Should Hire a Real Estate Lawyer

The Role of a Real Estate Lawyer

Now that you know what they do, when should you get a real estate lawyer involved? Here are a few situations where their knowledge is invaluable:

  • Buying or Selling Property in a Complex Transaction: Big commercial properties, unusual loans, or investments with multiple tenants? Call a lawyer.
  • Dealing with Legal Disputes: Issues with the title, boundary disagreements, or zoning problems? Don’t try to navigate these legal pitfalls alone.
  • Purchasing Commercial Real Estate: Commercial properties come with complicated leases, permits, and regulations. A lawyer can ensure you’re protected.
  • Handling Foreclosures or Short Sales: These sales can get tricky legally for both buyers and sellers. A lawyer can defend your rights and guide you.
  • When Required by Law: Some states or provinces insist on a real estate lawyer being involved in the closing.

How to Choose the Right Real Estate Lawyer

Picking the right real estate lawyer is vital. Here’s what to look for:

  • Credentials and Licensing: Make sure they’re properly licensed and in good standing with the local bar association.
  • Experience in Similar Transactions: Have they handled similar deals before? Experience counts.
  • Client Reviews and Referrals: Read online reviews and ask for recommendations from your real estate agent or people you know.
  • Communication Style and Fees: Are they easy to talk to? Do you understand how they charge? Good communication is key.

Costs and Fee Structures

What’s a real estate lawyer going to charge? Fees depend on how complex the deal is. Usually, they charge either:

  • Hourly Rates: You pay for each hour they work.
  • Flat Fees: A set price for the whole transaction.

Things that affect the cost include the property location, how complicated the deal is, and how much experience the lawyer has. While it might seem like an extra expense, hiring the right lawyer can save you money (and stress) by preventing problems down the road.

Conclusion

A real estate lawyer is essential for ensuring property transactions go smoothly and legally. Getting a lawyer involved early on can protect your interests and give you peace of mind. If you’re buying or selling, especially in complicated situations, it’s a smart move. Start your property journey by consulting a real estate lawyer!

Moving To Ottawa With Kids? Family Activities To Explore After Relocation!

0

Are you moving to Ottawa with kids, or already moved? If so, you’re probably searching for fun places where your little ones can laugh, play, and explore. You will find below a complete list of family-friendly attractions that everyone will enjoy. From lively parks and fascinating museums to exciting outdoor adventures, the city offers something for every child. To help you settle in, we’ve rounded up the best family activities in Ottawa that will keep kids entertained while making your new city feel like home.

Before we dive into fun activities for kids, let’s go over some helpful tips for making the move easier.

Tips For Settling In With Kids

A successful move with children is about more than unpacking. Working with the best movers in Ottawa can make the relocation smoother, giving you more time and energy to help your family adjust. These steps can help families settle in smoothly:

  • Join Ottawa Parent Child Resource Centre programs – free playgroups and support for families.
  • Check out local YMCAs – many offer childcare, sports, and parent-child programs.
  • Visit schools and daycares early – meeting teachers and classmates helps children feel comfortable.
  • Balance old routines with new adventures – keep bedtime and mealtime consistent while exploring your neighbourhood.
  • Stay connected through community centres like Dovercourt Recreation Centre, which hosts family events and sports programs.

These small steps make moving to Ottawa with kids less overwhelming while building strong family routines.

Best Family Activities In Ottawa When Moving With Kids

1. Explore Ottawa’s Iconic Outdoor Spaces

Moving To Ottawa With Kids? Family Activities To Explore After Relocation!

Fresh air and open spaces are some of the easiest ways for kids to adjust after a move. Ottawa has plenty of well-known outdoor parks and playgrounds where families spend weekends together:

  • Major’s Hill Park – located downtown with lawns for play and stunning views of Parliament Hill.
  • Andrew Haydon Park – features a pond, walking trails, picnic spots, and a popular playground.
  • Mooney’s Bay Park and Beach – famous for one of the largest playgrounds in Canada, and a sandy beach for swimming.
  • Rideau Canal Skateway – a UNESCO World Heritage Site and the world’s largest skating rink in winter.
  • Lansdowne Park – a central spot with green space, play structures, and weekend markets.
  • City splash pads – favourites include Brewer Park Splash Pad and Walter Baker Park Splash Pad.

These locations are always highlighted when families search for kids’ parks in Ottawa or family-friendly outdoor activities.

2. Educational Experiences For Kids

Ottawa has museums and cultural centres that make learning fun while giving kids hands-on experiences:

  • Canadian Museum of Nature – dinosaurs, geology, wildlife, and interactive displays.
  • Canada Science and Technology Museum – discovery rooms and hands-on science exhibits.
  • Canadian Children’s Museum (inside the Canadian Museum of History) – cultural play-based exhibits designed for kids.
  • Canada Agriculture and Food Museum – a working farm in the city where kids can meet animals and learn about farming.
  • Ottawa Public Library – branches across the city host kids’ programs like story time and craft sessions.

If you’re planning a move, hiring a residentialmover in Ottawa can make transitioning to your new home near these educational spots much easier.

These destinations are perfect for families looking for educational and fun experiences in Ottawa, helping kids feel at home while exploring their new city.

3. Fun Indoor Activities for Rainy Days

When the weather isn’t ideal, Ottawa has plenty of indoor attractions that keep children engaged and active:

  • Funhaven Family Entertainment Centre – arcade games, jungle gym, bumper cars, and mini bowling.
  • Laser Quest Ottawa – indoor laser tag games for older kids and families
  • Sky Zone Trampoline Park – wall-to-wall trampolines, dodgeball, and foam pits.
  • Altitude Gym Gatineau (just across the river) – kid-friendly climbing walls and bouldering.
  • Shenkman Arts Centre – offers art classes, pottery, and creative workshops for children.
  • Nepean Sportsplex – with an indoor pool, skating rinks, and recreation programs.

Families often look up indoor activities for kids in Ottawa or rainy day fun for families, and these spots are always at the top.

4. Seasonal Festivals and Events for Families

Ottawa Family Activities To Explore After Relocation!

Ottawa’s year-round festivals keep families busy no matter the season. Some of the most loved events include:

  • Winterlude Festival – featuring ice sculptures, snow slides, and the famous Snowflake Kingdom.
  • Canada Day Celebrations – downtown Ottawa lights up with concerts, parades, and fireworks.
  • Ottawa International Children’s Festival – theatre, puppet shows, and performances designed for kids.
  • Ottawa Bluesfest –a music festival with family-friendly zones.
  • ByWard Market Christmas Lights and Holiday Market – festive decorations and family activities.
  • TD Ottawa Jazz Festival – includes family concerts and open-air performances.

These events make it easy for newcomers to enjoy family festivals in Ottawa and feel part of the community.

5. Sports and Recreational Activities

Sports help kids stay active and meet new friends. Ottawa has many well-known programs and centres to choose from:

  • Ottawa Internationals Soccer Club – youth soccer programs.
  • Gloucester Cumberland Ringette Association – popular among kids who want to try this uniquely Canadian sport.
  • Nepean Skating Club – figure skating and learn-to-skate programs.
  • Ottawa Swim Club – swimming lessons and competitions.
  • Altitude Gym Gatineau – climbing for children and teens.
  • Sky Zone Trampoline Park – combines fun with fitness.

Parents searching for sports for kids in Ottawa or recreational activities will quickly find these names recommended.

6. Day Trips and Nearby Attractions

A great part of living in Ottawa is how close families are to amazing destinations just outside the city:

  • Gatineau Park – offers hiking, biking, skiing, and wildlife spotting.
  • Saunders Farm – well known for pumpkin season, mazes, and themed family festivals.
  • Parliament Hill – guided tours and the evening light and sound show are family favourites.
  • Rideau Canal – boat cruises in summer and skating in winter.
  • Valleyview Little Animal Farm – a petting zoo with play areas and farm demonstrations.
  • Upper Canada Village – a historical site where kids can explore 19th-century life.

These attractions are perfect for weekend plans when families search for day trips with kids from Ottawa or family attractions near Ottawa.

Conclusion: Making Ottawa Feel Like Home

Moving to Ottawa with kids brings exciting opportunities to explore the city’s parks, museums, play centres, and festivals. Whether your family is enjoying a sunny day at Mooney’s Bay Beach, visiting the Canadian Museum of Nature, or taking a day trip to Gatineau Park, there is always something new to discover.

Of course, before you can enjoy all these experiences, the moving process itself has to go smoothly. Partnering with the best movers ensures your belongings are handled carefully so you can focus on your children’s needs. A reliable residential mover in Ottawa can save time and energy, making it easier for your family to settle in quickly.

How to Become a Nanny for Moms Looking for Work

0

Just ten years ago, most women returned to their previous jobs after maternity leave – sometimes with a demotion. Today, the picture is completely different: women are actively entering the labor market, trying new professions, embracing flexible schedules and remote work, taking on project-based assignments, or completely changing careers. The world of work no longer expects a “return to the old ways”; it dictates new rules, and mothers are learning to embrace them to the fullest.

At this stage, a common issue arises: who will care for the child while the mother rebuilds her life? This is where a profession grows that would prevent thousands of women from returning to work: nannying.

But not just any everyday nanny, but a helper who understands the unique needs of families where the mother is looking for a job. This is a specific market segment that combines flexibility, empathy, and practical assistance. If you’re considering such a career, it’s important to know what exactly is required of a professional in this role.

How to Become a Nanny for Moms Looking for Work

Why is nannying so in demand now?

Over the past twenty years, the proportion of women returning to active work after having a child has increased by approximately a third. Social changes, the development of online education, and flexible work arrangements have made the labor market more open to young mothers. 

In the US and Western Europe, the market is growing by 6-7% annually; in Eastern Europe, growth is slightly slower, but the trend is the same. Mothers are increasingly preferring personalized care – especially when it comes to flexible schedules, relocation, or temporary employment.

Mothers searching for employment face a particularly difficult situation: they must attend interviews, complete continuing education classes, and locate temporary work. Daycare establishments do not always accommodate such situations, and relatives are not always available to assist. That is why nannies have so high potential in this field.As confirmed by research on childcare policies in Canada, access to affordable and structured childcare significantly influences women’s participation in the workforce, making the demand for flexible nanny services particularly relevant.

What makes a nanny different for a mother looking for a job?

At first glance, the responsibilities are the same: feeding, playing, putting the child to bed. But the context changes everything.

First, flexibility is required. A mother might call and say, “I have an interview in two hours”. And if you can adapt, that’s more valuable than experience working at a prestigious agency.

Second, stress tolerance is essential. Mothers looking for a job are often under emotional strain. Sometimes they need to talk things out, sometimes they just need to know their child is in good hands so they can focus on their work. In such situations, a nanny becomes not only a helper for the child but also a support system for the adult.

Finally, the partnership can be short-term. Sometimes help is needed for just a week or during an intensive job search. If you’re prepared for such conditions, it opens up more opportunities.

How to prepare: skills and documents

Imagine yourself in the mother’s shoes. She goes to a job posting website and sees dozens of resumes. How does she know who to trust with her most precious asset? Details matter.

  • You can start with experience. Even if you haven’t officially worked, write about volunteering at a children’s camp, helping with younger children in your family, or babysitting friends’ children. Real stories, not dry statements, immediately create a sense of trust.
  • Next comes health and safety. Parents need to know that the nanny won’t be flustered in an emergency. Therefore, first aid training, a health certificate, and the willingness to provide basic medical documentation are no longer a luxury, but the norm.
  • And, of course, references. Two or three short notes from families you’ve worked with, or even from teachers, can make all the difference. People trust people more than dry words on a resume.
  • If you add additional skills – knowledge of foreign languages, a teaching degree, or a willingness to work flexible hours – you’ll become the ideal candidate for the mother.

Where to look for vacancies

Finding a job in this field can be tedious. Personal ads, social media groups, and agencies all take time and don’t always yield results.

Aggregators work entirely differently. Some job platforms aggregate openings from thousands of sources worldwide and update their databases daily.. These include nanny offers and related family work opportunities.

What’s especially important: many platforms filter ads, protecting job seekers from scammers and phishing. For a profession where trust is paramount, this is a significant advantage. After all, a mother needs to be confident that the person she hires found a job on a reliable platform.

Secrets of a successful start

Resume

A nanny’s resume isn’t just a list of duties. It should convey character.Many platforms now offer free Resume Builders, which helps you format your resume so it’s easy to read and meets employer requirements.

It’s worth highlighting skills that are especially crucial for moms in their job search: the capacity to deal with an irregular schedule, a willingness to take on short-term tasks, and experience interacting with children of all ages.

Cover letter

Another tool is the cover letter. It often becomes the “live” text that decides the outcome. Here, you should explain why you understand the mother’s situation and how you can help her balance job searching and childcare. To create a compelling text, you can explore research on childcare policies and women’s employment – it will help avoid dryness and provide structure.

To create a compelling text, you can refer to the nanny cover letter writing guide. 

– it will help avoid dryness and provide structure.

How to Become a Nanny for Moms Looking for Work

Global perspectives

When you take a broader view of the profession, new horizons open up. For example, if a nanny’s salary in one country is one and a half times higher than in your home country, this can be a key factor in negotiations. If early development skills or language proficiency are particularly valuable in another field, you can take training and increase the price of your services.In fact, new research shows how remote work reshapes women’s labor supply and childcare balance, underlining the importance of flexible arrangements worldwide.

Thus, global job market data becomes a practical tool: it helps navigate the profession and plan your future career.

Traps newcomers fall into

Even the most motivated job seekers often make common mistakes.

  • Ignoring the mother’s schedule. Flexibility is key. If you insist on a rigid schedule, and the family expects you to “adapt as the situation dictates”, the partnership is unlikely to last.
  • Underestimating trust. For a mother looking for a job, even a single lateness or broken promise is especially painful.
  • Dry, overly formal communication. Parents are looking not only for a specialist, but also for someone they can trust.

All these mistakes have one thing in common: they hinder the development of rapport. And rapport is the foundation of a nanny’s work.

Final words

Being a nanny for moms seeking employment is more than simply a job that requires supervision. It is an integral element of a family’s existence during a critical period. Your dependability and adaptability affect whether a woman may quietly complete an interview or training course without worrying about her child.

Preparation, a well-written resume, a cover letter, and the use of online job search tools – all these factors help you enter the market with confidence. But the key is to remember: it’s not the paperwork or even the experience that counts, but the ability to be there.

This is what makes the nanny profession unique: you not only care for children, but also become part of the story of how a mother regains her job, and thus regains her confidence and independence.

Pumpkin Patches in Ottawa

0

Autumn in Ottawa offers a simple, joyful way to celebrate the season: take your family to a pick‑your‑own pumpkin patch, choose pumpkins together, and spend an afternoon carving or decorating them for Halloween.

toddler in a pumpkin patch

Pumpkin Season

Pumpkin season runs from late September through October; weekdays and early mornings are quieter, and the late-afternoon light is beautiful for photos. Dress in layers and wear sturdy shoes as fields can be muddy after rain.

When you arrive, give kids the freedom to roam a little and pick a pumpkin that speaks to them. Let each child choose one they can carry so everyone feels involved. Round, squat pumpkins are easiest to carve, while tall or misshapen ones are perfect for painting or gluing on decorations. Check for firm skin and a solid stem as soft spots mean the pumpkin won’t keep as long.

Picking the right pumpkin

When you arrive, give kids the freedom to roam a little and pick a pumpkin that speaks to them. Let each child choose one they can carry so everyone feels involved. Round, squat pumpkins are easiest to carve, while tall or misshapen ones are perfect for painting or gluing on decorations.

Size: Let each child pick a pumpkin they can safely carry, big enough to carve but not so heavy it becomes dangerous.

Shape: Round, squat pumpkins are easiest to carve. Tall or irregular pumpkins can be great for painting or decorating instead.

Stem: A sturdy stem makes the pumpkin easier to carry and looks better on display.

Check for soft spots or blemishes: These can mean the pumpkin won’t last as long.

Carving and Decorating Tips

At home, make carving a shared project. Younger kids can draw faces or paint their pumpkins while an adult does the cutting. For safety, use child‑safe pumpkin tools when possible and prefer battery LED lights over candles. If you do carve, cutting the bottom instead of the top makes placing a light inside easier and leaves a neater lid. To help carved pumpkins last longer, keep them cool, out of direct sun, and rub a little petroleum jelly on the cut edges to slow drying.

If carving feels too messy or tricky for small hands, decorating with paint, stickers, felt shapes or sequins keeps kids engaged and produces instant, no‑muss results. Turn the experience into a mini‑lesson too: talk about how pumpkins grow, why they’re seasonal, and let kids scoop the seeds to roast later. They will love the snack and the science.

Tips to remember:

  • Use templates: Print simple jack-o’-lantern faces for young carvers.
  • Cut the bottom, not the top: Cutting the bottom of the pumpkin instead of the top makes it easier to put a candle or battery light inside and helps the lid sit neatly.
  • Use battery-operated LED lights for safety.
  • For non-carving options: paint, stickers, glitter (use a craft sealer) or attach felt shapes. These are great for young kids or classrooms.
  • Preserve your pumpkin: Keep it cool, out of direct sun, and if carving, apply a thin layer of petroleum jelly on cut edges to slow shrivelling.

Activities at the Patch

Many pumpkin farms add extra activities like hayrides, corn mazes and petting zoos, and seasonal treats such as hot cider and cider donuts make a warm, cozy reward after a chilly walk. Those extras turn the trip into a half‑day adventure rather than a quick errand.

Pumpkin Patches in Ottawa

Bring your family to one of the pumpkin patches in Ottawa for a fun fall activity! Pick your own pumpkin to carve it with the kids for halloween or to make a delicious pumpkin pie! Ottawa also has several community pumpkin events to enjoy with the family.

Please visit the pumpkin patch sites to find out when they are open to the public before heading out.

A trip to a pumpkin patch is simple but full of moments that become family love! Whether you carve spooky faces or paint bright designs, picking your pumpkins together is an easy, heartwarming way to celebrate fall in Ottawa.

Ottawa Apple Orchards

0

Autumn in the Ottawa region means crisp mornings, bright maple leaves and baskets brimming with freshly picked apples. Visiting a nearby orchard is one of the season’s simplest pleasures: part outdoor escape, part farm-to-table treat.

Whether you’re after crunchy snacking apples, tart varieties for baking, warm cider and donuts, or a family day of hayrides and corn mazes, Ottawa’s orchards deliver.

Ottawa apple orchard

Ottawa Apple Orchards

Before you go, check the orchard’s website or social pages for current hours and Pick your own availability because weather, crop conditions and demand can change what’s on offer. Bring closed-toe shoes for muddy fields, layers for changing weather, and a cooler if you plan to transport a lot of fruit.

When to go to an Apple Orchard

  • Peak season: mid-August through October. Early varieties are ready in August; the main harvest runs September into October; late varieties (e.g., Fuji, Mutsu) extend into October and sometimes early November.
  • Weekdays are quieter than weekends, and mornings are cooler and less crowded.
  • Check orchard websites or social media for exact opening dates and pick-your-own availability — weather affects harvest timing and capacity.

Which Apples to Try

Trying different varieties is part of the fun:

  • Early apples like Lodi and Paula Red are tart and soft and great for sauce.
  • Midseason favourites include McIntosh (classic, tender, ideal for applesauce and fresh eating) and Cortland (sweet-tart and slow to brown, excellent for salads and pies).
  • Late-season apples—Gala, Empire, Honeycrisp, Fuji, Mutsu are firmer and sweeter and often store well for weeks. For baking, mix textures: tart apples add structure and flavour while sweeter ones balance sweetness and moisture.

Storing and Using your Apples

Not all apples store the same. Late, firm varieties like Fuji and Mutsu will keep longest in a cool, slightly humid place like an unheated cellar or crisper drawer is ideal. Sort and use bruised fruit first. For quick treats, slice for salads or snacking; for baking, combine tart and sweet apples to balance texture and flavour. Homemade applesauce, crisps and pies are classic ways to preserve the harvest, or try drying slices for snacks.

Ottawa Apple Orchard Locations

The Ottawa region has a mix of small family orchards and larger farms within a short drive of the city. You will find below a list of Ottawa Apple Orchards. Please click on the link(s) to view the Orchard’s information and when they are open to the public.

Ottawa-area apple orchards is a simple, rewarding seasonal outing that suits families, couples, and solo visitors. Whether you want a handful of crisp apples, a day of fall activities, or ingredients for pies and preserves, the orchards around Ottawa offer variety and charm. For delicious apple recipe ideas, you can try our Caramel Apple with M&M, Snickerdoodle Apple Cobbler Recipe, Easy Apple Crisp with Oats or Irish Apple Cake!

For more family fun ideas, you can view these fall activities in Ottawa!

23 Fall Family Activities in Ottawa

7

Fall is here! Just because the days are becoming shorter and cooler does not mean the fun in Ottawa has come to an end! There are plenty of fun fall family activities in Ottawa happening in and around the city for your family to enjoy! We have put together a list of fall family activities in Ottawa you can attend this autumn!

Fall Family Activities in Ottawa

FALL FAMILY ACTIVITIES IN OTTAWA 2025

Most attractions in Ottawa will require you to purchase your tickets in advance on their websites. Please make sure you check their websites before heading out!

Ottawa FALL EVENTS AND FESTIVALS

1. Ottawa International Animation Festival  

September 24th – 28th, 2025

North America’s largest animation festival once again takes centre stage in the Nation’s Capital. This year the Festival will run virtually with film screenings, the animation conference, workshops, and more which will be available online.

Whether you love classic cartoons, mind-bending experiments, fantastic digital creations, dazzling effects, thought provoking observations, or pure belly-busting fun, there is something for everyone and anyone at the Ottawa International Animation Festival (OIAF).

2. Fall Rhapsody in Ottawa and Gatineau 

Get outside! Travel the trails through Ottawa and Gatineau Parks and discover the beauty of the changing of the seasons in our region! There is so much to see and learn. Families can make a day of your adventures while visiting the parks.

3. The Day of the Dead Festival

October 31st to November 2nd, 2025

The Day of the Dead Festival is a non-profit organization focused on promoting the richness of Mexican culture through art, gastronomy, music and dance that appeal to the senses of all ages. The festival is an opportunity to experience a piece of Mexico in the heart of Canada.

The 5th edition of the Day of the Dead Festival in Ottawa will take place at the historic ByWard Market. The event features a special program including outdoor exhibitions, Mariachi performances, folkloric dancers, authentic Mexican cuisine, Catrina contests, workshops, artisan market, and much more.

4. Carleton University Butterfly Show

October 4-5 and 11-12, 2025

The Carleton University Biology Department hosts its annual Butterfly Show. During the days leading into the Thanksgiving weekend, over 1300 live exotic butterflies are released into the Nesbitt Biology building greenhouses. The public can visit during weekends.

5. Tucker House Winter Fair

November 22rd, 2025 – 10 am to 3 pm

The annual Winter Fair at Tucker House is a highly anticipated dog friendly event, drawing crowds from across the Ottawa region to celebrate the season in style. You will discover a diverse array of vendors, each offering a unique selection of traditional handcrafted goods and holiday-themed treasures, fun activities for kids of all ages as well as delicious homemade holiday foods to bring home! Free admission.

6Magic of Lights Ottawa 

November 21st, 2025 to January 3rd, 2026- Evenings

The National Capital Region’s favourite holiday tradition is back! Magic of Lights Ottawa is a remarkable drive-through experience, offering guests the opportunity to enjoy festive and vibrant LED light displays from the comfort of their own car. The Wesley Clover Parks Campground will be opening its doors to invite guests to tour along a route stretching more than two kilometers and featuring over a million gleaming lights. The magical route will include fan favourite displays including the Enchanting Tunnel of Lights, Snowflake Forest and Candy Cane Lane, along with new festive displays!

7. Christmas Lights Across Canada 

December 2025 – January 2026– On Parliament Hill, downtown Ottawa – Every evening, from 5:30 pm to 1 am

In Canada’s Capital, the winter landscape glows with over 300,000 multicoloured lights during the holiday season. The Christmas Lights Across Canada brighten Confederation Boulevard, Canada’s ceremonial route circling the heart of the Capital. The Boulevard encompasses Wellington Street, Mackenzie Street, Elgin Street, and Sussex Drive in downtown Ottawa, as well as Laurier Street in Gatineau and the Alexandra Bridge. A virtual version of the tour will also be available. 

8. Jurassic Quest is ROARING at the EY Centre

November 28th – 30th, 2025

Jurassic Quest is the largest & most realistic traveling dinosaur experience in North America! Jurassic Quest is the ONLY place where your family can experience true-to-detail (and size!) dinosaurs, including a 60 foot long, sky-scraping Spinosaurus, our 80 foot long Apatosaurus, and our gigantic LIFESIZE T.rex.

Opportunities to meet and greet loveable baby Dinosaurs like Tyson the T.rex, Cammie the Camarasaurus, and Trixie the Triceratops – plus their Dino Trainers. Fossil digs, Jurassic Jeeps, Crafts & Coloring Station, Fossil Experience, “Tricera-tots” (a soft play space for our littlest dino lovers), and MORE!

HALLOWEEN-THEMED EVENTS AND FESTIVALS IN OTTAWA

9. Saunders Farm 

Have a frightfully fun time as your family visits Saunders Farm this fall! They keeping the Halloween spirit alive with their world-famous FrightFest and Haunting Season. To control and limit the number of visitors on the Farm, visits must booked in advance. No walk-ups for either our day or night events.

FrightFest (fall nights)

Fridays and Saturdays (6pm – 11pm)
September 20th, 2025 – November 1st, 2025

Pumpkin Fest (Fall Days)

Saturdays and Sundays (10am – 5pm)
September 20th, 2025 – October 26th, 2025

10. Pumpkin Fest at the Proulx Farm 

September 20th, 2025 – October 26th, 2025

The Proulx Farm is transformed into a giant Halloween playground during Pumpkin Fest. Bring a picnic and come for a ghostly gathering in a country setting, just a few minutes from Orleans and 30 minutes east of downtown Ottawa.

11. Skreamers at the Proulx Farm

September 20th, 2025 – October 26th, 2025 – Friday and Saturday evenings

Proulx Farm is proud to support the Orleans Kiwanis club by providing a venue for Skreamers, the most haunted hayride in the east. Skreamers is night-time fun designed for more mature guests. Purchase tickets on their website.

Local residents and rival farmers have long suspected that something unnatural has been happening out at the Proulx Farm in Orleans, with reports of blood-curdling screams, a foul stench, unexplained power outages, and inexplicably lush & large crops…..

12. Stittsville Haunted Heritage Tours 

September 26th to November 8th, 2025 – Friday and Saturday at 7 pm and 9 pm

A tour down the archives of legends and lore with Stittsville Haunted Heritage Tours. Mysteries, apparitions and tales of the unexplained at 6154 Abbott Street West, Stittsville, in the Old Barn- Stittsville Train Park. You will examine the many legends, folklore and strange tales of the area. Oh- and there will be a Scavenger Hunt with a $1000.00 Grand Prize! You can find out more on their Facebook page.

13. Cannamore Orchard Acres of Terror 

Nights (6:30-9:30pm): September 26-27th (30% OFF),
October 3-4 (15% OFF), 10-11, 17-18-19, 24-25-26, 28-29-30-31
Days: (12-4pm): October 18-19th and 25-26th

Cannamore Orchard welcomes you their Acres of Terror, Eastern Ontario’s Most Terrifying Halloween attraction! Saturday and Sunday during the day are dedicated to families, younger children and those who get scared easily and don’t like it. Acres of Terror attractions will be toned down and made kid friendly. 

14. Pumpkinferno at Upper Canada Village 

October 3rd – November 1st, 2025 from 7 pm to 10 pm. October 18 to 31st, 2024 from 6:30 pm to 10 pm

Take the family for an evening stroll to see over 7 000 whimsically carved pumpkins at the Pumpkinferno. They are on display outdoors lighting your path across this dazzling display! Pumpkins of all different design and shapes will amaze all who attend. You may even pick up some tips for your family’s jack-o’-lanterns this year!

Fall family activities in Ottawa

Museum Fun This Fall In Ottawa

There are also many fall family activities happening at some of the museums in the Ottawa and Outaouais region throughout the season.

15Canadian Museum of History

16. Canadian Museum of Science and Technology

17. Canada Agriculture and Food Museum

18. Canadian Museum of Nature

19. Canadian Aviation and Space Museum

20. Cumberland Heritage Village Museum

21. Billings Estate National Historic Site

Your family can also enjoy visiting these places around Ottawa for a fun fall day:

22. Apple orchards

23. Pumpkin patches

There are so many things for families to enjoy and explore this fall around the city of Ottawa! We hope that you find an activity or event that will interest every member of your family! You can also visit these 23 Family Winter Events and Activities in Ottawa!

Which fall family activities in Ottawa do you think you will enjoy the most? Comment below!

What Is a Private Mortgage and Is It Right for You?

0

Thinking about mortgages? Forget the usual bank scenario for a minute. What happens when they turn you down?

Let’s say there’s David. Solid business, but his income jumps all over the place. Banks kept saying no, and he was about to lose a great property for expanding his business. Then, he found another way…

What Is a Private Mortgage and Is It Right for You?

That’s where private mortgages come in. Maybe you haven’t heard of them, but they’re getting more popular. And they might just be the solution you’re looking for.

This can be especially helpful if you’re a first time home buyer struggling to meet traditional mortgage criteria or competing in a hot housing market.

Here, we’ll break down exactly what a private mortgage is, how it operates, and, most importantly, if it’s the right move for you. Let’s get started.

Breaking Down the Basics: What Is a Private Mortgage?

Simply put, a private mortgage is still a loan secured by a property. The difference? You’re not getting it from a regular bank. Instead, you’re borrowing from an individual, a group of investors, or a specialized lending company. Imagine borrowing from a wealthy relative—but with all the legal stuff in place, and your house as collateral.

So, who’s handing out these mortgages? You’ve got individual investors seeking returns, investment groups pooling funds, and specific private lending firms focusing on this type of loan alone. They operate outside the strict rules of traditional banking, which means they’re often willing to look at deals banks won’t touch.

How’s it different from a bank mortgage? Banks have tons of rules to follow. Private mortgages? Not so much. This can be good and bad. More options, sure, but you need to be extra careful. The paperwork still matters, but they often care more about the property’s value than your credit score.

Why Do People Choose Private Mortgages?

Private mortgages usually aren’t the first choice, but they make sense in some cases. Like these:

  • Bad Credit or No Credit: Messed up credit in the past? Just starting out? Banks might see you as too risky. Private lenders might be more willing to skip the credit score and focus on your property’s value. And yes, they may look at why your credit is where it is.
  • Self-Employed Borrowers: Banks sometimes struggle to understand that a lower net income on paper doesn’t mean someone can’t make payments. Like David, proving a steady income can be tough when you’re self-employed. Banks want years of tax returns and aren’t very flexible. Private lenders? They might get it and work with you more easily.
  • Need to Move Fast: In a hot real estate market, speed wins. Bank mortgages can take forever – weeks, even months. Private lenders can often get you the money much faster, so you can snap up that property before someone else does. Get in on the deal quicker.
  • Unusual Properties: Think land out in the country, a fixer-upper, or something else outside the norm. Banks often don’t like these because of the risk – problems with insurance, trouble selling if they had to foreclose, you name it. Private lenders are often more open to these situations. They can be flexible and consider opportunities that banks just ignore.

How a Private Mortgage Is Set Up

What Is a Private Mortgage and Is It Right for You?

Expect a private mortgage agreement to spell out the loan amount, how long you have to pay it back (usually shorter than a normal mortgage, like one to three years), and the interest rate (usually higher).

Lawyers and mortgage brokers are key players here. Lawyers make sure everything is legal and protects both sides. Mortgage brokers connect you with the right private lender and help you negotiate the terms. EquityRich.ca can help find a broker for you.

The property itself is the “security” – what the lender gets if you don’t pay. Miss your payments, and they can take the property. Know this before you sign anything.

Benefits of Choosing a Private Mortgage

What’s good about going this route?

  • Fast and Flexible: Like we said, things happen faster than with a bank. Big advantage in a competitive market! Plus, private lenders aren’t as picky about rules. They look at each situation individually for terms that work for everyone.
  • Easier to Qualify: Private lenders usually don’t have as many strict rules as banks. This can be huge if your credit isn’t perfect or your income is a bit unusual.
    While often aimed at buyers and investors, private mortgages can also be an alternative to reverse mortgages for older homeowners who want to access equity without selling their property outright.
  • Terms You Can Negotiate: Banks have set rules. Private lenders? They’re often willing to talk. If you need a loan that fits your specific situation, this can be a game-changer.

What Are the Risks? 

Now for the downsides. Private mortgages come with risks:

  • Higher Interest and Shorter Time to Pay: Private lenders charge more interest to make up for the extra risk. Plus, you usually have less time to pay the loan back. Be ready to make those payments!
  • Less Regulation: Lawyers are involved to protect people, but in general, private mortgages aren’t watched as closely as bank mortgages. This could lead to problems, but good brokers and advisors can help avoid it.
  • Awkwardness with Friends/Family: Borrowing from someone you know might seem easy, but it can get messy if things go wrong. Think carefully before borrowing from family or friends.

Key Considerations Before You Commit

Before you sign, ask yourself these important questions:

  • Can you afford the payments? Seriously. Make a realistic budget and be sure you can handle those higher payments with a shorter repayment period.
  • What’s the plan to get out of this loan? Private mortgages are often short-term. How will you refinance with a bank or sell the property before the loan is up?
  • Did a professional look over the paperwork? Don’t sign anything until a lawyer or trusted financial advisor has checked it out. They can explain anything that’s unclear and make sure the deal is legit.
  • Are you ready for the worst-case scenario? Losing a property to foreclosure is serious. Have you thought about what happens if things go wrong?

The Bottom Line: Is It Right for You?

Private mortgages aren’t for everyone. They might be a great solution for some, and a bad idea for others.

Consider it if: you need money fast, can’t qualify for a traditional mortgage, or only need the money for a short time.

Be careful if: your income isn’t steady, you don’t have a solid plan, or the higher interest rates throw off your budget.

Say yes if: you’ve weighed the pros and cons, have a foolproof repayment plan, and a clear way to pay off the loan.

Walk away if: you feel pressured, you don’t understand the terms, or you can’t comfortably afford the payments.

Final Tip: Always Get Advice

Talk to a financial advisor or mortgage broker before making any decisions. They can look at your situation, explain the risks and rewards, and help you find a trustworthy lender.

EquityRich.ca can connect you with experienced mortgage pros who can guide you and make sure you benefit from the deal, not just the lender.

Make sure the terms help you, not just the lender. Your financial future depends on it!

Things to Do in Ottawa this Summer

2

Once the Rideau Canal Skateway has thawed and the spring tulips are past their peak, it’s time to enjoy summer in Ottawa. With Parliament not in-session the city takes on a relaxed vibe of holiday time, where outdoor museums and summer celebrations set the pace for a fun Ottawa summer vacation. Museums, festivals, and events all make excellent reasons to visit Ottawa. There are so many things to do in Ottawa this summer!

Things to Do in Ottawa this Summer

Ottawa Staycation: Become a tourist

The state of the economy has spawned a new word in the travel industry, the staycation. This is when you decide to stay home during your vacation. A summer staycation doesn’t mean hunkering down in the family room and watching reruns of TV shows, unless that is your idea of a vacation. What a staycation means is that you are not going to travel a long distance and have overnight stays away from your home. There are many ways to turn this summer staycation into a great vacation for the family.

Many people never think of their city or nearby towns in terms of tourism. It is time to look at them with new eyes. Do a little research. Try to see Ottawa as you would if you were actually coming here for a vacation, where would you go? Treat your Ottawa staycation the same way you would a vacation; the family can sleep in, watch cartoons in their PJs, go out to breakfast, and then have a plan for the day.

Make your first stop to an Ottawa’s tourist information centre and pick up some brochures and maps on all the things to do in Ottawa. You can also visit the Ottawa Tourism website to help you plan your visit to the Nation’s Capital.

Staying home for vacation can be as exciting as going away for vacation. The best part about a staycation is you don’t have to pay for airfare and hotels. This makes everything else you spend seem like a bargain.

Things to do in ottawa

Outdoor Ottawa museums, summer Parliament tours, and Canada Day festivities provide some fun options for an Ottawa summer vacation with the kids. Families can take part in numerous summer activities in Ottawa!

Ottawa Outdoor Summer Activities

Whether it’s renting a canoe at Dows Lake Pavillion, walking alongside the Rideau Canal, or visiting the outdoor art and monuments in the city, there are lots of outdoor activities and fun things to do in Ottawa this summer.

Ottawa has many parks and historic sites to visit with the family. These destinations are often free or very minimal prices for a visit. Some ever offer guided tours to add additional information.

Ottawa shopping opportunities increase with the warm summer weather. Enjoy outdoor markets such as the ByWard Market district and pedestrian-friendly Sparks Street Mall where sipping a Latté nicely complements strolling the downtown district and window shopping.

Plan a day at one of the Ottawa Beaches. You can plan activities on the water or it can just be a day of sun and fun. Pack a picnic in the car and make it a family day. Look for fun things to do with the kids like rent a canoe, walk along the beach, or take a nature walk.

Go see a sports team play such as the Ottawa RedblacksAtlético OttawaOttawa BlackJacks and the Ottawa Titans. Purchase tickets to games and enjoy great outdoor sports with popcorn, hotdogs, and lots of excitement!

Canada Day Fireworks

Things to do in Ottawa for Canada Day

Canada Day may be the city’s largest celebration. The festive sounds of the concerts, bright and awe-inspiring fireworks displays, fun and laughter of the kids activities, and smokey smells of barbecues fill the air and skies of Ottawa. The city stops to celebrate – the perfect atmosphere for a family summer vacation.

There are many things to do in Ottawa on Canada Day. You can also look for the numerous free Canada Day activities. Most museums offer free admission (including favourites such as the National Gallery of Canada and the Bytown Museum), free concerts, free shows, and of course the free fireworks display. These are just some of the many budget-friendly Canada Day activities.

Canada Agriculture and Food Museum

Visit Ottawa Museums During Summer

While the National Gallery of Canada, the Canadian Museum of Nature, and the Canadian War Museum make great museums to visit for families, opt for those museums with a strong outdoor element during summer vacation:

  1. Bytown Museum: The Museum sits on the banks of the Rideau Canal. Visit to see the locks and canal in action or the historical costumes. Located at 1 Canal Lane.
  2. Canada Agriculture and Food Museum: Living displays create a working farm in the city. From piglets to chickens to cows, the agriculture museum explores the day-to-day activities of farming. Located on Prince of Wales Drive.
  3. Cumberland Heritage Village Museum: This Ottawa museum provides an immersive and educational experience that showcases life in the 1920s and 30s. Located on Old Montreal Rd. in Cumberland.

To make it easier to plan your vacation to Ottawa, I have compiled a list of Ottawa Museums, sites, and buildings.

Ottawa Parliament Hill building

Explore Canada’s Parliament

With Parliament often on hiatus during the summer, visitors to Canada’s Parliament buildings can see a different side of the Canadian government. Walk the grounds of Parliament Hill and admire the many monuments and sculptures, views of the Ottawa River.

During a Parliament buildings tour, visit the Centre block and the East block (a summer-only option). Climb the Peace Tower, sit in Senate chambers, or visit the grand library. Tours are most comprehensive during the summer as the tour schedule concedes less to the schedules of Senate sessions and Parliament sittings.

More things to do in Ottawa in the summer

You can take part in popular Ottawa summer festivals such as the Ottawa Bluesfest, the Ottawa Fringe, and the new History Fest located at the Ottawa City Hall.

Things to Do in Ottawa this Summer

Warm and pleasant summer weather makes Ottawa a perfect family vacation destination: experience the outdoor markets, museums, beaches, parks, and festivals of this vibrant Canadian city. There are so many things to do in Ottawa this summer, so why not take advantage of it! Bring the family for a fun filled day of summer activities in the Nation’s Capital.

25 Summer Family Activities in Ottawa

16

Summer is here! This allows for families to spend more time together spend some time doing things together in Ottawa and its surrounding areas. Here is a list of 25 summer family activities in Ottawa for you and your family to attend and enjoy!

Summer Family Events in Ottawa

Summer Family Activities in Ottawa

There are lots of Ottawa summer family activities to do!

1. All Aboard! with the Ottawa Valley Live Steamers and Model Engineers Sundays May 25, June 29, July 27, August 31 and September 28 from 11 am to 3 pm

Travel back in time to the age of rail with the Ottawa Valley Live Steamers and Model Engineers and participate in a demonstration of their large-scale outdoor model locomotives at the Cumberland Heritage Village Museum. This program is weather dependent. In the event of inclement weather, the program may be adjusted or cancelled without notice.

2. Ottawa Fringe Festival, June 12-22, 2025

The Ottawa Fringe Festival provides all performing artists, both emerging and established, with the opportunity to showcase their original work and makes the Festival as affordable and accessible as possible to the members of the community.

This is no ordinary adventure! After reading an inspiring story, a museum guide takes children on an imaginary journey through our Solar System — landing on planets along the way. 

3. Mud Hero Ottawa June 21, 2025, 8:30 am – 6 pm

Challenge yourself by participating in one of Canada’s largest obstacle course events, Mud Hero: 12km, 6km, or kids’ event, with multiple obstacles.

4. Summer Solstice Festival, June 21-22, 2025 at MĀDAHÒKÌ FARM

The Summer Solstice Festival is spectacular tourism experience and gathering place in Ottawa’s Greenbelt. MĀDAHÒKÌ, which means “to share land” in Anishinaabe, builds on the growing interest in agritourism, farm-to-table culinary experiences and authentic cultural experiences from an Indigenous perspective.

5. Tim Hortons Ottawa Dragon Boat Festival, June 20-22, 2025,  Mooney’s Bay Park

The Tim Hortons Ottawa Dragon Boat Festival is a weekend of fun and racing. Visitors will cheer for their favourite dragon boat as teams from local businesses and organizations race each other along Mooney’s Bay. Concerts, food and free family events are planned for everyone to enjoy!

6. Canada Day in Ottawa, July 1, 2025

Numerous events are planned for your family to do to celebrate Canada Day in Ottawa! There will be street entertainers, games, ceremonies and performances throughout the day finishing with a dazzling fireworks display.

Local Canada Day events in Ottawa:

7. Movies in the Parks July to August, 2025 starts at 8 pm -Lansdowne Park – South Court

Bring some friends and enjoy free movie nights in the South Court. Movies take place Thursday evenings at sunset. Some seating is provided but feel free to bring your own chair.

July 3: Zathura Space Adventure
July 10: The Fall Guy
July 17: The Mitchells vs. the Machines
July 24: Twisters
August 7: Despicable Me 4
August 14: The Wild Robot
August 21: Kung Fu Panda 4
August 28: The Fifth Element

In case of rain, movies will take place inside the Aberdeen Pavilion. In the event of extreme weather warnings performances will be rescheduled. Please check the event Facebook page for the most current update.

8. RBC Bluesfest, July 10-20, 2025, Canadian War Museum LeBreton Flats

Ottawa’s RBC Bluesfest is one of the largest international music events in the world. Ottawa Bluesfest provides a world-class event that showcases local, regional, national and international musicians.

9. Music and Beyond, July 11-13, 2025

Music and Beyond is a classical music and arts festival. Each year, the festival offers a variety of programming to highlight exciting connections between classical music and other art forms. Music and Beyond introduces and fosters new audiences as they explore or experience music and the arts. All the while emphasizing and providing opportunities for young people in the community.

10. Ottawa Lebanese Festival, July 16-20, 2024, Saint Elias Centre

The Ottawa Lebanese Festival celebrates the very best in Lebanese food, entertainment, and culture in the National Capital Region.

11. Thai Street Food Festival July 19th, 2025, 11 am – 6 pm.

The Royal Thai Embassy Ottawa proudly presents the annual Thai Street Food Festival is held at the Horticulture Building in Lansdowne Park Discover the Magic of Thailand! Unforgettable journey of flavours, culture, and excitement. Savour authentic Thai cuisine, sway to the rhythm of traditional Thai dance, witness heart-pounding Muay Thai demonstrations, and unwind with a blissful Thai Massage.

12. Lock & Paddle July 19, 2025, Hartwells Lock, 901 Hartwell’s Locks Lane

Join Parks Canada and hundreds of your fellow paddlers for this free mass Lock & Paddle event on the Rideau Canal. Imagine a ‘flash mob’ of colourful canoes and kayaks, descending upon of Hartwells Lock for a celebratory lockage.

13. Fanaticcon, July 20, 2025, Ottawa Conference and Event Centre

Are you a fanatic of gaming, toys, cosplay, comics, entertainment, and more? YES, then Fanaticcon is for you!

14. Carivibe Ottawa Caribbean Carnival- Reach the Beach, July 25-27, 2025, on Petrie Island

The Reach the Beach is Caribbean inspired day Festival on Petrie Island featuring the very best in Tropical Cuisine, Tropical Drinks & Tropical Ice Cream. All mixed with sweet Soca, Dancehall, Reggae and Afro vibes!

15. Les Grands Feux du Casino Lac-Leamy, July 30-Aug 16, 2025 on Wednesdays and Saturdays at 6 p.m. at the Canadian Museum of History

Les Grands Feux du Casino Lac-Leamy are so much more than fireworks! It’s also about fiery culinary experiences, prodigious artistic performances, striking digital and multimedia art installations and much more! Join us for one of 6 evenings of programming.

Canada day fireworks

16. The Big Bounce Canada, August 1-3, RA Centre

The Big Bounce Canada is one of the world’s largest touring inflatable event arrives in Ottawa with a surreal, 900-foot-long playground. Featuring custom attractions like The OctoBlast and Air Space, this bold and bouncy experience delivers high-energy fun for all ages.

17. Ottawa International Buskerfest, August 8 – 10, 2025, Sparks Street

Sparks Street transforms into the ultimate stage for amazing street performers at the Ottawa International Buskerfest! This festival brings together various types of performers showcasing their comedic and thrilling skills. Performer such as escape artists,  fire eaters, contortionists, and so much more will be in attendance for visitors to see.

18. PuppetCon by PuppetsUp! Returns August 2026, Almonte

Almonte is home to PuppetCon with a weekend full of hands-on workshops, insightful panel discussions and showcase performances. Focusing on both the entertainment value of puppetry and the development of this art, PuppetCon provides hands-on workshops for adults and children, along with select puppet performances.

19. Water Lantern Festival, August 9, 2025, Andrew Haydon Park

The Water Lantern Festival is filled with fun, happiness, hope and good memories that you will cherish all your life. It’s a family event that can be shared by everyone. Friends, families, neighbors come together to create a peaceful and memorable experience.

As the sun begins to set on the evening sky, the Water Lantern Festival begins to shine with the launch of the lanterns on the water as we turn on the water together. Watch your unique lantern drift into the water as it joins other lanterns that bring hope, love, happiness, healing, peace and connection. It’s a night you’ll never forget.

20. Ottawa Greek Festival, August 14-17, 22-24, 2025, 1315 Prince of Wales Drive

The Ottawa Greek festival features delicious greek cuisine, live Greek music, traditional dances, The Zorba Show, a multicultural mights, and lots more!

21. Ottawa Junior Carnival – August 17th, 2025, 3 m to 7 pm – The Stadium at TD Place

The West Indian Youth Association of Ottawa presents the Ottawa Junior Carnival 2025, a celebration of Caribbean Culture, our children, youth and community. Immerse yourself in some of the flavors of the Caribbean, move to the rhythm and beats of Caribbean Music, Take a walk through Tanty’s Garden Carnival Costume Parade. This is a family fun event for everyone to enjoy

22. Allan Haan Manotick Soapbox Derby and Picnic, August 24, 2025 Beaverwood Road next to Centennial Park 

Summer is the time for kids and their parents to use their creativity by building a soapbox cart and racing it in the Allan Haan Manotick Soapbox Derby. This is a fun derby, perhaps not suitable for serious soapbox racing enthusiasts, but anyone 7 or older is welcome to participate. Participants can build their own carts or we have some sponsored carts for those who cannot make one.

MVCA’s Picnic in the Park begins at 11:30 am on the day of the Derby.  It can be found in Centennial Park which is located beside the Manotick Community Centre at 5572 Dr. Leach Drive. There will be activities for children and youth, live music and a barbecue lunch.

23. Latin American Parade and Festival, August 24th, 2025 11 am to 8 pm – Horticulture Building and East Court

The Latin American Community of Ottawa-Gatineau is organizing its annual celebration showcasing the richness of our cultures through its parade on site at Lansdowne Park and the festival located in East Court and inside the Horticulture Building. Enjoy traditional music and dance performances, savor authentic cuisine from across Latin America, and experience the warmth, joy, and hospitality that define the community.

24. Gatineau Hot Air Balloon Festival, August 27-31, 2025

Music. Activities. Fun. Oh, don’t forget the dazzling array of hot air balloons across the sky! The Gatineau Hot Air Balloon Festival attracts visitors from all over the world to see pilots navigate floating works of art in the skies above Canada’s capital region.

Gatineau Hot Air Balloon Festival

25. Ottawa ComicCon, September 5-7, 2025 – EY Centre

Ottawa Comiccon is a fan convention with multi-genre content: comic books, sci-fi, horror, anime, video games and the entertainment world. Fans have the opportunity come to meet their favourite creators from the world of comics and BD, get their autographs, buy a sketch or thank them for their work. Additionally, one of the biggest draws, fans get to meet the personalities behind their favourite TV shows and movies. Celebrities participate in autograph sessions, photo opportunities and stage appearances.

What to do with the kids on a rainy day? Visit Ottawa Museums!

On a rainy day this summer, enjoy one of Ottawa’s many museums with the family:

This list will help you plan your family activities in Ottawa this summer! We hope you have enjoy exploring all of the fun in the Nation’s Capital and get to make some special memories!

Running a Business as a Mom in Ottawa: What Matters Most

0

Being a mom is a full-time job. So is running a business. Doing both at the same time? That’s next-level.

Running a Business as a Mom in Ottawa

In Ottawa, where winters are long and schedules are packed, it’s easy to feel like everything’s fighting for your attention. You wake up early to pack lunches. You answer emails during naps. You check Google reviews after bedtime stories. It never stops. But it’s worth it because you’re doing it for your family and your future. Still, the hardest part isn’t the work. It’s the distractions. The little things that pile up and steal time from what matters.

Life in Ottawa as a Mom and Business Owner

Balancing Weather, School, and Work

Ottawa’s a great place to raise kids. Safe neighbourhoods, good schools, plenty of parks. But it comes with challenges too.

Snow days mean last-minute childcare. School pickups in minus-20 weather. Long drives between errands and appointments. And don’t forget hockey practice.

If you run your own business, every hour counts. Time spent shovelling the driveway or tracking down receipts is time you don’t get with your kids or your customers.

What Gets in the Way

The Mental Load Is Real

It’s not just work tasks. It’s everything else:

  • Meal planning
  • Laundry
  • Cleaning
  • Invoices
  • Comments on social media
  • Forms from school
  • Texts from customers

Even small things add up. You think you’ll get to the marketing project after lunch, then the baby needs a nap, and the dog throws up on the rug.

Focus on What Matters

Family Comes First. Then the Work You Love.

No mom starts a business because she loves admin work. You start it because you want freedom. Flexibility. Time with your kids. Maybe you saw a gap in the market. Maybe you wanted to build something of your own.

That focus should never get buried under spreadsheets and to-do lists.

Online Services That Help

Running a Business as a Mom

Streamline, Automate, and Outsource

You don’t need to hire a team. You just need to take a few things off your plate.

Here are some tools and services that work:

  • Online scheduling apps like Calendly let clients book without the back-and-forth.
  • Bookkeeping software like Wave or QuickBooks handles receipts and invoices automatically.
  • Grocery delivery from Instacart or Walmart lets you skip the checkout line.
  • Virtual assistants from platforms like Fancy Hands or Upwork can handle basic tasks like inbox management or order tracking.
  • Reputation management services help respond to online reviews so you don’t have to.
  • Social media schedulers like Later or Buffer save hours each week.

Using a few of these won’t just save time. It’ll give you breathing room.

Don’t Let Feedback Drain You

Reviews Are Important, But Not Everything

When you run a business, especially as a solo founder, feedback feels personal. A good review lifts your day. A bad one ruins it.

That’s normal. But don’t let one comment throw off your whole week.

If someone leaves a rude or fake review, there are ways to handle it. You can respond calmly and professionally. You can report violations on platforms like Google, Yelp, or Facebook.

And in some cases, you may need to look into how to delete negative Google reviews. It’s not always easy, but there are steps you can take or services you can hire to protect your reputation.

Just don’t let it take over your time or headspace. Your business is more than one review.

Build Systems That Support You

A Little Structure Goes a Long Way

You don’t need a perfect routine. But a simple system can change your day.

Try this:

  • Set blocks of time for focused work.
  • Keep a short list of top priorities for the week.
  • Automate or outsource one task each month.
  • Schedule screen-free time with your kids.
  • Protect your evenings whenever possible.

You’re the CEO of Your Life

It’s Okay to Say No

Running a business as a mom means learning to say no. No to extra work you don’t enjoy. No to clients who drain your time. No to the idea that you have to do it all to be successful.

Final Thought

You started your business for a reason, to build something meaningful and to create a better life for your family. Don’t let distractions steal that from you, use tools, ask for help, let go of what doesn’t matter, and never forget you’re doing two of the hardest jobs in the world at the same time…. And you’re doing them well!

Why Do Newborns Benefit from High Contrast Toys?

0

Feeling unsure about stimulating your newborn’s senses? Their world is mostly blurry and gray. The solution: high-contrast toys – black-and-white patterns – instantly captivate baby’s eyes and spark early growth.

Why Do Newborns Benefit from High Contrast Toys?

From day one, newborns see mostly in black, white and gray. Their eyes naturally latch onto bold, contrasting shapes. These toys direct a baby’s attention and transform simple play into visual and brain development. Over time, this simple trick builds better focus, early pattern learning skills, and even bonding moments.

Now you might wonder: What makes high-contrast toys so special for newborns? Next, we’ll tackle common parent questions about baby vision, toy use, and early development.

What Are High-Contrast Toys and Why Are They Important?

What exactly are high-contrast toys? Picture baby books, rattles, or mobiles printed with bold black-and-white patterns and other stark designs. Many new parents wonder why toys use such contrast. The problem is that a newborn’s vision is still very blurry and nearsighted. A colorful toy might look like a gray blob to a newborn, so plain stimuli often fail to hold interest. High-contrast toys solve this: they use clear edges and shapes (like stripes, checkerboards, or bold geometric forms) that a newborn can actually see. Studies confirm: newborns under a week old fixate on black-and-white patterns far more than on plain colors. These bold visuals make even simple objects into engaging early-learning tools.

Further reading: Advantages of high-contrast black and white color for newborn development.

  • High-contrast (black & white) designs: These bold patterns stand out sharply to newborns.
  • Simple shapes and lines: Stripes, checks and bold images are easy for tiny eyes to focus on.
  • Common examples: Picture books, mobiles or rattles with stark patterns—toys that naturally catch baby’s gaze.

When Will My Baby Start Seeing Colours?

When will my baby start seeing all those bright colours? Actually, a newborn’s world begins mostly in black, white and gray. Their eyes and brain are still maturing, so early on they notice only bold contrast. As a result, colourful toys can seem dull at first. For the first 2–3 months your little one is naturally more drawn to blacks, whites and simple shapes. Then around 4–6 weeks old, babies often start to pick out red hues. By about 3–4 months, they begin distinguishing reds from greens. By roughly five months, a wider range of colors becomes clear to them. For now, it’s normal if your newborn seems indifferent to bright colours. Understanding this timeline explains why black-and-white patterns captivate baby’s attention early on.

  • Birth to ~1 month: Baby sees mainly black, white and gray.
  • 4–6 weeks: The first clear colour seen is often red.
  • 3–4 months: Infants start distinguishing reds versus greens.
  • Around 5 months: Most primary colours become clear as vision matures.

How Do High-Contrast Toys Help a Newborn’s Vision?

How exactly do high-contrast toys help my baby’s vision? Early on, a newborn’s eyes and visual pathways are like untrained muscles. Without stimulation, they won’t get much practice. Black-and-white patterns change that. When a baby gazes at a sharp shape, it encourages focusing and tracking, which in turn strengthens the eye muscles. Those vivid contrasts also send strong signals from the retina to the brain, accelerating neural development. In simple terms: every time your baby follows a striped or dotted toy, they’re training their vision. For example, hold a patterned toy 8–10 inches away (the baby’s focus range) and slowly move it side-to-side; your baby’s eyes and head will follow. Each pattern they explore builds visual skills: stronger focus, better tracking, and more robust sight.

  • Eye muscle workout: Tracking bold patterns improves eye control and focus.
  • Brain boost: Strong contrast triggers neural connections in baby’s visual cortex.
  • Practice focus: Objects at about 8–10 inches (baby’s focus range) help sharpen vision.

How Do These Toys Support Baby’s Learning and Bonding?

How do these toys help my baby’s brain and bonding? It turns out, high-contrast images do more than just train eyes. When babies look at bold patterns, they’re also kick-starting cognitive learning. In fact, researchers note that gazing at black-and-white images strengthens a baby’s visual perception and brain development. Pattern recognition lays the groundwork for later learning — even math and reading start with simple shapes. These toys also become tools for interaction. Sharing a high-contrast board book or pointing out stripes during cuddle time encourages your baby to focus, listen and respond. This interactive play builds language skills and emotional connection between you two. Even noticing bold images can calm a fussy baby, giving them something engaging to study together.

  • Pattern learning: Recognizing stripes, dots and simple patterns teaches your baby about shapes and sequences.
  • Focus and calm: These toys hold baby’s gaze longer, building attention skills and often soothing fussiness.
  • Parent interaction: Talking about these images or reading a board book together boosts early language and bonding.

How Should You Use High-Contrast Toys with Your Baby?

What is the best way to use these toys? Think of them as visual exercises for your baby. Hold or hang a high-contrast item about 8–10 inches from the baby’s face (about arm’s length). That’s your newborn’s optimal focus range. Try these toys during alert, calm periods (for example, during tummy time or a quiet play session). Move the toy slowly side-to-side so your baby can track it, which boosts engagement. Keep sessions short – a few minutes at a time – to avoid overstimulation. For example, you might hang a bold-patterned mobile above the crib or show a graphic card during feeding while softly talking or singing. Used this way, high-contrast toys become a powerful tool: they give baby’s eyes just the right challenge, without overwhelming their senses.

  • Hold at about 8–10 inches from your baby’s face: This matches the newborn focus range, according to the Nationwide Childrens.
  • Choose calm, alert times: Use toys during quiet play or tummy time, not when baby is hungry or sleepy.
  • Encourage tracking: Slowly move toys side-to-side so baby practices following them with eyes.
  • Talk and bond: Describe the patterns or sing while playing to connect with your baby.

When Can You Transition to Colourful Toys?

When should you start introducing those colorful toys? Gradually, as your baby’s eyes mature. Most infants don’t see full colour well until around 4–5 months of age, so keep using high-contrast items first. Begin adding gentle colours around 3–4 months, especially red and green, which babies detect first. Offer a mix – for example, pair a bright-red toy with a black-and-white card. Watch for signs of interest: if your baby reaches or coos at a colourful toy, they’re starting to notice it. By about six months, you can rely less on strictly black-and-white and offer a richer variety of colours and patterns. For example, try a simple rainbow mobile or multi-coloured ring toy, while still keeping some stark-patterned items in play.

  • Gradual mix: Keep some black & white items and introduce a few colour toys together.
  • Red and green first: These colours often catch baby’s eye by about 3–4 months.
  • Follow baby’s lead: If your baby seems interested in a new colour, add more of that hue.
  • By 6 months: Baby can enjoy a wide range of colours and more complex patterns.

What Other Ways Can You Stimulate Your Baby’s Vision?

Why Do Newborns Benefit from High Contrast Toys?

Beyond toys, many everyday activities can boost a newborn’s sight. For example, change up baby’s view: carry and gently turn your baby around the room, or alternate which shoulder you hold them on so they see new objects. Black-and-white pictures or posters at their eye level (even simple ones printed at home) make interesting wall art. Face-to-face time is also key: babies naturally focus on human faces, so hold your baby upright facing you and make eye contact, smile or talk softly. Using a safe mirror or a high-contrast mobile overhead adds even more visual variety. The idea is to keep visual input fresh: your voice and motion bring objects to life. Small changes like these complement high-contrast toys and help your baby learn to track and focus in all kinds of situations.

  • Change scenery: Gently carry and turn your baby around the room, or alternate which shoulder you hold them on to show new views.
  • Face time: Speak, smile and make eye contact. Babies naturally focus on human faces, which sharpens their vision.
  • Mirrors and mobiles: A safe mirror or a high-contrast mobile overhead provides more interesting things for baby to watch.
  • Vary backgrounds: Even colourful clothes or posters near the crib offer visual interest once baby’s color vision grows.

Conclusion

High-contrast toys turn simple play into vision training: bold patterns capture a newborn’s attention, strengthening sight and sparking early learning. They also create bonding moments during play. As your baby grows, blend in colours but keep using some stark patterns.

How to Improve Your HVAC System’s Airflow

The Importance of Optimal Airflow

Optimal airflow ensures that every room in your home is at your desired comfort level, and it also helps lower your utility bill. Restricted, or inefficient, airflow also causes premature wear and failure of parts such as the blower motor and compressor, which means more money out of your pocket. A good airflow also helps improve indoor air quality, as it facilitates the removal of airborne contaminants through the filtration system. A healthy home requires addressing airflow issues.

How to Improve Your HVAC System’s Airflow

Common Causes of Poor Airflow

Several factors can prevent proper airflow. Realizing these causes is the first step in resolving airflow issues.

  • Blocked vents and registers prevent air from entering and exit. Blockages from furniture, drapery, or household items prevent conditioned air from reaching its destination and returning, completing the cycle. This makes the system run longer, wastes energy, and creates uneven temperatures.
  • Filters collect dust and debris to help protect the system and improve Air quality. Filters become blocked over time, reducing airflow and efficiency. Missing filter replacement can allow dust to collect in the ductwork and damage system components. Maintenance of filters should be regular.
  • Ductwork Problems (Leaks, Blockages, Improper Sizing):
    • Leaks: Leaky ducts allow conditioned air to enter unconditioned areas, reducing airflow and energy efficiency. Return duct leaks allow pollutants to enter the home.Blockages: Dust, debris, and nests may collect inside ducts and block airflow, leading to unevenly distributed temperatures and additional stress on the HVAC system
    • Proper Sizing: Under or oversized ducts lead to excessive resistance on the system and ineffective airflow. Professional maintenance will ensure correct fitting.
    • Dirty coils
    • These dirty coils prevent effective heat transfer, and the system cannot condition the air properly. This can lead to increased energy consumption and potentially cause compressor failure. Poor return air vents: Inadequate return air vents create pressure imbalances, making the system less likely to circulate conditioned air. This creates ineffective airflow & poor efficiency.
  • Dirty or Faulty Blower Wheel and Motor:
    • A faulty Blower Motor restricts or stops airflow, causing inconsistent temperatures and high energy consumption.
  • Oversized/Undersized HVAC Unit:
    • The base of your HVAC system is the unit itself. Whether too small or too big, the lifespan of the system will decrease, and utility bills will likely be elevated. Professional consultation is recommended, and furnace replacement may be needed.
  • A malfunctioning thermostat will provide improper signaling to the HVAC system, which can cause irregular temperatures, poor airflow, and additional stress as the system will often be overworked. 

First Priorities: Checking Your Air Filter Regularly

  • Locating Your Air Filter – Filter location depends on the system type. These may be near a furnace or air handler, within return air vents, or in packaged systems.
  • Checking Your Air Filter:
    • Make sure to turn off the power before inspecting the filter. Inspect the filter for visually evident dirt or debris. Depending on its severity, you may need to replace it. It is generally recommended to replace your air filter at least every three months. Regular maintenance is highly recommended, and we suggest seeking guidance on cleaning through our services or consulting on proper technique.
  • Air filter replacement: Use the correct filter size and ensure proper airflow direction. Slide in the new filter and attach the access cover. The frequency of filter changes depends on the type of filter, usage, presence of pets, allergies, and air quality.
  • General recommendations
    • It is recommended that you inspect your air filters at least every 30 days and replace them every 90 days.

The Impact of Obstructed Vents

  • How Blocked or Closed Vents Affect Airflow:
    • It is a common misconception that closing a vent reduces the amount of heating or cooling airflow, thereby lowering your utility bill. The only thing that determines this is your thermostat.  Closing your vents increases strain on the HVAC system by disrupting network balance, and instead, may lead to higher output with lower efficiency. Not to mention that it can increase wear and tear on the system, leading to higher expenses through necessary repairs rather than maintenance.
  • Identifying and Resolving Vent Obstructions: Conduct a visual inspection of vents, remove obstructions (such as dust and debris), and ensure proper clearance (Including Furniture, blankets, clothing, etc.). Check for internal blockages and adjust dampers. Professional duct cleaning may be necessary for severe blockages.

The Lifeblood of Your HVAC System: Ductwork

Ductwork distributes conditioned air and returns air to the unit. Leaks, blockages and improper sizing can restrict airflow. Professional ductwork sealing prevents air loss and improves efficiency. Ductwork insulation also prevents heat loss or gain in unconditioned spaces, as airflow is optimized and all output is utilized at its highest potential, resulting in improved comfort and consistency.

Professional ductwork maintenance will also aid in the removal of dust and debris, while providing expertise on contributing factors that may lead to recurring issues, thereby reducing not only the effectiveness of your system but also its lifespan.

Well-maintained ducts contribute to better indoor air quality by minimizing the circulation of allergens, mold spores, and other contaminants. Over time, neglected ductwork can also lead to uneven heating and cooling, putting additional strain on the HVAC unit and increasing energy bills. Regular inspections and cleanings ensure that airflow remains unobstructed, allowing your system to operate efficiently year-round. Investing in ductwork upkeep is essential not only for comfort but for long-term savings and system reliability.

In homes with pets or those that have undergone recent renovations, ductwork maintenance is even more critical due to the increased levels of debris and dust. Properly maintained ducts also help reduce system noise, contributing to a quieter and more peaceful indoor environment.

Discover an Enchanting Bridal Fair On June 14th at Tucker House 

0

Planning a wedding can be an exciting yet overwhelming experience. From choosing the perfect venue to finding the ideal photographer, there are countless decisions to be made. Fortunately, engaged couples have a unique opportunity to streamline their wedding preparations at the first annual Bridal Fair held at the historic Tucker House in Rockland on Saturday June 14th, 2025.

tucker house bridal fair in rockland
Photo credit: Tucker House

Whether you’re just starting your wedding planning journey or putting the finishing touches on your big day, this event is sure to provide you with the guidance and resources you need to create the wedding of your dreams.

The Atmosphere of Tucker House

The Tucker House Bridal Fair takes place in a truly remarkable setting at the historic Tucker House and on its picturesque grounds. This stunning 19th-century mansion, located in the heart of Rockland, has long been a beloved landmark in the community. With its grand architecture, elegant interiors, and picturesque gardens, Tucker House provides the perfect backdrop for a wedding celebration.

But Tucker House is more than just a beautiful venue; it’s a place steeped in history and tradition. Originally built in 1870, the house has been meticulously restored and maintained, preserving its original charm and character. Today, it serves as a hub for environmental community events, cultural activities, and, of course, the 1st annual Bridal Fair.

Exploring the Bridal Fair

The Bridal Fair at Tucker House is a must-attend event for any bride-to-be. The fair brings together a diverse array of vendors and experts, all dedicated to helping couples plan their dream wedding. The first 50 attendees receive a bag with gifts from Tiny Treasures Favors!

As you step through the grounds of the Tucker House, you’ll be greeted by a bustling hive of activity. Vendors from all corners of the wedding industry will be on hand, showcasing their products and services.

Attendees can also enter to win an array of prizes making the event even more memorable. Participating in the fair not only provides inspiration and resources but also the opportunity to take home fantastic prizes that add extra joy to the wedding journey.

Date, Time and Cost

📅 Date: Saturday June 14th, 2025

🕒 Time: 10 am to 5 pm

📍Location: 1731 Tucker Road, Rockland, ON K4K 1K7

💰Attendees cost: FREE ADMISSION

Personalized Attention and Inspiration

One of the most unique aspects of the Bridal Fair at Tucker House is the personalized attention and inspiration it provides to each attendee. Unlike larger, impersonal bridal shows, this event is designed to be a more intimate and tailored experience.

As you explore the fair, you’ll have the opportunity to engage directly with vendors and ask questions specific to your wedding vision. Whether you’re searching for the perfect venue, seeking advice on wedding day timelines, or simply looking for creative ideas, the vendors at the Bridal Fair are there to provide you with the guidance and support you need.

bridal fair at tucker house
Photo credit: Tucker House

Networking and Community Connections

The Bridal Fair at Tucker House is not just about finding vendors and gathering inspiration; it’s also a valuable opportunity to connect with other couples in the community who are on a similar wedding planning journey.

Throughout the event, you’ll have the chance to mingle with fellow brides-to-be, share experiences, and even form lasting friendships. These connections can be invaluable as you navigate the ups and downs of wedding planning, providing a supportive network of individuals who understand the process firsthand.

In addition to connecting with other couples, the Bridal Fair also serves as a platform for wedding vendors to showcase their talents and build relationships with potential clients. By attending the fair, you’ll have the chance to not only discover new vendors but also to develop meaningful connections that can enhance your overall wedding experience.

Exclusive Discounts and Promotions

One of the most significant benefits of attending the Bridal Fair at Tucker House is the opportunity to take advantage of exclusive discounts and promotions offered by the participating vendors.

As a special incentive for fair attendees, many vendors will provide special pricing, package deals, or added value services that are not available outside of the event. This can translate to significant savings for couples, helping to alleviate the financial burden of planning a wedding.

Whether you’re looking to secure a discounted package for your wedding photography, take advantage of a special offer on floral arrangements, or snag a deal on wedding day transportation, the Bridal Fair is the perfect place to find these exclusive opportunities.

The Tucker House Advantage

Beyond the exceptional vendor offerings and inspiring atmosphere, the Bridal Fair at Tucker House also provides couples with the unique advantage of hosting their wedding at the historic venue itself.

As a premier wedding destination in Rockland, Tucker House offers a range of stunning event spaces, from the salons to the picturesque gardens and pavilion. By attending the Bridal Fair, you’ll have the opportunity to tour the property, envision your wedding day, and even book your event before other couples snatch up the available dates.

Furthermore, the Tucker House team will be on hand at the Bridal Fair to answer any questions you may have about hosting your wedding at the venue. They can provide valuable insights into the logistics and amenities ensuring that your wedding day at Tucker House is a seamless and unforgettable experience.

You will also have the chance to enter to win a $800 gift certificate to book at Tucker House or use as a credit towards a rental for 2025 and 2026. The gift card can be transferred and used towards a new booking. Book your bridal shower, family gathering, baby shower, retreat or your wedding!

tucker house wedding show
Photo credit: Tucker House

A Bridal Fair Like No Other

The Bridal Fair at Tucker House is a truly exceptional event that offers engaged couples a unique and personalized wedding planning experience. From the historic charm of the venue to the wealth of vendor resources and inspiration, this fair provides couples with everything they need to bring their wedding day vision to life.

Whether you’re just starting your planning journey or putting the finishing touches on your big day, the Bridal Fair in Rockland is an event you won’t want to miss. With its unparalleled atmosphere, exclusive discounts, and community connections, this fair is sure to leave you feeling inspired, empowered, and one step closer to the wedding of your dreams!

So mark your calendars and get ready to discover the enchanting world of the Tucker House Bridal Fair. Your perfect wedding day is just around the corner!

Mother’s Day Pop Up Card with Template

0

Mother’s Day is a special time to celebrate the incredible women in our lives who have nurtured and supported us. What better way to show your mom, grandma, or any mother figure just how much they mean to you than by creating a heartfelt, handmade card? We will walk you through a fun and easy Mother’s Day pop-up card craft that kids of all ages can make.

mother’s day pop up card craft

We always need some sort of card for occasions throughout the year so creating a pop up card is a fun way to get creative and make something that really shows your care. These 3D flowers are so easy to make that young kids can make them with a bit of help with the cutting and gluing.

This easy step-by-step guide will help kids to create their very own Happy Mother’s Day pop-up card. Using simple materials and clear instructions, this craft is perfect for children of all ages. It’s a great way to help kids express their feelings, practice their creativity, and give their moms a heartfelt keepsake they’ll treasure forever. Let’s get started on making a card that’s as unique and wonderful as mom herself!

Understanding the Basics of Pop-Up Cards

Before we dive into the step-by-step instructions, let’s first explore the fundamentals of pop-up cards. Pop-up cards, also known as 3D cards or origami cards, are a type of greeting card that features intricate, three-dimensional designs that “pop up” when the card is opened. These cards often incorporate various folding techniques, cutting patterns, and creative elements to create a dynamic and visually engaging experience for the recipient.

The key to a successful pop-up card lies in the careful planning and execution of the design. Each fold, cut, and assembly step must be precisely executed to ensure that the final product not only looks beautiful but also functions as intended. With a little practice and patience, even beginners can master the art of pop-up card making and create truly stunning pieces.

Mother’s Day 3D Card

Every day is a chance to celebrate the moms, grandmothers and bonus moms in your lives, Mother’s Day is a super special day to show them how much they mean to you. Make this pretty Mother’s Day pop up card to do just that; fill it with words from deep in the heart before sending it to moms near and far. The card blooms into a three-dimensional arrangement that’s much more unexpected than a vase of flowers. It looks delicate, but with the template, step-by-step instructions, a few pieces paper, and some glue, you’ll quickly realize just how easy it is to create.

Mother’s Day Pop Up Card with Template

Before we get started, let’s make sure you have all the necessary materials on hand. Here’s what you’ll need for this Mother’s Day pop-up card:

Supplies

  1. Cardstock Paper (white or your favourite colour)
  2. Craft Papers (green, yellow, orange, pink, brown, purple, blue – pick your favourite colours)
  3. Pencil
  4. Ruler
  5. Scissors
  6. Glue
  7. Marker Pens
  8. Mother’s Day pop up card template

It’s important to choose high-quality materials that will hold up well and create a polished, professional-looking card. Experiment with different paper weights and textures to find the ones that best suit your design and personal style.

How to make a Mother’s Day pop up card

Now that you’ve gathered your supplies, let’s dive into the step-by-step instructions for creating your DIY Mother’s Day pop-up card:

Step 1:Cut out the watering can template from the Printable PDF file. And choose a colourful craft paper for your watering can. We will be using brown craft paper.

mother’s day pop up card step 1

Step 2: Cut out the watering can shape using the brown craft paper.

mother’s day pop up card step 2

Step 3: Use a darker brown marker pen to draw outline on the watering can cut out.

mother’s day pop up card step 3

Step 4: Then, similarly, use the templates to cut out the flowers, leaves, and stems.

mother’s day pop up card step 4

Step 5: Glue the round yellow pedicels inside the flowers.

mother’s day pop up card step 5

Step 6: Glue the stems with the flowers.

mother’s day pop up card step 6

Step 7: Glue the leaves to the flower stems.

mother’s day pop up card step 7

Step 8: According to the red line on the template of the watering can use a pair of scissors to cut along the line and make slit. And start putting the flowers through the slit.

mother’s day pop up card step 8

Step 9: Once you have places all the flowers through the slit apply glue on the back to keep them in place.

mother’s day pop up card step 9

Step 10: Take a cardstock paper 4x the length of the flowers and fold it in half.

mother’s day pop up card step 10

Step 11: Make two vertical cuts on the closed side of the card.

mother’s day pop up card step 11

Step 12: Open the card and fold in the cutout slot.

mother’s day pop up card step 13

Step 13: Use a marker and coloured paper to decorate the border of the card.

mother’s day pop up card step 13

Step 14: Then, glue the flowers watering can on the pop-up slot to make your Mother’s Day craft.

mother’s day pop up card step 14

Step 15: On the inside of the Mother’s Day card, write a special message to mom or grandma expressing love and appreciation. Encourage your child to get involved in this step, whether they want to dictate the message or write it themselves.

mother’s day pop up card with template

And that’s it! This easy Mother’s Day pop-up card is now complete!

mother’s day pop up card with template

Mother's Day Pop Up Card

Prep Time: 5 minutes
Active Time: 30 minutes
Total Time: 35 minutes
Difficulty: Easy

Create a heartfelt Mother’s Day Pop Up Card with our easy step-by-step guide. Perfect for kids of all ages!

No Ratings

Materials

  • Cardstock Paper (white or your favourite colour)
  • Craft Papers (green, yellow, orange, pink, brown, purple, blue – pick your favourite colours)
  • Pencil
  • Glue
  • Marker Pens
  • Mother’s Day pop up card template

Tools

  • Scissors
  • Ruler

Instructions

    tep 1: Cut out the watering can template from the Printable PDF file. And choose a colourful craft paper for your watering can. We will be using brown craft paper.

mother’s day pop up card step 1

Step 2: Cut out the watering can shape using the brown craft paper.

mother’s day pop up card step 2

Step 3: Use a darker brown marker pen to draw outline on the watering can cut out.

mother’s day pop up card step 3

Step 4: Then, similarly, use the templates to cut out the flowers, leaves, and stems.

mother’s day pop up card step 4

Step 5: Glue the round yellow pedicels inside the flowers.

mother’s day pop up card step 5

Step 6: Glue the stems with the flowers.

mother’s day pop up card step 6

Step 7: Glue the leaves to the flower stems.

mother’s day pop up card step 7

Step 8: According to the red line on the template of the watering can use a pair of scissors to cut along the line and make slit. And start putting the flowers through the slit.

mother’s day pop up card step 8

Step 9: Once you have places all the flowers through the slit apply glue on the back to keep them in place.

mother’s day pop up card step 9

Step 10: Take a cardstock paper 4x the length of the flowers and fold it in half.

mother’s day pop up card step 10

Step 11: Make two vertical cuts on the closed side of the card.

mother’s day pop up card step 11

Step 12: Open the card and fold in the cutout slot.

mother’s day pop up card step 13

Step 13: Use a marker and coloured paper to decorate the border of the card.

mother’s day pop up card step 13

Step 14: Then, glue the flowers watering can on the pop-up slot to make your Mother’s Day craft.

mother’s day pop up card step 14

Step 15: On the inside of the Mother’s Day card, write a special message to mom or grandma expressing love and appreciation. Encourage your child to get involved in this step, whether they want to dictate the message or write it themselves.

mother’s day pop up card with template

Notes

Variations and Customization Ideas

One of the best things about this Mother’s Day craft is that it can be customized in countless ways to suit your child’s interests and abilities. Here are a few ideas to get your creative juices flowing:

  • Different Pop-Up Shapes: Instead of a simple shape, try creating a more complex pop-up element, like a butterfly with wings that spread out.
  • Themed Designs: Tailor the card to your mom’s interests by creating a pop-up element that reflects her hobbies, such as a book, a gardening tool, or a piece of jewelry.
  • 3D Elements: Take the pop-up card to the next level by adding 3D elements with depth and dimension. Glue on small trinkets, use puffy paint to create raised designs, or even attach small toys or figurines.
  • Envelope: Don’t forget to make an envelope and decorate it! Use stickers, drawings, or even cut-out shapes to make the entire package a work of art.

Variations and Customization Ideas

One of the best things about this Mother’s Day craft is that it can be customized in countless ways to suit your child’s interests and abilities. Here are a few ideas to get your creative juices flowing:

  • Different Pop-Up Shapes: Instead of a simple shape, try creating a more complex pop-up element, like a butterfly with wings that spread out.
  • Themed Designs: Tailor the card to your mom’s interests by creating a pop-up element that reflects her hobbies, such as a book, a gardening tool, or a piece of jewelry.
  • 3D Elements: Take the pop-up card to the next level by adding 3D elements with depth and dimension. Glue on small trinkets, use puffy paint to create raised designs, or even attach small toys or figurines.
  • Envelope: Don’t forget to make an envelope and decorate it! Use stickers, drawings, or even cut-out shapes to make the entire package a work of art.

The possibilities are endless, so encourage your child to let their creativity shine. The most important thing is that they put their heart and soul into creating a one-of-a-kind Mother’s Day card that mom will cherish.

Tips for Success

To ensure your Mother’s Day pop-up card craft goes off without a hitch, here are a few tips to keep in mind:

  1. Supervise Younger Children: While this project is generally suitable for kids of all ages, younger children may need extra assistance with tasks like cutting and gluing. Be prepared to lend a helping hand as needed.
  2. Encourage Creativity: Resist the urge to take over and make the card “perfect.” Instead, let your child take the lead and express their unique style and personality. The end result will be much more meaningful.
  3. Use Sturdy Materials: Choose high-quality cardstock or construction paper to ensure your pop-up element holds its shape and doesn’t tear or crumple when the card is opened and closed.
  4. Allow Time for Drying: Be sure to give any glue or paint ample time to dry completely before closing the card. This will prevent smudging or sticking.
  5. Consider Adding Surprises: For an extra special touch, try incorporating hidden elements like a small photo or a tiny trinket inside the card.

With these tips in mind, you and your child will be well on your way to creating a Mother’s Day pop-up card that is not only beautiful, but also filled with love and thoughtfulness.

Mother’s Day Pop Up Card

Crafting a Mother’s Day pop-up card is a wonderful way to celebrate the special women in your life while spending quality time with your child. By guiding them through the step-by-step process, you’re not only creating a meaningful keepsake, but also fostering their creativity, fine motor skills, and sense of pride in their handmade gift.

So gather the supplies with your kids, get ready to get a little crafty, and let’s make this Mother’s Day one to remember!

For more Mother’s Day card craft ideas, check out Mother’s Day Shirt Card: A Heartfelt DIY Keepsake and DIY Rose Filled Heart Card.

Creating Eye-Friendly Study Spaces for Better Focus

Designing a study environment that supports concentration and well-being is crucial for children. Managing light exposure effectively can enhance their ability to focus and improve their academic performance.

Creating Eye-Friendly Study Spaces for Better Focus

In the modern educational landscape, screens are an integral part of learning, making it essential to design study spaces that minimize distractions and potential health risks. By understanding how different types of light – such as blue light and red light – affect concentration, alertness, and calmness, parents can make informed decisions to optimize their child’s study environment. This article explores practical strategies for managing light exposure and enhancing study spaces.

The effects of blue light on concentration

Blue light, commonly emitted by digital devices, has a complex role in learning and concentration. While excessive exposure – especially in the evening – can disrupt sleep patterns and contribute to eye strain, leading to reduced cognitive performance and fatigue, blue light is not solely harmful. In fact, exposure to blue light during the day helps boost alertness, improve concentration, and enhance mood, making it a crucial element for maintaining focus during study sessions.

To strike a balance, parents can implement simple measures such as using screen filters or apps that adjust color temperature based on the time of day. These tools help minimize blue light exposure in the evening, when it can interfere with natural circadian rhythms, while still allowing enough blue light during the day to promote attentiveness and cognitive engagement.

Encouraging regular breaks from screens is another effective strategy to reduce overall eye strain without completely eliminating the beneficial aspects of blue light. These breaks allow the eyes to rest, support sustained focus, and contribute to a healthier study routine. By thoughtfully managing light exposure, parents can create a study environment that supports both academic performance and their child’s long-term well-being.

Choosing the right lighting for study spaces

Creating Eye-Friendly Study Spaces for Better Focus

To create an eye-friendly study environment, consider using lighting solutions that emit softer, warmer tones. Lamps with a color temperature below 3000 Kelvin can reduce glare and prevent eye strain, providing a calming atmosphere that supports learning. This type of lighting mimics natural sunlight, enhancing visibility and comfort.

In addition to selecting appropriate lighting fixtures, it’s important to encourage a balanced routine that includes time away from screens. This balance fosters a healthier approach to learning and improves long-term concentration. By implementing these strategies, parents can create a study space that supports both academic success and overall health.

The role of red light in creating a balanced study environment

Red light therapy is gaining recognition for its calming effects, making it a valuable addition to study environments. While it is not intended to replace traditional lighting needed for active learning, red light can serve as a powerful complement to help balance the intensity of screen time and mental exertion. Incorporating red light during study breaks or after homework sessions can promote relaxation, ease eye strain, and help the body transition into a more restful state – without interfering with concentration during active study periods.

By subtly integrating a red light source, such as a small desk lamp or ambient light fixture, parents can create a restorative atmosphere that supports emotional regulation and reduces the cumulative stress of prolonged focus. This gentle contrast to the stimulating effects of blue light encourages better mental well-being and may even improve a child’s ability to return to their studies feeling refreshed.

Considerations When Setting Up A Study Space

While you will be limited by the space in your house or building, you should always try to get plenty of natural light in your study space. Natural light is invaluable, especially when you are staring at a screen or book for long periods of time. The perfect place is near a window or under a skylight. However, if this is not possible then consider installing decorative mirrors that will carefully reflect light to your workstation.  

In addition to light, you also need privacy when studying. That means a place that not only shields you but keeps you free from interruptions. Avoid corridors or areas with high levels of footfall. Privacy also includes digital distractions, so make sure your phone and other modern devices are elsewhere. A further cause of distraction can be noise. Particularly if you are in a busy city, this can be a surefire way to disrupt your learning. Not only positioning can help this, but muffling the incoming sound with thick fabrics, curtains or soundproof baffles can help.  

Make sure your space is clean and tidy. This is harder than you think. Books, papers, and stationery can all begin to mount up when you are studying. Make sure you have plenty of places to tuck things away, such as folders, shelving, and desk tidies. You may wish to consider this when buying furniture for your study space: Find a desk that has plenty of drawers or units to tuck things away in.  

If you have the budget, you may even wish to go a step further than just placing a desk in the most available location. This could involve the renovation of certain areas, such as garages or attics. Even spaces under staircases can provide excellent storage spaces if they are done correctly.  

Lastly, make the space your own. Comfort is a big factor, so get s chair that supports good posture but keeps you from wriggling around. A bad chair can be just as bad a distraction as a mobile phone. Once you have this, add some personal touches to it. It could be pictures, trinkets, ornaments, or anything else you have that will make the perfect study space.  

Thoughtful management of both stimulating and calming light sources empowers parents to craft a more holistic and effective study environment. This is one that nurtures both academic performance and the overall wellness of a child.

Mother’s Day Shirt Card: A Heartfelt DIY Keepsake

0

Mother’s Day is a chance to show the special women in our lives just how much they mean to us. While flowers and store-bought cards are always appreciated, there’s something truly memorable about a handmade gift that comes straight from the heart. If you’re looking for a creative way for you or your kids to express love and gratitude, a Mother’s Day shirt card is the perfect choice.

mother's day craft: shirt card

This Mother’s Day craft turns a simple card into a fun and personalized keepsake that mom will treasure for years. Whether you want something quick or a project to enjoy with kids, the shirt card is both meaningful and easy to create. Get ready to create a one-of-a-kind keepsake that will make Mother’s Day extra special.

What is a Shirt Card?

A shirt card is a delightful and innovative way to present a greeting card. Instead of a traditional flat card, the shirt card takes the shape of a miniature shirt, complete with sleeves, a collar, necklace, and even buttons. This unique design not only adds a whimsical element to the card but also allows you to incorporate personal details and meaningful touches.

The beauty of a shirt card lies in its ability to transform a simple greeting into a thoughtful, handmade gift. By crafting this DIY Mother’s Day card, you’re not just giving a card – you’re creating a keepsake that your mom can display, wear, or even frame to commemorate the occasion.

Mother’s Day Card Craft

The great thing about this project is that you can use materials you already have on hand or get creative with what you find. Feel free to experiment with different colours, patterns, and embellishments to make your homemade Mother’s Day card truly unique.

Supplies to make the Mother’s Day Card

To make this Mother’s Day card, you’ll need the following supplies:

  • Coloured craft papers (mom’s favourite colour red, pink purple, yellow, etc.)
  • Cardstock paper or fabric (mom’s favourite pattern or colour such as red, pink, purple, etc.)
  • Craft glue
  • Small round beads
  • Thread
  • Pencil
  • Sharpies
  • A pair of scissors
  • Mother’s Day card printable template

Step-by-Step Instructions to make this paper craft card

Step 1: Select coloured craft papers for the shirt and flower patterns. The printable template includes patterns for the shirt, neck and flower. Use a pair of scissors to cut out the traced patterns from the coloured craft papers.

mother's day craft: shirt card step 1

Step 2: Glue the strip cutout along the middle of the shirt base cutout, vertically.

mother's day craft: shirt card step 2

Step 3: Glue the neck cutout on the top, middle part of the shirt base pattern.

mother's day craft: shirt card step 3

Step 4: Glue the collar cutout below the neck pattern. 

mother's day craft: shirt card step 4

Step 5: Prepare a thread and add enough beads into it to make a small necklace for the shirt card.

mother's day craft: shirt card step 5

Step 6: Apply glue on the neck part of the card to place the beaded necklace.

mother's day craft: shirt card step 6

Step 7: Place the beaded necklace along the glued line on the neck part.

mother's day craft: shirt card step 7

Step 8: Trace and cut out the flower patterns. Fold and make vertical, horizontal creases on the flower cutouts.

mother's day craft: shirt card step 8

Step 9: Glue the 2 flower cutouts together. Glue the round cutout in the centre.

mother's day craft: shirt card step 9

Step 10: Glue the papercraft flower on the shirt pattern and attach the shirt pattern to a card. This easy DIY Mother’s Day card is almost ready!

mother's day shirt card

Step 11: Finally, take the time to write or print and glue a heartfelt message on the back of the card. This is the perfect opportunity to express your love, gratitude, and appreciation for mom, grandma, or the special woman in your children’s life!

mother's day shirt card

Mother's Day Craft: Shirt Card

Yield: 1
Prep Time: 5 minutes
Active Time: 25 minutes
Total Time: 30 minutes
Difficulty: Easy

Create a unique Mother's Day craft by making this shirt card with your kids. A heartfelt keepsake that mom will cherish forever.

No Ratings

Materials

  • Coloured craft papers (mom’s favourite colour red, pink purple, yellow, etc.)
  • Cardstock paper or fabric (mom’s favourite pattern or colour such as red, pink, purple, etc.)
  • Craft glue
  • Small round beads
  • Thread
  • Pencil
  • Sharpies
  • Mother’s Day card printable template

Tools

  • A pair of scissors

Instructions

    Step 1: Select coloured craft papers for the shirt and flower patterns. The printable template includes patterns for the shirt, neck and flower. Use a pair of scissors to cut out the traced patterns from the coloured craft papers.

mother's day craft: shirt card step 1

Step 2: Glue the strip cutout along the middle of the shirt base cutout, vertically.

mother's day craft: shirt card step 2

Step 3: Glue the neck cutout on the top, middle part of the shirt base pattern.

mother's day craft: shirt card step 3

Step 4: Glue the collar cutout below the neck pattern. 

mother's day craft: shirt card step 4

Step 5: Prepare a thread and add enough beads into it to make a small necklace for the shirt card.

mother's day craft: shirt card step 5

Step 6: Apply glue on the neck part of the card to place the beaded necklace.

mother's day craft: shirt card step 6

Step 7: Place the beaded necklace along the glued line on the neck part.

mother's day craft: shirt card step 7

Step 8: Trace and cut out the flower patterns. Fold and make vertical, horizontal creases on the flower cutouts.

mother's day craft: shirt card step 8

Step 9: Glue the 2 flower cutouts together. Glue the round cutout in the center.

mother's day craft: shirt card step 9

Step 10: Glue the papercraft flower on the shirt pattern and attach the shirt pattern to a card. This easy DIY Mother’s Day card is almost ready!

mother's day craft: shirt card

Step 11: Finally, take the time to write or print and glue a heartfelt message on the back of the card. This is the perfect opportunity to express your love, gratitude, and appreciation for mom, grandma, or the special woman in your children’s life!

Notes

Here are some ideas to make this creation truly one-of-a-kind:

  • Incorporate Her Favourite Colours: Choose cardstock or paper in hues that you know your mom loves, or incorporate her favourite colour scheme into the design.
  • Add Meaningful Embellishments: Consider using buttons, fabric scraps, or other small items that hold special significance for your mom, such as a charm from her jewelry or a piece of her favorite clothing.
  • Customize the Design: If your mom has a favourite pattern, print, or style of clothing, try to incorporate that into the design of the Shirt Card.
  • Create a Memory-Inspired Card: Use photos, ticket stubs, or other mementos to create a Shirt Card that celebrates a cherished memory you share with your mom.

Personalization Ideas

The beauty of the Mother’s Day Shirt Card is that it lends itself to endless personalization options. Here are some ideas to make this creation truly one-of-a-kind:

  • Incorporate Her Favourite Colours: Choose cardstock or paper in hues that you know your mom loves, or incorporate her favourite colour scheme into the design.
  • Add Meaningful Embellishments: Consider using buttons, fabric scraps, or other small items that hold special significance for your mom, such as a charm from her jewelry or a piece of her favorite clothing.
  • Customize the Design: If your mom has a favourite pattern, print, or style of clothing, try to incorporate that into the design of the Shirt Card.
  • Create a Memory-Inspired Card: Use photos, ticket stubs, or other mementos to create a Shirt Card that celebrates a cherished memory you share with your mom.

The possibilities are endless, so let your creativity and love for your mom guide you as you design this special keepsake.

Displaying and Gifting the Mother’s Day Shirt Card

Once you’ve completed your shirt card, there are several ways you can present it to your mom or the special lady in your life:

  • Display it on a Shelf or Mantel: The shirt card can stand on its own, making it the perfect decorative piece to display in your mom’s home.
  • Attach it to a Gift Bag or Box: Tie the shirt card to the handle of a gift bag or secure it to the top of a gift box for a unique and personal touch.
  • Frame it as Wall Art: If you want to create a more permanent display, consider framing the shirt card and hanging it on the wall as a piece of artwork.

No matter how you choose to present this Mother’s Day card craft, the gesture will be deeply appreciated and cherished by the recipient. It’s a heartfelt way to celebrate the special women in our lives and create a lasting memory.

mother's day craft: dress card

This Mother’s Day shirt card is a delightful and personalized DIY project that allows the kids to express love and appreciation for the incredible mom in their lives. By crafting this unique keepsake, your kids are not just giving a card, they are creating a one-of-a-kind gift that mom or grandma can display and cherish for years to come.

I hope you enjoy this DIY Mother’s Card as much as I did! If you are looking for a Father’s Day card craft, check out this Father’s Day Shirt Card!

15 Easy Scone Recipes‏

22

Scones are usually made of wheat, barley or oatmeal and often lightly sweetened or glazed with egg wash. A scone is a single-serving cake or quick bread. It’s so delicious with a cup of tea and served warm with butter! They can be made into a different variety of textures such as tall and airy, plump and cakey, or traditionally coarse and crumbly to satisfy every taste buds. I have gathered 15 easy scone recipes for you to make at home!

scrumptiousscones1words

Soft and pillowy scones are a favourite snack that people nosh on at a myriad of occasions. They can take on a light flavour or be flavour-packed with different fruit or spice combinations that will tickle your tastebuds.

What Are Scones?

Are you curious to know what a scone is and where these delicious scone recipes originated from? A scone is a traditional British baked good that is very similar to an American biscuit. It is generally made of either wheat or oatmeal and baked on sheet pans. These delightful treats are usually topped with jam, or clotted cream.

Scones vs Biscuits

Ah, the great debate! What is the difference between a scone versus a biscuit? It is as simple as one ingredient: An egg. Scones are the fluffy treat that crack open this perfect protein. Biscuits do not. Other than this one ingredient, the process in making both bready baked side dishes are the same.

How Long Are Scones Good For?

When you whip up one of these homemade scone recipes, make sure to devour them quickly! Homemade scones usually last for up to two days if they are in an airtight container. If you want to keep these scones for a longer period of time, you are also able to store them in an airtight container in the fridge for up to a week.

Scones for Tea

Whether they are served for High Tea, a tea party, or as a part of your quiet morning breakfast, scones and tea are a classic combination to enjoy together. Most scone recipes tend to have a neutral flavour that allows for your tea, the condiments you use to top this fluffy baked good, or any fruit you choose to nibble on with your tea and scone the ability to shine.

Which are the best teas to enjoy with these homemade scone recipes? Look below at this list to see which pairing you would like to try first:

  • Savoury scones and a strong black tea without any fruity notes.
  • Sweet scones and a lightly flavoured tea, especially if you are finishing it off with cream or jam.
  • A holiday season idea – spiced flavoured scones and nutty flavoured teas.
  • A coconut flavoured scone and green tea like jasmine.

15 Easy Scone ‏Recipes

scrumptiousscones2final

I love baking and eating these delicious scone recipes for my family and friends throughout the year. Check out these 15 easy scone recipes you can whip up, bake, and nibble on to find your favourite one to create!

1. Fresh Fruit Scones

2. Pumpkin Spice Scones

3. Gluten Free Cornmeal Delicata Squash Scones

4. Blueberry Scones

5. Keto Blueberry Lemon Scones

6. Gluten Free Chestnut, Apple, and Bacon Scones

7. Apple Cinnamon Oatmeal Scones

8. Blueberry Almond Scones

9. Irish Soda Bread Cinnamon Scones

10. Gluten and Dairy Free Strawberry Scones

11. Strawberry Basil Scones

12. Cranberry Scones

13. Cranberry Buttermilk Scones

14. Vegan Pumpkin Maple Walnut Scones

15. Gluten Free Fontina and Herb Scones

Hope you enjoy these 15 easy scone recipes as much as I did! I can’t wait to hear which one of these homemade scones you want to try first!

How to Make an Origami Chicken: Step-by-Step Guide

0

Origami, the ancient Japanese art of paper folding, has captivated people around the world for centuries. While many origami designs feature elegant flowers, graceful animals, and intricate geometric shapes, one of the most charming and recognizable origami creations is the humble origami chicken. With its distinctive shape, compact size, and whimsical appeal, the origami chicken is a delightful project for origami enthusiasts of all skill levels.

origami chick

The Origins of Origami

The origins of origami is believed to have started in China around the 1st or 2nd century AD. The earliest forms used paper for ceremonial and religious purposes.

The practice spread to Japan, where the art form emerged as a means of religious and ceremonial expression. The practice spread to Japan by the 6th century, where it became more refined. Paper was introduced to Japan by Buddhist monks, and the Japanese began to develop their own styles of folding.

One of the earliest and most significant examples of origami in Japanese culture is the “orizome,” a type of folded paper used in Shinto ceremonies. These intricate paper creations were believed to possess spiritual significance, representing the harmony and balance of the natural world. As the art of origami evolved, it became closely intertwined with Japanese cultural traditions, such as the tea ceremony, where delicately folded paper decorations were used to enhance the aesthetic experience.

Over time, the practice of origami spread beyond the realm of religious and ceremonial uses, becoming a popular pastime and form of artistic expression among the Japanese people. During the Edo period (1603-1868), origami experienced a surge in popularity, with the emergence of specialized origami books and the development of more complex folding techniques.

The Simplicity and Appeal of the Origami Chicken

This easy origami chicken is a beloved design for several reasons. Firstly, it’s relatively simple to fold, making it an accessible and approachable project for beginners. The basic steps involve a series of straightforward folds and creases that, when executed correctly, result in a recognizable chicken shape.

Secondly, the origami chicken’s compact size and minimal use of paper make it a practical and versatile creation. Its small footprint allows you to easily incorporate it into various crafts, decorations, and even practical applications, such as using it as a bookmark or gift tag.

Finally, the origami chicken’s whimsical and charming appearance is a big part of its appeal. With its distinctive beak, wings, and tail feathers, the paper chicken captures the essence of its real-life counterpart in a delightful, three-dimensional form. This makes the origami chicken a popular choice for adding a touch of playfulness and creativity to any setting.

Choosing the Right Paper for Your Origami Chicken

The type of paper you choose can significantly impact the final appearance and durability of your origami chicken. While you can use a variety of paper types to make your paper chicken, some work better than others:

  1. Origami Paper: Origami paper, also known as kami, is the traditional choice for origami projects. It’s thin, lightweight, and comes in a wide range of colors and patterns, making it an excellent option for your origami chicken. The paper’s crispness and ability to hold creases are particularly well-suited for this design.
  2. Printer Paper: Standard printer paper, such as 8.5 x 11-inch sheets, can also be used to create an origami chicken. While it may not have the same level of crispness as origami paper, it’s readily available and can still produce a satisfactory result.
  3. Tissue Paper: Tissue paper can be used to create a more delicate and translucent origami chicken. However, it’s important to note that tissue paper is more fragile and may require a gentler touch during the folding process.

Regardless of the paper you choose, make sure it’s square-shaped. If your paper is rectangular, you can easily transform it into a square by folding one corner to the opposite edge and cutting off the excess.

Step-by-Step Instructions for Folding an Origami Chicken

how to make an origami chicken

Now, let’s dive into the step-by-step process of creating your own origami chick. Follow these instructions carefully, and don’t hesitate to refer back to them as you work through the folds.

List of Supplies

  • Coloured craft papers (yellow and orange)
  • Pencil
  • Scissors
  • Craft glue
  • Sharpies (black and pink)

How to make an origami chicken

Step 1: Prepare a piece of square paper (12cm x 12cm).

origami chicken step 1

Step 2: Fold the square paper in half diagonally. Unfold the diagonal half-fold.

origami chicken step 2

Step 3: Fold the square paper diagonally along the other side.

origami chicken step 3

Step 4: Hold the right open corner of the current pattern, fold it inwards, and align it with the closed side.

origami chicken step 4

Step 5: Unfold the last fold.

origami chicken step 5

Step 6: Hold the right bottom corner and join it with the crease-edge on the opposite open side.

origami chicken step 6

Step 7: Now, hold the bottom left corner and fold it similarly (symmetrically).

origami chicken step 7

Step 8: Hold the open corner of the top layer and join it to its opposite corner.

origami chicken step 8

Step 9: Slightly unfold the top layer.

origami chicken step 9

Step 10: Now, fold the open corner of the bottom layer and join it to its opposite corner.

origami chicken step 10

Step 11: Fold the top open corner in by a cm.

origami chicken step 11

Step 12: Rotate the current pattern to bring the narrow end to the top.

origami chicken step 12

Step 13: Make small folds on both sides of the top narrow edge.

origami chicken step 13

Step 14: Fold up a triangle flap (right side) to a point where a small part crosses the origami base pattern on the side.

origami chicken step 14

Step 15: Similarly, fold the other flap.

origami chicken step 15

Step 16: Make small folds on the bottom ends of the folded flaps.

origami chicken step 16

Step 17: Turn the origami pattern to the other side.

origami chicken step 17

Step 18: Use sharpies to draw the eyes and blush spots on the origami chicken pattern. Cut out a small triangle shape (beak) and attach it to the origami chick below the eyes.

origami chicken step 18
origami chick

Origami Chicken

Prep Time: 5 minutes
Active Time: 15 minutes
Total Time: 20 minutes
Difficulty: Easy

Explore the charming art of origami chicken. Discover techniques to fold this delightful paper creation with ease.

No Ratings

Materials

  • Coloured craft papers (yellow and orange)
  • Pencil
  • Craft glue
  • Sharpies (black and pink)

Tools

  • Scissors

Instructions

    Step 1: Prepare a piece of square paper (12cm x 12cm).

origami chicken step 1

Step 2: Fold the square paper in half diagonally. Unfold the diagonal half-fold.

origami chicken step 2

Step 3: Fold the square paper diagonally along the other side.origami chicken step 3

Step 4: Hold the right open corner of the current pattern, fold it inwards, and align it with the closed side.

origami chicken step 4

Step 5: Unfold the last fold.

origami chicken step 5

Step 6: Hold the right bottom corner and join it with the crease-edge on the opposite open side.

origami chicken step 6

Step 7: Now, hold the bottom left corner and fold it similarly (symmetrically).

origami chicken step 7

Step 8: Hold the open corner of the top layer and join it to its opposite corner.

origami chicken step 8

Step 9: Slightly unfold the top layer.

origami chicken step 9

Step 10: Now, fold the open corner of the bottom layer and join it to its opposite corner.origami chicken step 10

Step 11: Fold the top open corner in by a cm.

origami chicken step 11

Step 12: Rotate the current pattern to bring the narrow end to the top.

origami chicken step 12

Step 13: Make small folds on both sides of the top narrow edge.origami chicken step 13

Step 14: Fold up a triangle flap (right side) to a point where a small part crosses the origami base pattern on the side.

origami chicken step 14

Step 15: Similarly, fold the other flap.

origami chicken step 15

Step 16: Make small folds on the bottom ends of the folded flaps.

origami chicken step 16

Step 17: Turn the origami pattern to the other side.

origami chicken step 17

Step 18: Use sharpies to draw the eyes and blush spots on the origami chicken pattern. Cut out a small triangle shape (beak) and attach it to the origami chick below the eyes.

origami chicken step 18

Customizing Your Origami Chicken

Once you’ve mastered the basic origami chicken, you can explore various ways to customize and personalize your creation. Here are a few ideas:

  1. Colour and Patterns: Experiment with different coloured papers or even try using patterned paper to give your origami chicken a unique look.
  2. Accessories: Consider adding small details, such as googly eyes or a beak made from a contrasting colour of paper, to give your chicken more character.
  3. Positioning: Experiment with different ways to display your origami chicken, such as standing it upright, laying it on its side, or even incorporating it into a larger origami scene or arrangement.
  4. Variations: Challenge yourself by trying different origami chicken variations, such as a standing chicken or a chicken with its wings spread.

Mastering the art of origami chicken folding is a rewarding and enjoyable experience. Whether you’re a beginner or an experienced origami artist, this step-by-step guide has provided you with the necessary knowledge and skills to create your own delightful paper folding chicken.

As you continue to practice and explore the world of origami, remember to have fun, experiment with different techniques, and let your creativity shine. Origami is a wonderful way to connect with the ancient Japanese tradition while expressing your own unique style and personality. So, gather your paper, follow the instructions, and start folding your way to a flock of charming origami chickens that you can display!

origami chicken

For another chicken craft idea, you can check out this Chicken Craft: Fun and Easy Paper Cup Craft for Kids. And for more origami projects, view Get Creative with Origami Multiple Airplane Designs and this Origami Maple Leaves Craft With Printable Template.

Chicken Craft: Fun and Easy Paper Cup Craft for Kids

0

Unleash your child’s creativity with this delightful paper cup craft that transforms a simple everyday item into an adorable chicken craft! This hands-on project is perfect for kids of all ages, providing an engaging and educational activity that encourages imagination, fine motor skills, and artistic expression.

paper cup chicken craft

Chicken Craft made with a paper cup

Whether you’re a parent, teacher, or caregiver looking for a fun craft to do with the little ones, this paper cup chicken craft is sure to captivate and delight. Not only is it a blast to make, but the end result is an adorable Easter chick craft that can be displayed proudly or used as a playful decoration.

Supplies Needed

Before we dive into the chick craft, let’s make sure you have all the necessary supplies on hand:

  • Coloured craft papers (orange, yellow, and pink construction paper or cardstock)
  • Paper cup
  • Embossed paper
  • Pencil
  • Scissors
  • Craft glue
  • Sharpies
  • Chicken craft template

The great thing about this chicken craft is that the materials are inexpensive and easy to find, making it accessible for families, classrooms, and community groups. You can even get creative with recycled materials or use up leftover scraps from your craft stash.

Step-by-Step Instructions

Ready to bring your chicken to life? Follow these simple steps to create your own easy paper cup craft:

Step 1: Print and cut out the template patterns for the paper cup chick craft. The template includes a head, hair, eyes, beak, blush, wings, legs, and cup cover patterns. Trace the patterns on the selected coloured craft papers and cut them out nicely using scissors. For a nicer look, trace and cut out the hair and cup cover patterns from embossed paper.

paper cup chicken craft step 1

Step 2: Attach the hair cutout to the top side of the chicken head cutout.

paper cup chicken craft step 2

Step 3: Attach the eye patterns on the chicken head pattern.

paper cup chicken craft step 3

Step 4: Attach the blush cutouts on both sides of the head, below the eyes, and attach the beak between the eyes, slightly below.

paper cup chicken craft step 4

Step 5: Cover the paper cup with the cover cutout.

paper cup chicken craft step 5

Step 6: Attach the chick head pattern on the paper cup’s closed end.

paper cup chicken craft step 6

Step 7: Attach the wing cutouts to the paper cup, on both sides of the head.

paper cup chicken craft step 7

Step 8: Attach the leg cutouts on the bottom part (open side) of the paper cup chick craft to complete it.

paper cup chicken craft step 8

And there you have it! Your charming paper cup chicken is now ready to be displayed, played with, or given as a thoughtful handmade Easter gift.

Chicken Craft: Fun and Easy Paper Cup Craft for Kids

Chicken Craft

Yield: 1
Prep Time: 5 minutes
Active Time: 20 minutes
Total Time: 25 minutes
Difficulty: Easy

Unleash your child's creativity with this delightful paper cup craft that transforms a simple everyday item into an adorable chicken craft!

No Ratings

Materials

  • Coloured craft papers (orange, yellow, and pink construction paper or cardstock)
  • Paper cup
  • Embossed paper
  • Pencil
  • Craft glue
  • Sharpies
  • Chicken craft template

Tools

  • Scissors

Instructions

Step 1: Print and cut out the template patterns for the paper cup chick craft. The template includes a head, hair, eyes, beak, blush, wings, legs, and cup cover patterns. Trace the patterns on the selected coloured craft papers and cut them out nicely using scissors. For a nicer look, trace and cut out the hair and cup cover patterns from embossed paper.

    paper cup chicken craft step 1

Step 2: Attach the hair cutout to the top side of the chicken head cutout.

    paper cup chicken craft step 2

Step 3: Attach the eye patterns on the chicken head pattern.

    paper cup chicken craft step 3

Step 4: Attach the blush cutouts on both sides of the head, below the eyes, and attach the beak between the eyes, slightly below.

    paper cup chicken craft step 4

Step 5: Cover the paper cup with the cover cutout.

paper cup chicken craft step 5

Step 6: Attach the chick head pattern on the paper cup’s closed end.

    paper cup chicken craft step 6

Step 7: Attach the wing cutouts to the paper cup, on both sides of the head.

    paper cup chicken craft step 7

    Step 8: Attach the leg cutouts on the bottom part (open side) of the paper cup chick craft to complete it.

paper cup chicken craft step 8

Variations and Customization of the Paper Cup Chicken Craft

One of the best things about this chicken craft is the endless possibilities for customization and creativity. Here are some ideas to make your paper cup chicken unique:

  • Colour Scheme: While the classic yellow and orange colors are traditional for chickens, you can experiment with different colour combinations.
  • Personality Plus: Get creative with the facial features to give your chicken its own distinct personality. You can draw on additional details like eyebrows, a smiling beak, or even a little wattle.
  • Themed Chickens: Spark your child’s imagination by making themed chickens, such as a superhero chicken, a holiday-inspired chicken, or a chicken dressed up as their favourite character.
  • Chicken Accessories: Take the craft to the next level by adding accessories like a small nest, eggs, or even miniature food bowls to really bring the chicken to life.

The possibilities are endless, so encourage your little ones to tap into their creativity and make their paper cup chickens truly one-of-a-kind.

chicken craft

Educational Opportunities

This simple paper cup craft offers more than just a fun activity, it can also be a valuable learning experience for kids and an adorable chick craft for preschoolers. Here are some ways you can incorporate educational elements into the chicken craft:

  1. Fine Motor Skills: Cutting, gluing, and manipulating the various paper shapes helps develop children’s fine motor skills and hand-eye coordination.
  2. Colour Recognition: Identifying and working with different colours, like yellow and orange, reinforces colour recognition and awareness.
  3. Shapes and Patterns: Discussing the geometric shapes used (triangles, ovals, etc.) and creating patterns can teach children about shapes and repetition.
  4. Chicken Facts: As you create the chicken, you can share interesting facts about these feathered friends, such as their anatomy, behaviors, or role in agriculture.
  5. Storytelling: Encourage kids to come up with imaginative stories and adventures involving their paper cup chickens, fostering creativity and narrative skills.

Ideas for Themed Craft Sessions

If you’re looking to expand upon this chicken craft idea or want to incorporate it into themed sessions for an event or classroom setting, here are some creative themes you might consider:

Farm Day

Host a farm-themed day where children can create various farm animals using paper cups and other materials. Alongside chickens, they could make pigs using pink cups or cows using black-and-white patterned cups. This theme can also include storytelling sessions about life on a farm and discussions about animal care.

Spring Celebration

With spring often associated with new life and growth, a spring-themed crafting session can feature not only chickens but also bunnies and flowers made from colourful paper cups. This season-themed event could be paired with outdoor activities like planting flowers or having a picnic.

Holiday Crafts

Incorporate holiday themes into your crafting sessions by creating chickens dressed up for specific occasions. For example, during Easter time, kids could create bunnies alongside their chickens while discussing traditions related to both animals during festivities.

Storybook Characters

Choose beloved storybook characters that feature animals as protagonists (like “Chicka Chicka Boom Boom” featuring various animal friends) for inspiration during crafting sessions. Kids could create not only chickens but also other animal characters from their favourite books.

By incorporating these educational elements, the chicken craft becomes more than just a fun activity, it becomes a valuable learning experience that engages children’s minds and supports their development.

Crafting paper cup chickens is a delightful and engaging activity that allows children to tap into their creativity, develop important skills, and have a blast in the process. Whether you’re a parent, teacher, or caregiver, this simple yet charming chick craft is sure to be a hit with the little ones.

Chicken Craft: Fun and Easy Paper Cup Craft for Kids

For more Easter craft ideas, you can check out the Felt Easter Garland with Printable Template, the Super Easy DIY Bunny Headband For Kids, or the Bunny Craft For Easter With Printable Paper Craft Template.

Felt Easter Garland with Printable Template

0

As the spring season blossoms and Easter approaches, it’s the perfect time to add some festive flair to your home decor. One easy and creative way to do this is having your kids make their very own Easter garland. Not only is this DIY Easter craft fun and simple to put together, thanks to the printable template, but it also allows to bring some springtime cheer to any room in the house.

easter garland made with felt

Easter Garland

Whether you’re looking to add a touch of whimsy to your mantel, spruce up your staircase, or a wall, these step-by-step instructions to create a beautiful one-of-a-kind Easter garland made with felt will definitely embellish your home.

Gathering Your Supplies

To get started on your Easter felt decoration, you’ll need to gather a few basic supplies for your kids. The great thing about this Easter garland craft is that the materials are inexpensive and easy to find, making it an accessible craft for crafters of all skill levels. This would be an fun Easter craft for kindergarten.

Here’s the supplies that you’ll need:

  • Felt fabrics (pink, purple, yellow, green, fuchsia)
  • Yarn (white or favourite Easter colour)
  • Pompom (white)
  • Pencil
  • Craft glue
  • Printable template

Once the supplies are ready, your kids can print and cut out the template patterns for the Easter garland. The template includes patterns for an egg, carrot, rabbit, and flower. Trace the patterns on the selected coloured felt fabrics and cut them out nicely using scissors.

easter garland cut out

Assembling Your Felt Easter Garland

Once felt shapes are cut out, it’s time to start assembling the Easter garland. This is the fun, hands-on part of the process where children can really bring their design to life.

Here are the steps to follow:

Step 1: Take the carrot cutouts and attach the leaf cutout to the wide end of the carrot cutout. Use craft glue or hot glue for a quick craft.

easter garland step (1)

Step 2: Turn the felt carrot pattern to the other side, this will be the front side of the felt carrot.

easter garland step (2)

Step 3: Take the rabbit cutout and select a pompom for the tail. Attach a pompom to the centre of the bottom round part using craft glue or hot glue.

easter garland step 3

Step 4: Take the egg cutouts. Attach the small round cutouts on the egg using craft glue or hot glue.

easter garland step 4

Step 5: Glue the felt egg with the small round cutouts.

easter garland step 5

Step 6: Prepare a long piece of strand for the garland.

easter garland step 6

Step 7: Glue the backside of the felt items to the prepared yarn strand.

easter garland step 7

Step 8: Attach enough felt items to the yarn and keep even gaps between the items. Turn the garland to the front side and make sure to keep enough length on both sides of the strand.

easter garland step 8

Step 9: Carefully hang the Easter garland up in your desired location. This could be along a mantel, staircase, or even draped across a shelving unit or windowsill. Get creative with how you display Easter felt decoration for maximum impact.

The great thing about this DIY Easter craft is that it’s highly customizable. Feel free to make your garland as long or as short as you need.

easter garland made with felt

Easter Garland

Prep Time: 5 minutes
Active Time: 20 minutes
Total Time: 25 minutes
Difficulty: Easy

Creating a beautiful Easter garland made with felt is a wonderful way to add a personal, handcrafted touch to your spring decor.

No Ratings

Materials

  • Felt fabrics (pink, purple, yellow, green, fuchsia)
  • Yarn (white or favourite Easter colour)
  • Pompom (white)
  • Craft glue or hot glue gun for quick craft
  • Printable template

Tools

  • scissors
  • Pencil

Instructions

    Once the supplies are ready, your kids can print and cut out the template patterns for the Easter garland. The template includes patterns for an egg, carrot, rabbit, and flower. Trace the patterns on the selected coloured felt fabrics and cut them out nicely using scissors.

    Once felt shapes are cut out, it’s time to start assembling the Easter garland.

    easter garland cutout

Step 1: Take the carrot cutouts and attach the leaf cutout to the wide end of the carrot cutout. Use craft glue or hot glue for a quick craft.

easter garland step (1)

Step 2: Turn the felt carrot pattern to the other side, this will be the front side of the felt carrot.

easter garland step (2)

Step 3: Take the rabbit cutout and select a pompom for the tail. Attach a pompom to the center of the bottom round part with craft glue or hot glue.

easter garland step 3

Step 4: Take the egg cutouts. Attach the small round cutouts on the egg using craft glue or hot glue.

easter garland step 4

Step 5: Glue the felt egg with the small round cutouts.

easter garland step 5

Step 6: Prepare a long piece of strand for the garland.

easter garland step 6

Step 7: Glue the backside of the felt items to the prepared yarn strand.

easter garland step 7

Step 8: Attach enough felt items to the yarn and keep even gaps between the items. Turn the garland to the front side and make sure to keep enough length on both sides of the strand.

easter garland step 8

Step 9: Carefully hang the Easter garland up in your desired location. This could be along a mantel, staircase, or even draped across a shelving unit or windowsill. Get creative with how you display Easter felt decoration for maximum impact.

Caring for Your Easter Garland made with Felt

One of the best things about a DIY Easter garland is that it’s built to last. With proper care and storage, you can enjoy your festive creation year after year.

Here are some tips for maintaining your Easter garland:

  • Avoid exposing it to direct sunlight or high heat, as this can cause the felt to fade or become misshapen over time.
  • Store your garland carefully in a cool, dry place when not in use, such as in a box or garment bag.
  • Spot clean any dirty areas with a damp cloth as needed, being careful not to over-wet the felt.

By following these simple care instructions, your felt Easter garland can continue to bring joy and festive flair to your home for many Easters to come.

diy easter garland

Creating a beautiful Easter garland with your kids is a wonderful way to add a personal, handcrafted touch to your spring decor. Not only is it a fun and creative felt craft, but the end result can also be a meaningful Easter decoration that you’ll enjoy displaying year after year.

I hope you enjoyed my Easter garland! For more garland craft ideas, you can check out DIY Fall Paper Leaf Garland With Printable Template and Shamrock Garland: Easy St Patrick’s Day Craft.

Happy crafting and happy Easter!