
Mother’s Day is a special time to celebrate the incredible women in our lives who have nurtured and supported us. What better way to show your mom, grandma, or any mother figure just how much they mean to you than by creating a heartfelt, handmade card? We will walk you through a fun and easy Mother’s Day pop-up card craft that kids of all ages can make.

We always need some sort of card for occasions throughout the year so creating a pop up card is a fun way to get creative and make something that really shows your care. These 3D flowers are so easy to make that young kids can make them with a bit of help with the cutting and gluing.
This easy step-by-step guide will help kids to create their very own Happy Mother’s Day pop-up card. Using simple materials and clear instructions, this craft is perfect for children of all ages. It’s a great way to help kids express their feelings, practice their creativity, and give their moms a heartfelt keepsake they’ll treasure forever. Let’s get started on making a card that’s as unique and wonderful as mom herself!
Understanding the Basics of Pop-Up Cards
Before we dive into the step-by-step instructions, let’s first explore the fundamentals of pop-up cards. Pop-up cards, also known as 3D cards or origami cards, are a type of greeting card that features intricate, three-dimensional designs that “pop up” when the card is opened. These cards often incorporate various folding techniques, cutting patterns, and creative elements to create a dynamic and visually engaging experience for the recipient.
The key to a successful pop-up card lies in the careful planning and execution of the design. Each fold, cut, and assembly step must be precisely executed to ensure that the final product not only looks beautiful but also functions as intended. With a little practice and patience, even beginners can master the art of pop-up card making and create truly stunning pieces.
Mother’s Day 3D Card
Every day is a chance to celebrate the moms, grandmothers and bonus moms in your lives, Mother’s Day is a super special day to show them how much they mean to you. Make this pretty Mother’s Day pop up card to do just that; fill it with words from deep in the heart before sending it to moms near and far. The card blooms into a three-dimensional arrangement that’s much more unexpected than a vase of flowers. It looks delicate, but with the template, step-by-step instructions, a few pieces paper, and some glue, you’ll quickly realize just how easy it is to create.
Mother’s Day Pop Up Card with Template
Before we get started, let’s make sure you have all the necessary materials on hand. Here’s what you’ll need for this Mother’s Day pop-up card:
Supplies
- Cardstock Paper (white or your favourite colour)
- Craft Papers (green, yellow, orange, pink, brown, purple, blue – pick your favourite colours)
- Pencil
- Ruler
- Scissors
- Glue
- Marker Pens
- Mother’s Day pop up card template
It’s important to choose high-quality materials that will hold up well and create a polished, professional-looking card. Experiment with different paper weights and textures to find the ones that best suit your design and personal style.
How to make a Mother’s Day pop up card
Now that you’ve gathered your supplies, let’s dive into the step-by-step instructions for creating your DIY Mother’s Day pop-up card:
Step 1:Cut out the watering can template from the Printable PDF file. And choose a colourful craft paper for your watering can. We will be using brown craft paper.

Step 2: Cut out the watering can shape using the brown craft paper.

Step 3: Use a darker brown marker pen to draw outline on the watering can cut out.

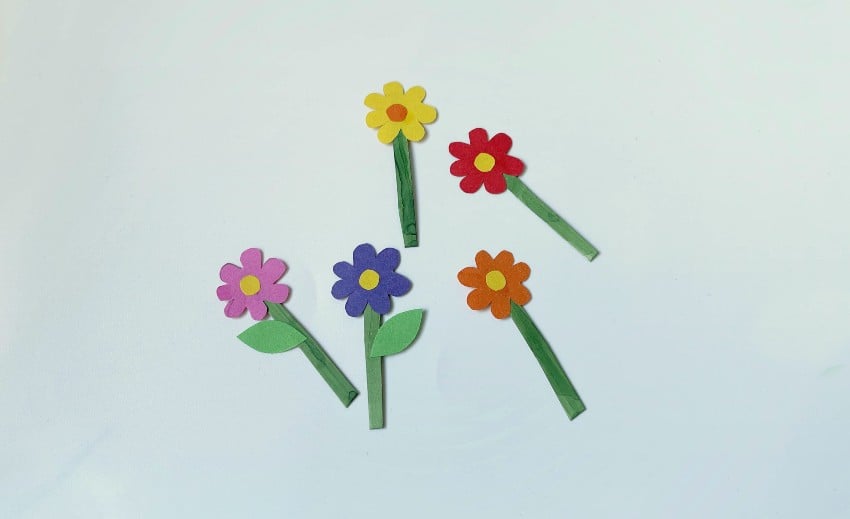
Step 4: Then, similarly, use the templates to cut out the flowers, leaves, and stems.

Step 5: Glue the round yellow pedicels inside the flowers.

Step 6: Glue the stems with the flowers.

Step 7: Glue the leaves to the flower stems.
Step 8: According to the red line on the template of the watering can use a pair of scissors to cut along the line and make slit. And start putting the flowers through the slit.

Step 9: Once you have places all the flowers through the slit apply glue on the back to keep them in place.

Step 10: Take a cardstock paper 4x the length of the flowers and fold it in half.

Step 11: Make two vertical cuts on the closed side of the card.

Step 12: Open the card and fold in the cutout slot.

Step 13: Use a marker and coloured paper to decorate the border of the card.

Step 14: Then, glue the flowers watering can on the pop-up slot to make your Mother’s Day craft.

Step 15: On the inside of the Mother’s Day card, write a special message to mom or grandma expressing love and appreciation. Encourage your child to get involved in this step, whether they want to dictate the message or write it themselves.

And that’s it! This easy Mother’s Day pop-up card is now complete!

Mother's Day Pop Up Card
Create a heartfelt Mother’s Day Pop Up Card with our easy step-by-step guide. Perfect for kids of all ages!
Materials
- Cardstock Paper (white or your favourite colour)
- Craft Papers (green, yellow, orange, pink, brown, purple, blue – pick your favourite colours)
- Pencil
- Glue
- Marker Pens
- Mother’s Day pop up card template
Tools
- Scissors
- Ruler
Instructions
tep 1: Cut out the watering can template from the Printable PDF file. And choose a colourful craft paper for your watering can. We will be using brown craft paper.
Step 2: Cut out the watering can shape using the brown craft paper.
Step 3: Use a darker brown marker pen to draw outline on the watering can cut out.
Step 4: Then, similarly, use the templates to cut out the flowers, leaves, and stems.
Step 5: Glue the round yellow pedicels inside the flowers.
Step 6: Glue the stems with the flowers.
Step 7: Glue the leaves to the flower stems.
Step 8: According to the red line on the template of the watering can use a pair of scissors to cut along the line and make slit. And start putting the flowers through the slit.
Step 9: Once you have places all the flowers through the slit apply glue on the back to keep them in place.
Step 10: Take a cardstock paper 4x the length of the flowers and fold it in half.
Step 11: Make two vertical cuts on the closed side of the card.
Step 12: Open the card and fold in the cutout slot.
Step 13: Use a marker and coloured paper to decorate the border of the card.
Step 14: Then, glue the flowers watering can on the pop-up slot to make your Mother’s Day craft.
Step 15: On the inside of the Mother’s Day card, write a special message to mom or grandma expressing love and appreciation. Encourage your child to get involved in this step, whether they want to dictate the message or write it themselves.
Notes
Variations and Customization Ideas
One of the best things about this Mother’s Day craft is that it can be customized in countless ways to suit your child’s interests and abilities. Here are a few ideas to get your creative juices flowing:
- Different Pop-Up Shapes: Instead of a simple shape, try creating a more complex pop-up element, like a butterfly with wings that spread out.
- Themed Designs: Tailor the card to your mom’s interests by creating a pop-up element that reflects her hobbies, such as a book, a gardening tool, or a piece of jewelry.
- 3D Elements: Take the pop-up card to the next level by adding 3D elements with depth and dimension. Glue on small trinkets, use puffy paint to create raised designs, or even attach small toys or figurines.
- Envelope: Don’t forget to make an envelope and decorate it! Use stickers, drawings, or even cut-out shapes to make the entire package a work of art.
The possibilities are endless, so encourage your child to let their creativity shine. The most important thing is that they put their heart and soul into creating a one-of-a-kind Mother’s Day card that mom will cherish.
Tips for Success
To ensure your Mother’s Day pop-up card craft goes off without a hitch, here are a few tips to keep in mind:
- Supervise Younger Children: While this project is generally suitable for kids of all ages, younger children may need extra assistance with tasks like cutting and gluing. Be prepared to lend a helping hand as needed.
- Encourage Creativity: Resist the urge to take over and make the card “perfect.” Instead, let your child take the lead and express their unique style and personality. The end result will be much more meaningful.
- Use Sturdy Materials: Choose high-quality cardstock or construction paper to ensure your pop-up element holds its shape and doesn’t tear or crumple when the card is opened and closed.
- Allow Time for Drying: Be sure to give any glue or paint ample time to dry completely before closing the card. This will prevent smudging or sticking.
- Consider Adding Surprises: For an extra special touch, try incorporating hidden elements like a small photo or a tiny trinket inside the card.
With these tips in mind, you and your child will be well on your way to creating a Mother’s Day pop-up card that is not only beautiful, but also filled with love and thoughtfulness.

Crafting a Mother’s Day pop-up card is a wonderful way to celebrate the special women in your life while spending quality time with your child. By guiding them through the step-by-step process, you’re not only creating a meaningful keepsake, but also fostering their creativity, fine motor skills, and sense of pride in their handmade gift.
So gather the supplies with your kids, get ready to get a little crafty, and let’s make this Mother’s Day one to remember!
For more Mother’s Day card craft ideas, check out Mother’s Day Shirt Card: A Heartfelt DIY Keepsake and DIY Rose Filled Heart Card.