I have been having the hardest time these days getting my toddler to take a bath. She used to love to splash in the bath with her sister but these last few months it has been like pulling teeth. Don’t even get me started on brushing teeth… that in itself is like, umm pulling teeth! I found a great idea about making “glow water” over at “Growing a Jeweled Rose’s” Site – I was blown away by all the fun ideas we could do with glow in the dark glow water and black lighting.
My first step was to get my little girl to fall in love with playing in the bath tub again- my next plan will be to transform my downstairs play area into a black light sensory fun haven… “baby steps” I said to myself. I will let my husband in on the plan in a few months!
The best high lighters seem to be the yellow ones
Glow in the dark and blacklight
My kids and I purchased a black light bulb from Walmart (for about $5) and some Highlighters ($5). I found that the Sharpie brand were the easiest to work with. I pulled off the end of the high lighters with some scissors and placed them in a plastic water bottle. I also bought a cheaper brand of high lighters that worked well too. Only I could not for the life of me get the cap off the base of the highlighter. I even used my teeth when the kids were not looking! (don’t try this at home kids..) I cut my lip somehow – no fun. Save yourself the hassle and get the sharpie ones.
I took some scissors and pried the cap off, it was easy.
Glow in the dark water toys
I kept some water in so it could be shook up. You can add white beads, and sparkles or little “lost toys”. Make sure the cap is on tight. Though these markers are non toxic I am not sure if it would be fun to have the water bottles spill open and colouring your child like Wesley from the Lorax. The yellow Glow High lighters worked best for this. I tried the pink, and it was alright, but the blue and purple had no “magic” at all.
Glow in the Dark Glow Water
I looked for all kinds of toys that had some white to them, or were made of that glowing plastic.
Next time I will add some tonic water to the water and it is supposed to make it glowing too.
You can see here that my shower curtain is white so it really glows. I took one of the markers and coloured little stars on the walls. They cleaned right off afterwards.
what an impact with a white shower curtain.
We have done this a few times now and the kids really love it. We have even added glow sticks to the water. Next time, I will add some tonic water and see if it glows like they mentioned in the website.
Glow in the Dark Glow Water
I hope you try this idea- It definitely adds a whimsical feeling to bath time.
Being a teacher I love bringing thematic learning to my classroom. This time of the year is tough, major holidays are over and spring is just around the corner but winter clothing still needs to be worn. During this time of year I would bring out my mitten unit for my primary students.
I have to start with this little song. I would sing to my students and I still sing to my three children, much to the embarrassment of my 9 year old daughter:
Thumb in the thumb hole,
Fingers all together,
These are the songs we sing in mitten weather
The perfect book to accompany this unit is of course Jan Brett’s “The Mitten”
The Mitten cover book
“The Mitten” Synopsis
If you have not read “The Mitten” here is a brief synopsis courtesy of Good Reads:
When Nicki drops his white mitten in the snow, he goes on without realizing that it is missing.
One by one, woodland animals find it and crawl in; first, a curious mole, then a rabbit, a badger and others, each one larger than the last. Finally, a big brown bear is followed in by a tiny brown mouse and what happens next makes for a wonderfully funny climax.
As the story of the animals in the mitten unfolds, the reader can see Nicki in the boarders of each page, walking through the woods unaware of what is going on.
Once again Jan Brett has created a dramatic and beautiful picture book in her distinctive style. She brings the animals to life with warmth and humor, and her illustrations are full of visual delights and details faithful to the Ukrainian tradition from which the story comes.
Illustrations
One of my favourite characteristics of the book are the illustrations. There is the main story within the pages of the text, but then there is a second story going on within the frame of the illustrations. I would intentionally not tell my students about the second story. Listening to their squeals as they discovered the secret story is an amazing experience as a teacher.
This is Mitten Weather
To further the learning, I have added a couple of activity pages to do at home with your little ones.
This is one of the best YouTube videos of The Mitten, I have used it in my classroom many times!
When your kids are young it is fun to have them in the kitchen helping you pour and stir. The photos are cute, the flour on the floor and sprinkles all the way to the bathroom are adorable, and the memories are precious! As the kids get older, it is still fun to get them in the kitchen, but it is also important. The earlier kids learn to cook, to bake, to value food and healthy ingredients the better chance they have of making good food choices as teens and adults. It’s so important to spend kitchen time with our kids!
Spend Time with your Kids in the Kitchen
Kitchen time with kids is an opportunity to teach them about recipes, ingredients, measurements, baking, boiling, steaming and broiling. As kids grow they develop a relationship with food and rather than it always being a battle ground, cooking with your kids allows them fun time in the kitchen to learn. Being a part of the process of meal preparation will give them pride at the dinner table and may entice them to try new things, to experiment with tastes and flavours and empower them to make good eating choices.
Child making cookies
I have always spent kitchen time with my kids, mainly because I had to. Sometimes, they were literally wrapped around my legs as I tried to feed our family of 5, but mostly watching me prepare dinner was entertainment for them from their high chair as they chased peas around their tray. As they got bigger, they stood on a chair, pulled up to the counter while I chopped and stirred the food. I was giving them small tasks like assembling a whole lasagna once the ingredients were ready.
Kids of all Ages Can Help
Kids of all ages love to help and spend time in the kitchen. What we see as a daily chore they see as fun play time with mom or dad. Even doing the dishes! Have you ever asked an 8 year old that can now see over the counter to wash a few dishes for you? Hot soapy water, a scrub brush, a cloth and all these fun shapes I can play with??? Of course they see this as a good time!
Start small with fun things they like to eat such as muffins or healthy apple oat bars before moving on to bigger meals, but always give the kids as many of the tasks as you can, even dishes!! They really do love to help and the learning along the way is the icing on the cake!
Kitchen Time with Kids
It may take a little longer to get the task of dinner making done, but by including your kids in the process, they become engaged in the meal. They are also more interested in it once it’s on the table, proud they were a part of it and eager to try another recipe the next time. Do you spend time cooking in the kitchen with your kids? Which recipes do you like to make together?
The temperature is gradually rising and the snow is beginning to melt. This only means one thing, it’s maple syrup time and time for a yearly family outing to one of Ottawa’s local sugar bushes! You will find below a list of Sugar Bushes in Ottawa and Surrounding Areas!
Ottawa is home to a variety of sugar bushes that offer unique experiences for visitors looking to immerse themselves in the world of maple syrup production. From family-friendly farms with interactive demonstrations to rustic sugar shacks that transport you back in time, each sugar bush has its own charm and character. Some popular sugar bushes in Ottawa include the Proulx Farm, Stanley’s Olde Maple Lane Farm, Fulton’s Pancake House and Sugar Bush, and Temple’s Sugar Bush.
Many sugar bushes in Ottawa offer all you can eat self-serve or cafeteria style brunch buffet. After you’ve eaten, you can also enjoy a maple tour, maple taffy, a farm with animals, walking trails, a playground, a horse drawn hay ride, and more!
Before you leave the Sugar Bush, don’t forget to stock up on maple syrup, taffy, and maple butter! By purchasing these products, visitors can support local producers and savor the taste of Ottawa’s maple heritage. You can even plan a sugar shack party to celebrate maple season with cocktails and appetizers that showcase your maple treats from the sugar bush outing.
Planning Your Visit
Before embarking on your sugar bush adventure in Ottawa, it’s essential to plan your visit accordingly to make the most of your experience. Check for seasonal opening hours, event schedules, and booking requirements for activities such as guided tours and dining reservations. Dress warmly for outdoor activities and bring along a camera to capture memorable moments amidst the maple trees.
Sugar Bushes in Ottawa
You will find below a list of the most popular sugar bushes in the region!
Exploring the sweet delights of sugar bushes in Ottawa offers a sensory journey through the sights, smells, and tastes of maple syrup production. From witnessing the time-honored process of sap collection to indulging in farm-fresh pancakes drizzled with golden maple syrup, a visit to a sugar bush is a quintessentially Canadian experience that celebrates nature’s bounty and cultural heritage. So pack your bags, gather your loved ones, and embark on a sweet adventure into Ottawa’s maple-scented wonderland.
Shrove Tuesday, also known as Pancake Tuesday, isn’t the only day of the year you can eat breakfast for dinner. In my house, we often have breakfast for dinner, especially when looking for something quick, but healthy to eat. One of my favourite things is using eggs to make is an omelette.
At first the idea of whisking the egg just right and folding it over perfectly intimidated me, but I quickly learned that so long as the right ingredients are in the omelette, my family could care less if the omelette looks picture-perfect.
How to make an omelette
To make an omelette for one person you simply whisk together two eggs with a tbsp. or two of milk (I use skim, but it doesn’t matter what kind), and add a dash of salt and pepper.
In a preheated lightly greased skillet pour in the whisked egg and move the pan around so that the egg is evenly distributed into a circle.
Next add your favourite finely chopped or shredded ingredients to half of the circle. Some of my family favourites are green or red pepper, onion, mushroom, spinach and ham. Then add some freshly grated cheese. If you want to be really adventurous, you can try sprinkling some flax-seed on top of the veggies, before adding the cheese – flax seed is a great source of fibre and omega-3 fatty acids.
It’s time to flip the one half of the omelette on top of the ingredients when the egg is cooked along the edges and almost cooked toward the middle.
Cook until all the cheese is melted. Slide the omelette onto a plate and serve!
Again, don’t worry if your omelette is not a perfect half circle – mine rarely are, especially since I try to jam as many healthy ingredients in them as I can!
So, the next time you can’t think of anything for supper, but have eggs and various vegetables sitting in your fridge, there is an upside! You can make can basic omelette and regardless of what is in it, I bet it will taste great!
Living in Canada sure does have its perks. The weather is usually nice, people are friendly, and the scenery is just gorgeous. Those things are great, but honestly, the food is what keeps me here. Around every corner is a little bakery or family owned shop with the most delicious and moist foods I have ever tasted. If you know me, after enjoying a snack a few times, I am ready to try my hand at making it. That is exactly what I am bringing to you today, the Canadian Fried Dough Pastry or also know as Elephant Ear Pastries.
Fried Dough Pastry Recipe
This delicious fried dough pastry is so yummy and really easy to make. The dough is really easy to make and is slightly sweet, thanks to the added vanilla and cinnamon. I usually like to use a dough hook in my mixer, but if you have kids, they can have fun helping to knead the bread. Once it is ready, pop it in some hot oil and it is ready to enjoy. If you wish, you can also make a fruit spread, cream cheese spread, or even just some plain Nutella to enjoy with this dish.
You will need the following ingredients:
1/2 cup warm water
5 teaspoons dry yeast
1 pinch sugar
1 cup warm milk
1/3 cup sugar
1 1/2 teaspoons salt
1 teaspoon vanilla
2 eggs
1/3 cup vegetable oil
4 1/4-5 cups unbleached all-purpose flour
vegetable oil for frying (about 4 cups)
2 cups of granulated sugar (for dusting)
1/4 cup of cinnamon
How do you make fried dough
In a large mixing bowl, stir together the yeast, warm water and pinch of sugar. Allow to stand a couple of minutes to allow yeast to swell or dissolve.
Stir in remaining sugar, milk, vanilla, eggs, oil, salt, and the flour to make a soft dough. Knead by hand or with a dough hook for 5 minutes, adding flour as needed to form a firm, smooth, elastic dough.
Place in a greased bowl. Place bowl in a plastic bag and seal. If not using the dough right away, you can refrigerate it.
Let rise in a covered and lightly greased bowl about 30-45 minutes.
Gently deflate dough. If dough is coming out of the fridge, allow to warm up for about 40 minutes before proceeding.
Take a piece of dough the size of a golf ball and roll out into an oval.
Heat about 4 inches of oil in fryer, wok or frying pan. Temperature of the oil should be about 385°F.
Before putting in oil, stretch the ovals into a tail shape, thinning them out and enlarging them, like a beaver’s tail.
Add 1-2 dough pieces of the dough at a time to the hot oil. Turn once to fry until the undersides are dark brown. Lift the tails out with tongs and drain on paper towels.
Canadian Fried Dough Pastry on a white plate
Fill a large flat bowl with a 2 cups of white sugar. Put the fried dough elephant ears in sugar with a little cinnamon and shake off excess.
You can top with jam, Nutella or a few drops of lemon juice!
This fried dough recipe makes at least a dozen elephant ear pastries.
I hope you enjoyed my Canadian Fried Dough Pastry Recipe as much as my family and I did. If you make it, make sure to share with us on Facebook or Twitter! Also, check out all of our other Recipes.
Canadian Fried Dough Pastry
The Canadian Fried Dough Pastry recipe is really easy to make. The dough is is slightly sweet, thanks to the added vanilla and cinnamon.
In 1981, my father went home for lunch. He walked into my baby sister’s room to kiss her goodbye and instead found that his little girl not breathing and without a pulse. She could not be revived. It was a parent’s worst nightmare come true. My sister’s death from Sudden Infant Death Syndrome (SIDS) has left a lasting scar on my family. We still feel its effects over thirty years later.
Baby sleeping
The Legacy of Sudden Infant Death Syndrome (SIDS)
My sisters and I are more anxious than the average parents with newborns. All of us are guilty of sneaking into our babies’ rooms while they were sleeping and anxiously looking for the rise and fall of their chest. Always watchful and with crossed finger hoping, no praying that the fate of our sister will not be revisited on our children.
The cause of Sudden Infant Death Syndrome (SIDS) remains, for the most part, unknown. Prematurity is a risk factor, so too seems to be exposure to cigarette smoke. Placing a baby on their back to sleep seems to help prevent SIDS, as does removing blankets, pillows, and bumper pads from cribs. Some research has also shown that up to 10 percent of SIDS deaths may be related to congenital heart rhythm disorders.
I find little of this reassuring. Sudden Infant Death Syndrome (SIDS) feels to me like a random lightening strike. You don’t know where or when it is going to strike and, as a parent you are powerless to prevent it. And, I do believe it can happen to my child because my sister’s death proved to me that my family is not immune to such a tragedy.
Legacy of Fear
Pregnant with my second child, I find myself growing more anxious as her birth approaches. I will count down the months until she passes out of the danger zone for SIDS, as I did with my son. I will pray and hope that she makes it through and sleep more soundly when she does.
It is a legacy of fear. But, it is a legacy of fear that I hope to not pass down to my own children. The farther our family moves away from the tragedy, the less hold it has over us. My children will, most likely, never share my experience of losing a sibling to Sudden Infant Death Syndrome (SIDS).
Baby’s feet
They will be able to believe that it would never happen to them or their children and that, in my opinion, is for the best. After all, I will worry enough about my grandchildren enough for all of us because I will never forget.
I had the pleasure of child minding my 4 year old niece. My kids are much older now so I don’t have too many toys or crafts for that age group, so we made some together. I used to make homemade playdough all the times with my kids when they were younger. We preferred the uncooked playdough recipe since it would be easier for them to make. I am sharing below my favourite recipe!
It is no secret that playing with those colourful pieces of playdough is fun, but did you know that it has other benefits for children? Having children play with playdough can introduce many different things to them.
Child playing with Homemade Playdough
How does playing with playdough help a child’s development
When it comes to playing with playdough, many parents tend to avoid it because they see it as messy. While it can be messy at times, playing with playdough offers a ton of benefits and learning opportunities for your child that outweigh the negative aspect of it being messy.
1. Playdough can help build and enhance fine motor skills.
Since playdough is malleable, your child can manipulate it easily. As your child rolls, pokes, squishes, scores, and shapes the play dough it will help them strengthen their hand muscles.
Strengthening those hand muscles and tendons will help improve their fine motor skills and coordination. This can even help get them ready for more control when it comes to using pencils and scissors.
2. Encourages creativity
Playdough typically starts out in the shape of the ball. After that, it allows children to create and make anything they want through open ended play.
As they are shaping and forming objects like food, flowers, or other fun shapes, it’s really encouraging them to be creative and use their imaginations. Children see the world differently and allowing them to manipulate and get creative with playdough will help them bring their designs to life. From just a simple ball, they can create a variety of different shapes and designs.
3. Playing with playdough is soothing and calming
Manipulating and playing with play dough has a calming effect, even for adults. When children start to squeeze and mush the playdough through their hands, it is a soothing feeling that can help calm them down.
Playdough can also help children when it comes to their emotions, especially if they tend to struggle with them. For instance, if you give your child a ball of playdough to play with and let them freely play, it may be easier for them to open up more easily when it comes to talking about their feelings. You may notice that as they are playing, their feelings and worlds will just start to come out because they don’t have to focus on their words or try so hard to explain them.
4. Increases curiosity
Have you ever been curious as to what would happen if you mixed two or three things together? What if this colour mixed with that colour? When children play with playdough, it can help increase their curiosity to discover new colours or new things. They will start asking questions and experimenting which can turn into a fun learning opportunity.
5. Promotes investigation and science learning
There are a lot of kid-friendly playdough recipes out there and if want to encourage some extra learning, let your child help make homemade play dough.
As they are helping make the playdough, they will see the science come to life. They will be closely watching what happens when the simple ingredients are mixed. They may start to form their own hypotheses or try and predict what is going to happen.
This doesn’t just apply when it comes to making playdough. These learning experiences will also make an appearance when they are playing with the dough. As they explore the different shapes they can make or try to stack the playdough pieces, their scientific thinking will set in leading to the “what if?” questions.
These are just a few ways that playing with playdough can be beneficial to children. As you can see, play dough is versatile and offers a lot of learning opportunities for children.
Homemade Playdough Recipe
Some recipes require cooking on the stovetop. The playdough does have a better texture when cooked, but if you want the kids to do it themselves, it’s best to try an uncooked playdough recipe.
Homemade Playdough Recipe
This easy homemade playdough recipe provides hours of fun! It can be expensive to buy at stores, but it’s very easy and costs nothing to make it at home! The only materials you will need are:
Ingredients
1/2 cup salt
1/2 cup water
1 cup flour
Food dye or Kool-aid
Homemade Playdough Recipe
How to make playdough from scratch
1. Food dye (any colour, be creative mix & match!) They now sell Neon food colouring. You can even scent it by adding 1-2 single packages of Kool-Aid.
2. Newspaper or plastic place mat to cover the surface you’re working on.
3. Mix salt and flour in a bowl. Mix water and food dye in another bowl. Pour water mixture into the dry ingredients bowl. Mix thoroughly by hand. If it’s too sticky add some flour or too dry/flacky add water.
I hope you enjoyed my Homemade Playdough recipe as much as I did! If you make it, please share your photos with us on Facebook or Twitter! Also, check out all of our other crafts!
The final instalment in my Nursery Decor Tips For Safety, Development, and Style, is by far the best part. When the paint has finally dried, the last picture has been hung, and the last teddy bear placed on the shelf, the awaited arrival of your little one will seem much more real and a lot more exciting (if that’s even possible)!
These simple and easy to follow nursery decor tips will point you in the right direction and help get you started on giving your little bundle their fabulous space that they will laugh, cry, and grow up in.
Nursery Decorating For Style
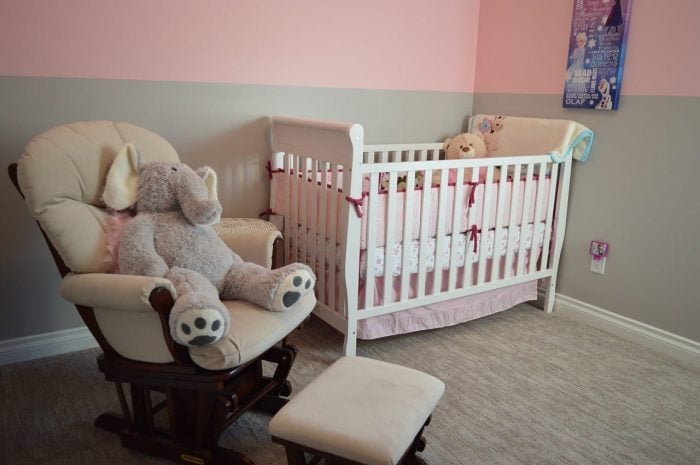
Nursery room
Exit duck and clown art
Nursery decor is less about using the juvenile patterns we are use to seeing in the past, and more about being an extension of your home. By bringing your decorating choices throughout your home into the nursery you will increase the life of your design and allow for a more consistent and comforting feeling into your little ones bedroom. Nursery’s are now sweet without looking immature, and sophisticated without being pretentious.
Nix the matchy-matchy mindset
Matching all your nursery pieces is a thing of the past. Adding a more eclectic feeling to your nursery by using mismatched pieces can help increase the longevity of your design. It adds depth and an interesting atmosphere that your little bean can grow into, and is less likely to make you tire of the decor and want to redecorate in a couple of years.
Wall decals
These are huge for nursery decorating because they are cheap, extremely easy and foolproof to use. They also peel off without damaging paint when you want a change. A great website to visit is magicwall.ca . They sell countless wall decals and have tips and ideas for using their products.
A white bassinet
Style: room Colour
Grey – The grey colour can be coupled with every colour imaginable. Grey is gender neutral and is seen everywhere for the coming year.
Black and white with pops of colour add loads of drama and sophistication. It will add interest, stimulation and a definite cool vibe.
Traditional made modern – There is a more modern approach to nursery decor by taking traditional furnishings and adding pops of colour. For example- DIY by taking an old rocking chair and modernize it with gorgeous paint colours.
Nursery Decor Tips For Safety, Development, and Style – Part 3
Decorating your baby’s space is easier and even more enjoyable now than it ever was. Nursery decor is all grown up, and the predictable designs and boring decorating choices of yesterday are long gone. In today’s nursery you will find a more sophisticated, advanced, stylish, and usable spot that your little one will enjoy and grow in for years to come.
Don’t forget to read Part 1 and Part 2 of the series!
I wanted there to be a bit of valentines magic in our house this year. I searched for hours on Pinterest (your welcome!!) to find what I thought was the coolest craft and it was Crystal Hearts. They are also perfect to make for Mother’s Day or any just for the fun of making them!
Crystal hearts flower
Valentines day is approaching and we are all starting to see red and pink hearts on everything in the stores. My kids are starting to get really excited. My 5 year old can hardly wait to pass out little heart shaped papers to all her friends and get little valentine notes. Her excitement reminds me of how much I liked this special day and sometimes when you get older you don’t see the holiday the same way you once did as a child.
What Are Crystal Hearts
These are little hearts that you shape out of pipe cleaners and dip in a solution. When you wake up in the morning they are filled with beautiful crystals. We are going to hang them up so the birds don’t bump into our windows. Not only are they gorgeous but they are useful too!
Homemade Crystal Hearts
Material You Need To Make The Crystal Hearts:
Pipe Cleaners
Wide Mouth mason jars
thread
Popsicle stick
boiling water
borax (found in the laundry section of your supermarket)
long spoon or stirring stick
ribbon for hanging
How To Make Crystal Hearts
Step 1: We started making the crystal hearts by forming cute shapes with the pipe cleaners. This is something that kids can do too. We made some heart shapes and a cute squiggle. Tie a piece of thread around the pipe cleaner. Attach the other end of the thread to the Popsicle stick so that the shape hangs in the jar and does not touch the bottom or sides and place them aside.
Step 2: Pour boiling water into each jar and add a few tablespoons of borax, stir until powder is dissolved. Continue adding a tablespoon at a time and continue stirring until the mixture becomes cloudy and solution is completely saturated with the borax.
Step 3: Add your shapes to the jar and let it sit in a place where it will not be disturbed for 24 hours. I took them out of the solution and let them dry. I added some ribbons to the crystals so I can hang them from the windows.
Step 4: As my crafty neighbour and I made these we thought about all the different things we could dip into the solution. Pom poms, thread, yarn. So many fun possibilities! These would look beautiful in a shadow box or even as little toppers for gifts.
Notes:
Please keep a watchful eye around children with hot liquid and heating water on stove. Borax is a soap product and may be harmful to children if ingested. Please don’t let children handle crystals without supervision. Please wash hands thoroughly after touching crystals.
I hope you enjoyed my Crystal Hearts Craft as much as I did! If you make it, please share your photos with us on Facebook or Twitter! Also, check out all of our crafts!
The winter blahs have been getting me a little down lately. When I feel like this there are usually two things that change my mood. The first is to rearrange my furniture and since I have moved my sofa couch to every possible position in my living room, I had to resort to the next possible “pick me up”…. a new hair colour. I decided to try Tints of Nature permanent hair colour to dye my hair and share my review.
after shot- a nice natural shade of chocolate brown.
I will just let it be said that I have used many different types of hair dyes. I am no stranger to brands or to exotic colours. Mostly what I have always look for in a hair dye is something that is easy to use at home and was easy on my wallet. These days I have been thinking more and more about the products I am putting on my hair, in my body, and on my skin. I have been questioning the safety of products out there that I use for myself and my family.
Tints of Nature Permanent Hair Colour Review
When I first found out about the Tints of Nature hair dye, I was very excited. A long lasting hair dye without such harmful chemicals as ammonia and parabens, one that is gentle for your hair containing organic certified ingredients. I had to try this.
Tints of Nature Pre-Treatment
The first thing that I found different about this hair dye product was that it offered a “pre – treatment” for my hair. There was a little packet of shampoo made with grape seed oil extracts that is used to prepare your hair before you dye it. It strips away any build up on the hair and removes any oils making it more receptive to the dye. I also thought that it was interesting that I was to wash my hair with the shampoo first, then towel dry my hair. The dye then goes on the hair that is damp. Normally I have always put the dye on my hair when it is dry.
The pre treatment had no smell and left my hair feeling squeaky clean. I then proceeded to towel dry my hair and I combed it out just like in the instructions.
Tints of Nature Colour Application
I mixed the colour and the activator and there was no offensive odours. It smelt a bit “minty”, but it did not have the harsh chemical smell that I have experienced with some other brands. When I put the dye in my hair, it was fairly easy to use. I just lathered it in. I was careful to go around the back of my ears and get all the spots that I sometimes miss. There was plenty of dye, I was tempted to ask my husband if he wanted to use some. The gloves that came in the package were a thicker plastic which I thought was nice since I always poke my finger nails through the flimsy ones. I just had some trouble getting them off once I was done.
I left the dye in my hair for 40 minutes and used the little shower cap it came with. It was a loose fit, but there was an elastic in the box and it helped keep my cap on. (wow they thought of everything!) My husband had noted that I got quite a bit on the back of my neck.
When I washed it out I used the shampoo and conditioner that came with the product. It had a nice fresh smell. It left my hair feeling soft and removed the stiff feeling most hair dyes leave you with. I was also relieved to see that all the dye on my neck had been washed away with out having to do any intense scrubbing. Usually I have the “tell tale” signs on my neck, forehead ears and hands for a few days.
When my hair dried it was a cute chocolate brown colour. The colour was in my hair and not all over the towel. I noticed my natural highlights and low lights. My hair was soft and silky and my bathroom did not smell like a chemistry lab.
Love Tints of Nature Permanent Hair Colour
I am very happy with the results I got with Tints of Nature. This product is definitely worth the few extra dollars. Remember you get what you pay for, but in this case you don’t get the Parabins, the Amonnia, the resocinol. You get an amazing award winning product that isn’t tested on animals and uses natural and organic ingredients.
Winterlude is a festival in Ottawa that celebrates all the best that winter has to offer. Usually February kicks off Winterlude. Having lived in Ottawa and enjoyed Winterlude for 12 years now, I have several pieces of advice for parents. All three of my children now 9, 7 and 4 have experienced Winterlude from different perspectives and look forward to the adventure each year. You will find this parent’s guide to Winterlude very handy!
We usually go once with the insane crowds, thousands of visitors and exhibits galore along the canal route. However, the best time to go is when the tourists are not. The ice is clear, smooth and inviting. The absence of crowds gives my family and I the freedom to roam along the 14 km of skating uninterrupted.
Ice Sculpture at Winterlude
Bring Cash !
Beavertails are a rite of passage after skating on the worlds longest skating rink. Canadian invented & 100 % Canadian made these tasty oblong pastries can be purchased on the canal at the Beavertail kiosk.
Beavertails Girls!
Baby it’s Cold Outside
You may think because the sun is shinning the canal will be a warm place to explore, but you would be wrong. Bundle up in layers and remember cotton kills. The theory of skating 14 k with you family may seem like the idyllic way to spend a Saturday but there are drawbacks. Cold feet are the number one complaint of skaters and their little ones. Bring a wagon or sled to draw your little one down ice after they have decided they are done for the day.
My tired boy.
Donate to a Good Cause
The canal is an amazing feat build by masterful technicians in the heart of the nations capital. Please consider donating at one the many drop boxes along the canal route.
Tired of Skating?
There are so many other activities to experience during Winterlude other than skating on the canal including Jacques Cartier park, exhibits, contests and figure skating shows don’t limit yourself to one activity enjoy them all! One word of caution, the winter weather will tucker out even the most outdoorsy family. Pack fresh fruit, veggies, cheese treat and of course water for instant energy during your Winterlude adventures. Don’t be afraid to take a break or head back at your hotel, the canal will still be there when you get back.
Skating with our Shadows
Souvenirs…Functional & Fashionable
One thing I have learned about souvenirs is that most are dust collectors. However, the Winterlude items serve a purpose. Several years ago I bought Ice Hogs zipper fobs for my kids winter coats. It was one of the best purchases I have made, giving my kids the ability to zip up their coats with mittens on all while sporting our Winterlude swag.
Exploring the Glebe
So I may be a little bias, but the Glebe is wonderful area to explore. Take off your skates and take a walk up the tree lined streets for a break from the canal. The beautiful four square homes, wides side walks and shops make the Glebe a family friendly area.
A Parent’s Guide to Winterlude
Enjoy this parent’s guide to Winterlude and your time in the nation’s capital. Winterlude is a fabulous place to start your family adventure just don’t forget to look at all the activities available to you and your family!
Every year since I can remember, I have given my grandfather a Valentine’s Day card. It’s a tradition I have since passed down to my four-year old daughter. Because my daughter enjoys crafts, we now make a Valentine’s Day craft or card instead of purchasing one, which to me is much more personal and heartfelt anyway. This year we made a Huggable Valentine’s Day Craft!
A Huggable Valentine’s Day Craft
Thanks to the brilliance of Pinterest, I have access to hundreds of great Valentine’s Day crafts for kids. This year, I let my daughter chose which one she would like to do and right away she chose this “hug” craft from a blog called The Party Event! It’s such a fun handprint Valentine’s Day craft that makes it so much more memorable as a Valentine’s Day gift.
A Huggable Valentine’s Day Craft
How To Make The Valentine’s Day Craft
The craft is really easy to make and involves:
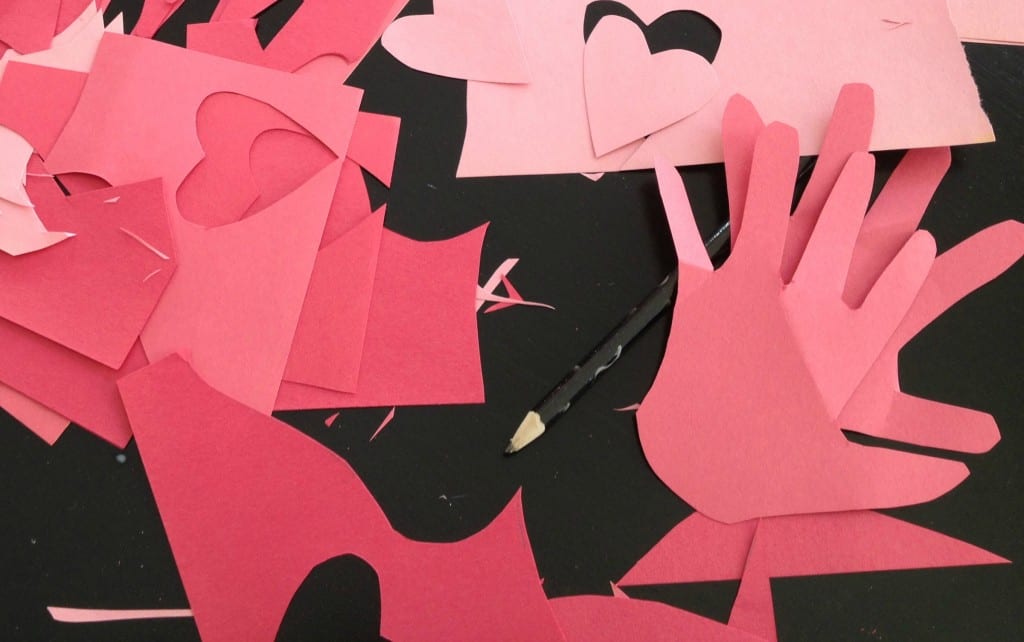
simply tracing and cutting out your child’s handprint on red or pink construction paper,
attaching it to a ribbon (or yarn) of your choice,
then cutting out several hearts and also gluing them to the ribbon,
followed by printing or writing out and then attaching a verse to explain what the craft is.
A Huggable Valentine’s Day Craft
My daughter was able to cut out her handprint that I traced for her, as well as cut out some of the hearts and glue them to the ribbon. She also chose where she would like to place the hearts along the ribbon. The ribbon is the exact length of her arms stretched out – or the size of her hug.
A Huggable Valentine’s Day Craft
My grandfather does not live in town, so this was the perfect craft to make and send to someone who will not be hugged in person this Valentine’s Day. It was, however, tricky to find an envelope that would fit her handprint without having to bend the fingers, so keep this in mind when tracing your child’s handprint – the more spread out the fingers are, the larger the handprint will be and the less likely it will fit into a standard letter-sized envelope.
After finding the perfect size envelope, sending the Huggable Valentine’s Day Craft reminded us how special, handmade gifts can bridge any distance. These crafty moments also highlight the potential of repurposing many of the materials we already have around the house, including old colouring pages. For those who enjoy upcycling, we’ve got inspiring ideas for turning colouring pages into greeting cards and gifts that are just as heartwarming as our Huggable Craft.
Huggable Valentine's Day Craft
Yield: 1 craft
Prep Time: 5 minutes
Active Time: 25 minutes
Total Time: 30 minutes
Difficulty: Easy
Estimated Cost: $5
This Huggable Valentine's Day Craft is easy to make and uses construction paper, ribbon, your child's handprint, and writing out a verse.
No Ratings
Materials
Ribbons
Construction paper
Tools
scissors
glue
Instructions
The craft is really easy to make and involves:
simply tracing and cutting out your child’s handprint on red or pink construction paper,
attaching it to a ribbon (or yarn) of your choice,
then cutting out several hearts and also gluing them to the ribbon,
followed by printing or writing out and then attaching a verse to explain what the craft is.
My daughter and I are happy that her great-grandfather will have her “hug” on Valentine’s Day. In fact, my daughter loved this craft so much, she made one for her best friend as well as one for her father. She’s so huggable…
I’m sure we all have memories of laminate countertops in our parent’s or grandparent’s kitchens. I know my parents have had various shades of colours and styles of laminate in their kitchen over the years and just recently gone the way of granite. This past weekend, Mr. Fix-it and I were on the hunt for new countertops. I had no idea how many options there are now…and if you want to go the way of laminate…it has done leaps and bounds in improvements. So which countertop to choose?
Which Countertop to Choose?
If you are thinking about new countertops in your kitchen, it is important to do some research to see what is a good fit for you and your needs.
Here are a few tips on which countertop to choose:
LAMINATE
Plastic laminates have been popular through the years because they are inexpensive, easy to install and durable. When choosing a plastic laminate, you have a variety of colors and styles to choose from. It used to be that laminate only came in solid colours, however now photographs are taken of more expensive options (such as granite) and placed on the laminate to give it that “granite” look. Laminate is a great option for relatively short term needs, renters and budget friendly. The disadvantages to choosing this alternative are that it fades over time, isn’t the most fashion forward, will not tolerate direct heat, and the seams are very noticeable.
STAINLESS STEEL
Stainless steel is used in restaurant kitchens all over the world. It has also become popular for residential use as it provides a modern look, is scratch resistant and cleans well. However, it can make a kitchen feel cold and sterile depending on what else is going on in the kitchen.
GRANITE
Granite is one of the most popular counter tops that is being installed in kitchens today. It is a natural stone that comes in a variety of patterns and textures. Granite isn’t a cheap option so it is best to hunt around for a good price and choose your slab as each piece is different. It is likely that you will pay per foot for granite or if your counter top area is relatively small, you may be able to purchase end pieces which will be significantly cheaper.
The advantages to granite is it can take the heat of your pans and does not scratch easily. The dissadvantage is that it can stain easily if you don’t catch a spill quickly. It is important to seal your granite about once a year.
QUARTZ
Quartz is also a beautiful option that usually has the highest price tag. This counter top requires little maintenance and is usually even throughout in its look with less visible seams.
STONE-SYNTHETIC COMPOSITES
Stone-Synthetic composites consist of Corian’s Zodiac, Formica’s Crystalite, and Consentino’s Silestone. Many times, these counter tops look like stone.
An advantage to using this type of material over granite, or other naturally occurring substances is that it will not have imperfections. These composites to do not need to be sealed and are pretty resistant to scratching. However, spills not mopped up will leave a stain.
CORIAN AND SOLID SURFACING MATERIALS
These countertops are 100% acrylic or polyester acrylic mixes. These types of countertops come in a wide range of colours and patterns.
When solid surfacing countertops are installed they are installed seamlessly leaving a continuous surface. You can even opt to have your sink done with solid surfacing material so there isn’t even a seem break there. These countertops are extremely popular as they provide a high end look that costs less than granite and quartz.
I’m still undecided on what to put into our kitchen. We won’t be changing our cabinets but the counter top does need an upgrade. It is a small space so I’m hoping that maybe we can find an “end” piece that will fit. Hmmm, we’ll see. I’ll keep you posted, but in the meantime make sure to have your research done when looking for counter tops and ask lots of questions.
Decorating your baby’s nursery to provide the best possible atmosphere for development is a lot simpler than you would think. There is no need to spend copious amounts of money on expensive gadgets and unrecognizable furniture. With a little tweaking here and there, the simple traditional methods of decorating lead the way for maximum growth potential. Here are my top tips for the next chapter in my three part series on Nursery Decor.
Nursery Decor Tips For Safety, Development, and Style – Part 2
Nursery Decorating For Development
1) Crib Mobiles
I love using mobiles in nurseries for two reasons. The first reason is that they can help aid in visual development. Infants can see approximately 8-15 inches away and need your help to further develop their eyesight. Since a crib mobile is the ideal length away from a baby’s face, it is the perfect tool for stimulating their vision. Using patterns and colours is highly recommended, as well as a mobile that spins around, since month 2 & 3 will see (pardon the pun :)) your baby developing sharper visual acuity, as they start to follow moving objects.
The second reason I love mobiles is for the music. Studies have established the presence of, “The Mozart Effect” in correlation between music and spatial reasoning in cognitive development for learning and problem solving. Not only that but the music will relax and sooth baby as well.
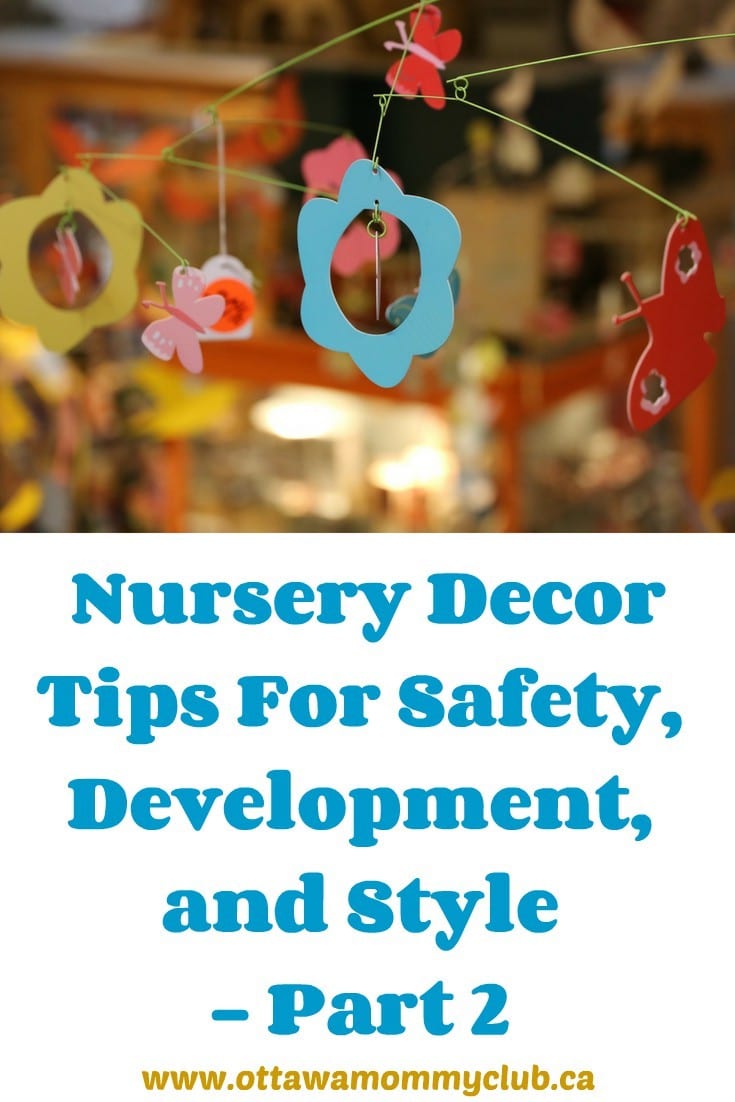
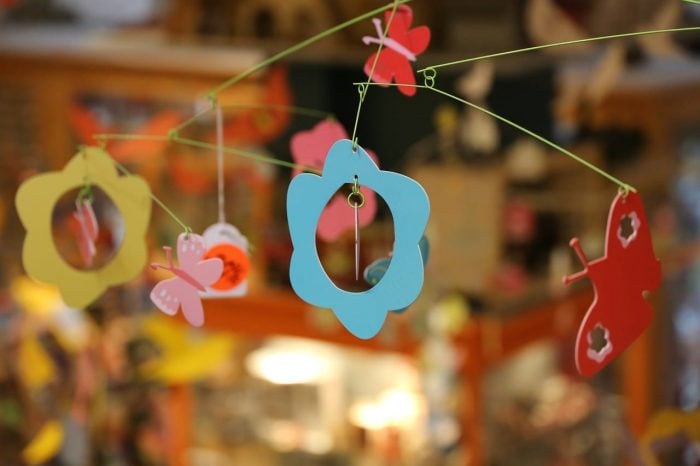
Crib mobile
2) Wall Art
After month one baby can approximately see objects up to 18 inches away and sight will continue to develop at a rapid pace. To help further stimulate your infant’s vision, decorate their room with artwork that has bright, cheerful, contrasting colours, and shapes. It is advisable however, that you do not over do it in this area. Too much stimulation will backfire and you will wind up with a very cranky baby, and I imagine I will wind up with a few unhappy phone calls as well :s. A few interesting pieces will do the trick, or you can even opt for wall stickers that will easily peel off once you want to redecorate!
The trick is to keep the wall art consistent around the room to develop a sense of balance as your newborn develops. So if you are hanging paintings you would want them to be equal distance apart and the same amount on each wall. Likewise if you are using wall stickers you would do a cluster equal space apart, same amount on each wall, or you could even do a border of wall stickers instead, around the centre of the wall at the same height that baby will be looking at while in the crib. The idea is to keep it stimulating but simple and consistent at the same time. We want to help the baby develop not have a brain aneurism 🙂
3) Patterned area rugs
Supervised tummy time is very important in helping baby develop important muscles and learn how to hold their head up, turn over, and crawl. Why not give them something to look at that will stimulate their eyes and brain at the same time? A simple patterned area rug is a great way to provide warmth, comfort, and stimulation as well! Since your baby will be a couple of inches from it you can opt for something neutral that will blend in with your decor.
4) Lighting
Did you know that a one month old baby requires 50 times more light than an adult to be aware that light is even present? Fast forward to one month later and that amount is reduced to needing 10 times more light than an adult for optimal sight. As their eyesight develops and becomes acclimatized to their new environment it is a good idea to have a dimmer switch installed for your ceiling fan (as discussed in Part 1) and some soft lighting around the room such as nightlights. Providing some low lighting will provide visual stimulation when they are awake in their crib.
5) A Rocking Chair
Of course I couldn’t finish without the obvious! What does a rocking chair have to do with development you ask? It gives you a cozy, quiet spot to bond with the newest love of your life. Bonding is an important human instinct that gives us a sense of security and self-esteem. Quality bonding time is a key factor in your baby’s social, emotional, intellectual, and physical growth. The soothing rocking motion will also calm and de-stress you both, allowing you to slow down and enjoy each others company.
The main thing to remember when decorating your baby’s new space is to keep it simple and comfortable. It is better to provide a calm, soothing nursery, with a few bold, bright decorating pieces that will support growth, than it would be to over stimulate with what could only be described as a Skittles explosion.
Next week, I will share my final top tips for decorating your nursery in true baby style!
Decorating for your little beans’ arrival is an incredibly fun and exciting project. It’s easy to get carried away in all the glee and excitement and purchase everything in sight; from blankies, to wall decals, to furniture, to teddy bears. Everything seems too cute to pass up and too perfect that before you know it, the crib is overflowing with toys, and the floor is littered with so many assembly instructions its enough to make your head spin! In my three part series on nursery decor tips for safety, development, and style, I will help keep you on track with buying the best items that will look fabulous, be safe, and help with the healthy development of your little one.
Blankets, pillows, bumper pads, and toys of any kind should never be used in a crib. Using these items has the potential to increase the risk of suffocation or of a baby getting tangled in them. A well fitted crib sheet is sufficient and should be the only item in your baby’s crib. It is also better to err on the side of caution and not use sleep positioners-even those that claim to reduce the risk of SIDS, as there is no actual evidence they do what they claim, and some babies have actually suffocated while using them.
Dressing your baby in a cozy fitted onesie will be just fine and they will be plenty warm without adding the risk of blankets.
2) Room Comfort
Installing a reversible ceiling fan to cool and circulate the air is a great choice to ensure your little one does not overheat. One study found that using a ceiling fan reduced the risk of SIDS by a whopping 72%! You can find some ultra-cute nursery theme ceiling fans.
3) Window Coverings
Heat reflecting UV blocking window treatments are another great choice for keeping baby comfortable and safe. My all-time favourite window treatments for nurseries are cordless blackout roller shades, which come in many gorgeous baby colours and cute patterns. They totally darken the room, look great, and carry the added safety and comfort feature of blocking out heat and having no cords which nix the risk of strangulation completely.
4) Furniture
When furnishing a nursery I never recommend anyone buy second hand or use hand me down furniture. Believe me-when it comes to saving money I’m the first person to get in line, but for this situation I would never risk it. Purchasing brand new furniture, from cribs to change tables, is the best way to ensure these items are up to code and companies are following proper safety procedures.
5) Crib mobiles
Using a crib mobiles is a debate that many people would argue for or against. I like using mobiles for one very good reason- It can aid in babies healthy eyesight development. We will discuss more about that next week. Hey! You didn’t think I was gonna give it all away now did you? 😉
If you DO decide to use a mobile there are some important guidelines to follow; Strings should not exceed 7 inches, a mobile should only be installed according to the manufacturer’s instructions, and they should be removed the moment your baby can turn over, and\or starts to pull up, and\or can sit up.
Nursery Decor Tips For Safety, Development, and Style
Finally, make sure you register all your purchased baby items with the manufacturers as they will keep you up to date on any recalls or warnings that may come into effect.
Join me next week for Part Two of this series where we will discuss tips for Decorating For Baby’s Healthy Development.
After having a baby, one usually stays at home for a year or so to take care of their new baby. Some describe this as a very difficult year full of adjustments and lack of sleep. Now, over a year after having my son, I look back at that year and think that yes it was a hard year, but this year is much harder. I find it difficult to balance work and home!
5 Tips to Help Moms Balance Work and Home
I decided when Max was eight months old to go back to work. Raising a baby and holding down a professional job has resulted in days whizzing by and a multitude of little tasks that pile up and never seem to get done. If you make the choice to go back to work: not only are you expected to maintain a full-time job – you still have to take care of your little one, keep up with the housework, and at some point: take care of yourself! It is very easy to become overwhelmed.
Woman working on her laptop
It did take some time to get used to the new routine, but I believe that I’ve become accustomed to my new dual role of Mom and career person. Some aspects of my life had to change and I had to become more efficient with my time (meaning (for me): do not be lazy). I still struggle though. There are days when I look back at my job pre-baby and think to myself “wow did I ever waste my time!”. I’ve complied a list of ways to figure out your work-life-family balance if you do choose to go back to work.
Please find 5 tips below to help to balance work and home!
1.Alter your work schedule
If you can – go part-time, telecommute or work a condensed work schedule. I went back part-time to work and it worked for me (both balance-wise and financially). Now that Max is a bit older, I am going back to full-time work 6 months after returning to work. This has allowed me to get as much work done as I can during “work hours”, so that when I pick up Max from daycare, I am all his for the evening. It has also reduced my workload which in turn reduces my stress levels.
2.Create an online calendar that you can share
One of the biggest adjustments that I had to make was the idea that I could remember everything. I used to be able to remember my schedule without writing things done – now, not a chance. For my day-planner, I use two: an ‘old-school’ pen and paper agenda and my iCalendar. The great thing about my iCalendar (and Google Calendar as well) is that I can share my calendar with my husband. We are able to compare schedules and basically keep track of what is happening.
Spa essentials
3. Set aside some ‘me-time’
Set aside some ‘me-time’! This could be anything from going to Starbucks once a week to have a latte and read a book, to going to a yoga class, to spa treatments or to going for a run/walk! Although I felt the need to run and pick up Max as soon as the work day was over – I ended up deciding to pick him up a bit later every other day so that I could have an hour at the gym. After working out for a bit, I feel re-energized and ready to conquer the evening!
4.Get your sleep!
Make sure to get a solid nights sleep – not just once a week, but every day. If you have trouble going to bed, set a routine for yourself. Personally, I like to turn off all my devices at 10pm, read a book and relax.
5. Say No
Although it may be tempting to take up new work opportunities, sign the kids up for another activity or take up someone on a dinner invitation – sometimes ones schedule becomes a bit too packed and stress may appear. Know your limits.
Tips to Help Moms Balance Work and Home
It can be a struggle to try and balance it all. Some days are better than others. But in the end, the important thing is to keep calm, do your best and try and be the best parent you can be!
With busy households, it’s hard to find time to cook at home and eat right. Here are some time-saving tips and hacks to use in the kitchen that are good for our families and our budget!
A woman and a man doing meal preparation.
Time and Sanity Saving Tips in the Kitchen
Get Organized
Make breakfast the night before. Some ideas are: instant stovetop oatmeal, boiled eggs, and scrambled eggs.
Pack your lunch and kids’ lunches the night before.
Set aside a few hours on the weekend to cook for the week (or for 3 days worth of meals).
Shop for ingredients on Friday.
Do the chopping and food preparations on Saturday.
Cook it up on Sunday.
Defrost something from the freezer in the middle of the week.
Invest in a deep freezer!
Treat yourself to takeout towards the end of the week to help you make it into the weekend.
Take Shortcuts
Throw a bunch of chicken bones into a pot of salted boiling water to make chicken stock. Pour the cooked stock into ice cube trays and freeze. When recipes call for broth, it’s easy throw in a few cubes.
Use salad dressing as a quick cooking sauce. Check out some recipes at www.Kraftcanada.com.
Rice and chicken on a white plate
Try Quick Dishes
Make easy Indian-style basmati rice on the stove or rice cooker by adding frozen peas, a dash of turmeric, cumin seeds and chicken broth.
Use a rice cooker for cooking pasta. Add less water than listed on package directions. Recently I tried out a quick and easy tomato penne pasta recipe.
If your rice cooker has a steamer, steam veggies on top while the rice is cooking and you’ll have a side dish ready for dinner.
Try out crockpot recipes. Throw in a bunch of ingredients in the morning before leaving for the day. When you get home, dinner will be ready.
Simple Marinades
When you buy meat, poultry or fish for freezing, divide it up into meal-sized portions. Or try marinating it before freezing. Mix it with your favourite marinade, put it in Ziploc bags and label it. When you are ready to defrost it for cooking, the meat will marinate and tenderize while it defrosts. This saves you a step when it comes time to cook.
a) Stir fry or Pasta: Marinate chicken breast pieces or small beef strips with garlic, ginger, and your favourite dry rub or seasoning mix. Separate chicken/beef pieces into 1 pound portions and put each in Ziploc bags. Label and freeze. Great for stir fries, pastas, casseroles, anything!
b) Rotisserie: You could do the same for chicken thighs or legs. Marinate and freeze with St. Hubert or Swiss Chalet seasoning mix from the grocery store and you have a restaurant‐style meal at home. When it comes time to cook, take out the chicken, defrost, throw it in the oven / toaster oven / BBQ and let it cook while you do something else.
Ambereen Rahim is a senior analyst, part-time blogger and mom of three year old boy/girl twins. In her spare time you can find her travelling, exploring activities with the kids, trying new recipes and blogging about it. You can follow their adventures at www.2cute.intiaz.com
If there’s one skill that most single parents have mastered down to a fine art, it has to be multi-tasking. Between things like packing the kids’ lunches, getting them to school, picking them up from ballet practice and excelling at your career – it’s not unusual for single moms and dads to feel like they rarely have a spare moment to themselves. Finding the time to meet new people seems like a mammoth task in its own right, let alone maintaining a healthy long-term relationship. Yet despite the challenges, the good news is that it is possible for single parents to also develop happy and fulfilling relationships.
Here are some tips on how to make the process smoother.
1. Consider your timing
Whether you find yourself single following bereavement or a divorce, the process will no doubt have had an effect on both you and your children. It’s important to give plenty of thought about when it is an appropriate and considerate time to return to dating. Starting a new relationship can bring with it a lot of mixed feelings. It’s important to make sure you feel completely ready to begin sharing your life again with somebody new.
2. Start dating for the right reasons
If you find yourself single for the first time after a long-term relationship or marriage, it’s going to feel like quite a shock. Make sure the decision to get back on the dating scene is made for the right reasons. Finding a new partner and immediately entering a steady relationship might have more to do with your need for security than genuine feelings. Make sure you feel confident, happy and successful with your own life first before agreeing to share it with somebody new.
3. Look for love in the right places
For most single parents the biggest barrier faced when returning to dating is simply a matter of finding the time. Sitting in bars, going to nightclubs on weekends and agreeing to blind dates with family friends aren’t always an option. If you’re short of time one of the most successful methods of searching for love is by looking online.
Online dating sites are perfect for single parents, whether you hail from a small town or are looking to start dating in Ottawa or another big city. Relationship sites allow people to start meeting compatible, like-minded singles in your area, without the hassle of hiring a babysitter or missing out on spending time with the kids.
Be sure to look for a dating site with the right focus for you, with sites like eharmony specializing in creating meaningful and fulfilling relationships.
4. Be patient
This applies to all aspects of the dating process. Be patient when looking for love, and be patient when introducing a new partner to your kids. They might be frustrating experiences but statistics show that single parents can find long-term and meaningful love again.
When introducing your children to a new partner, always wait until the relationship has progressed to a more serious level before making them a regular feature in your children’s lives. For a first meeting place always choose a laid-back location that avoids pressure, like a trip to the park, bowling or the cinema.
When my first daughter was born, I discovered quickly how to soothe her when she was crying or fussy. Like most babies, she was soothed by rocking, bouncing, and walking. She also liked to be held (what baby doesn’t) and she wasn’t fond of the swings. I discovered a few ways to keep her comfortable and help her to sleep while burning calories at the same time. You will find below 4 ways on How To Soothe Your Baby And Get Fit At The Same Time! Let me know if you try them out with your munchkins and how it worked.
4 Tips on How To Soothe Your Baby And Get Fit At The Same Time
Hold baby tight and bounce gently on an exercise ball. This worked the best with my firstborn and we’re doing this now with my 6 week old. Hold baby close to you supporting his/her head and step up and down off a step.
I use a Reebok step but the first step on a staircase would work as well as walking up and down stairs.
Standing on a BOSU and bouncing gently (great for core and balance!), march or step up and down off the BOSU.
Lastly, my favourite – walking. Around the house, outside in the yard, or for longer stretches with baby in a sling, baby carrier or stroller.
When carrying baby in any of these positions, try to focus on good posture. Relax your shoulders, alternate sides or keep baby at the midline of your body. Note if you’re favouring one side or feeling aches or pains from holding your baby awkwardly and try to alternate positions or adjust so that you can maintain good upright posture. Take breaks if you’re feeling tight and sneak in some neck stretches to keep shoulders down and relaxed. Hoping these tips on How To Soothe Your Baby And Get Fit At The Same Time are helpful!
When Georgia is a little older, I’ll be incorporating her into my workouts as I did with Rayne. Once she has sufficient neck control, we’ll be doing squats, presses, bridges and more. It’s a great way to bond with baby and get your workout in as well. In the meantime, I’ll keep bouncing, stepping and walking!
Whether you want to enjoy a pickup game with friends or want to practice your lay-up, the City of Ottawa Parks and Recreation branch provides seasonal basketball courts throughout the City for your enjoyment. You will find below Ottawa Outdoor Basketball Courts for your perusal.
Ottawa basketball court locations have been divided into two categories: East and West. The dividing line follows the Rideau Canal and continues south along the Rideau River. Courts are listed alphabetically.
City of Ottawa Outdoor Basketball Courts
Ottawa East Outdoor Basketball Courts
Park Name
Park Address
Court Size
Notes
Acres
2193 East Acres, Gloucester
Full
Half on full
Aladdin
3939 Albion, Gloucester
Half
Two half courts
Alta Vista
1309 Randall, Ottawa
Half
Alvin Heights
349 Claremont, Ottawa
Half
Andy Sheilds
1448 Meadow, Osgoode
Full
Baden
3900 Autumnwood, Gloucester
Full
Balena
1640 Devon, Ottawa
Half
Barnabe
1797 Des Epinettes, Gloucester
Full
Three backboards.
Bathgate
724 Bathgate, Ottawa
Full
Blackburn
190 Glen Park, Gloucester
Full
Bob MacQuarrie Recreation Complex
1490 Youville Gloucester
Full
Brantwood
120 Clegg, Ottawa
Full
Brewer
100 Brewer, Ottawa
Half
Canterbury
2185 Arch, Ottawa
Full
Carson Grove
1423 Matheson, Gloucester
Full
With two half courts along the side
Cathcart
219 Cathcart, Ottawa
Full
No posts or nets
Cecil Morrison
1332 Avenue N, Ottawa
Full
Fenced with tennis
Cedarcroft
1200 Cedarcroft, Gloucester
Full
Champagne
1861 Markwell Gloucester
Half
Chapel Hill
1556 Forest Valley, Gloucester
Full / Half
Two half courts, one full
Chapel Hill South
6011 Longleaf, Gloucester
Half
City Centre
1800 City Park, Gloucester
Full
Coronation
442 Coronation, Ottawa
Full
Cummings
980 Cummings, Gloucester
Full
Cyrville Community Centre
4355 Halmont, Gloucester
Half
Cyrville
1420 Meadowbrook, Gloucester
Half
Delorme
6591 Delorme, Gloucester
Full
Dr. John Hopps
300 Den Haag, Ottawa
Full
Shares with another basket on the side of the court (three nets)
Eastvale
740 Eastvale, Gloucester
Full
Lights
Edwards
1081 York’s Corners, Osgoode
Full
Eighth Line Park / Harkness
6020 Eighth Line, Gloucester
Half
Shared with tennis
Elizabeth Manley
1161 Blohm, Ottawa
Full
Elmridge
1841 Elmridge, Gloucester
Full
Emerald Woods
3795 Alderwood, Gloucester
Half
Fairlea
2989 Fairlea, Ottawa
Full
Fallingbrook
681 Deancourt Cumberland
Half
Forbes
669 Paul, Ottawa
Full
Four Seasons
4386 Spratt, Gloucester
Full
Half on full
Geoff Wightman
89 Leopolds, Ottawa
Half
Gerald Poulin
1899 Du Clairvaux, Gloucester
Full
Glen
1766 Grey Nuns, Gloucester
Full
Greenboro Park and Community Centre
1505 Cahill, Ottawa
Full
Holes for volleyball poles
Harold Barnhart
5650 Scobie, Osgoode
Full
Heron
1560 Heatherington, Ottawa
Full
Heron
999 Heron, Ottawa
Full
Hiawatha
6218 Voyageur, Gloucester
Full
Isaie Savaage
114 Saphir, Cumberland
Full
Jasmine
2040 Jamine, Gloucester
Full
Joe Jamieson
6940 Bilberry, Gloucester
Full
Joe Rowan
2665 Glenwood, Osgoode
Full
Joella
5565 Joella, Osgoode
Full
Josee Anselmo Memorial
6499 Princiotta, Osgoode
Half
Small paved court (only 3 by 3)
Kemp
11 Robert Kemp
Half
Kenmore Ball Park
3151 Yorks Corners, Osgoode
Full
La Verendrye
625 Laverendrye, Gloucester
Half
Ledbury
1250 Ledbury, Ottawa
Full
Lindenlea
15 Rockcliffe, Ottawa
Full
Longleaf
5831 Gladewoods, Gloucester
Full
Louis Perrault
6250 Beausejour, Gloucester
Full
Luc Major
956 Bilberry, Gloucester
Full
Marcel Beriault
1691 Sunview, Gloucester
Half
Marchand
1163 Kenaston, Gloucester
Full
McCarthy
3320 Paul Anka, Ottawa
Full
McKendry
2567 Dow, Osgoode
Half
Mooney’s Bay
2960 Riverside, Ottawa
Half
New Edinburgh
193 Stanley, Ottawa
Full
Ninth Line Park and Carlsbad Community Centre
5065 Ninth Line, Gloucester
Full
North Vineyard
6026 Voyaguer, Gloucester
Full / Half
Two half courts, one full
Ogilvie North
1059 Ogilvie, Gloucester
Full
With a half court
Optimiste
43 Ste. Cecile, Vanier
Full
Overbrook
33 Quill, Ottawa
Full
Pineview
1465 Ridgebrook, Gloucester
Full
Queenswood Heights Centennial and Community Centre
Do you enjoy picking strawberries, raspberries, and blueberries? How about supporting local farmers in Ottawa area? Bring the family for some great outdoor fun times at one of these farms in Ottawa!
Proulx Sugar Bush & Berry Farm
1865 O’Toole Rd. Cumberland (Ottawa), ON K4C 1N2 Tel: 613-833-2417 or 613-833-9009 Fax: 613-833-0472 Email: proulx@proulxberryfarm.com
March-April: Visit our sugarbush, see the maple production, enjoy a meal, sleigh ride and the petting farm;
June-August: PYO or freshly picked available at our “on-farm market”, birthdays, corn roast, family gathering, educational tours;
October:
The farm is transformed into a gigantic Pumpkin Festival with mazes including evening hauntings of “SKREAMERS.ca”, plus a century old two storey “Barn of Terror.”
Saunders Farm is located on Bleeks Road, in Munster, in the old township of GOULBOURN, it was the perfect location for a Hallowe’en farm attraction. An extensive renovation of the Farm’s historic log buildings began and in October 1992, Haunting Season was born.
Children and adults alike will enjoy seeing a wide variety of animals and birds up close, from alpacas to zebus, goats to geese. Ride the Valleyview Express and enjoy our creative farm playground. Explore Bill’s Old Farm Museum to learn about our agricultural past. Watch a puppet show, have lunch in the Sunflower Cafe and browse in Robyn’s Nest Gift Shop. Come and spend a day in the country at Valleyview Little Animal Farm.
Enjoy picking strawberries, raspberries, and blueberries with the family at these local farms. Some of them even sell vegetables!
Tobogganing is one of our great Canadian traditions! Pack up the family and head out to one of the National Capital Greenbelt’s toboggan hills. You will find below the Best Hills To Toboggan In Ottawa and the Outaouais and many tips on tobogganing!
Tobogganing Tips
Keep children warm. Dress your children in layers. Make sure their heads and necks are covered by a hat and a neck warmer. Watch for frostbite!
On sunny days, put sunscreen on their skin.
Check your children’s equipment to make sure that it fits and is in good condition.
When tobogganing or sledding:
Make sure your children wear a helmet.
Choose a hill that is away from roads and parking lots. There should be no rocks, trees, fences or other dangers in the path.
Teach your children to slide down the middle of the hill, climb up the side and watch up the hill.
Teach them to move out of the way quickly when they get to the bottom.
Tobogganing and Sledding Injury Prevention – Winter Safety
Tobogganing and sledding are fun winter pastimes, however, they can cause serious injuries that require medical attention. Colliding with objects such as trees, rocks, signs, and other people are common causes of sledding and tobogganing related injuries. Being aware of the dangers associated with these activities and exercising some common sense can help you and your family to have a safe and fun winter season.
Choose a hill with a gentle slope, free of protruding objects such as ice, rocks, and tree stumps. Also, be sure that the hill is not too icy – you want to be able to stop if you need to!
Sled in daylight so that you can see any potential dangers. If you choose to sled at night, make sure that the hill is very well lit.
Children should wear a helmet at all times while sledding to help protect their heads and to decrease their risks of head injuries. In a study conducted by the Canadian Hospitals Injury Reporting and Prevention Program (1996) a total of 806 records of sledding related injuries in children and youth were examined. Of these 806 patients studied, only 5 reported wearing a helmet. Head and neck injuries accounted for 1/3 of injuries for children less than 10 years of age. Do not let your child go sledding without a helmet! Hockey helmets will do the trick to help minimize the risk of head injury.
Tuck in any scarves, strings, or long hats that could potentially catch on a rock or tree and cause strangulation or other serious injuries.
Wait until the path is clear before starting down the hill. This could help prevent you from running into another person on your way down.
Always position yourself on your sled or toboggan so that you are kneeling or facing forward. Never lie down on a sled or toboggan while going down a hill.
Children who are five years old or younger should have an adult accompany them on a sled or toboggan.
Climb back up the hill on the side to keep out of the way of others who are sledding down. Also, wear bright coloured clothing so that you will be easy to spot from far away on the hill. This will give others time to turn or stop before they get close enough to hit you.
Choose a sled that is sturdy and easy to control. Magic carpets, flying saucers, garbage bags, and cardboard boxes are not good options, as they are light and flimsy and can easily fly out of control.
Have only the recommended number of passengers on a sled or toboggan at one time.
Racing down the hill might seem fun, but sleds can often be more difficult to control at higher speeds. You could end up falling off the sled, hitting an unforeseen object, or hitting one of your friends! Try to maintain safe speeds that will allow you to have the control to stop if you need to.
The Best Hills To Toboggan in Ottawa and Gatineau:
Bruce Pit (Nepean) Cedarview across from Bell High School in Bell’s Corners
Conroy Pit (Ottawa) Conroy Road south of Hunt Club
Watler Baker Park (Kanata) On Terry Fox Drive near Hazeldean. Parking available at Kanata Recreation Complex.
Mooney’s Bay Park (Ottawa) 2960 Riverside Drive. Parking is provided at Terry Fox Athletic Facility.
Carlington Park (aka Carlington Ski Hill) (Ottawa) 937 Clyde Avenue
Arboretum / Experimental Farm (Ottawa) Next to Dow’s Lake along the Rideau Canal, access from Queen Elizabeth Drive, part of the Experimental Farm.
Green’s Creek There are also toboggan hills at Green’s Creek
Parc Lemoyne (Gatineau) Rue Hillside – advanced hills.
Private Toboggan Hills / Admission Required In the Outaouais
We use cookies to ensure that we give you the best experience on our website. If you continue to use this site we will assume that you are happy with it.