
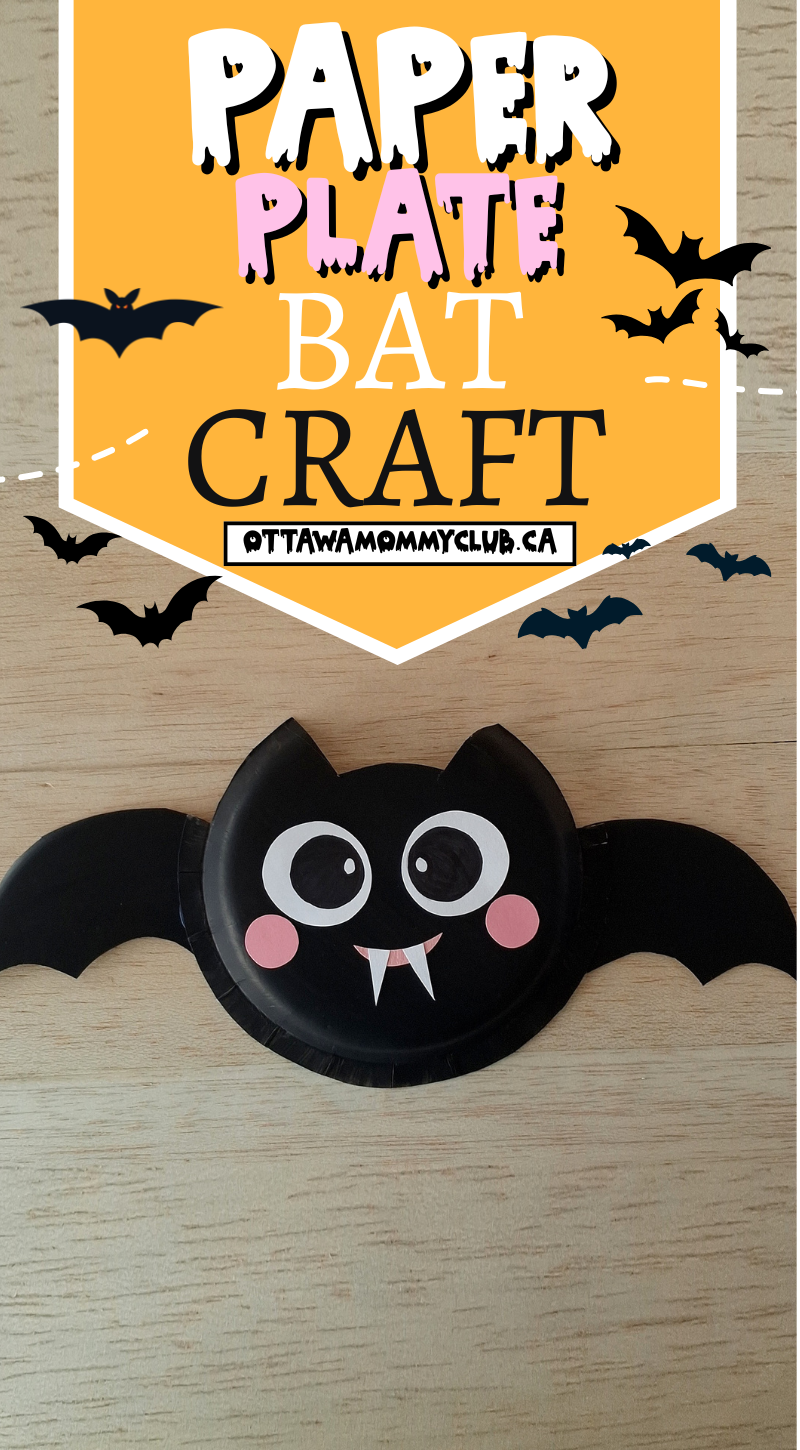
Halloween is the perfect time for simple, creative crafts that kids can make with minimal fuss. This paper plate bat craft is inexpensive, low-mess, and fast. It’s a great Halloween craft for classroom activities, party crafts, or a cozy afternoon at home. Using everyday supplies like paper plates, craft paper, and acrylic paint, children can make their own spooky bat decorations to hang around the house. Follow the step-by-step instructions below to create a cute paper plate bat, plus tips for variations, finishing touches, and safety.
Paper Plate Bat Craft
Get ready for an easy Halloween craft that kids love: a paper plate bat. It’s quick, uses basic supplies, and yields a cute decoration you can hang or display.
Supplies
- Coloured craft papers (white and pink recommended)
- 2 paper plates
- Black acrylic paint
- Paint brush
- Scissors
- Pencil
- Craft glue
- Black Sharpie
- Bat craft template
Prep and setup
- Work on a protected surface (newspaper or craft mat).
- Keep wet wipes or a damp cloth handy for paint and glue cleanup.
- If children are young, pre-cut small or detailed parts (fangs, eye bases, blush spots).
Step-by-step instructions
Step 1 — Trace and cut template patterns

- Using a pencil, trace the included template patterns onto the white and pink craft papers.
- The bat craft template includes:
- Top border of the head (with ear outlines)
- Eye bases
- Blush spots
- Mouth and fangs
- Wing shapes
- Carefully cut out each piece with scissors.
Step 2 — Prepare the paper plates

- Wipe the bottom surfaces of both paper plates so they’re clean and dry.
- Cut one paper plate in half — these halves will become the bat’s wings.
Step 3 — Cut the bat head and wing shapes

- Trace and cut the bat wings and the top side of the bat’s head pattern directly from the paper plates.
- Make sure edges are neat so the paint covers evenly.
Step 4 — Paint the bat
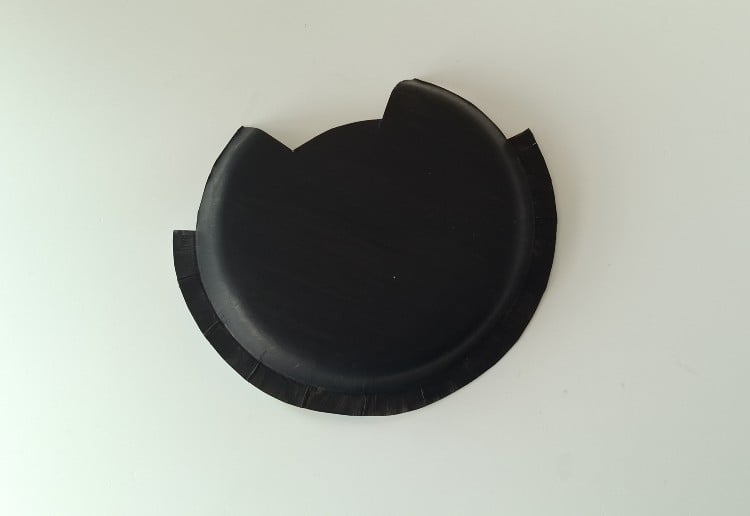
- Apply one or two coats of black acrylic paint to the paper plate pieces (head and wings). Allow each coat to dry before applying the next.
- Tip: Thin coats dry faster and look smoother.
Step 5 — Attach eyes and blush

- When the painted head piece is dry, glue the eye bases and pink blush cutouts into position on the face.
Step 6 — Add mouth and fangs
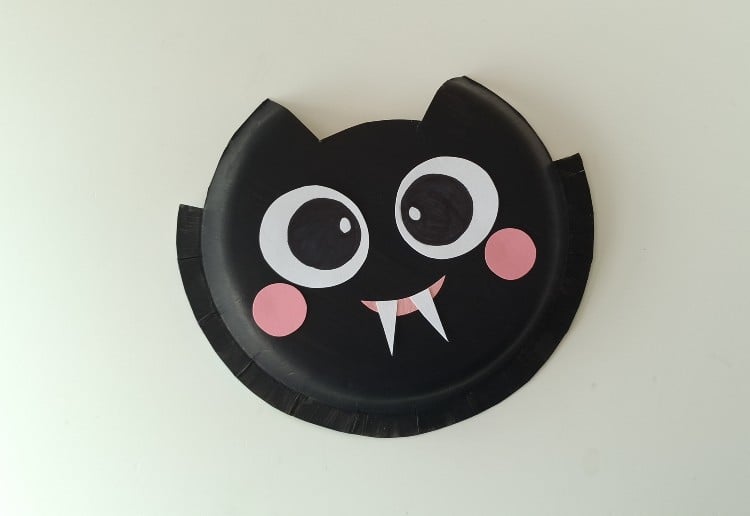
- Glue the mouth and fang shapes under the eyes, centered between the blush spots.
Step 7 — Let the wings dry

- Ensure the wings are fully dry before you attach them to the bat so paint doesn’t smear or pieces shift.
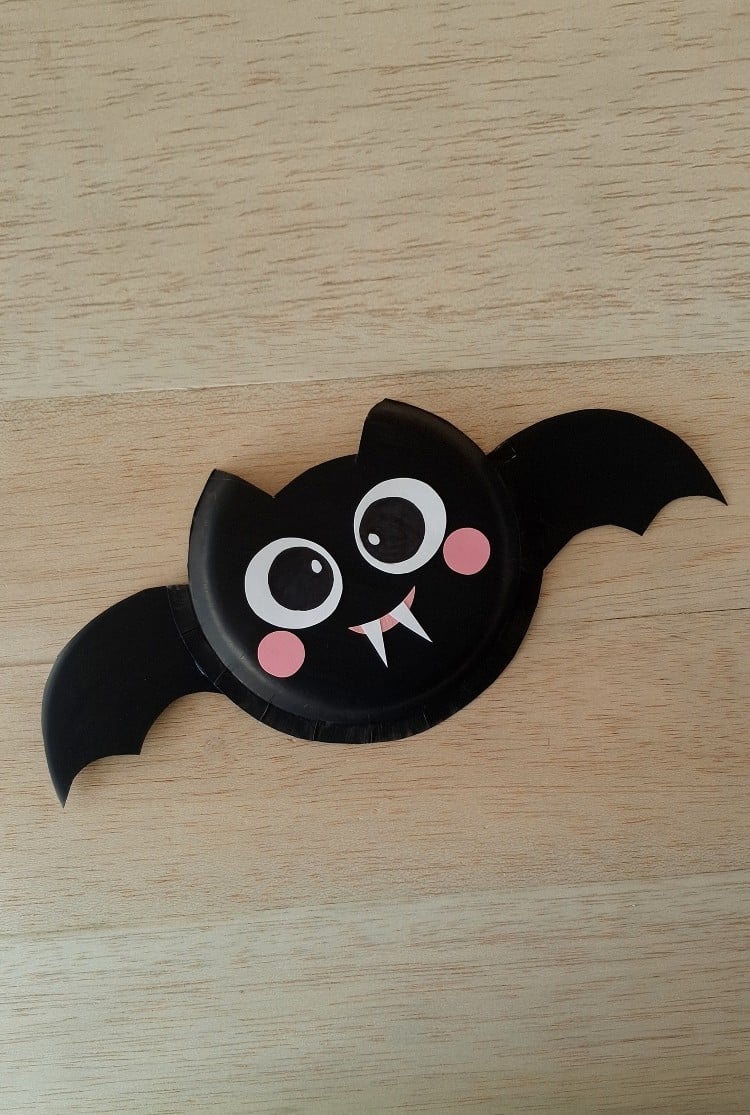
Step 8 — Assemble the bat
- Glue the wing halves to each side of the painted paper plate bat head. Press gently until secure.

Paper Plate Bat Finishing Touches and Display
- If you want to hang the bat, tape or glue a loop of string to the back.
- Add a little glitter or glow-in-the-dark paint to fangs or eyes for extra Halloween fun.
- Attach several bats to a wall or window to create a spooky scene.
Variations and ideas
- Use different paint colours (purple, dark blue) for a whimsical bat family.
- Make a puppet: attach a craft stick to the bottom and move the wings by bending a folded paper hinge.
- Turn the bat into a mask by cutting eye holes and attaching an elastic band.
Safety notes
- Supervise scissors and glue use with young children.
- Use non-toxic paints and materials recommended for kids.
This paper plate bat is a fun Halloween craft that’s great for classrooms, parties, or a rainy afternoon at home. Quick to make, cute to display, and adaptable for all ages. Enjoy crafting!